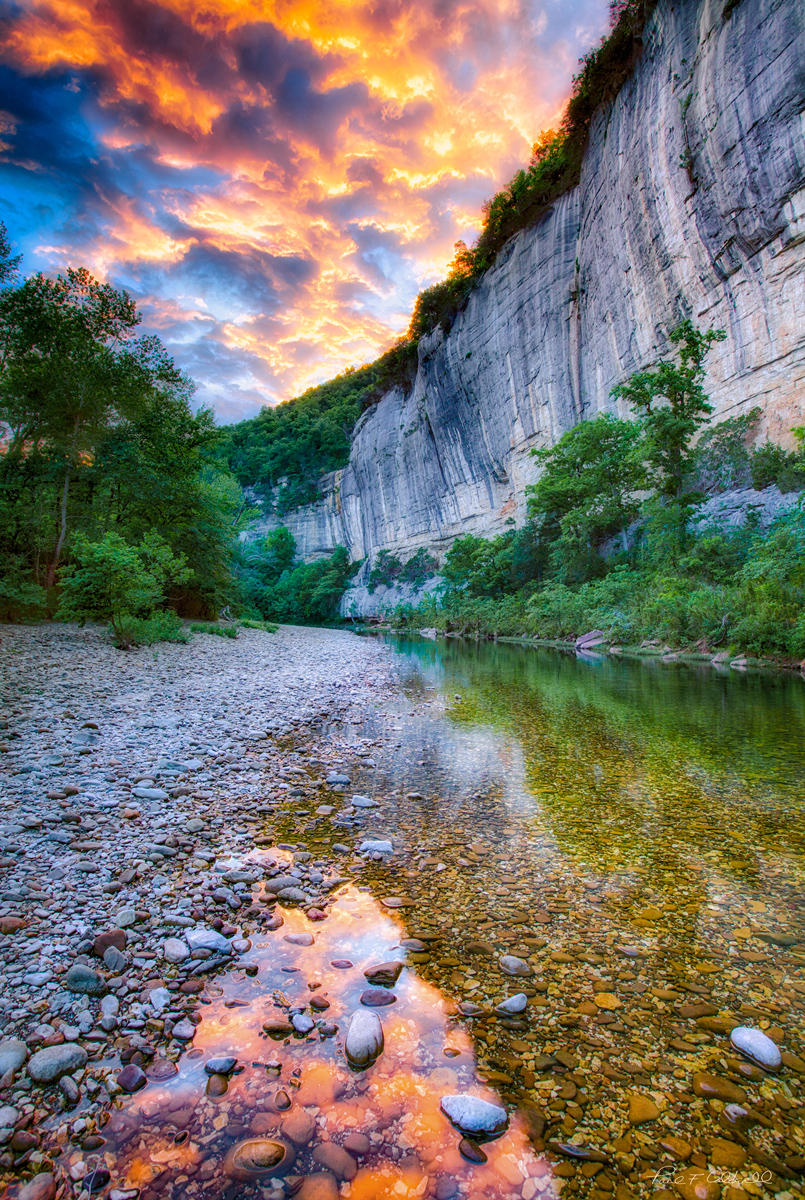
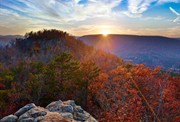
02/16/25 Using Adobe Generative Fill to remove lens flare–Example an X2D image with 20-35 lens
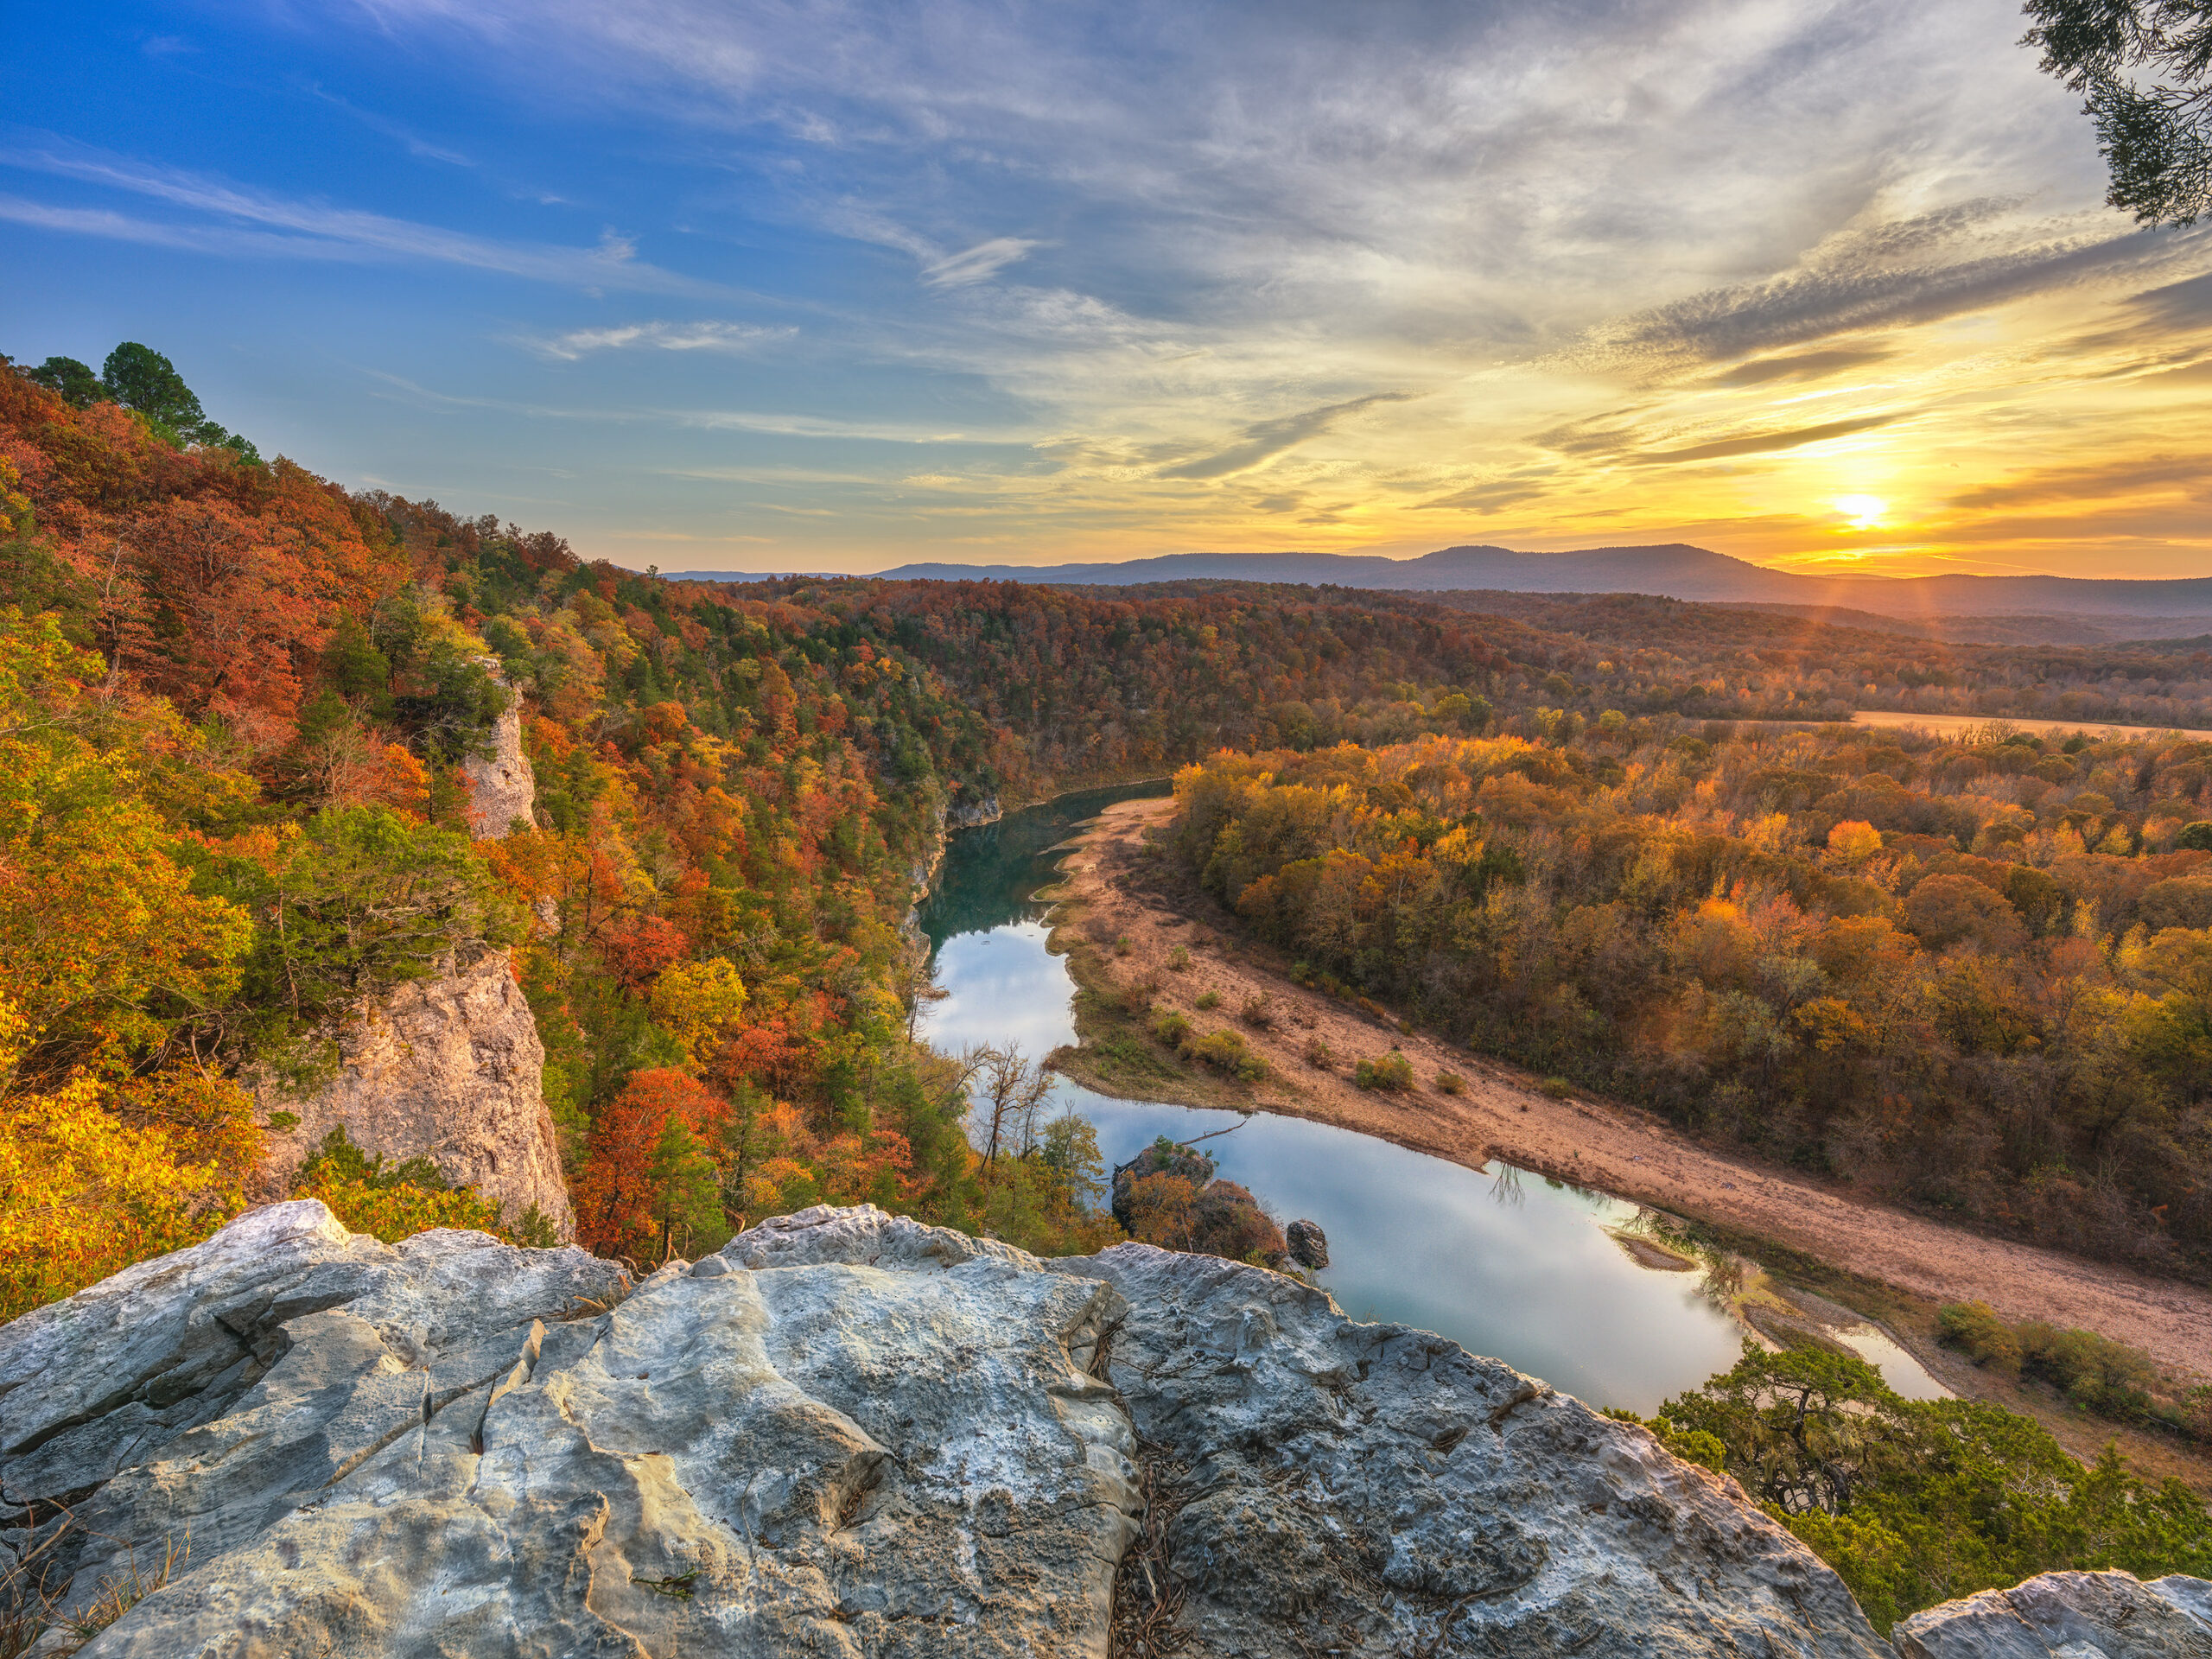
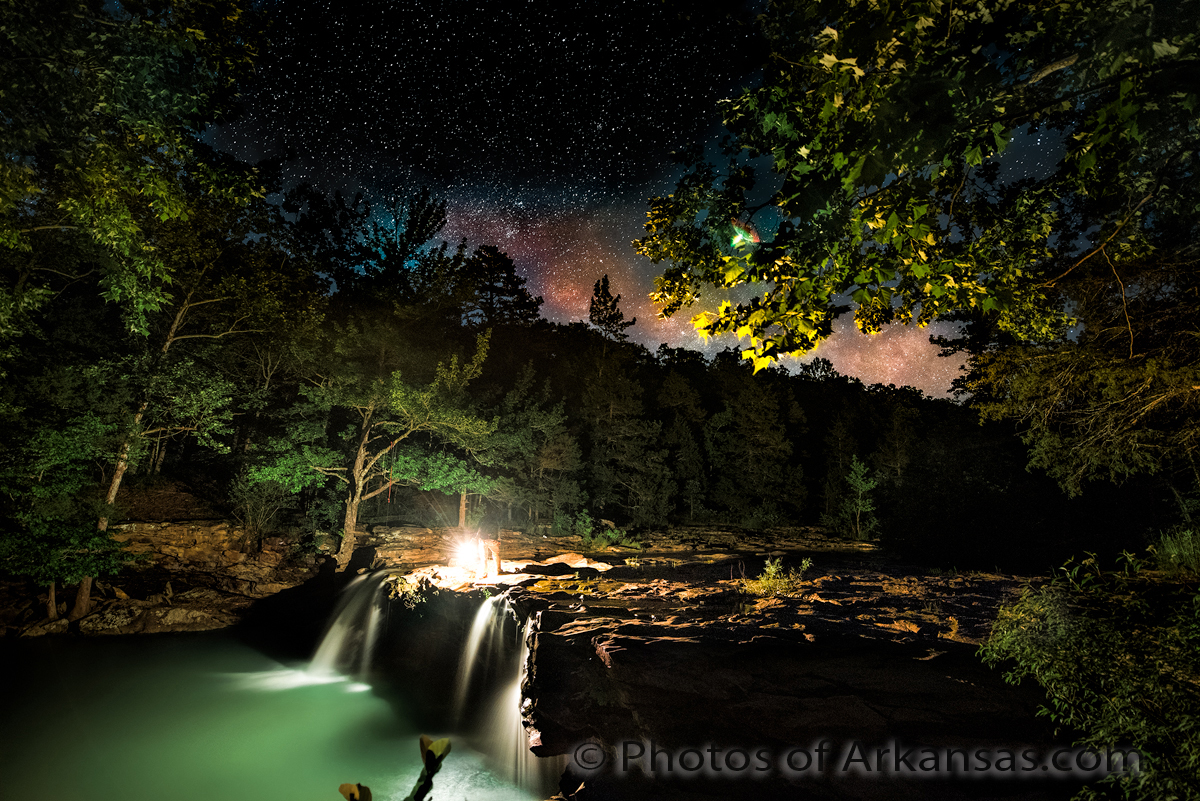
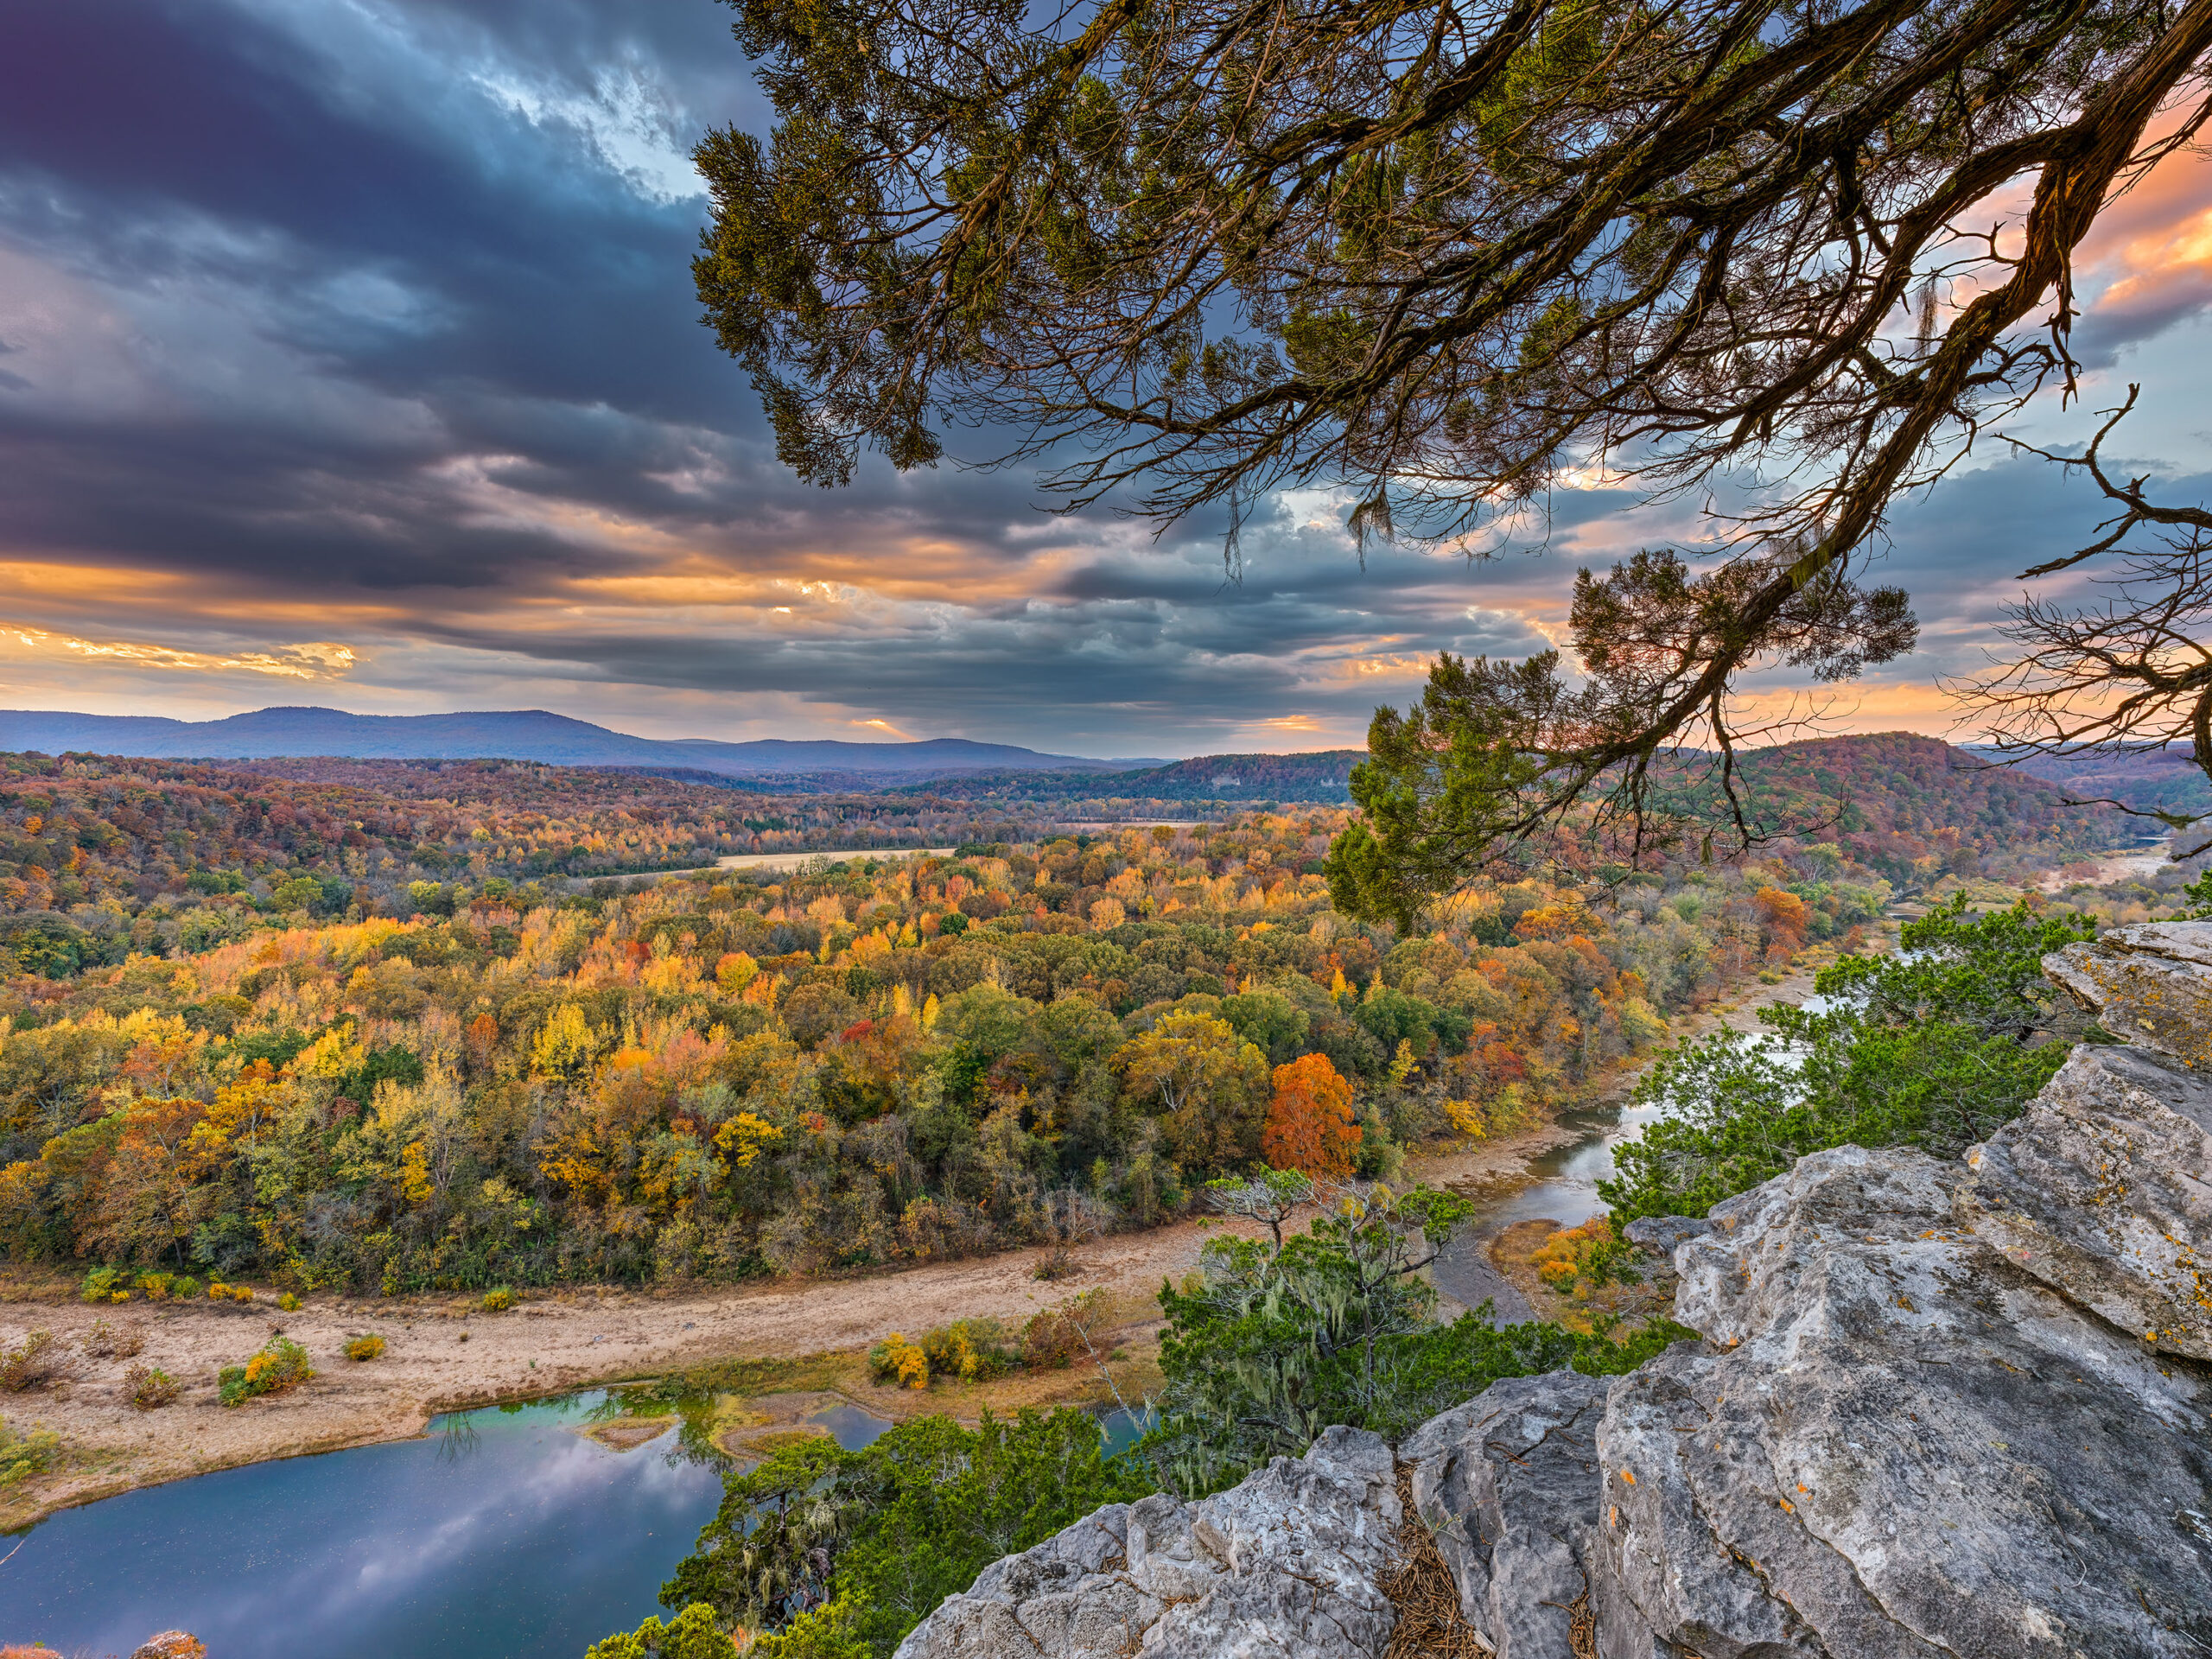
Sunset from Peter Cave Bluff–Buffalo River in Arkansas
If you like to shoot sunrise or sunset images one of the issues that always has to be considered is lens flare. The effect is destructive as it tends to totally change the color of the subject, remove or change saturation levels, and totally alter the overall color of the image. Depending on the lens the flare tends to be in the corners or off of a diagonal from the sun. There are times where this type of flare can add to the overall image, but most times I find it distracting and destructive. In the past, the only way I knew to remove it was either cloning over the flare with a part of the image that is free of flare or attempting to use software tools like “Content Aware” in Photoshop. I never found content aware to be very effective for this and ended up usually either cropping the photo or using cloning. You can always try to hold your finger over the sun when shooting but this is tedious, and at time hard to due. I used to carry a flare buster to this as I could attach it to the flash bracket on my camera but many times I forgot it and knew I was going to have to work on the flare in post.
It’s also hard at times to see the flare when you are looking through the EVF or viewfinder of your camera, especially if you are using exposure brackets. In the image at the top of this article, you can see the sun was muted through some soft clouds, but there was still a flare issue. The camera I was using was the Hasselblad X2D and the 20-35 lens. I have found that the 20-35 is very flare prone anytime you are working with the sun in the image. The flare is especially large and damaging at times. In the crop below, you can see the amount of flare that occurred.

Discoloration due to flare on Hasselblad 20-35 lens
The flare in this case was rather large, and had the typical rainbow color spectrum on the outside edge. You can clearly see that the colors of the trees have been totally changed by the flare and overall the area has a more yellow look.

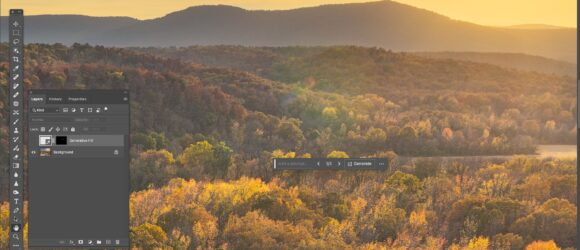
Selection area to remove flare with Generative Fill
In this screenshot, you can see that I used the lasso in Photoshop to select an area which slightly exceeds the amount of the image that is effected by flare. Once you have made a selection, click on “generative fill” and Photoshop will give you three solutions. There is an option to name this fill selection, I never do that. Once you have run the fill process you can then click through the three options to find the one that works best for you. Once you make that decision, simply flatten your layers and you are done. If you don’t feel any of the fills that Photoshop created work, then cancel and start again. Sometimes it can take a few runs to get the best possible solution. However I have always found that Photoshop can get something that works much better than content aware, or cloning.
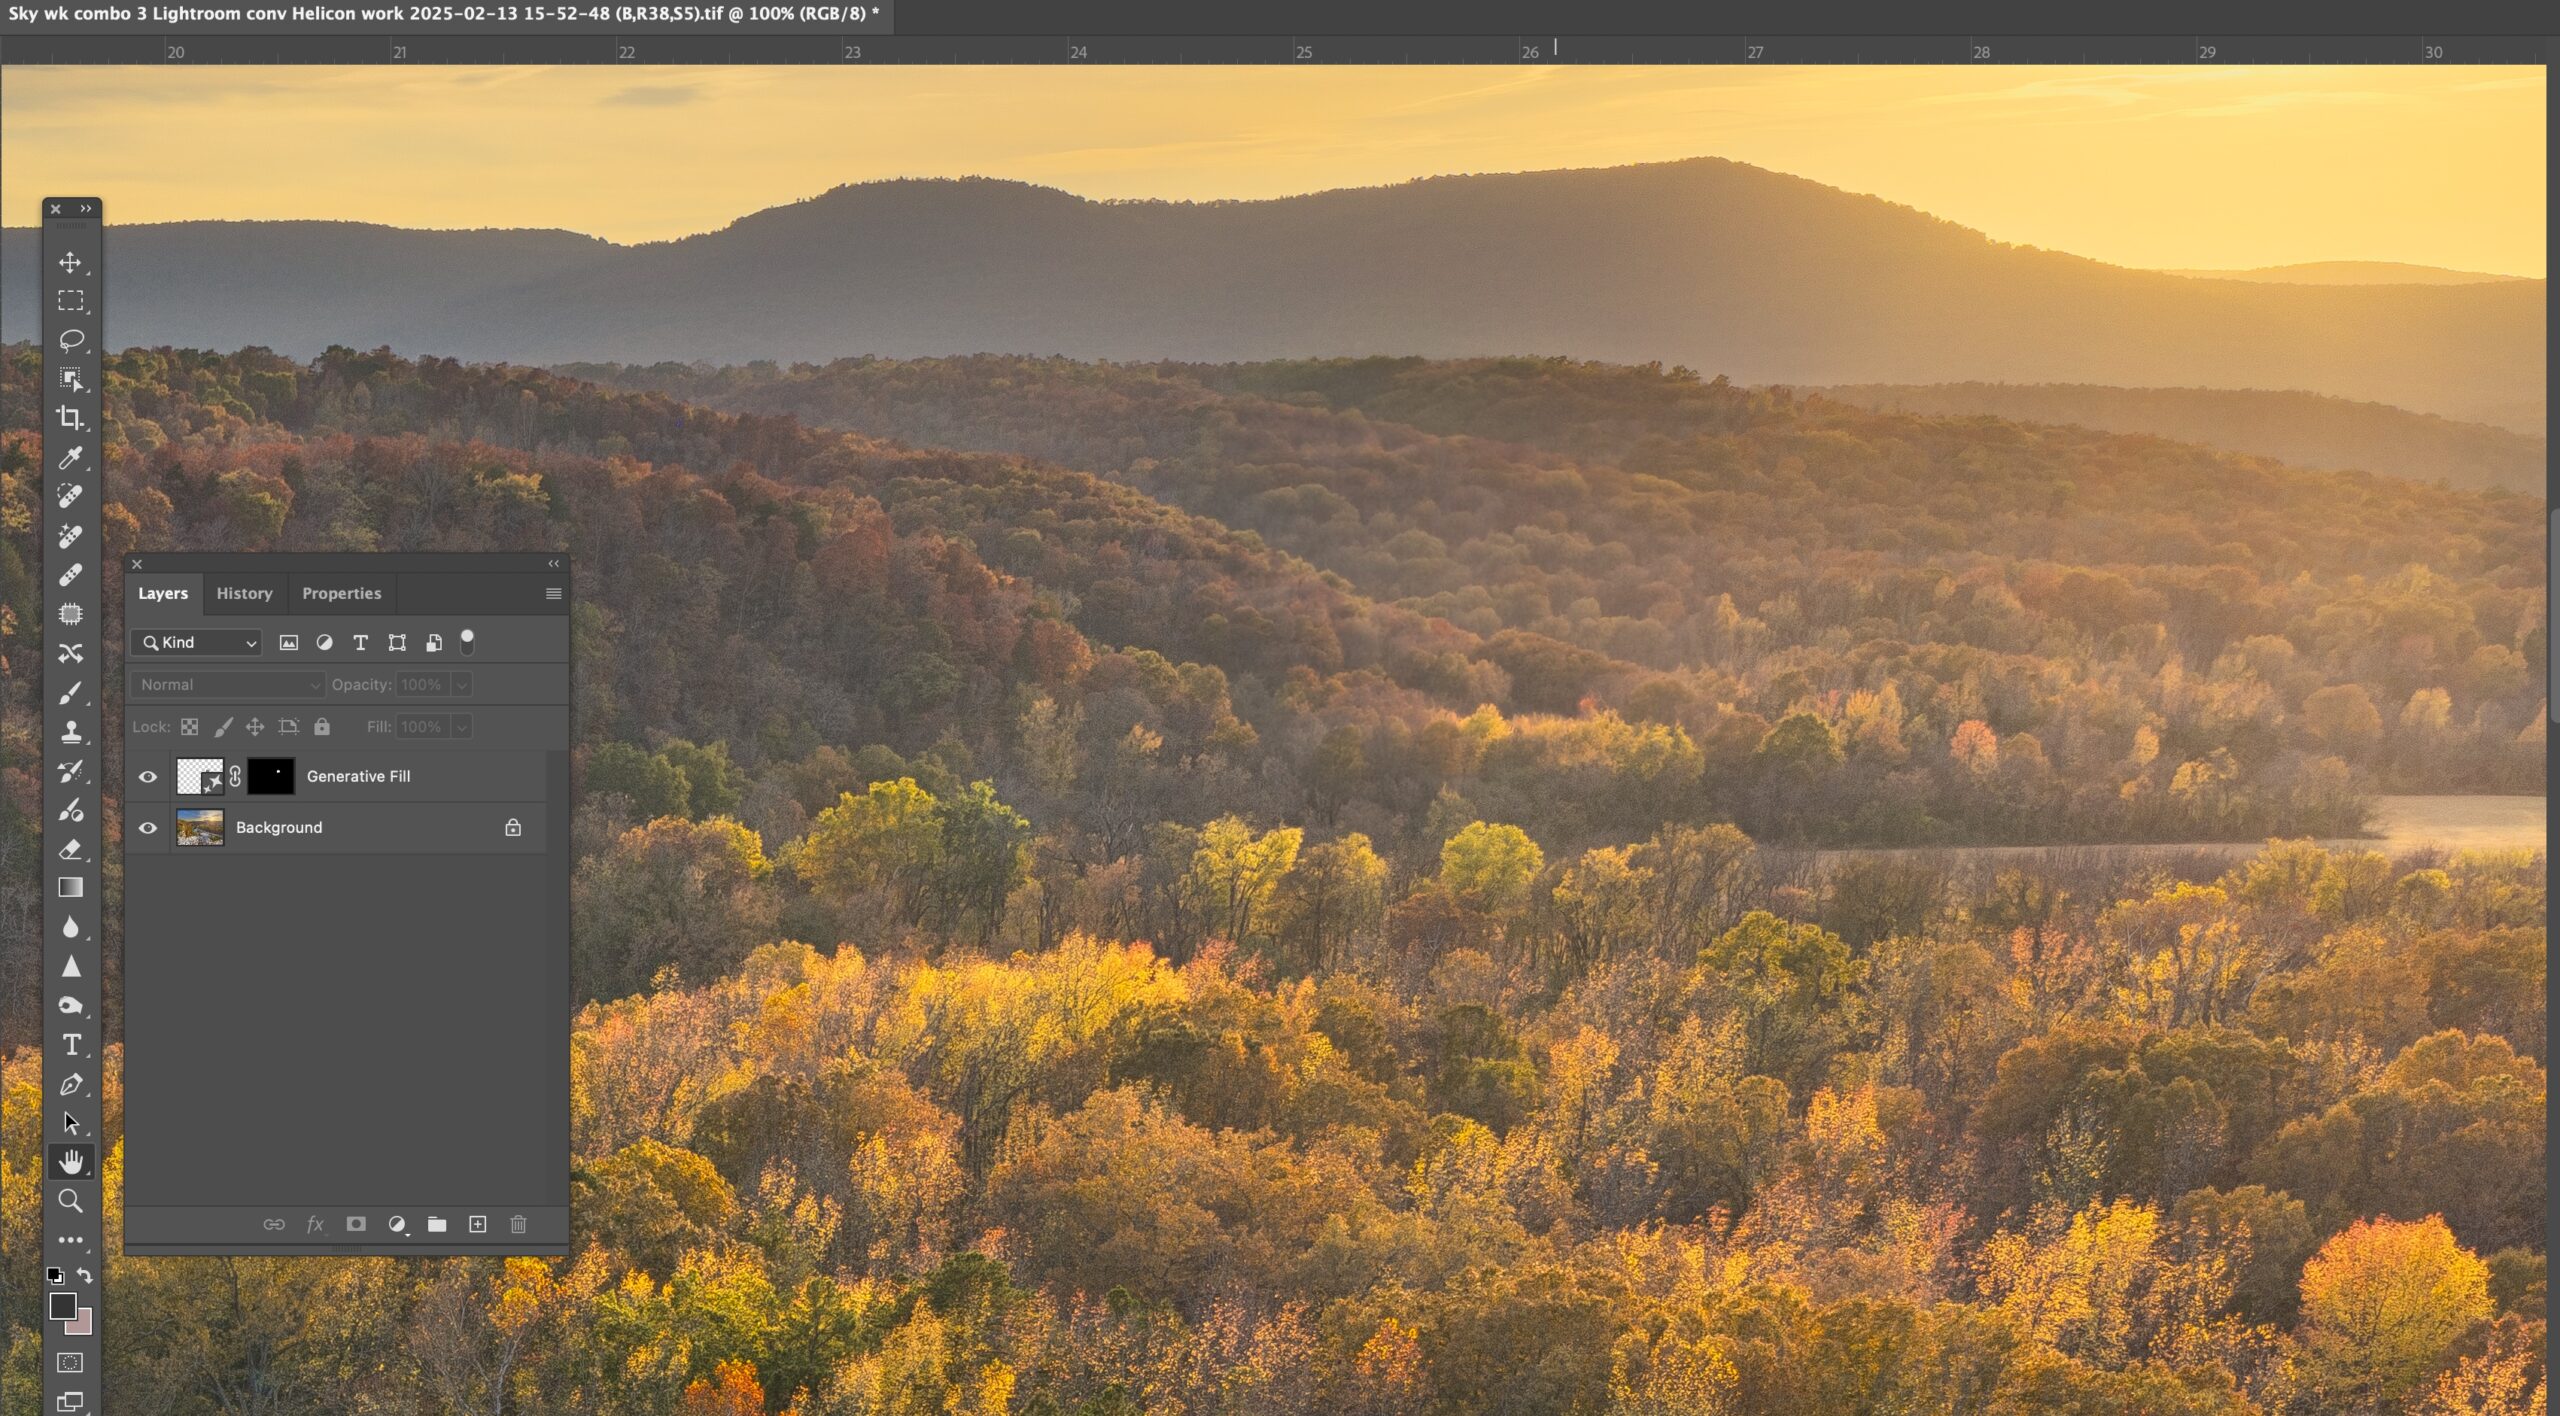
After Generative Fill has been applied to area on image
Now it’s possible to see the same area after generative fill has been applied. No more flare, or discoloration. A perfect blend.
Written for Photos of Arkansas by Paul Caldwell
02/03/25 Focus Bracketing example, Hasselblad X2D and 21mm XCD Lens

Focus Bracket, 7 images total, Hasselblad X2D
When working with a Medium format camera system, you have to be very careful when composing your shot for many reasons, one of the most important one is the issue of shallow Depth of Field (DOF). If you are coming from 35mm or APS-C, you may be surprised the first time you view your images as many times you will have parts of a shot that are outside the range of focus for the particular lens you are using. This is true with all medium format lenses and can be an issue when composing your shot. There are two ways around this that I know of:
- Increase your aperture to F12 to F16. This will help bring in the closer details to a better focus, however you may start to see smearing in the corners and for sure you will see some diffraction. The smaller your aperture, (larger the number) the more diffraction will play. What diffraction will cause is softness in parts of the image, mainly the finer details. In the past my technique would be to focus on infinity and increase my aperture to F14 or F16. This will give you a good result most of the time, especially with all of the modern software tools for sharpening that are available.
- Use Focus bracketing. With Focus Bracketing, you allow the camera to focus on various ranges of the image from the greatest distance to the closest the chosen lens will resolve. For example in the image above I used F 6.3 and ended up with 7 total images. Each image will have a unique part of the scene in perfect focus.
Focus bracketing requires a lot of post production work. You now have to work up in this case 7 different images and they need to be pretty much the same. After that you will use a software tool like “Helicon Focus” which will take the images and combine them into one image with everything in focus. Trying to do this manually is next to impossible and requires a tremendous amount of work, whereas Helicon will do everything for you.
There are a few issues that might come into play when you are working with Focus Bracketing.
- The most important consideration is that there is little to no subject movement. So if you are attempting this on a windy day, with a lot of tree limbs, forget it. In the example above, I was blessed with a totally calm evening. There may have been slight movement in the cedar tree overhead, but it was not enough to create a problem. If you have too much movement, you will see aliasing, as the software can’t get the exact same parts of the various images to line up. The effect will be like a ghost image and makes the combination impossible. Also do not try Focus Bracketing where you have cars, trains, or people moving through the scene as they will cause the same problems.
- Exposures variances. In the example shown above, I knew that I could not expose for the sky and the foreground (especially the rocks in the lower right corner) in one series of images. So I ended up taking 14 total shots. I ran Helican on both series of 7 images, which resulted in 2 final images, that I then combined in Photoshop and the Camera Raw filter. Note: The name camera raw filter is misleading as it works very well on tif and jpg images.
- You must have your camera on a tripod. There is no way to hand hold the camera to take the bracketing series of images, you will have movement and the images will not align correctly.
With the X2D, you have three options when working with focus bracketing:
- Shoot from Infinity to nearest spot
- Shoot from nearest spot to infinity
- Use a symmetric option, where the camera should start in the middle and work up and down.
I use option 1, with the camera in AF mode (auto focus) I will move the focus point to where I know I am on the most distant part of the subject and start the series. You have to pick the number of frames you want, and for most landscape shots I have found that anywhere from 6 to 10 seems to work with the aperture at F6.3. However it’s always a good habit to check you shots to make sure the camera was accurate on the furthest and nearest frame. NOTE, if you are going to need several series due to the variance in exposure make sure you do not move the camera. Also you will need to be on a tripod.
Here are some close ups from parts of the file to show the details that were captured throughout.
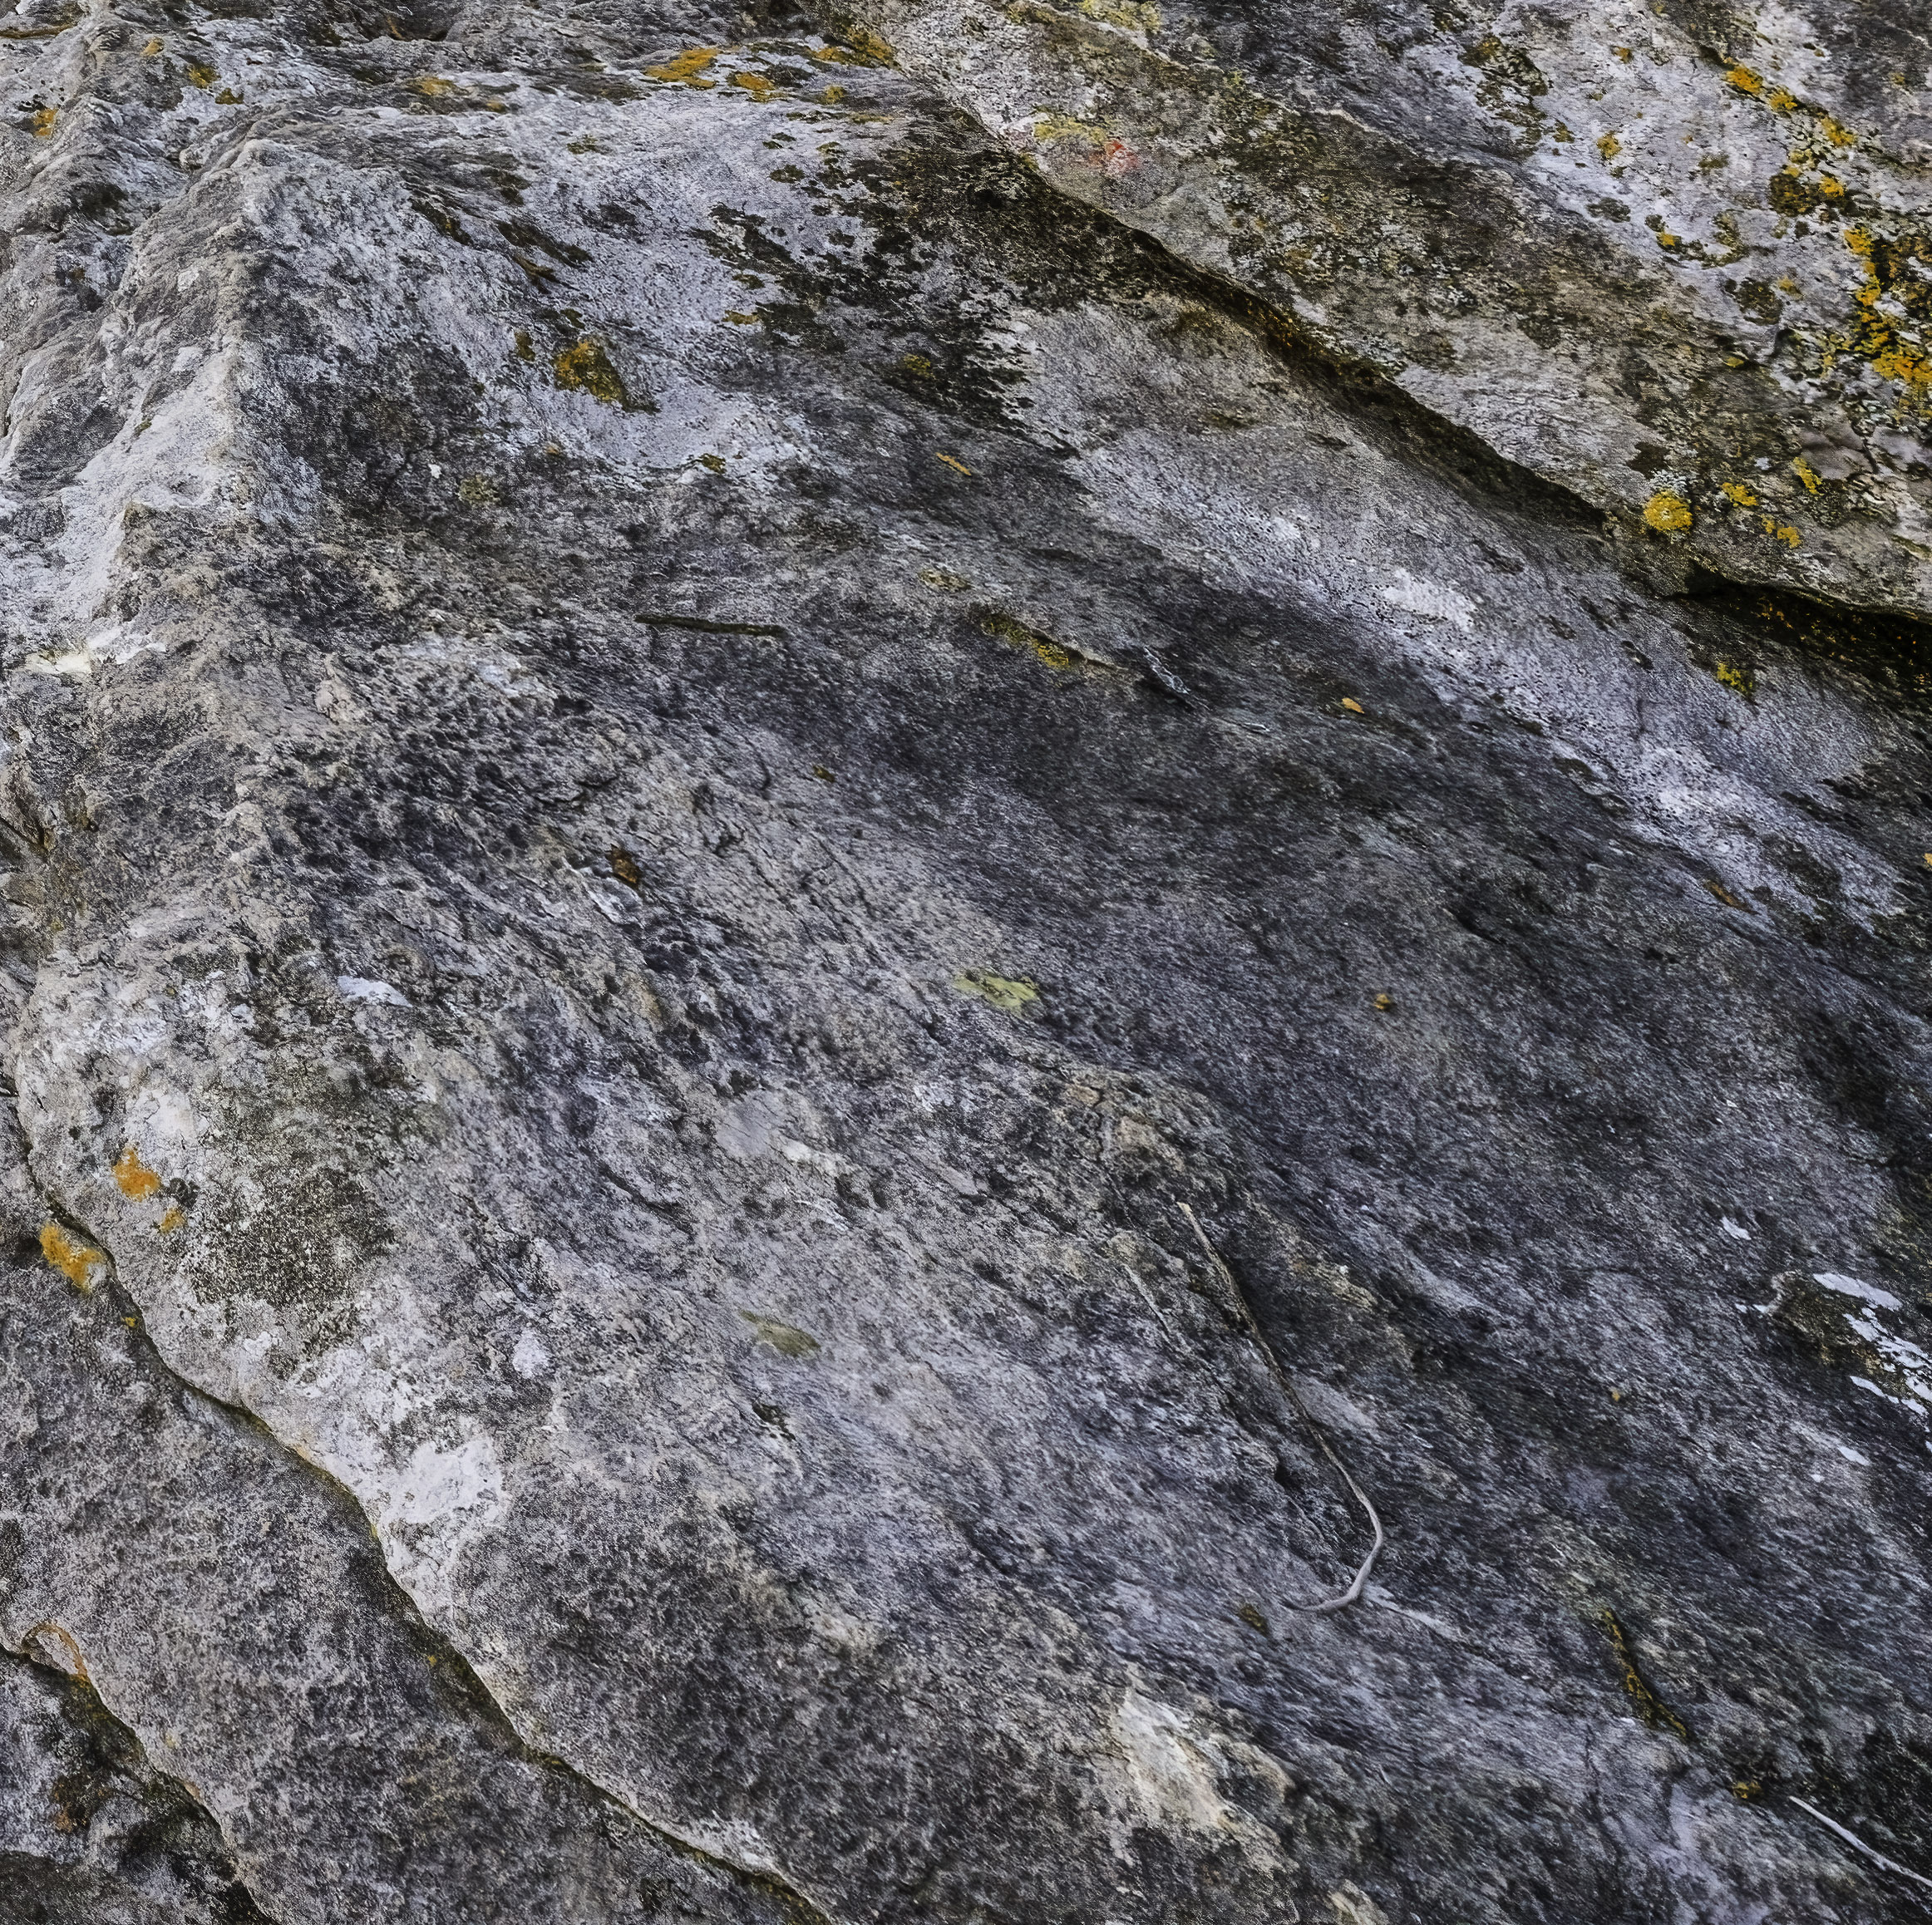
LOWER RIGHT CORNER (Click on image to view it larger)
Even though I used a 21mm lens, I still needed to focus bracket to get the closest corner in good focus. This part of the subject was less than 3 feet away from my camera.
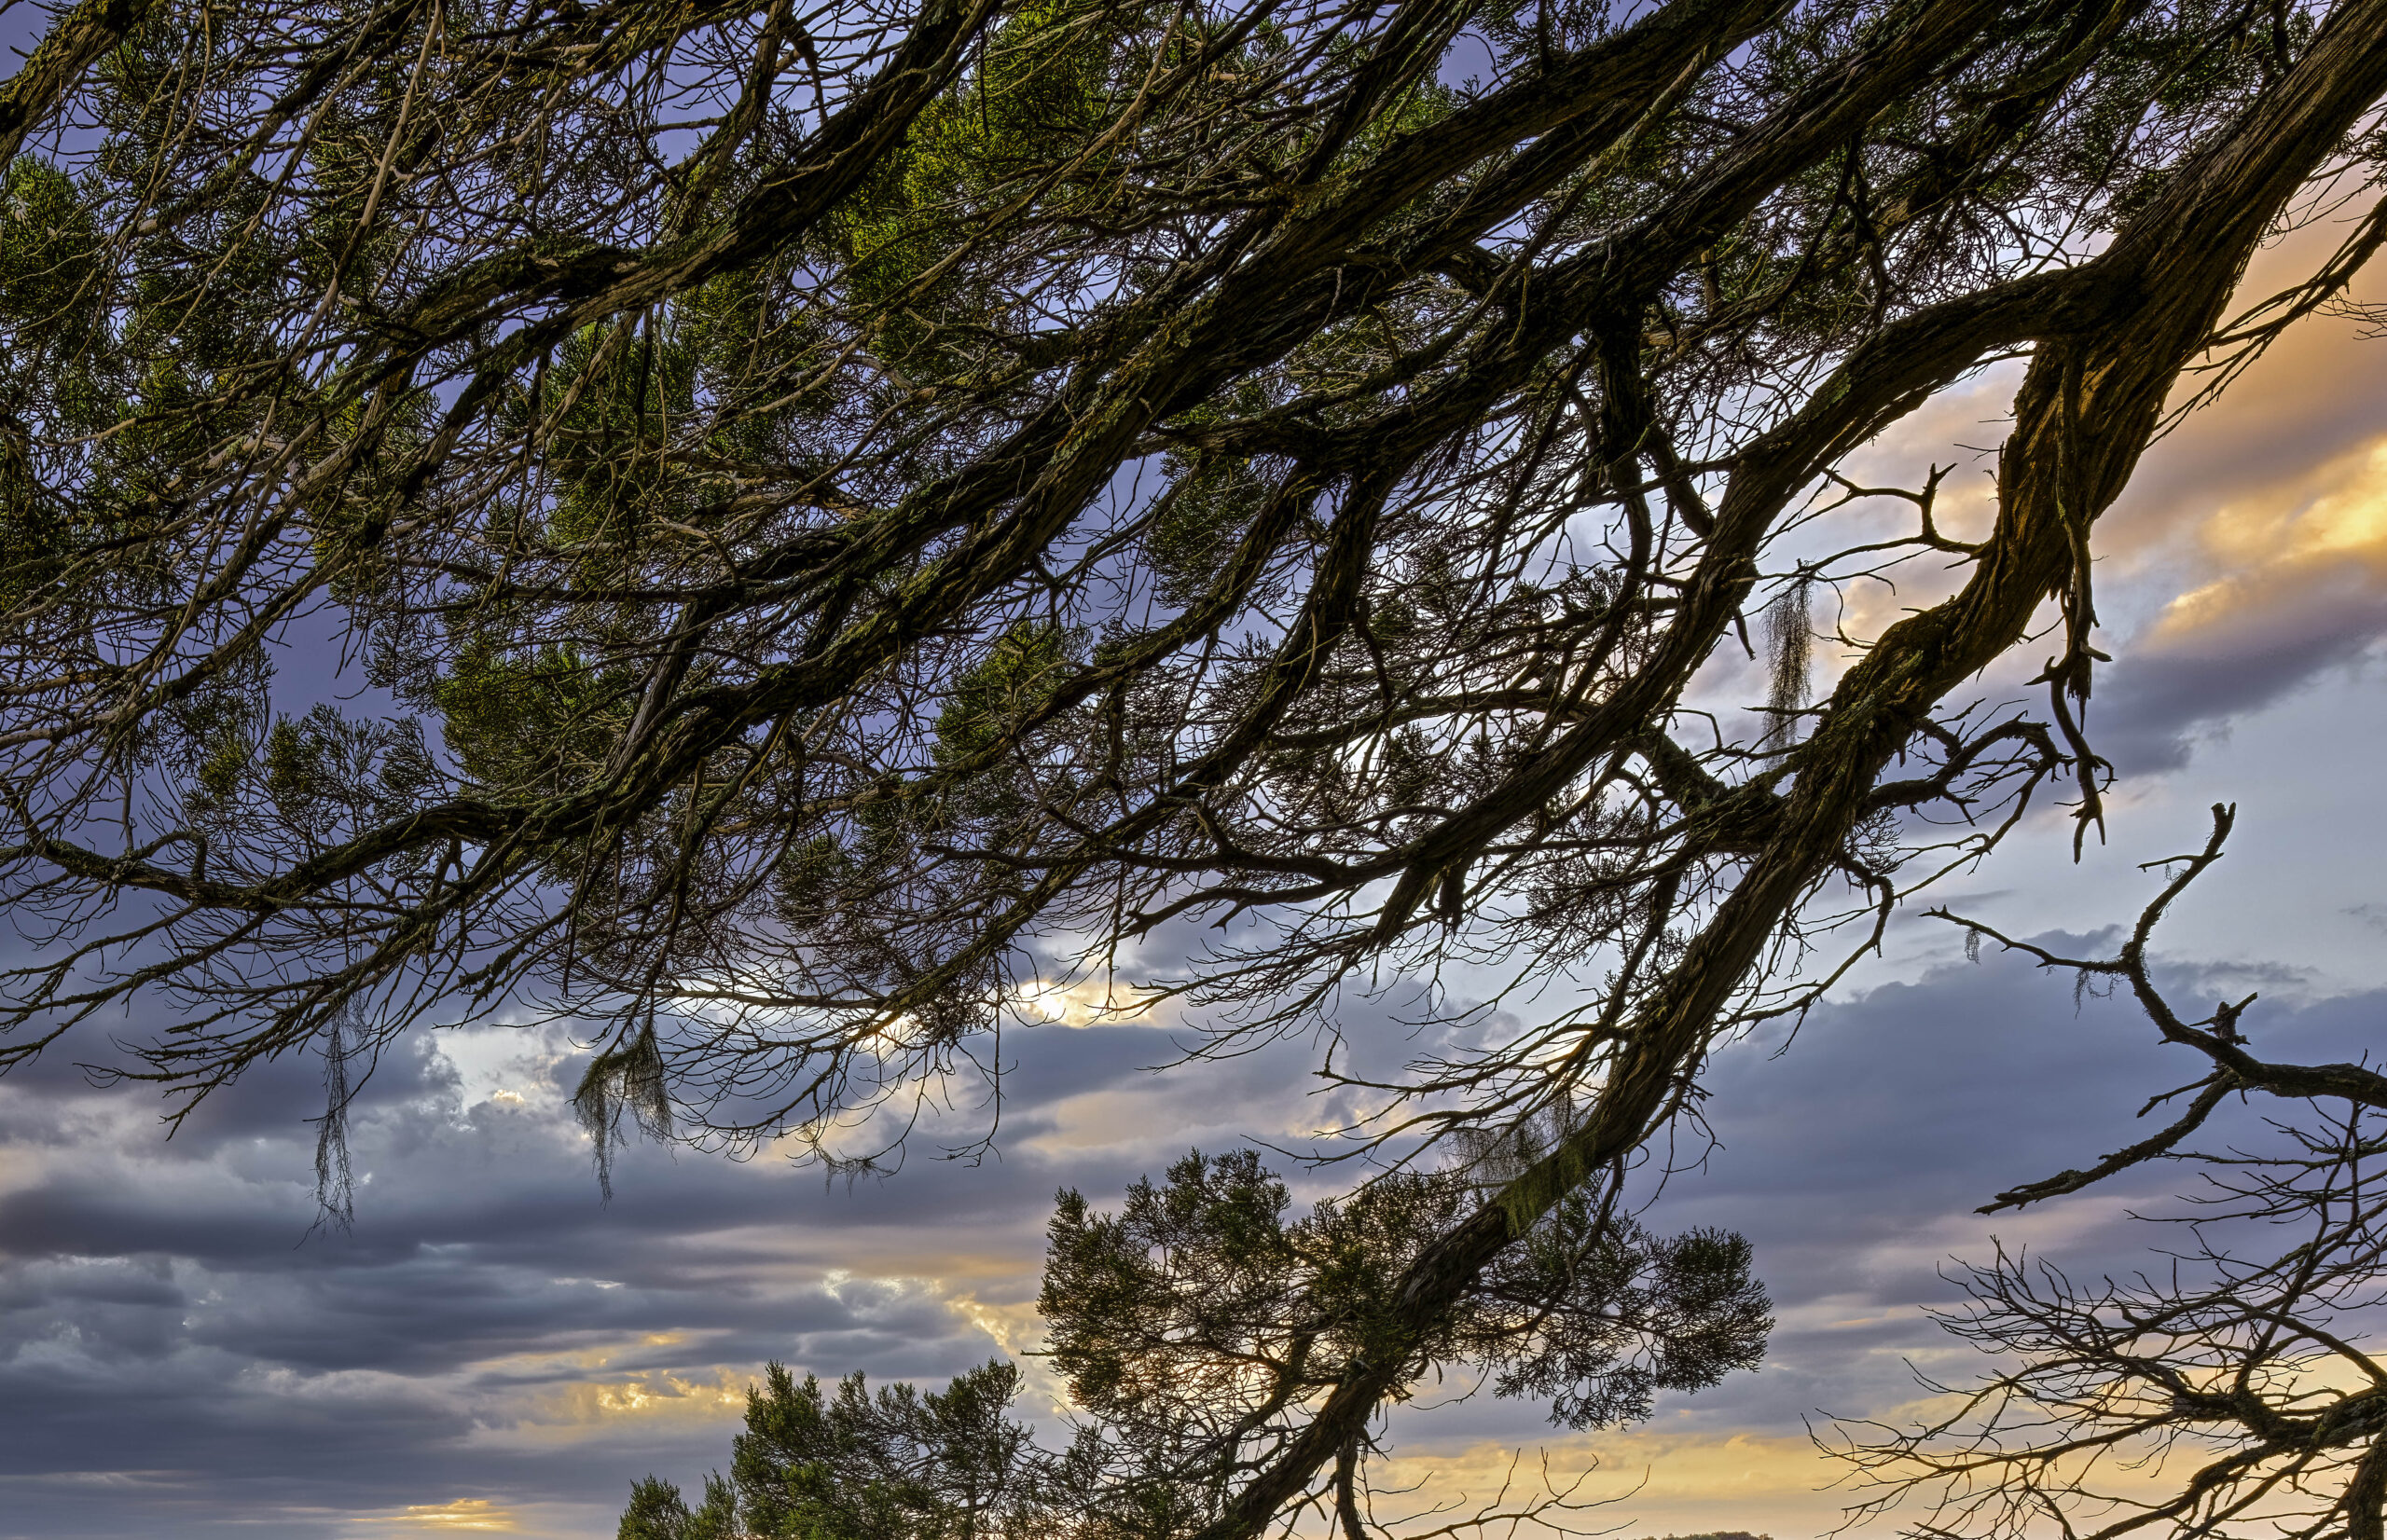
UPPER RIGHT CORNER SHOWING DETAILS OF CEDER TREE (Click on image for a larger view)
What really makes this shot complete for me is the 1000+ year old cedar tree that is growing out of the top of the bluff. It’s really impossible to shoot the scene without the tree being in the frame so it’s very important to have it in sharp focus.
UPPER LEFT OF IMAGE SHOWING TREES IN THE DISTANCE (Click on image for a larger view)
This was a fall shot, so I wanted to have all the different species of trees in sharp detail. The Hasselblad 21mm lens has an excellent ability to resolve these finer details, however if I had tried to capture all of the shot in one frame I would have lost some of the finer details to diffraction.
LOWER LEFT CORNER (Click on image for a larger view)
One test of any ultra wide is the ability to capture sharp details at the extreme edges of the frame. The Hasselblad 21mm does a very good job with this, however it does suffer from retrofocus distortion. This will cause details at the edges of the frame to elongate and or stretch out. The effect on this image is not enough that I am concerned with it. However if I were to make a print of this, I might crop into the image just a bit.
In conclusion, I hope this article has made you more interesting in working with Focus Bracketing. If you have a medium format system from either Fuji (GFX camera) or Hasselblad (X2D), you can work with this in camera to take all of the images. Once you understand the workflow it’s a pretty automated process. If you have a 35mm camera from Nikon, or Canon, I know that Nikon offers focus bracketing with their Z cameras, I assume that Canon also now has it. Sadly Leica still does not offer Focus bracketing and I feel it’s huge over sight by them. There is no need for image stabilization, all you need is auto focus and a piece of firmware to process out the images. Leica has missed this with both the Sl2 and now their latest Sl3 cameras. According to available information, the Leica SL3 does not have an in camera focus bracketing option; reviews and specifications indicate that the camera only offers exposure bracketing, meaning it cannot automatically capture a series of images with varying focus points within a single shooting sequence.
Notes from the author:
I have the Lecia Sl2 and would strongly recommend to Leica that they add Focus Bracketing to their SL cameras. I doubt it would be retroactive the SL2, but with the SL3 it could be added via firmware. The Sl3 is 6oMP and even with the best Leica lenses, you often times need to bracket your focus to get the best overall image. I have used the Hasselblad X2D and it has a very nice Focus bracketing option, however after each series, you have to go back to re-focus on infinity (if you are shooting from far to near). The Fuji GFX100 has a more complicated menu to setup Focus Bracketing, however once you have it set, you can reshoot at will, i.e. the camera remembers you are shooting from far to near and on each series will return to the set point to gave the camera. With Fuji you set both the far and near points. With Hasselblad pick the shooting method far to near or near to far, and use you AF point to hit first point, then the camera makes all the rest of the decisions, thus I feel you need to check it after the first run to make sure the camera got the near point correctly.
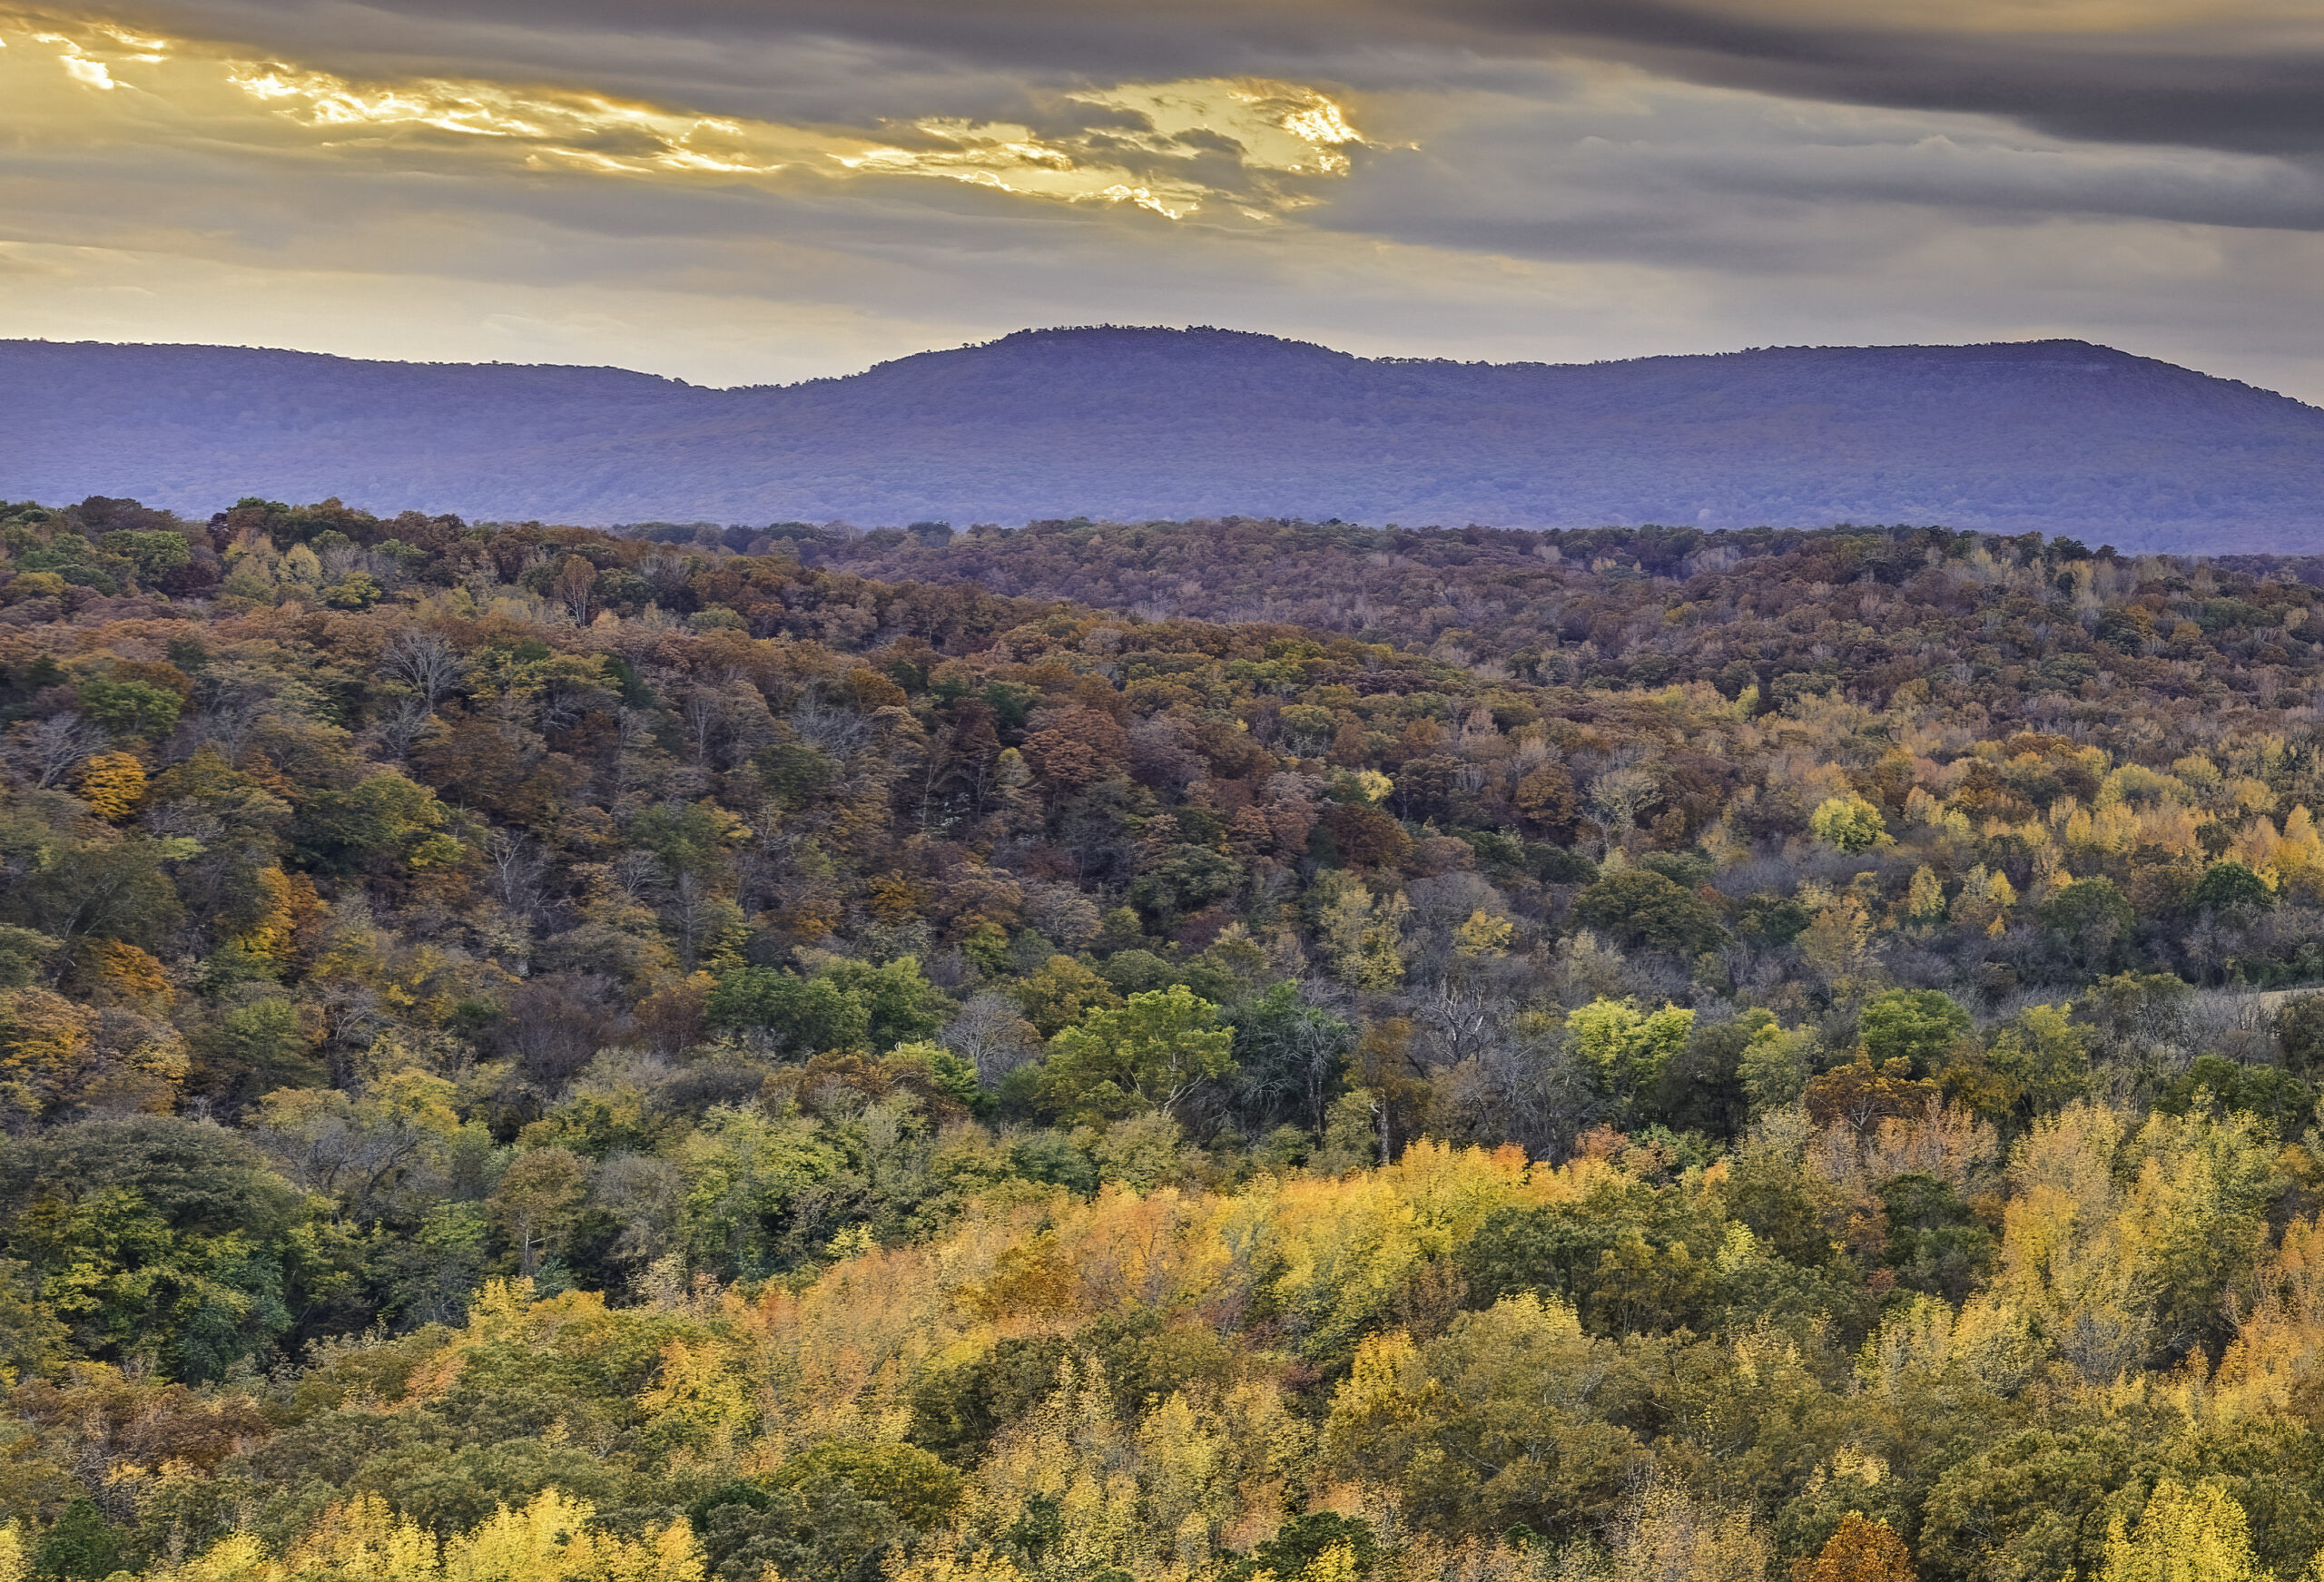
03/14/19 Sunset skies over Pinnacle Mountain–Featured Arkansas Photography
- At March 14, 2019
- By paul
- In Featured Arkansas Photography
 0
0
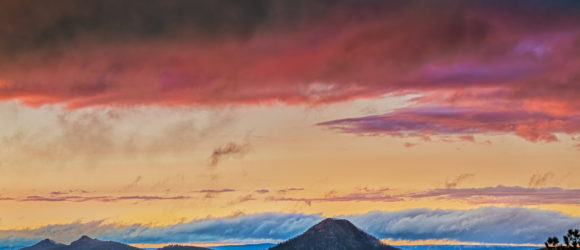

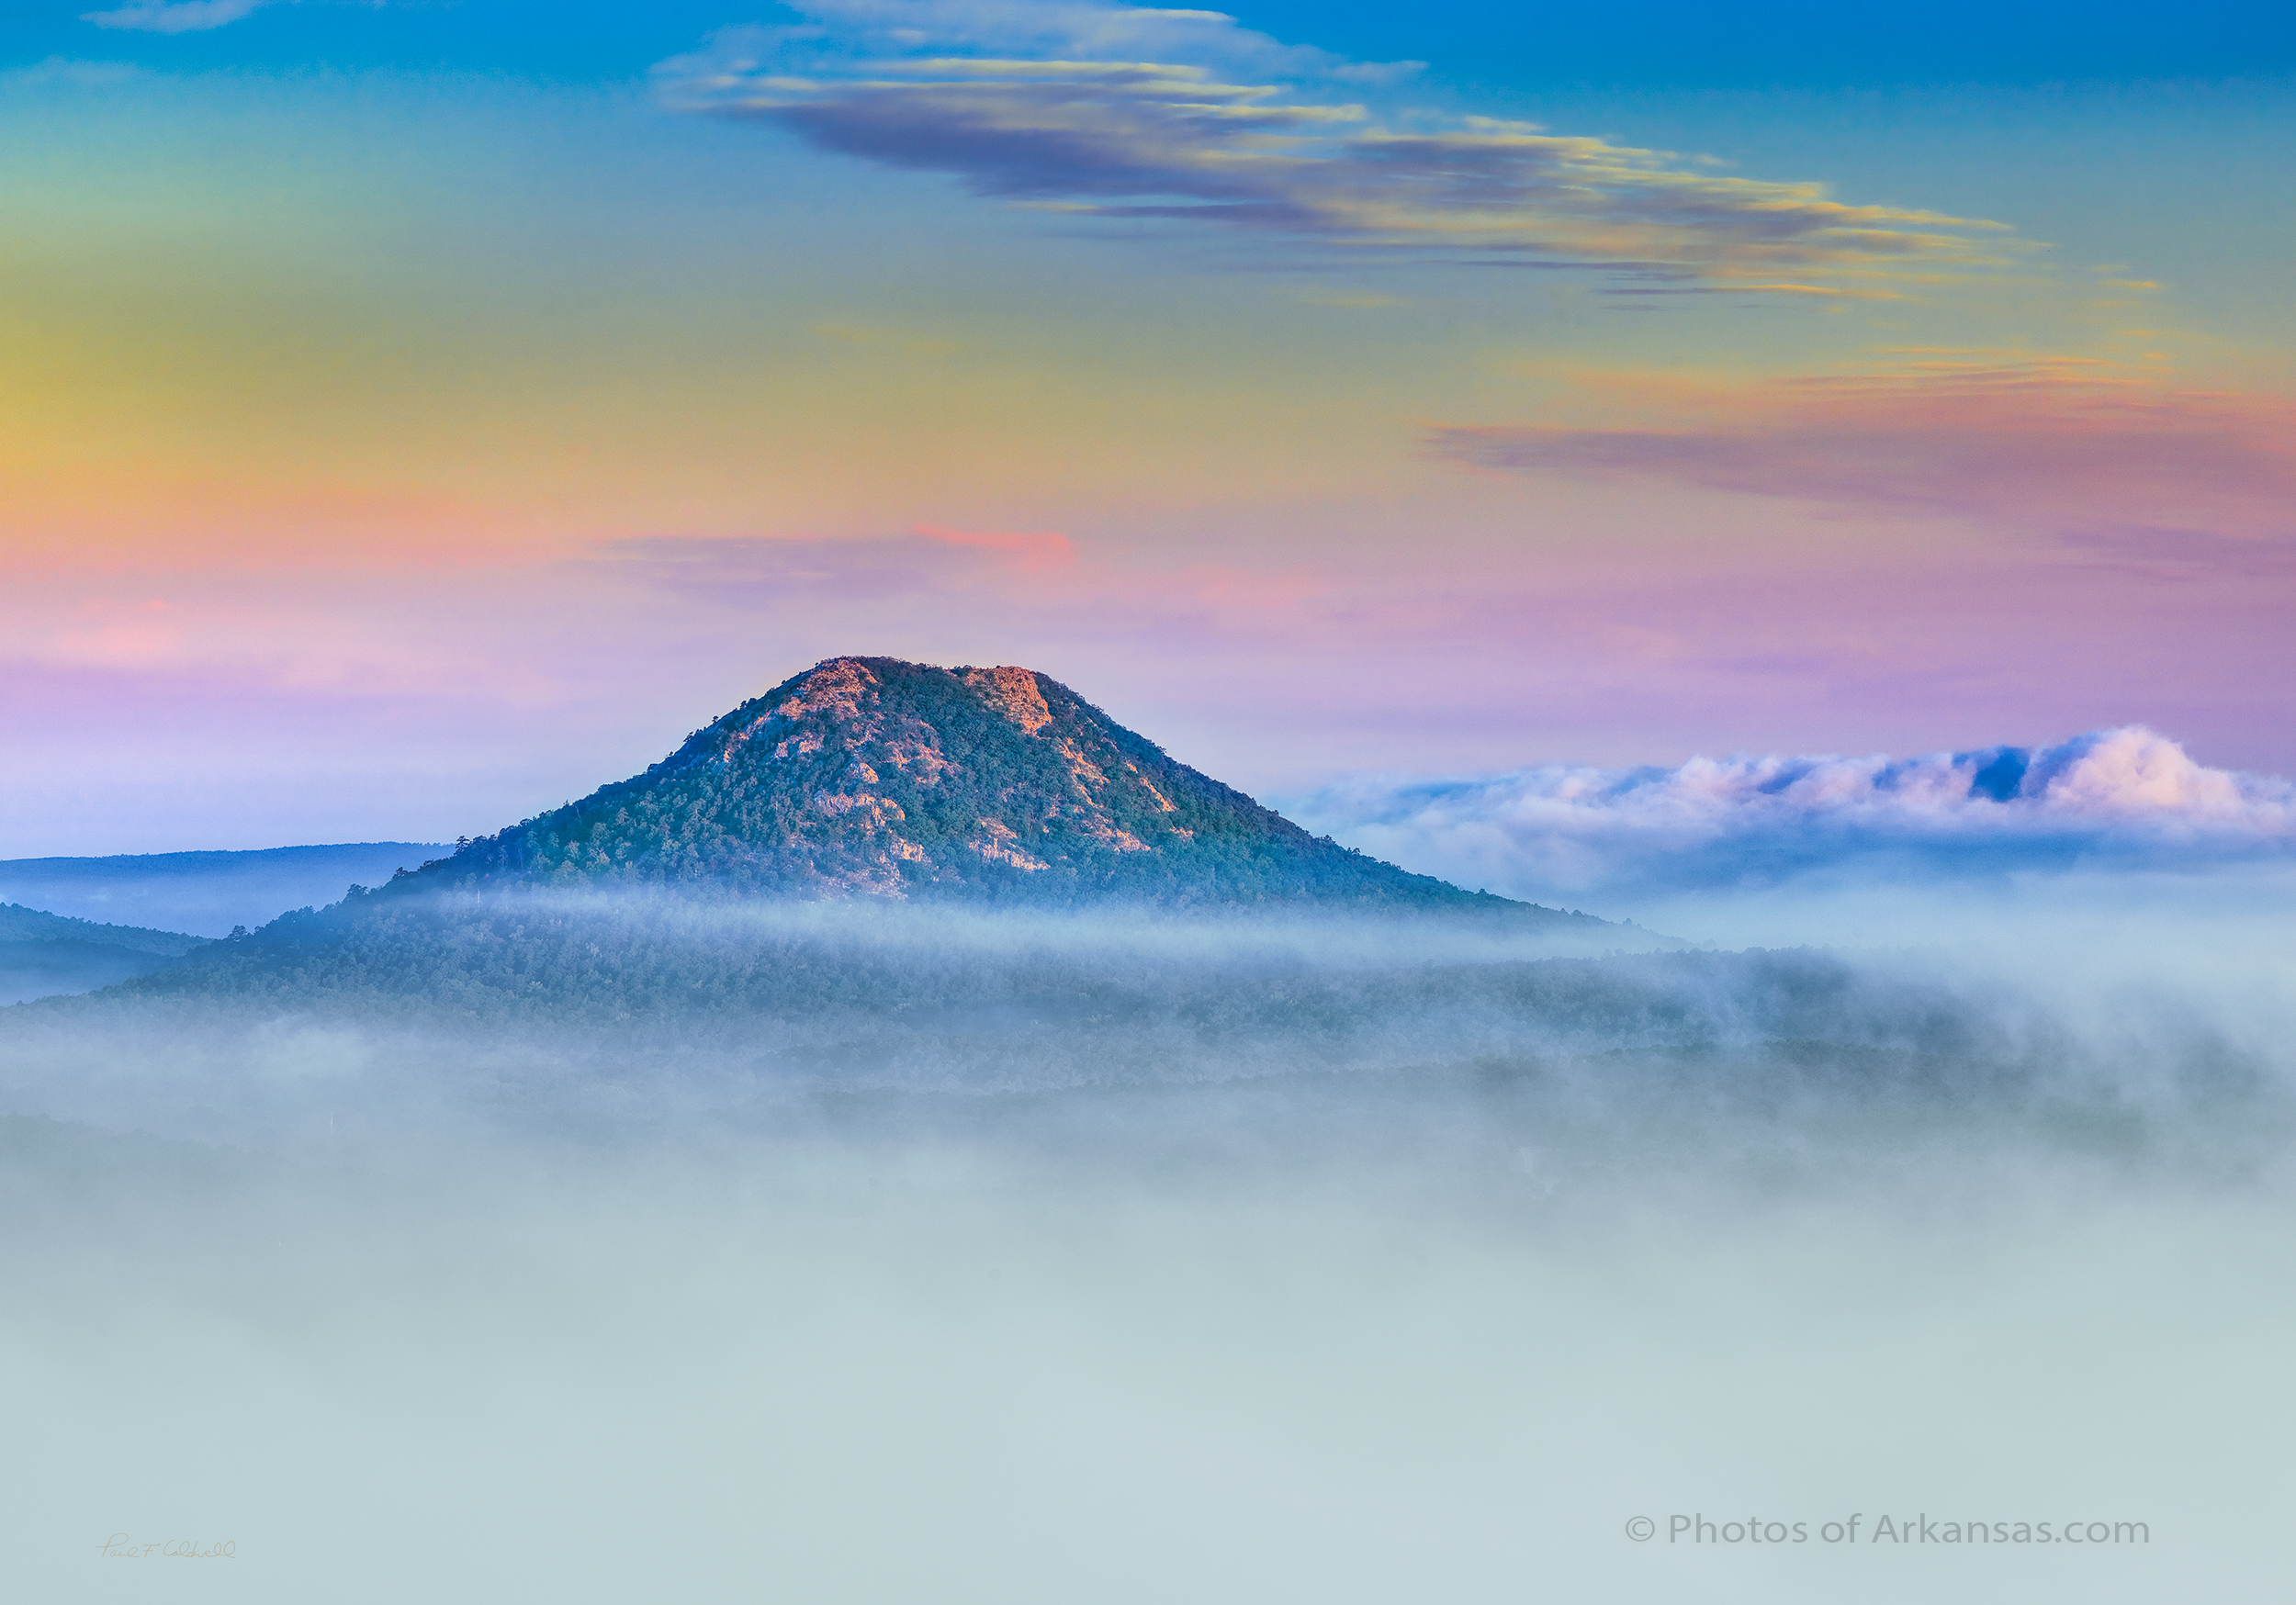
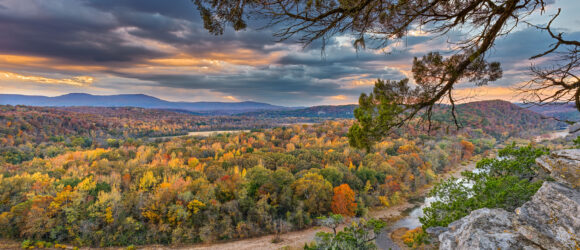
Sunset skies over Pinnacle mountain
Taken with a Nikon D850 and 80-400 lens, ISO 200. 4 vertical shots combined into 1 final image.
Love the area around Pinnacle mountain in western Pulaski county. All day long the skies had been grey and dark, no color. But right at sundown, the clouds broke open and the sun started to shine. It was still raining a bit, but I headed out to try and capture at least 1 sunset shot. I was working with the D850 and 80-400 lens, (a lens I have mixed feelings about) and no tripod, so I pushed up the ISO to 200 and shot brackets. I really should have pushed up to around 400 or even 800, but I was still able to get my shot. There is a bit of noise in the foreground, but it’s not as bad as I thought it would be. The skies were just loaded with color and I loved the way the various layers of clouds were moving across the skies.
I used Capture One to convert the images from raw files and then used Photoshop CC 2018 to create the panorama. It’s not really a true panorama, but more large format image. To capture this, I took 4 vertical images all hand held then used the panorama tools in Photoshop to create the final image. Photoshop does a great job most of the time and was able to get this image converted fine.
Pinnacle is an amazing looking mountain in western Pulaski County, Arkansas.
Written for www.photosofarkansas.com by Paul Caldwell, please do not reprint or reproduce any of this content without permission.
12_02_15 Featured Arkansas Landscape Photography–Autumn afterglow at Sam’s Throne
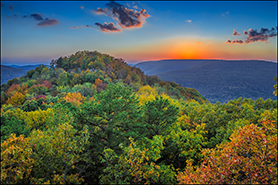

Sam’s Throne Afterglow in the Arkansas Ozarks
Taken with a Canon 1ds MKII (16MP), multishot bracket for exposure, Canon 24-70 @ 24mm F 11 iso 200
This an example where it pays to work with older files, in this case, way back 2004, with more modern software. I have taken a lot of sunsets at Sam’s Throne, however this is still one of my all time favorites. When I purchased my Canon 1ds MKII, which had 16MP, I started retracing many of trips to places I loved to go as I felt that 16MP would be about the maximum in resolution for a long time to come. We all know that changed pretty quickly. However on this evening, I found the best shot was after the sun set as it painted a wonderful afterglow in the sky. Sam’s Throne was just starting to change for fall but there was plenty of color around. To make the shot perfect, the couple of clouds that rolled into the frame helped to breakup the solid sky.
Sam’s Throne is one of premier climbing spots in Arkansas but it’s also one of the best for photography. You have a huge bluff line that runs at least 1/2 mile or longer and allows for wonderful views of the Big Creek valley. In this view you can see the Throne itself and all the rolling hilss that work their way off into the distance. The forest here is a good mix of both pine and deciduous trees, mainly Oak, and Gum but there are also some nice Maples scattered though the valley. One of the best aspects of Sam’s Throne is the fact that you can drive very close to the bluffline and you only have about a 1/8 of a mile walk to get started. Sam’s Throne is a great place to camp also as there is now a primitive campground with about 10 sites.
As this series of shots was taken with an older Canon Digital camera, the noise in the shadows was excessive. The 1ds MKII was not noted for extreme dynamic range. Back in the day, I shot almost everything in brackets knowing I would need multiple shots to get the exposure coverage I needed without excessive noise even at base iso or one step up. I had worked this image many times with various HDR software toolsets, but never really received the output I was looking for. Now that Adobe Lightroom has an excellent HDR tool, I decided to go back and try this shot again. The result was impressive and I found a much better overall image. The big advantage to HDR in LR is that Lightroom leaves that output as an .dng, in essence a raw file. This means you have all the flexibility of a raw file but with the added exposure blend, and you can still use the excellent Lightroom Toolset. I have started going back to a lot of my early Canon photography and working it back in LR and the results have been impressive.
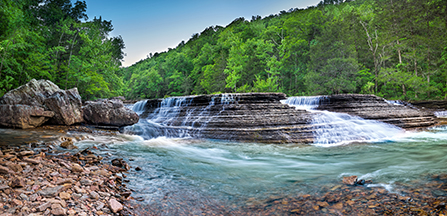
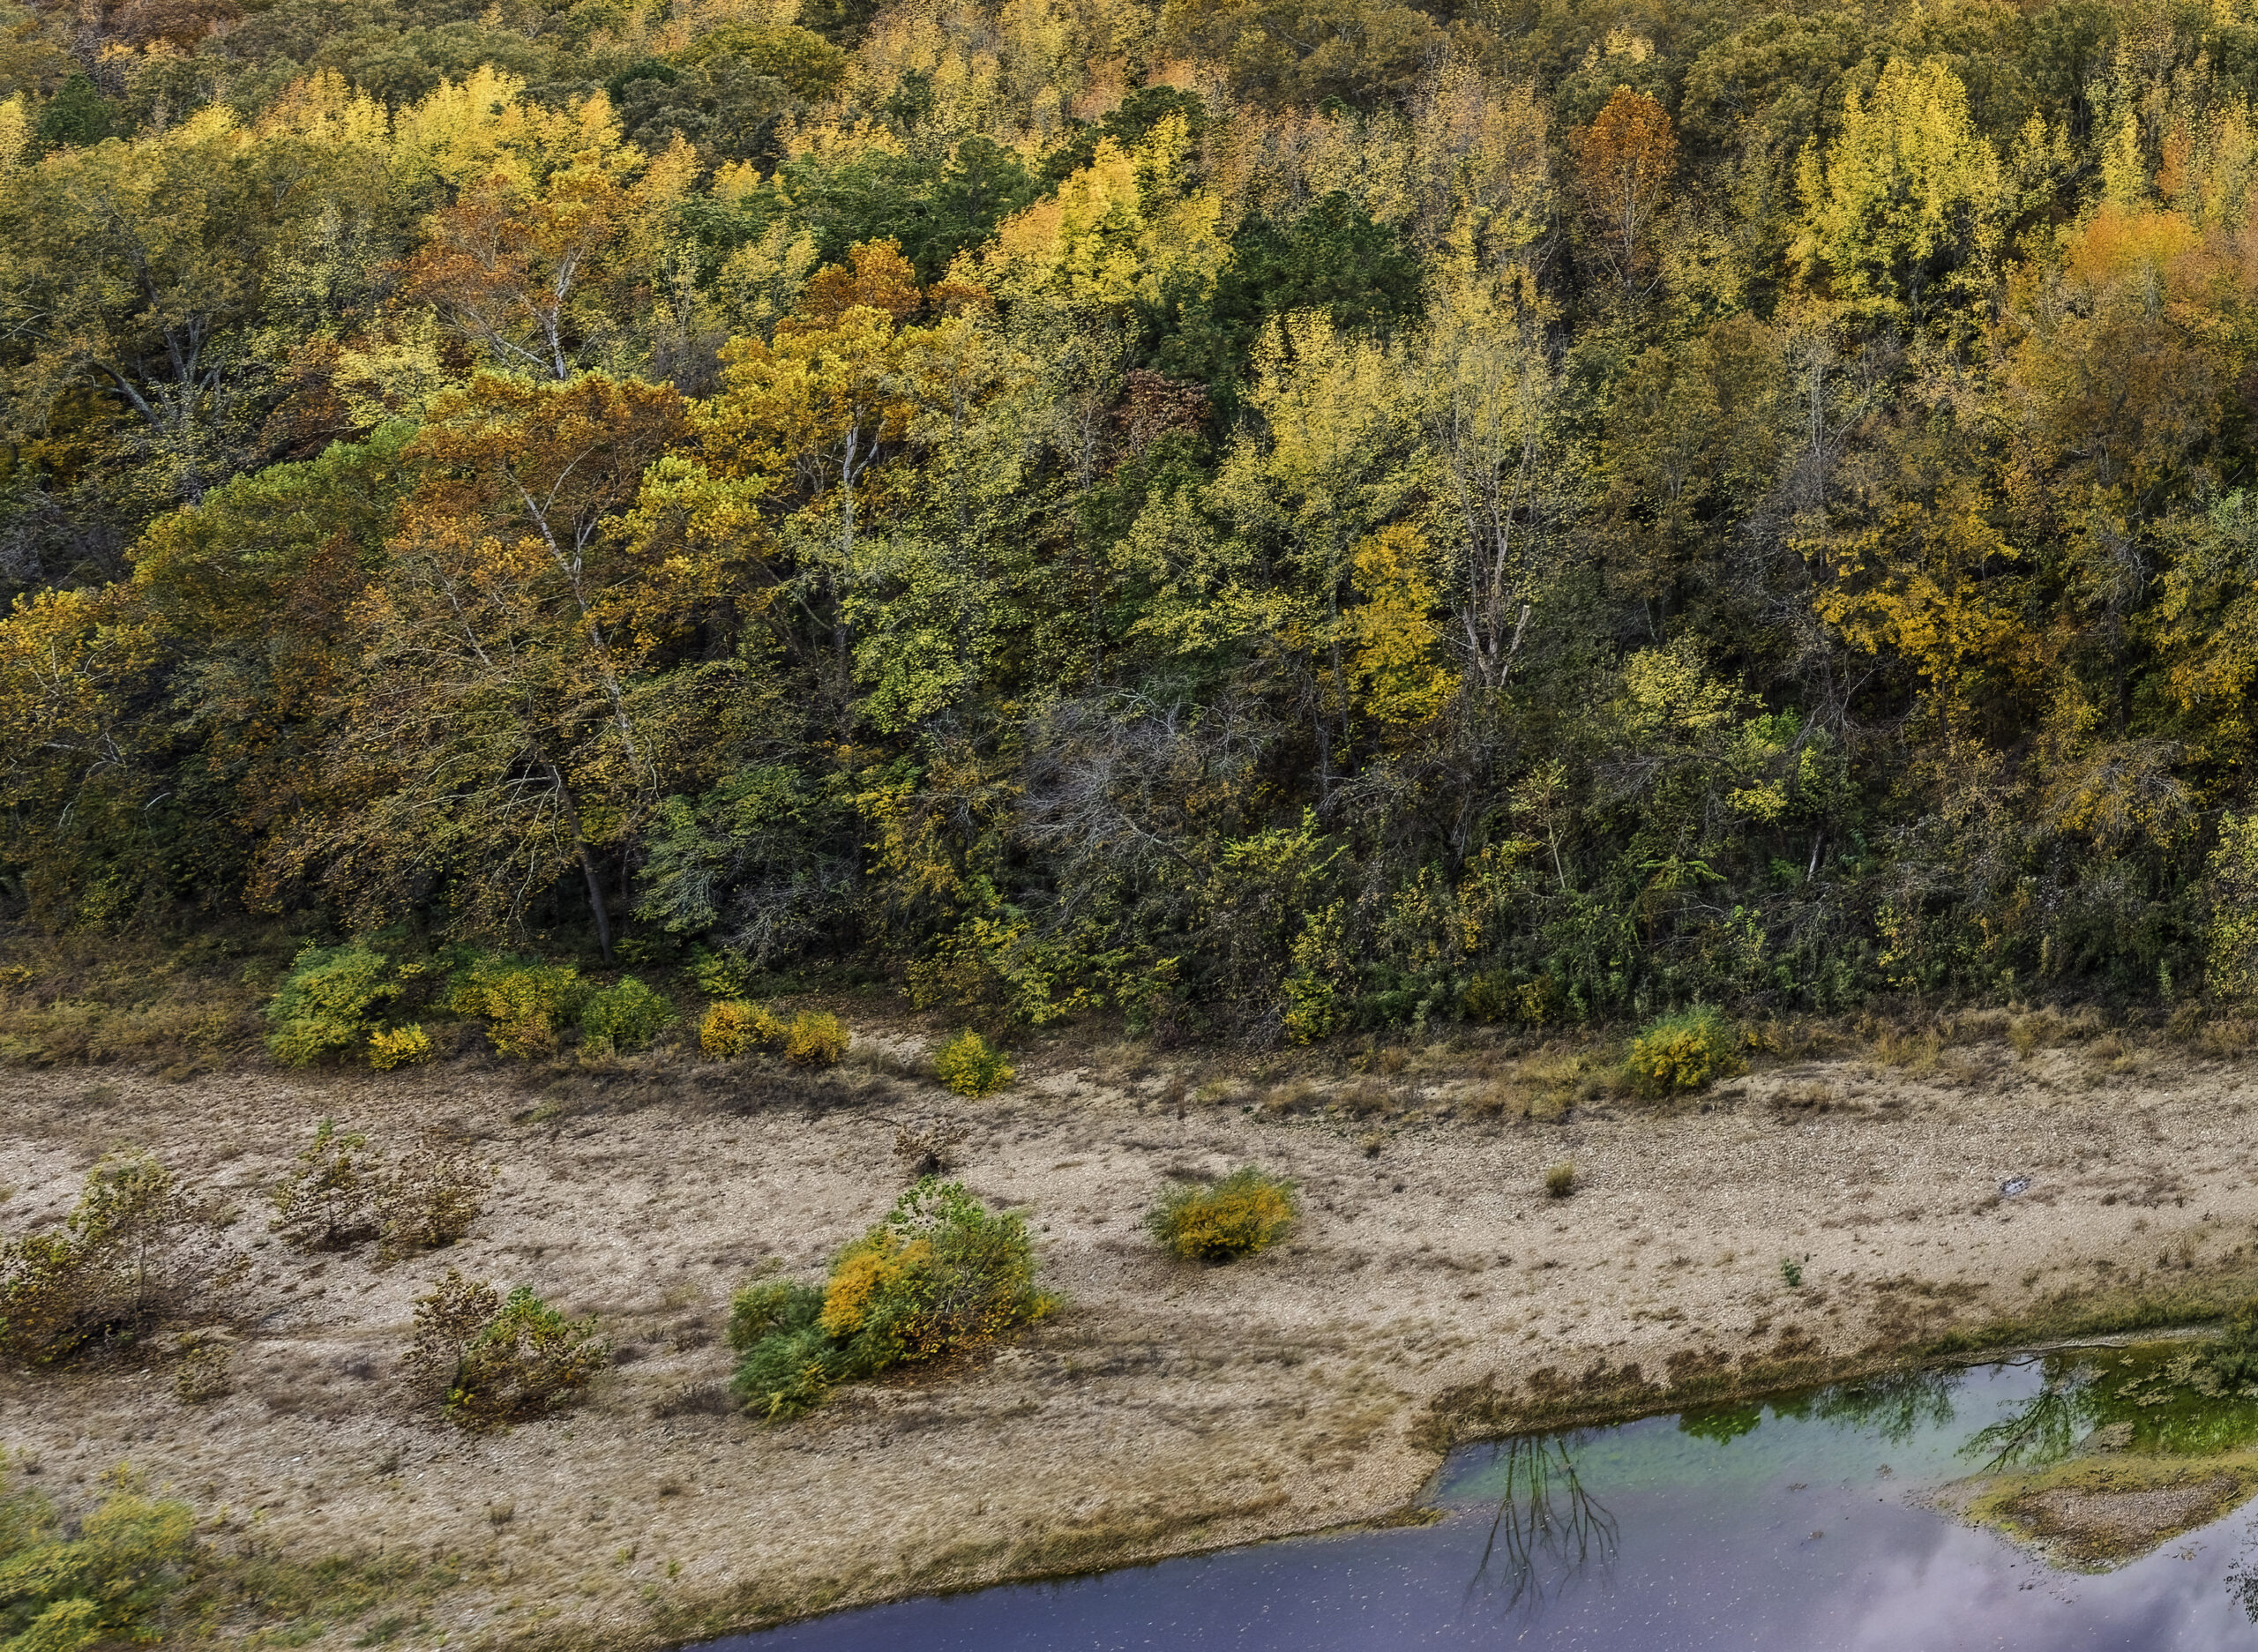
10/14/14 Featured Arkansas Landscape Photography–Sunset at Roark Bluff on the Buffalo River
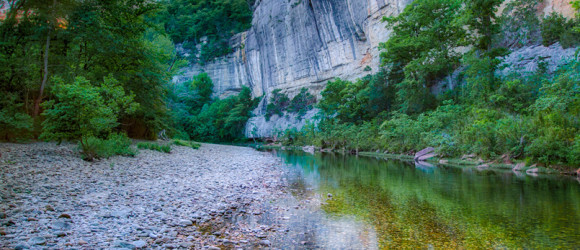
Sunset over Roark Bluff on the Buffalo River
Taken with a Canon 5D MKII, Canon 14mm F 2.8 lens, in a bracketed series of exposures @ iso 200 This one is a special shot as it was one of those photographs that was just pure luck. I was up on the Buffalo River with Bob Shull, mainly to work the night skies, and we were just up on the river setting up our cameras. I had been looking downstream as the moon was starting to rise and it was in a very nice position. I had left my Canon 5D MKII setup for a upstream shot of Roark bluff for later that night. The evening skies had been cloudless, so I was not very interested in a sunset. I remember for some reason I looked around, probably due to a noise on the river, and wow, all of a sudden a bank of clouds had rolled at just the right time and they were on fire! I had to shoot the 5D MKII in a series of bracketed exposures as I knew that I would not be able to pull in the entire exposure with just one frame. This scene only lasted about 6 minutes and then the sun dropped below the bluff. My first series, missed the reflections of the sunset on the water at my feet. The river was not dead calm, but I still was able to pull in the reflection of the sunset on the water and the river rocks.
This was one of those once in a life time lucky lighting shots, that unless you happen to live on the river and can be out there everyday, just doesn’t happen very often. This was one of the last major photographs I took with the Canon, as I was in the process of transitioning to my Nikon D800, however I was much more familiar with the Canon at the time, so I shot with it.
06/13/14 Featured Arkansas Photography–Sunset and Distant Thunderstorm at Sam’s Throne
- At June 13, 2014
- By paul
- In Featured Arkansas Photography
- 1


Taken with a Fuji X-E1 18-55 lens @ 18mm and F11 iso 200, image taken in 3 vertical series and converted into 1 horizontal image. I can never get enough of the vista from Sam’s Throne in Searcy County, Arkansas. This spot is surround by red/yellow sandstone bluffs that really will catch the setting sun. In this view, the sun had already dropped below the hills in the distance, however there was still plenty of light available. This day had started out with a cloudy and overcast sky, which as the day wore on, started to open up. By sundown only one large storm was still visible way off in the distance and the light hitting it really made the thunderheads pop. One of the most beautiful things about Sam’s Throne is the way the hills overlap off into the distance. This is the valley of Big Creek which is one of the largest tributaries of the Buffalo National River. The bluffs around Sam’s Throne are a favorite for rock climbers in the state. It’s a great place to spend the day. I took this shot my my camera in the vertical orientation in 3 segments, and then stitched them into 1 image that is in the landscape orientation. This allowed me to have much greater overall resolution.
03/26/13 Featured Arkansas Photography–Sunset over Sam’s Throne in the Arkansas Ozarks
- At March 26, 2013
- By paul
- In Featured Arkansas Photography
- 0

Sunset over Sam’s Throne in the Arkansas Ozarks
Taken with a Phase One IQ-180, Schneider 43 Super Digitar lens, F11, iso 100, exposure time 1/30 sec. This was a strange day, as the wind was blowing about 20 to 30 mph and just standing around trying to take the picture was a bit dangerous. Sam’s Throne is a great place to spend a day and or night as there is now a informal maintained campground. Sam’s Throne is the single large hill out in the distance but the entire valley has some wonderful views. I like to try and catch a sunset there working to catch the sun illuminating the throne in the background. This area is frequented by climbers so be prepared to watch some interesting activity on the rocks. The rocks are mainly sandstone and will take on a deep orange yellow color with the sun shining on them. The valley is surrounded by oaks and hickory trees which tend to have great display of fall color.
03/10/13 Featured Arkansas Photography–Sunset from Flatside Pinnacle
- At March 10, 2013
- By paul
- In Featured Arkansas Photography
- 0

Sunset from Flatside Pinnacle in the Eastern Ouachita Mountains
Taken with a Canon 1ds mkII, Canon 70-300 lens, F11, iso 200, Composite shot taken as a manual exposure bracket. If you get a chance to visit this area you won’t be disappointed by what you find. Flatside is the 3rd in a series of pinnacles that I consider to be the gateway to the Ouachita mountains. In Pulaski County, you have Pinnacle Mountain, then just a bit east from Flatside, there is Northside Pinnacle. These are followed in turn by Flatside and then Forked Mountain. Forked mountain can easily be seen in the distance from the summit of Flatside. Forked Mt. is a considerably harder climb than Flatside but the view from it’s summit is worth the hike. I like to shoot to the west from the summit of Flatside after the sun has dropped below the horizon as you then can pick up the rolling hills out towards the west. I worked this shot up from 5 separate exposures in a classic exposure bracketed series, which was required back when I was shooting with the Canon 1ds series of cameras, now with Nikon’s newer cameras like the D800, I should be able to get the same shot with 2 or 3 frames max due to the extra dynamic range of the Nikon sensors. The trail runs up the back of Flatside mountain and right now there are several large trees down that make the hike take a bit longer. The trail is an easy 1/4 hike from where you park your car.
08/03/12 Featured Arkansas Photography–Sunset from Flatside Pinnacle
Sunset from Flatside Pinnacle looking to the west and Forked Mountain
Taken with a Canon 1ds MKII, iso 100, HDR series 5 frames, Canon 24-70 lens @ F11. Flatside Pinnacle is one of those places that once you make a trip there, you will find yourself going back many times. You can catch a great sunset looking out over the Ouachita mountains, or if you are there early in the morning, the fog will be down in the hills. Flatside is an easy 40 minute drive from Little Rock, west on Hwy 10 towards Lake Sylvia. I took this shot with a Canon 1ds, MKII, in a 5 frame HDR series. The sun had already set and the exposure times were from around 5″ to 20″. The effect I was after was the light playing off the haze in the distance. The colors of the sky that day were amazing. The hike to Flatside will take you near the 150 mile Quachita trail which runs east/west across most of the Arkansas Ouachita mountains and into Oklahoma.
 From the Blog
- 05/08/25 Capture One, big announcement, at least for portrait photographers May 8, 2025
- 05/03/25 Trump’s Tariffs finally start to hit Photography Equipment. May 3, 2025
- Firmware 4.1.0 for X2D? April 21, 2025
- 04/18/25–Looks like Trump’s Tariffs are much ado about NOTHING in regard to photography equipment. April 18, 2025
- 04/09/25 Arkansas Sets new standard for Scientific Ignorance with new law for Ivermectin April 4, 2025
- 04/04/25 The Debacle of the Trump Tariff Plan Continues, with another 1K drop in the Market April 4, 2025