02/06/25 Featured Arkansas Photography–Fall Scene from Peter Cave Bluff
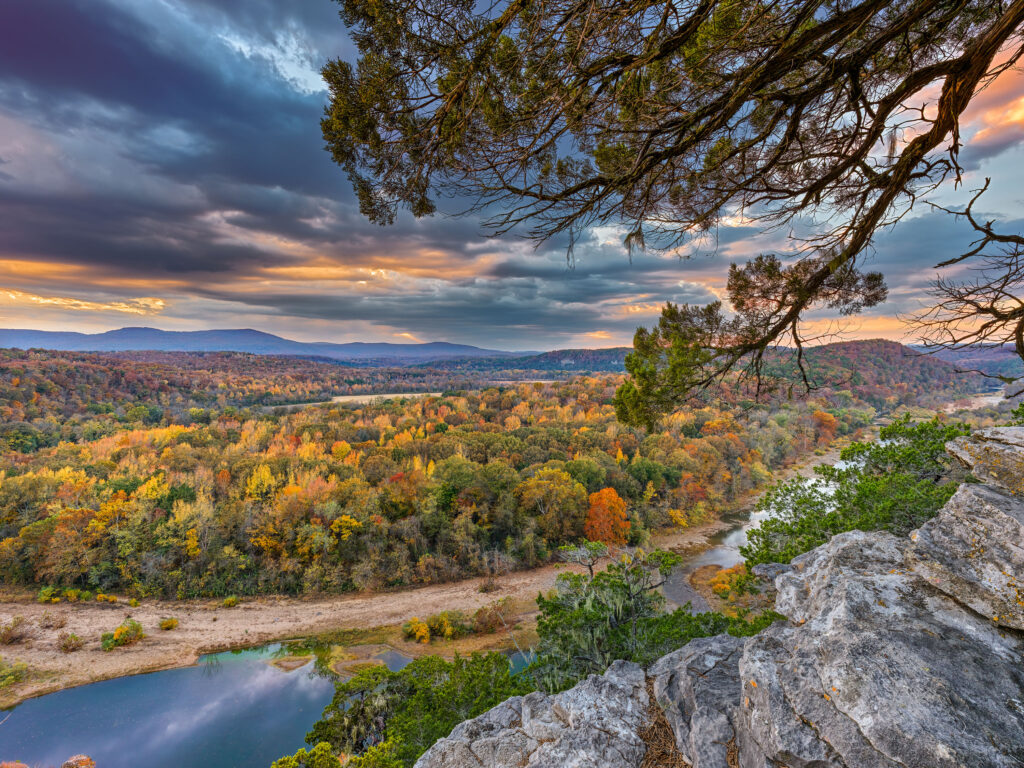
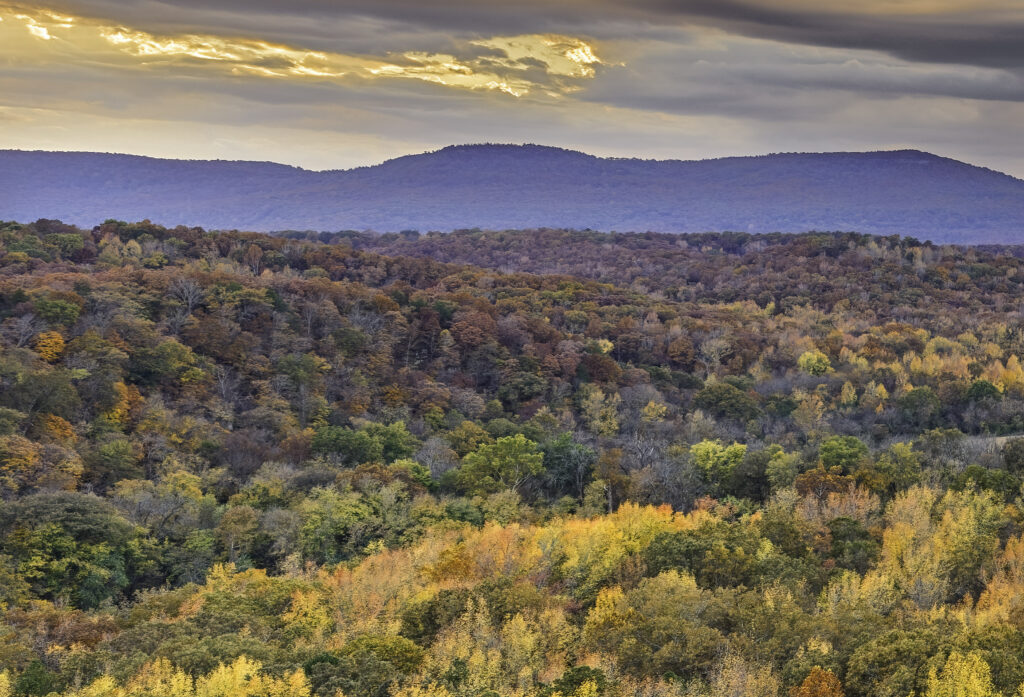
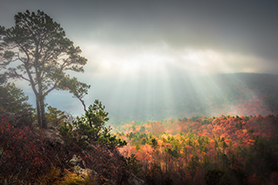
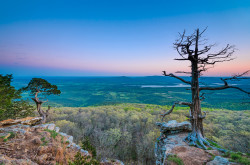
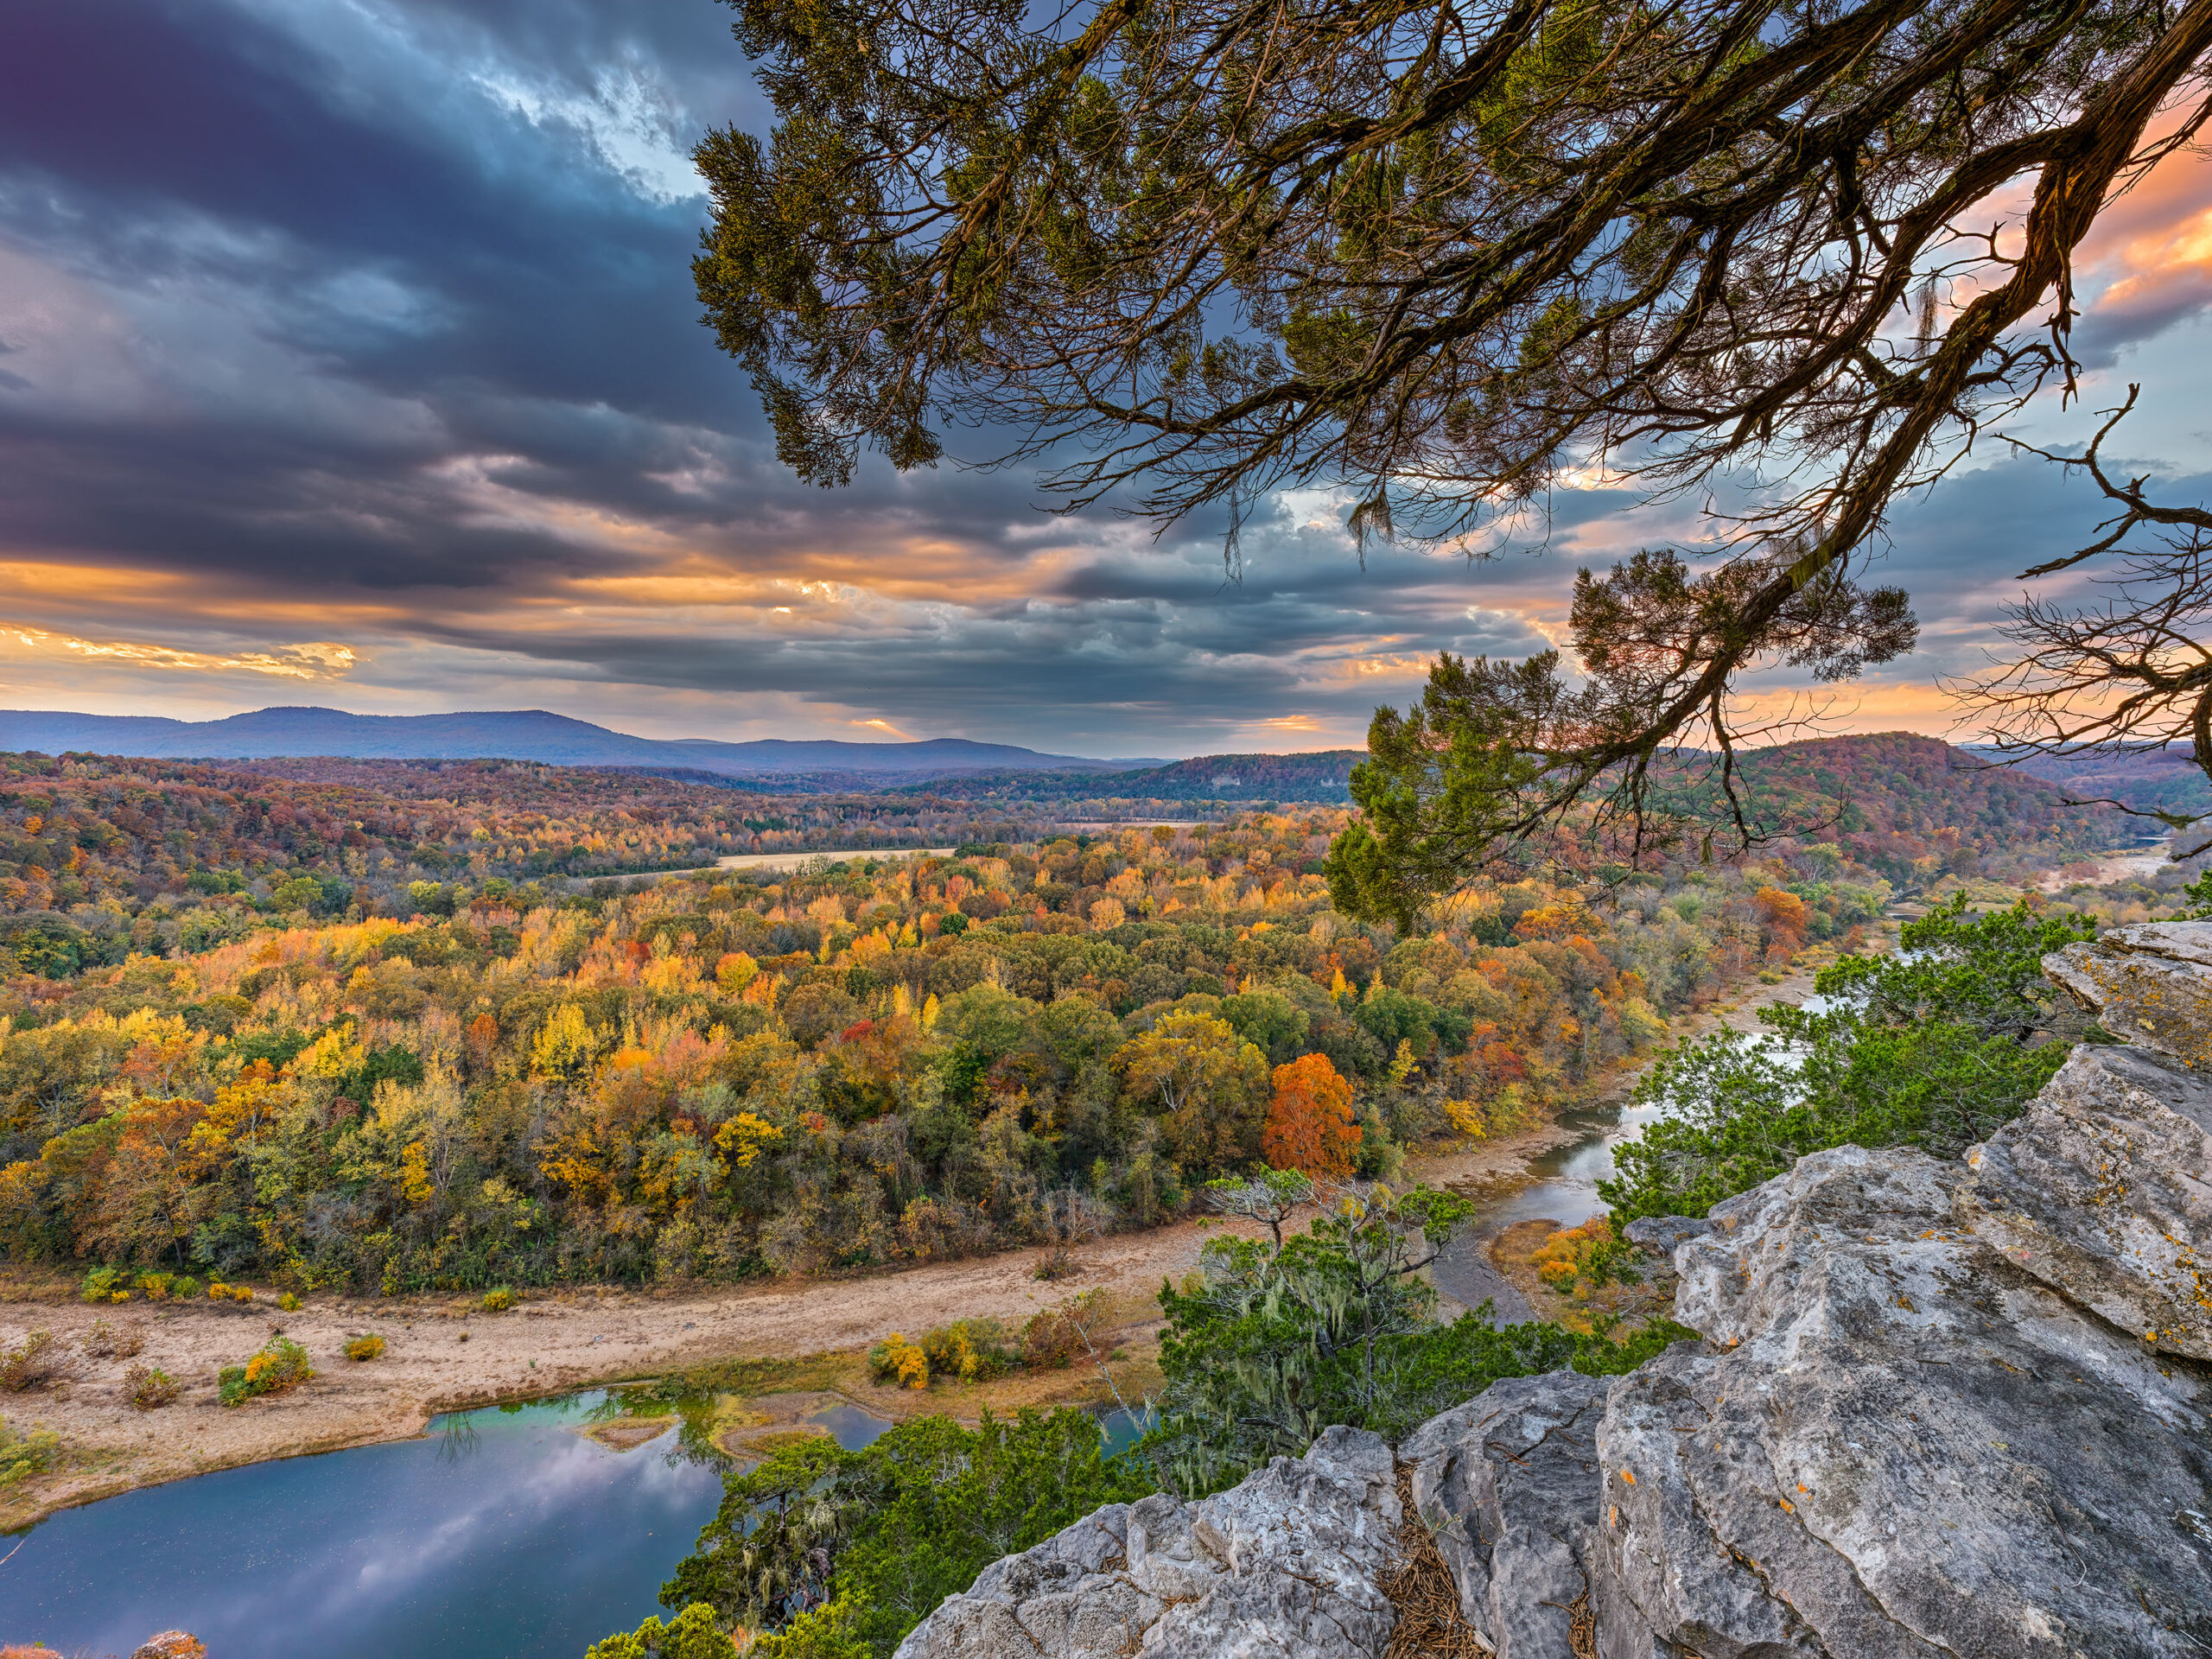
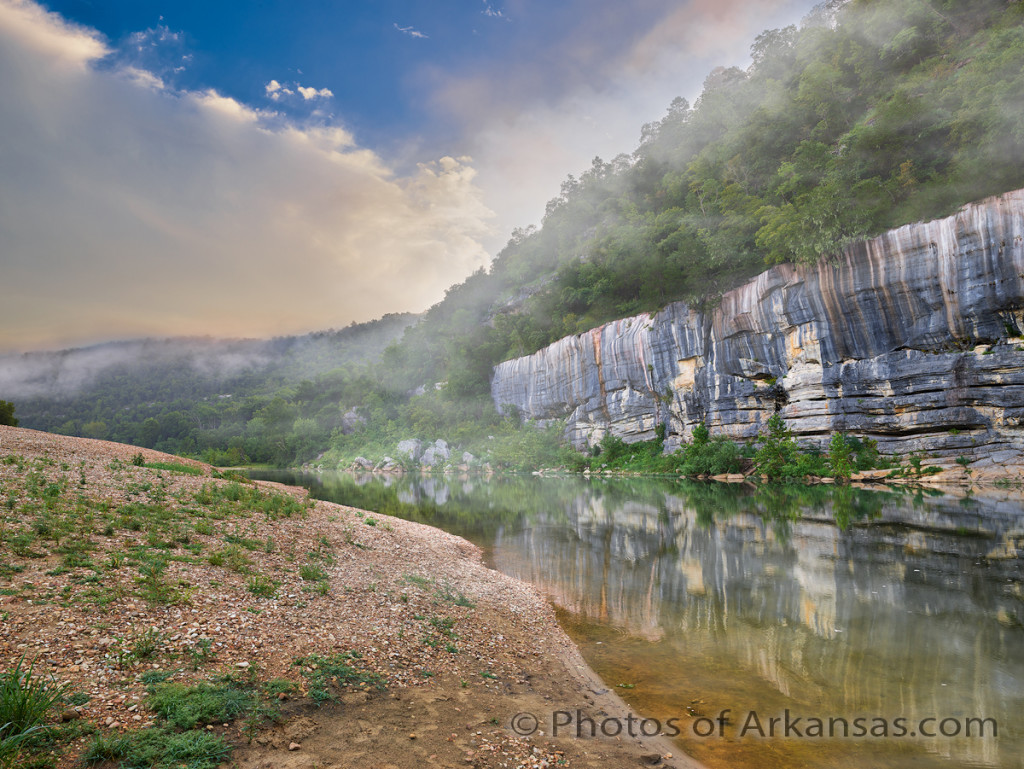
Fall color in Arkansas has been on the decline over the last 5 years. There have been many reasons listed, but whatever the cause, the colors in the state just are not as beautiful as they used to be 10 years ago. Peter Cave Bluff, is on the Buffalo National River, near the middle of the river. I love to photograph there since you have a grand vista of the countryside and can still feature the Buffalo River. There is a large single cedar tree that grows out of the bluff and I always try to make it a part of the photograph.
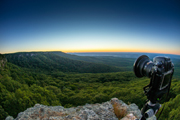
This image was taken with a Hasselblad X2D, and 21mm XCD lens. Even with the extra wide lens, I still needed to setup for a focus bracketing as I wanted to capture the rock of the bluff which was about 2 feet away from me. No medium format lens/camera combination I know can do this in a single frame even with apertures in the F16 range. Here also a tech camera would be a waste as if you added tilt to the shot to pull in the rocks in the foreground, you would quickly lose the top of the image to bluff since you have tilted the plane of focus. For many years I worked with a tech camera mainly for tilt and shift, but now with modern software and focus bracketing, I just don’t see the need for the tech camera system.
This particular shot was taken with 16 shots, two sets of 8 exposures at F 6.3. I had no wind that evening so I knew that movement would not interfere with the process. I had to take one set of shots at a higher exposure to hold the sky from blowing out in the areas where the sun was shinning through. The other set of 8 I used a slower exposure to help pull up the foreground. All the images were converted from raw files in Phocus. Then ran two sets of 8 image through Helicon Focus to create the focus bracketed sets, and then combined the two sets into one image.
Paul Caldwell, written on 02/06/25
02/03/25 Focus Bracketing example, Hasselblad X2D and 21mm XCD Lens
When working with a Medium format camera system, you have to be very careful when composing your shot for many reasons, one of the most important one is the issue of shallow Depth of Field (DOF). If you are coming from 35mm or APS-C, you may be surprised the first time you view your images as many times you will have parts of a shot that are outside the range of focus for the particular lens you are using. This is true with all medium format lenses and can be an issue when composing your shot. There are two ways around this that I know of:
- Increase your aperture to F12 to F16. This will help bring in the closer details to a better focus, however you may start to see smearing in the corners and for sure you will see some diffraction. The smaller your aperture, (larger the number) the more diffraction will play. What diffraction will cause is softness in parts of the image, mainly the finer details. In the past my technique would be to focus on infinity and increase my aperture to F14 or F16. This will give you a good result most of the time, especially with all of the modern software tools for sharpening that are available.
- Use Focus bracketing. With Focus Bracketing, you allow the camera to focus on various ranges of the image from the greatest distance to the closest the chosen lens will resolve. For example in the image above I used F 6.3 and ended up with 7 total images. Each image will have a unique part of the scene in perfect focus.
Focus bracketing requires a lot of post production work. You now have to work up in this case 7 different images and they need to be pretty much the same. After that you will use a software tool like “Helicon Focus” which will take the images and combine them into one image with everything in focus. Trying to do this manually is next to impossible and requires a tremendous amount of work, whereas Helicon will do everything for you.
There are a few issues that might come into play when you are working with Focus Bracketing.
- The most important consideration is that there is little to no subject movement. So if you are attempting this on a windy day, with a lot of tree limbs, forget it. In the example above, I was blessed with a totally calm evening. There may have been slight movement in the cedar tree overhead, but it was not enough to create a problem. If you have too much movement, you will see aliasing, as the software can’t get the exact same parts of the various images to line up. The effect will be like a ghost image and makes the combination impossible. Also do not try Focus Bracketing where you have cars, trains, or people moving through the scene as they will cause the same problems.
- Exposures variances. In the example shown above, I knew that I could not expose for the sky and the foreground (especially the rocks in the lower right corner) in one series of images. So I ended up taking 14 total shots. I ran Helican on both series of 7 images, which resulted in 2 final images, that I then combined in Photoshop and the Camera Raw filter. Note: The name camera raw filter is misleading as it works very well on tif and jpg images.
- You must have your camera on a tripod. There is no way to hand hold the camera to take the bracketing series of images, you will have movement and the images will not align correctly.
With the X2D, you have three options when working with focus bracketing:
- Shoot from Infinity to nearest spot
- Shoot from nearest spot to infinity
- Use a symmetric option, where the camera should start in the middle and work up and down.
I use option 1, with the camera in AF mode (auto focus) I will move the focus point to where I know I am on the most distant part of the subject and start the series. You have to pick the number of frames you want, and for most landscape shots I have found that anywhere from 6 to 10 seems to work with the aperture at F6.3. However it’s always a good habit to check you shots to make sure the camera was accurate on the furthest and nearest frame. NOTE, if you are going to need several series due to the variance in exposure make sure you do not move the camera. Also you will need to be on a tripod.
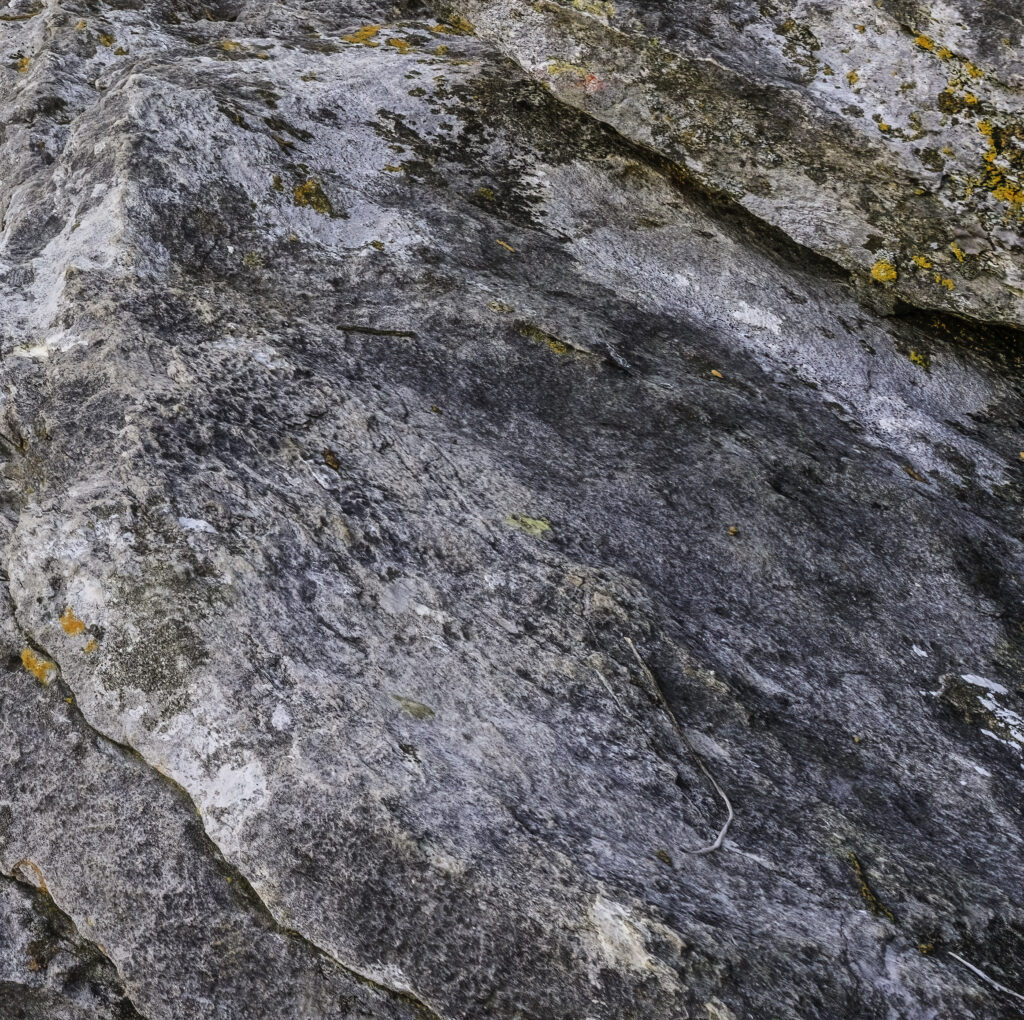
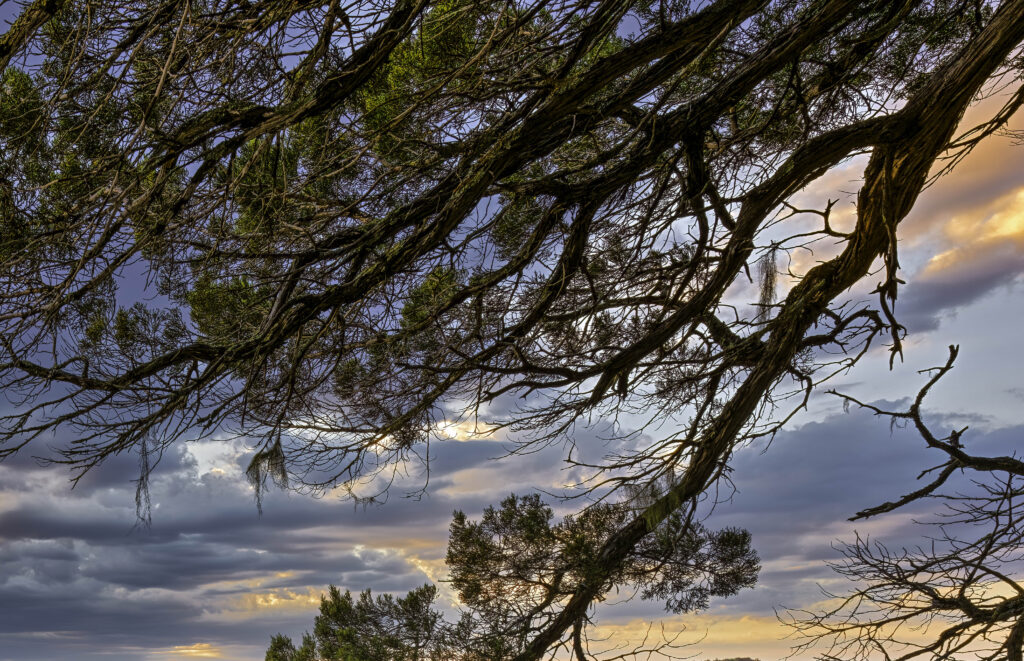
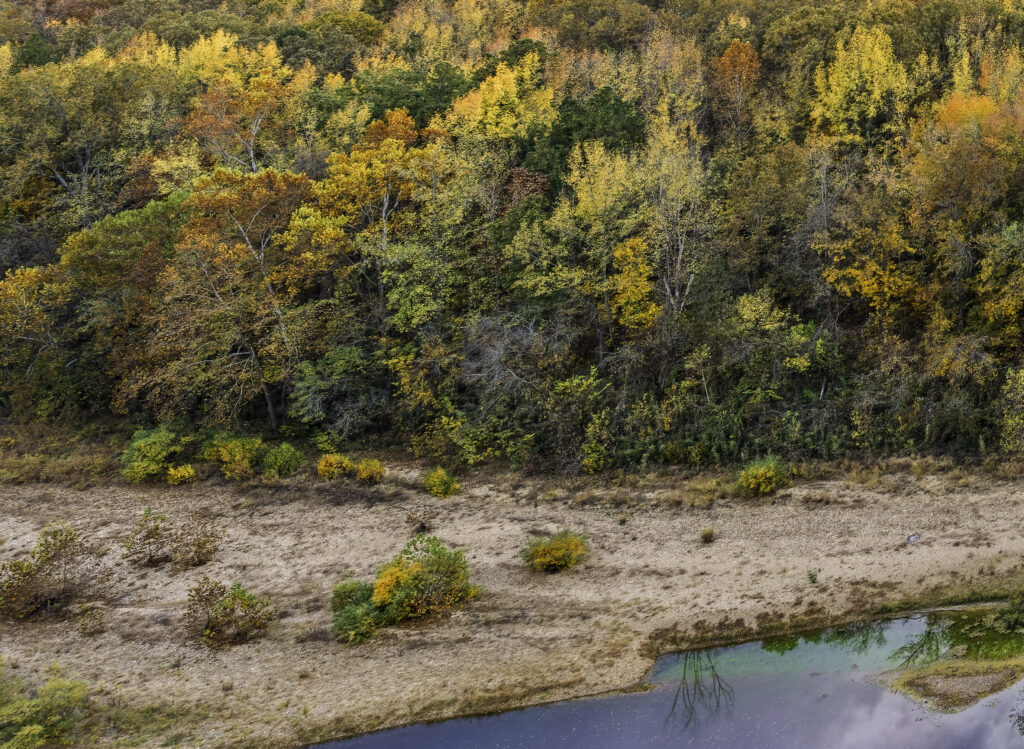
Here are some close ups from parts of the file to show the details that were captured throughout.
Even though I used a 21mm lens, I still needed to focus bracket to get the closest corner in good focus. This part of the subject was less than 3 feet away from my camera.
What really makes this shot complete for me is the 1000+ year old cedar tree that is growing out of the top of the bluff. It’s really impossible to shoot the scene without the tree being in the frame so it’s very important to have it in sharp focus.
This was a fall shot, so I wanted to have all the different species of trees in sharp detail. The Hasselblad 21mm lens has an excellent ability to resolve these finer details, however if I had tried to capture all of the shot in one frame I would have lost some of the finer details to diffraction.
One test of any ultra wide is the ability to capture sharp details at the extreme edges of the frame. The Hasselblad 21mm does a very good job with this, however it does suffer from retrofocus distortion. This will cause details at the edges of the frame to elongate and or stretch out. The effect on this image is not enough that I am concerned with it. However if I were to make a print of this, I might crop into the image just a bit.
In conclusion, I hope this article has made you more interesting in working with Focus Bracketing. If you have a medium format system from either Fuji (GFX camera) or Hasselblad (X2D), you can work with this in camera to take all of the images. Once you understand the workflow it’s a pretty automated process. If you have a 35mm camera from Nikon, or Canon, I know that Nikon offers focus bracketing with their Z cameras, I assume that Canon also now has it. Sadly Leica still does not offer Focus bracketing and I feel it’s huge over sight by them. There is no need for image stabilization, all you need is auto focus and a piece of firmware to process out the images. Leica has missed this with both the Sl2 and now their latest Sl3 cameras. According to available information, the Leica SL3 does not have an in camera focus bracketing option; reviews and specifications indicate that the camera only offers exposure bracketing, meaning it cannot automatically capture a series of images with varying focus points within a single shooting sequence.
Notes from the author:
I have the Lecia Sl2 and would strongly recommend to Leica that they add Focus Bracketing to their SL cameras. I doubt it would be retroactive the SL2, but with the SL3 it could be added via firmware. The Sl3 is 6oMP and even with the best Leica lenses, you often times need to bracket your focus to get the best overall image. I have used the Hasselblad X2D and it has a very nice Focus bracketing option, however after each series, you have to go back to re-focus on infinity (if you are shooting from far to near). The Fuji GFX100 has a more complicated menu to setup Focus Bracketing, however once you have it set, you can reshoot at will, i.e. the camera remembers you are shooting from far to near and on each series will return to the set point to gave the camera. With Fuji you set both the far and near points. With Hasselblad pick the shooting method far to near or near to far, and use you AF point to hit first point, then the camera makes all the rest of the decisions, thus I feel you need to check it after the first run to make sure the camera got the near point correctly.
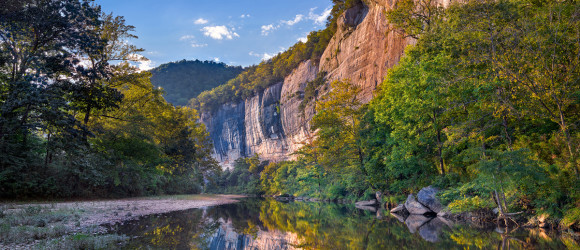
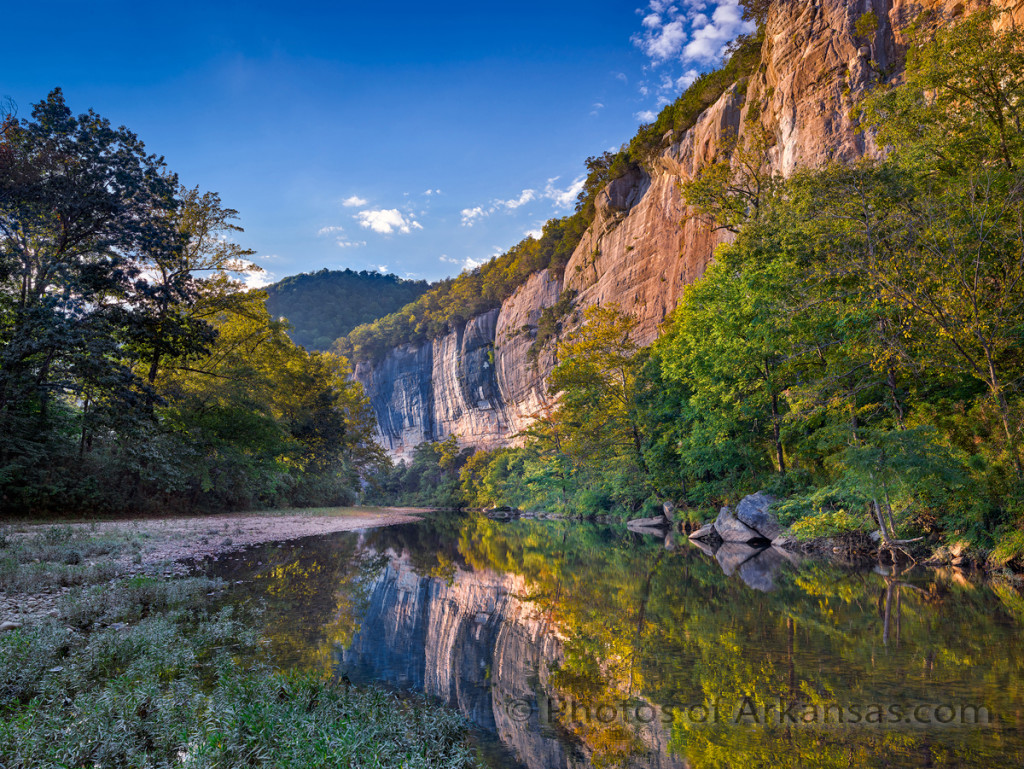
09/27/16 Featured Arkansas Landscape Photography–Late afternoon at Roark Bluff Buffalo River
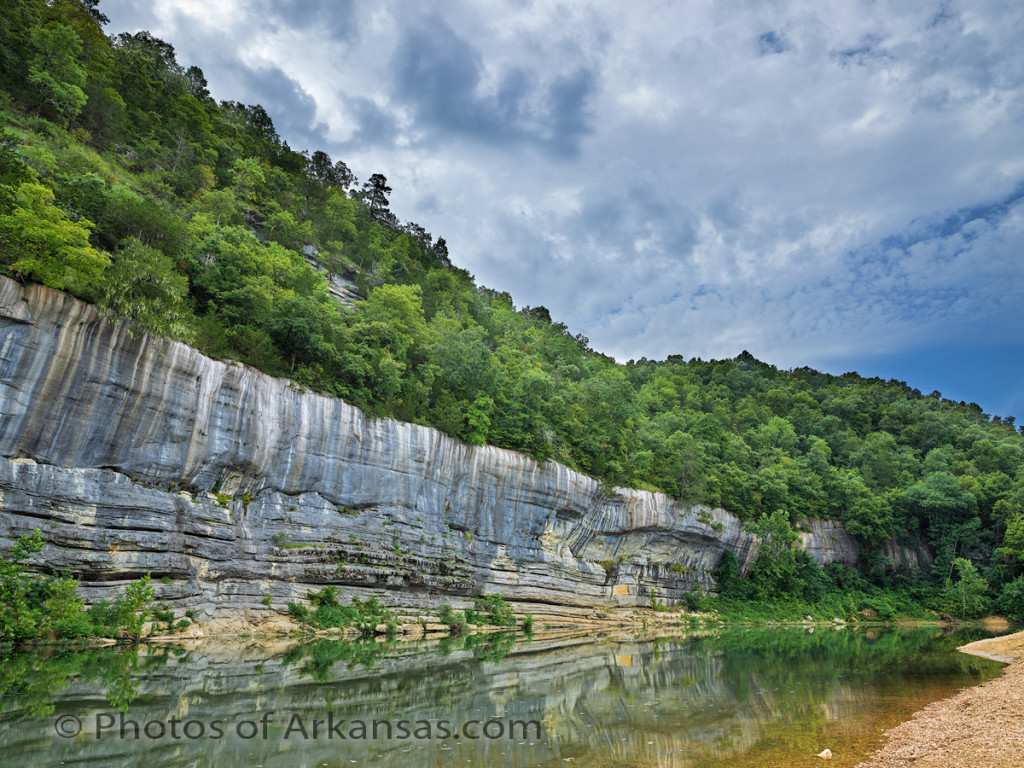
Taken with an Phase One IQ100 @ 35mm LS lens, ISO 50 and circular polarizer for both sky and cutting glare on leaves.
This is the time I like to start working the Buffalo River, as fall is just around the corner, and as can be seen in this shot, is actually started on the Buffalo.
The Buffalo River at Roark Bluff is one of my favorite spots to photograph and I work it as often as I can, but the drive up and back has started to slow me down. I was hoping for a few clouds to help break up the sky and there were there, but only towards the far side. The sun was playing hide and seek most of the afternoon, and when the sun finally came out the wind started to blow ruining the reflection. There are a lot of spots on the Buffalo to catch a reflection but this is my favorite.
This was taken in one exposure, something I never could have done before with a Phase One CCD back, the 100MP CMOS chip does have some excellent range. This type of shot is one of the most difficult as you are working directly at the brightest part of the subject. This means that anything not illuminated by the sun (in this case the left side of the river) will be in deep shade. You want enough exposure to be able to pull this area up some and not leave it black, but you also have to be very care not to blow out the sky, especially the left side. The use of a polarizer was needed more for the glare on the leaves to the right. Without it the colors would not have been as nice and clean, you have to be careful when working such a scene to see that you keep the polarized effect as even as possible on your sky, so you may need to try a few exposures.
After waiting for almost an hour, the sun popped back from behind the clouds and the wind died down long enough for this shot.
08/21/16 Featured Arkansas Landscape Photography–Storm Clouds over Buffalo Point, Buffalo National River Arkansas
Taken with a Phase One IQ100 and Phase One XF/35LS lens, at ISO 100, F12 for 1/40 of a second on tripod, single exposure.
This was taken back in early August 2016 on the Buffalo River in Northwest Arkansas. This part of the river is known as Buffalo Point, and is one of the more popular spots on the river. It features one of the larger campgrounds on the Buffalo along with hundreds of miles of hiking trails. Within 9 miles of Buffalo Point, you can driver over to Rush Arkansas which is an old mining town which dates back to around 1917. There is not much left standing at Rush, but it still offers some nice hiking.
This image shows just how fast conditions can change. I walked down to the river before sunrise. This particular bluff is on the east side of the river, thus will not get any sunlight until mid day. It’s a great spot to catch a sunset if the clouds lineup, but you also can expect to find hundreds of people wandering around the beach which just add confusion to both the scene and water. On this morning I was hoping to catch the area to myself, and for about a magic 40 minutes I had just that. There was almost no wind blowing, so I also was able to get a very nice reflection of the bluff. This bluff is about 80 feet tall and the face about 35 feet or so and it’s one of the classic Ozark bluffs made 100% from limestone so you can expect to get some interesting color from the rock.
I worked the area up and downstream, but this spot was the best as a early morning storm rolled in. When I first arrived there were no clouds in the sky at all just a bit of river fog, but within 30 minutes the top of an old thunderhead came over the river and really added to the shot. The heat and humidity were intense but the photographic opportunities were excellent.
This is single exposure from an IQ100 Phase One digital back and I have to say that the overall dynamic range of this back is impressive. The ability to finally cover a shot with just one exposure, knowing that you have room to work up shadows without a bracketing series of exposures is a great feature and long overdue from Phase One.
08/20/16 Featured Arkansas Photography–Early morning at Buffalo Point, Buffalo National River
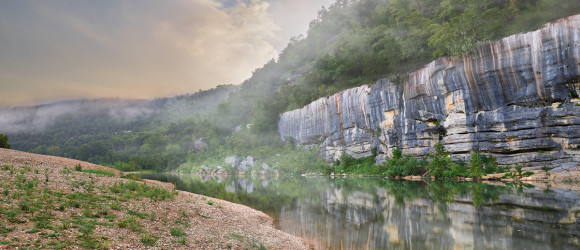
Early mornings are some of the best times to photograph the Buffalo River. This is from Buffalo Point.
Taken with a Phase One IQ100 and 35LS lens, no filters @ ISO 100 for 1/40th of a second F12 and Phase One XF.
While on a trip to the lower Buffalo River, I was able to spend the night at Buffalo Point Campground. This is the first campground that was built on the Buffalo, and dates back to the WPA and CCC days of the late 1930’s in Arkansas. Here you are pretty low down on the river as there is only about 20 or so miles left before the river runs into the White River. Buffalo Point is a very popular spot on the river as it has an excellent campground, and there is a great swimming hole below the large bluff on the far side of the river. From here you can take a quick float down to Rush which is about 8 miles or do down river. It’s a great float to take in the fall to enjoy the fall colors as most often there will be enough water for floating year round.
I was hoping to catch the early morning light burning off the fog but there was only a small amount of fog. However there was a large cloud bank moving in from the west and sun managed to pop the lower clouds along with the fog rising up towards the top of the bluff. I had the place to myself, which on this river is a rare event so I was able to have almost 45 minutes before the first floaters started to come down from Hwy 14 and break up the great reflection on the river.
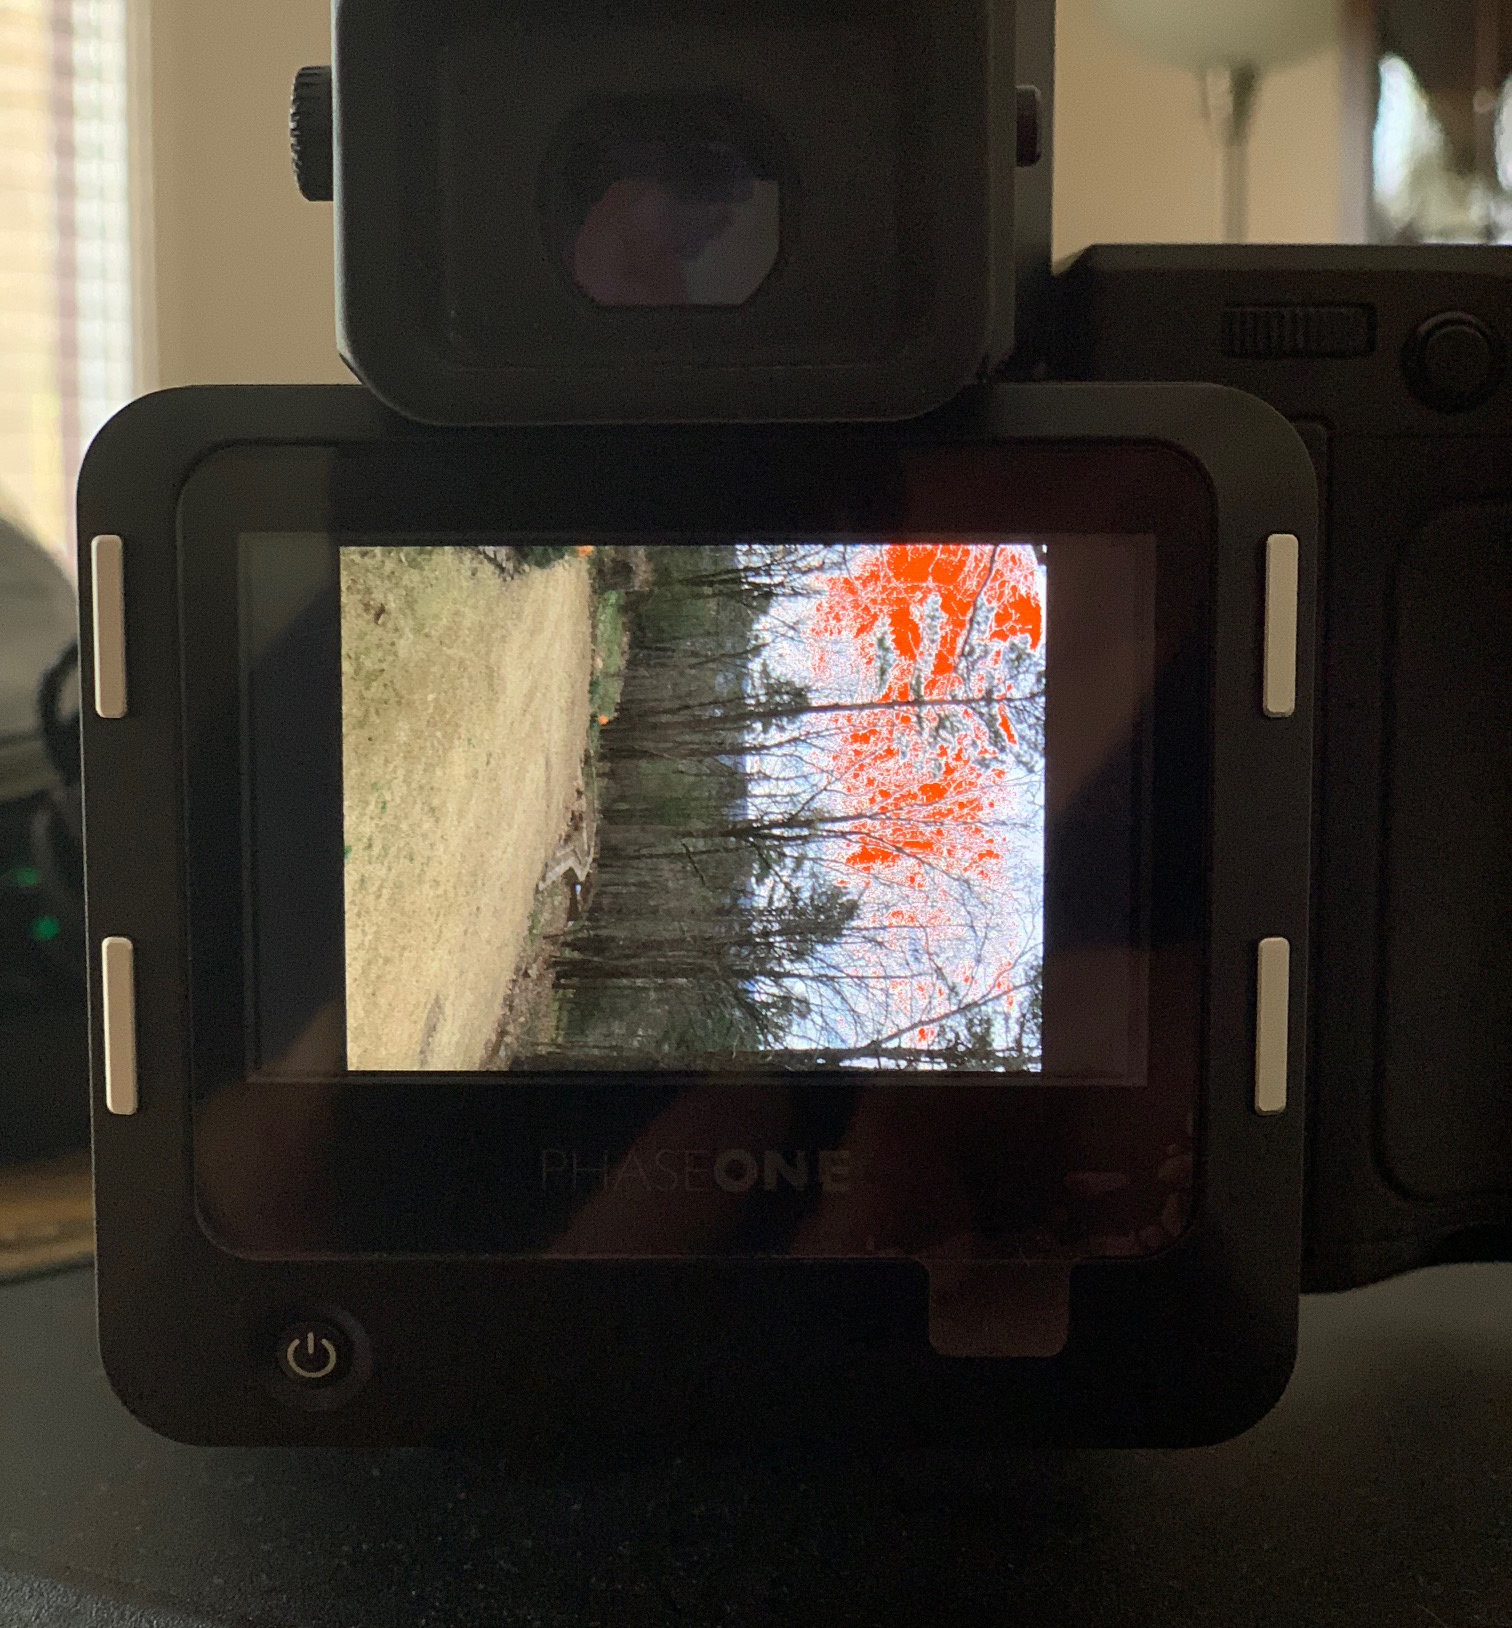
The Phase One XF and IQ100 worked together very well on this occasion. I was using a tripod due to the slower exposure times and the fact that the 35LS lens is so heavy. The camera controls on the back of the IQ100 LCD made working with this scene very easy. I ended up shooting several manual brackets but due to the impressive dynamic range of the IQ100 sensor, I was able to create this image from one exposure. The 35LS lens performed quite well, giving me excellent details throughout the image.
08/15/16 A close look at the Dynamic Range of the Phase One IQ100
I have been using the IQ100 now for several months, and have noticed that there are some interesting facets to the dynamic range of this digital back. Lets take a more detailed look at this particular image taken on the Buffalo River, in Arkansas
The IQ100 is of course the first 100MP digital camera ever marketed, was introduced in January of 2016 by Phase One, and so far has had a very good reception. I was very interested in the previous IQ250, 50MP digital back, however it has a 1:3 crop factor, which for my work, (example this image) would have been too much to sacrifice. I use wide angle lenses in most of work unless I am stitching and the 30 percent loss in focal view was too much for me. But I easily saw with the IQ250 the massive advantages that CMOS had over the traditional CCD Phase One backs. This showed up for me in two main areas, noise and dynamic range. These both have many definitions but for me it’s simple:
Noise, how much noise will I see in areas of shadow, at base ISO and at higher ISO. If I push an image, how much detail is lost to noise in the shadows. With a CCD back, there was never too much room here even at base ISO of 50
Dynamic Range, with one single exposure, what can I capture? If I adjust for highlights, will my shadows be filled with too much noise or vise versa. Also how well does my color saturation hold up at higher ISO ranges. With CCD digital backs, the color saturation fell off very quickly once past the base ISO. You might be able to get one more stop before the saturation was lost.
Moving to the IQ100 from the IQ260 I was hoping to see similar if not greater dynamic range at base ISO to the Nikon D810. I still regard the Nikon D810 as the flagship for dynamic range at base ISO of 64. With the Nikon D810 it’s easy to push a single exposure as much as 2.5 stops and still have wonderful details in the areas of shadow. Phase One (P1) rates the IQ100 at a base ISO of 50 so I was hoping to be able to get at least 2 stops of details when shooting at ISO 50. So on my first couple of outings with the IQ100, I mainly used ISO50 and planned to push the shots when necessary. I quickly found out that this the chip in the IQ100 (made by Sony) behaves differently that the 36MP chip in the D810 (also by Sony).
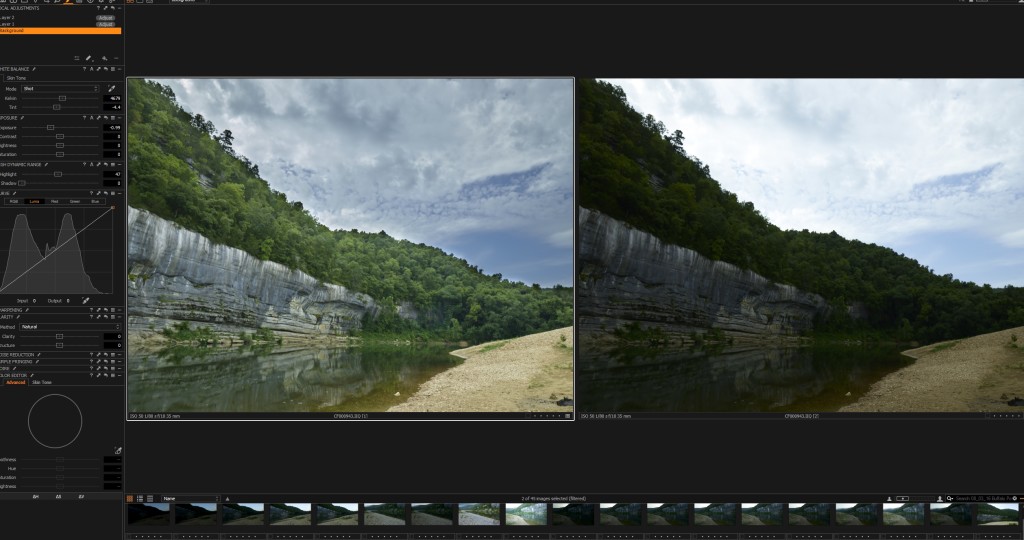
In working at base ISO 50, it became apparent to me that a shadow push of even 1 stop may be enough to cause you to lose details in the shadows, and also a huge amount of color saturation. This was a surprise to me as I had expected to get even better push than what I was seeing with the D810. However it was also soon apparent that the IQ100 has quite a bit of leeway with highlights, much more so than any of the CCD backs I have used from Phase One in the past. You can easily let your highlights go past 1 to 1.5 stops and still regain the finer whites. If you combine the “highlights” slider in Capture One, along the exposure slider, there is a lot of recovery. Looking at the example below: Click on the image to view it larger
The image on the right side is the base image before any adjustments, the image on the left side, I just pulled the overall exposure down from center to -99 (almost 1 stop) and then adjusted the highlights to 47 from the far left. This pulled back all of the sky and actually provided some very nice cloud features. I then just added a local adjustment layer to the lower portion of the file, (non sky) and pulled up the overall exposure then added one more adjustment layer to tweak a few dark areas. Overall the end result to me is very nice and again is testimony to just how much range is in a single exposure from this chip. The take away is for sure feel free to let your highlights go a bit so that you can pull in a bit more shadow details.
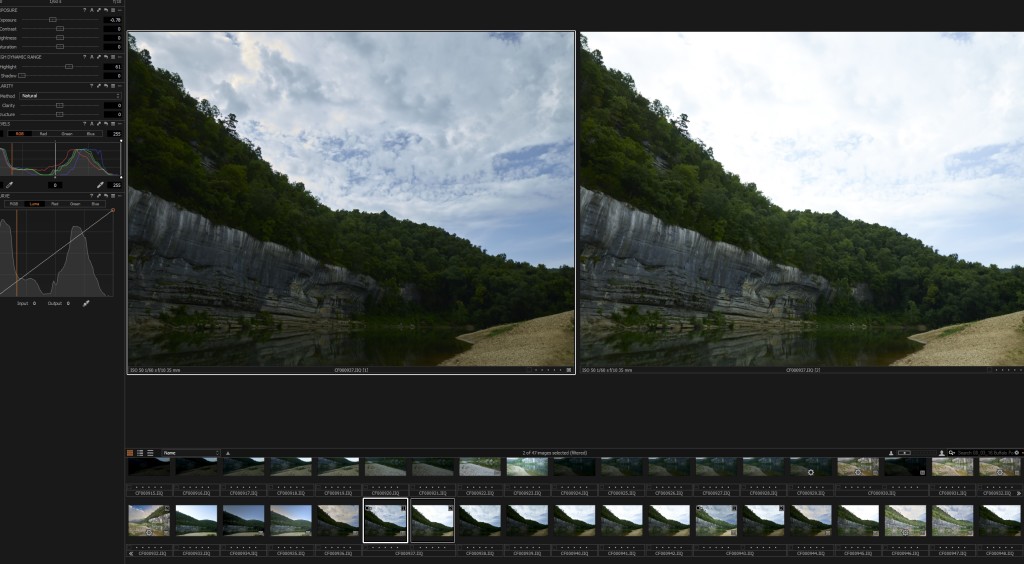
Here another example.
Here the original raw file is on the left side. Initial thoughts are that the sky is pretty blown, but with just a bit of highlight adjustment and overall exposure work, you can pull back the sky to a very manageable level. The bluff and trees will easily recover to most of their full detail with a bit of shadow recovery and local adjustment layer to work only on that part of the image.
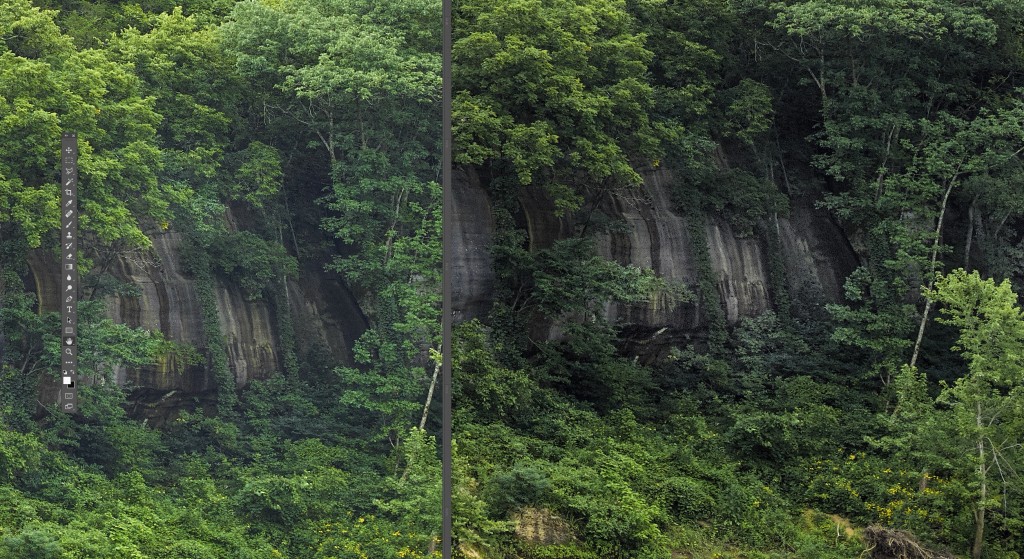
From my photography I feel if there is a downside to the IQ100 dynamic range, it would be in the shadow recovery. Here you have to be very careful as just one stop or two can make a huge difference between good details and color in the shadows. Lets go back to an example from the same set of images. If you look at the image at the top of this article, you can see that towards the far right on the bluff there is a dark area. I shot this scene in several brackets at both ISO 50 and 100 as I was unsure as to just how the clouds would capture. As it turned out, the clouds/sky were not the problem, but the dark shadows were. Look at this comparison: make sure to click on the image to view it full screen.
The image on the left was shot at ISO 50 at 1/25th of a second, F12, and the image on the left was taken immediately next at ISO50 and 1/60th of a second F12. If you click on the image, you can see that the bluff and trees along the bluff are almost devoid of color and there is considerably more noise. Both of these screen crops are from sharpened final images. The image on the left holds the green down into the shadows where as the same part of the image on the right is starting to lose the color fidelity. The color you may be able to pull back with some work in Photoshop, but the noise and loss of overall details you will never get back. So the point, is that you really need to watch your exposure and if you are unsure, bracket the frames. Just a difference in 1/25th and 1/60th can make a big improvement in the overall quality of the final image.
Photographer’s Notes:
I feel that there is considerably more dynamic range in the IQ100 CMOS back, over similar CCD backs like the IQ260 and IQ380 (60 and 80MP respectively)
The IQ100 has a tendency to push to a green overall tint and it seems that the greens can easily be come over saturated.
When working in mixed outdoor lighting, I would recommend exposing to the right, and pushing the highlights, as from my shooting experience you can easily recover 1 stop and possibly 1.5 stops in the highlights.
The shadows will quickly loss details and color if underexposed, even at base ISO of 50 or one push to ISO100. Once these details are lost you will not be able to get them back easily.
Considering that the 100MP back will start to suffer softness from diffraction at apertures past F11, you need to balance your shooting between both shutter speeds (subject allowing) and ISO.
When working on a single file, don’t be fooled into thinking that you have lost your highlights as you will be surprised to see just how much dynamic range and malleability is available in these fantastic files.
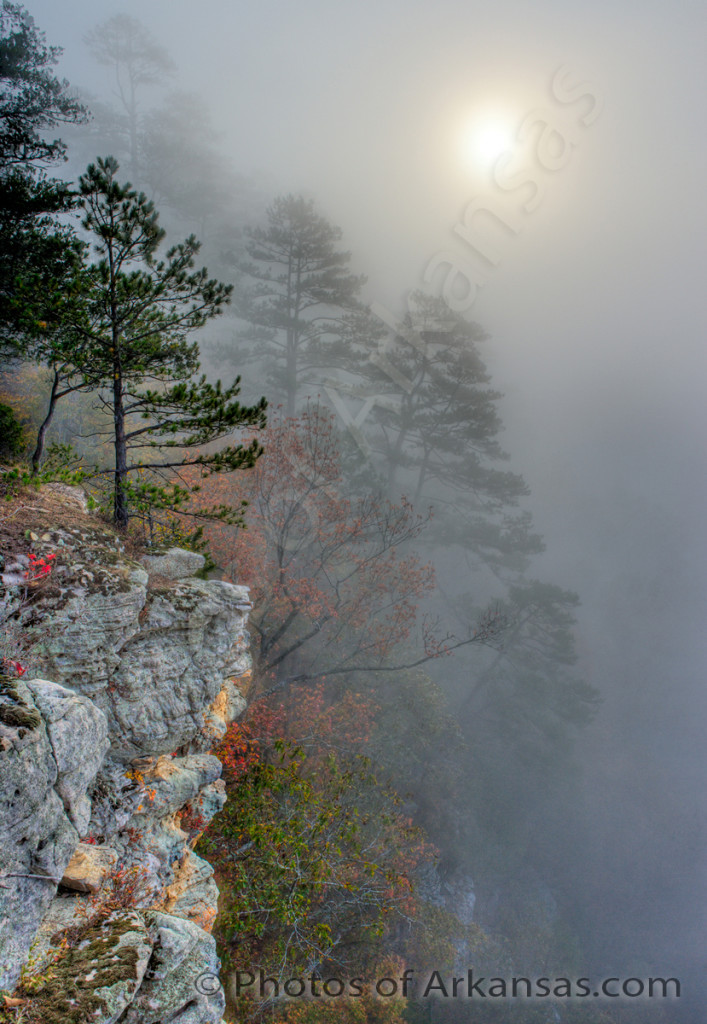
12/29/15 Featured Arkansas Landscape Photography–Foggy Morning View from Roark Bluff
PLEASE NOTE: All of the photography of this website is the property of www.photosofarkansas.com and is copy right protected. Do not copy any of the images on this site to paste on Facebook, Pintrest, or any other website without the permission of Paul Caldwell. Years of time have gone into capturing these photographs, please respect that. I do not take copy right infringement lightly. If you have a need to display any of my work on your site ASK me before you Copy & Paste.
Taken with a Canon 5D MKII, Canon 24-70mm Lens, ISO 400 to 800 bracketed, and exposure bracketed in 5 separate exposures.
The early morning hours on the Buffalo tend to be some of the best to photograph the river. I love to hike up to the summit of one of the river bluffs and then wait for the morning fog to lift over the river. However sometimes the best shots are taken in the fog as this one was.
On this morning, I was setup to catch the fog rising and wanted to keep my lens out of the sun, so I was aiming westward. During the long morning wait I went back to my pack to get a drink and just happened to see this shot, as the sun was starting to break through the fog. I was barely able to run back to the camera, grab my camera/tripod and catch this shot.
I took this image in 5 exposure and ISO brackets since I knew that the Canon camera would not allow me the dynamic range to capture it in one shot. The Canon 1ds MKII, as good as it was for the time @ 16MP was pretty terrible with shadow recovery. Most the shots I took during this time were all in exposure brackets. Still the sun coming through the fog has always been a hard part of the shot to get just right. I did not want to the bright orb of the sun to just break through the shot, but instead I wanted it to just barely show. Many of the HDR software tools at the time would not allow for this, and I ended up having to do a manual bracketing exposure. Since then I have re-worked this shot many times over the years and but still have come back to my early versions as my preference.
This photograph has been printed up to sizes of 40 x 60 and has been selected by several Hospitals and offices in Arkansas to be placed in their permanent collections.
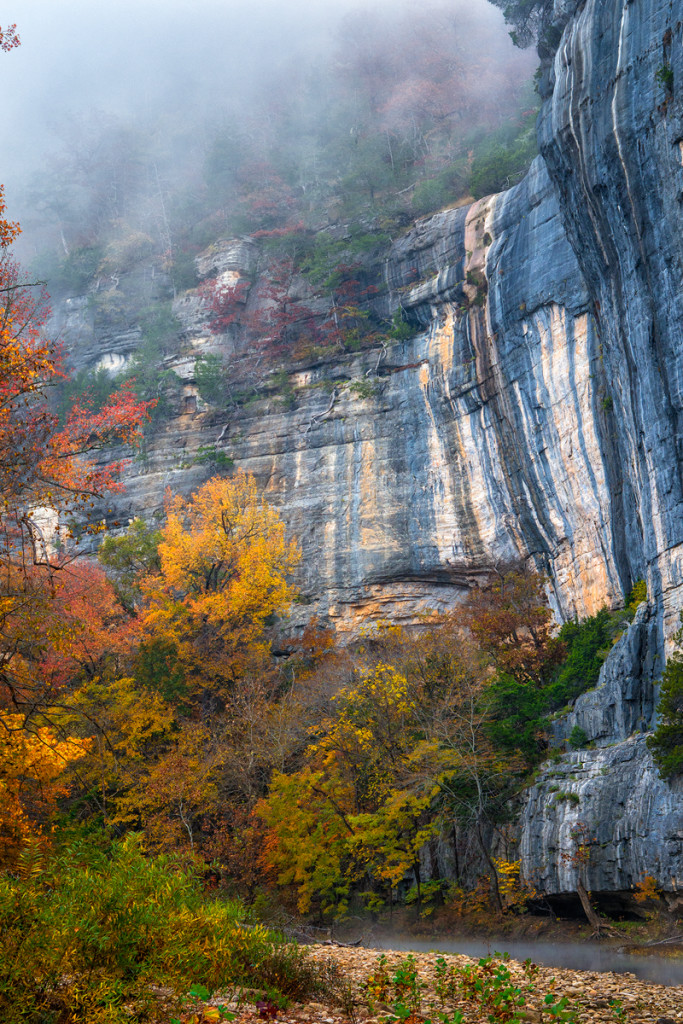
11/18/15 Featured Arkansas Landscape Photography–Foggy view of Roark Bluff
Taken with a Nikon D810, Nikon 24-120mm Lens, hand held @ 320iso for 1/100 of second, F 5.6
When I think of the Buffalo River, I tend to think about Roark Bluff and the beauty around that part of the river. Here you have two of the largest bluffs on the river, Roark and Bee both of which are well over 300 to 400 yards long. Each bluff has a unique character to it and the colors of the limestone comes alive in the early morning. At this time you have the valley totally fogged in. The fog will last for a while after sunrise and the best time to photograph the mornings is when the sun has started pop through the fog and adds a very unique light to the scene. Now add fall colors you have a real prime setting for sure.
On this morning, I was amazed to have the entire beach to myself, and I will take that when I can get it. It was a Sunday morning and the colors on the top of Roark Bluff had already turned brown, however there was still excellent color along the river. The top of the bluff seems to be mainly hickoy and maple, but on the riverbank there is a lot more variety. Here you will find oak, sweetgum, maple and gums. The display this morning was perfect. I had a tall gum tree on the upper left of the frame still showing the brillant yellows and reds, and across the river was another gum tree, but in pure yellow. In the foreground the river birch is starting to turn from green to yellow so overall it was a nice setting. I framed the shot with just a bit of the fog on the top of the shot. I still wanted to be able to see through the fog to make out the colors along the top of the bluff.
Roark is a great place to drive and spend the entire day. You can watch the sun move across the valley and enjoyed varied shooting situations during the day. Roark is one of my favorite spots for night photography, either star trail work or the milky way.
Fuji X-Trans Raw Conversions–Which is best Lightroom or Capture One
- At October 27, 2015
- By paul
- In Articles/Reviews, Fuji Gear
 2
2
In 2015, Arkansas did not present a good color display really anywhere throughout the state. Since July Arkansas has been short on rainfall and the month of September and first half of October no measurable rain fell in the state. Most of the trees just turned brown. There were some spots that held OK color, but they were the exception. Since 2014 was such a great year on the Buffalo National River for fall colors, I have been going back over some of my shots. Many times I was using my Fuji X-T1. I realized once again that there is still no perfect raw conversion software for Fuji files however it does seem to me that Lightroom CC has made some improvements.
Since the announcement of the Fuji X-Trans cameras, which now max out at 16MP in an APS-C format, there has been a lot written about which raw conversion software provides the best output. At present there are three main solutions:
- Iridient Developer
- Lightroom CC 2015
- Capture One by Phase One
I have worked with all three and since Iridient chooses to only work on the MAC platform, I rarely use it. I prefer to do the majority of my work in either Lightroom (LR) or Capture One (C1). One of the single largest issues that comes up with Fuji raw files is how to get the most detail out of the files. Due to the different layout on the CMOS chip, the Fuji raw file needs a different domosaicing algorithm than most Bayer pattern CMOS sensors. You can easily find out about the differences by a quick web search and since so much has been written already I am going to move on to the actual raw conversions.
With the Fuji files, I personally don’t think you can make definite all or nothing statements, as C1 gets around the issues by applying too much blur in the demosaicing alogrithim, and LR seems to pull out the edges a bit more than necessary, neither of the tools seem able to get all the surface details that are there, (when you use Iridient developer for example). To me C1 has some positives, but so does LR and in no way do I see C1 as the end all to Fuji conversions.
But to my eyes, many times the LR conversion looks better and holds up for sure in a interpolation scheme for making a larger print. Color out the gate C1 wins more times than not, but I can get there in LR. Overall I feel the C1 images converted loose too much details and get a bloated look where as the LR files can start to take on a overdone look which is some cases can start to look painterly.
But for sure I can’t say C1 is better than LR or vise versa and I have been working on Fuji X-trans files now since early 2013. LR has gotten better in that it no longer has the issue with haloing around green/blue transitions, which was such an issue before.
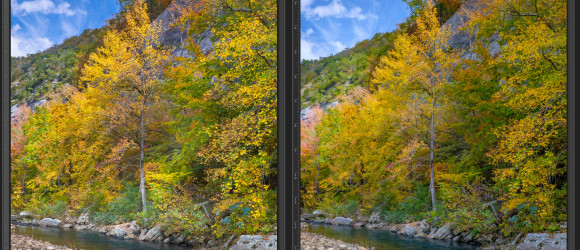
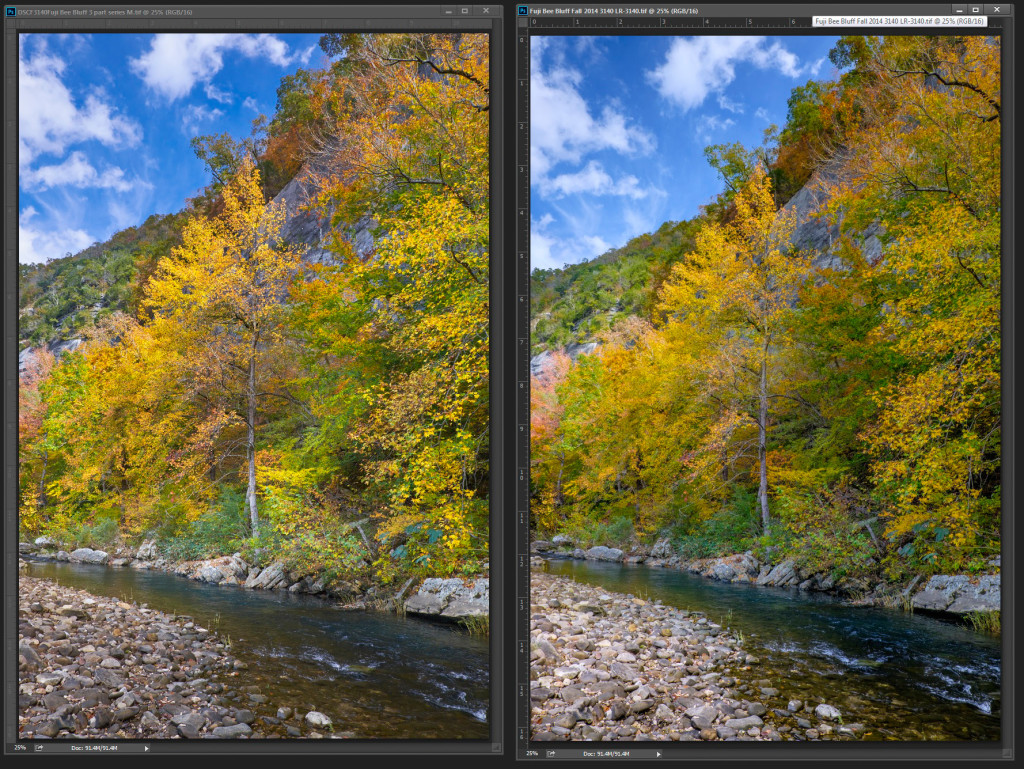
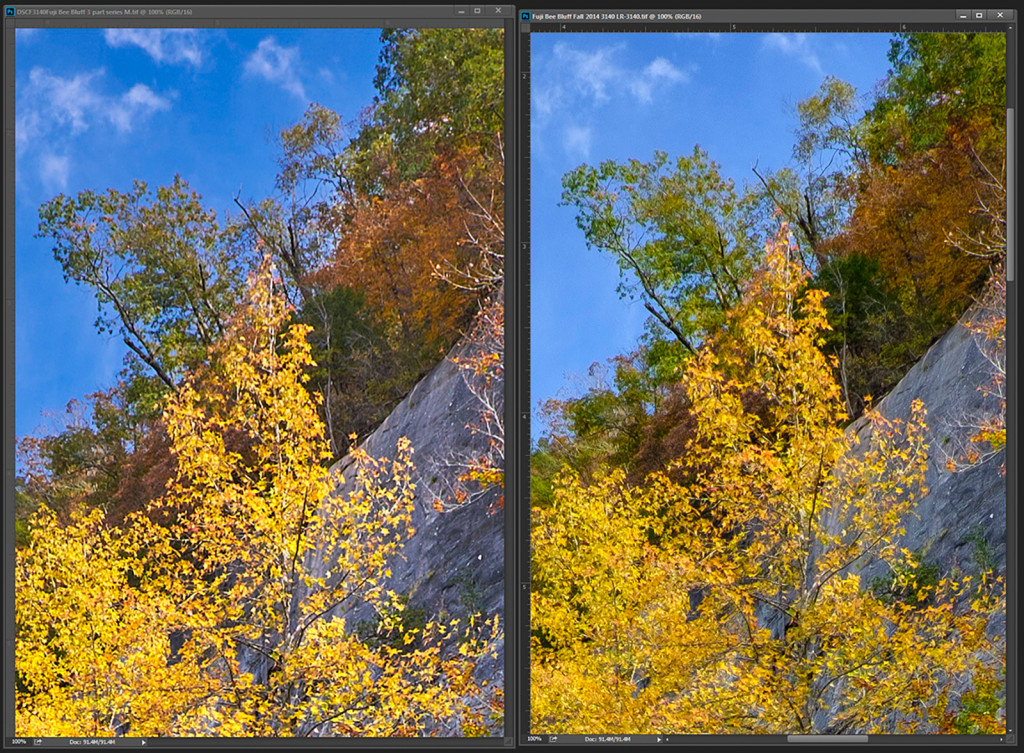
Here is a side by side comparison of a Fuji X-T1 raw taken in the fall of 2014. Note that what I am writing holds true for the X-E1, Xe2 and XT1 as they all share the same sensor. Click on the image at anytime to view it larger. I used the 18-55 on the X-T1 and as I recall the file was taken at 200 iso.
In this example, I have taken a typical photo from one of my Arkansas landscape studies. This image is the middle of a 3 part panorama series I took. In this case I was not looking for a true 1:3 ratio pano, but instead I planned to stitch the 3 files into 1 normal 3:2 landscape shot which would allow me to have more resolution for printing. I do this often in my work. Out the gate, I feel that the C1 image has a bit better representation of the color that was displayed, however the LR file is not far off. This type of shot is a hard one to work since I had to expose for the sky and still have enough room in my foreground to pull up the shadows without losing too much details to noise. Both C1 and LR were able to give me the strong yellows and reds that were available and also provide for a nice tone to the blue sky. But now lets look at a few crops from each of these files. To capture these crops, I opened both images in Adobe CC 2014 and then selected view at 100%. I feel that the only way to really tell how well a image file will hold up in printing is to view at 100%, not view at print size.
With each file I used the default sharpening of the raw converter, in fact I added a bit more to the C1 conversion as I felt the default left too many details on the table.
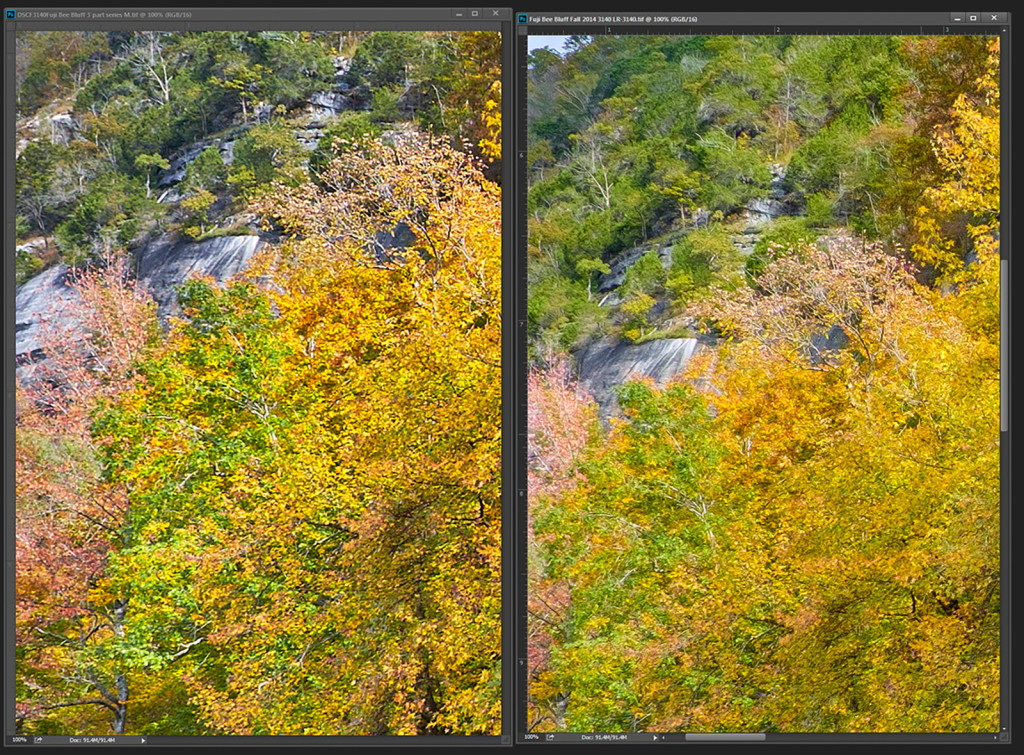
The LR conversion is on the right, click on the image to view it as large as possible. You can start to see that the C1 conversion appears a bit soft and begins to take on a interpolated look to the finer details. Areas that stand out to my eyes, are the green trees on the distance hillside and the bare tree trunks. When I look at those parts of the files, the LR conversion just looks better, whereas the C1 image is quite soft. Also look into the yellows on the gum tree in the foreground. The LR image may yet be just a bit soft but you can still see more details in the leaves. If you were to attempt to interpolate this file to print it larger, the C1 image is going to give way to a much softer look. On the Fuji image I would want to run one round of “Focus Magic” to add just a bit more detail to the yellows and greens.
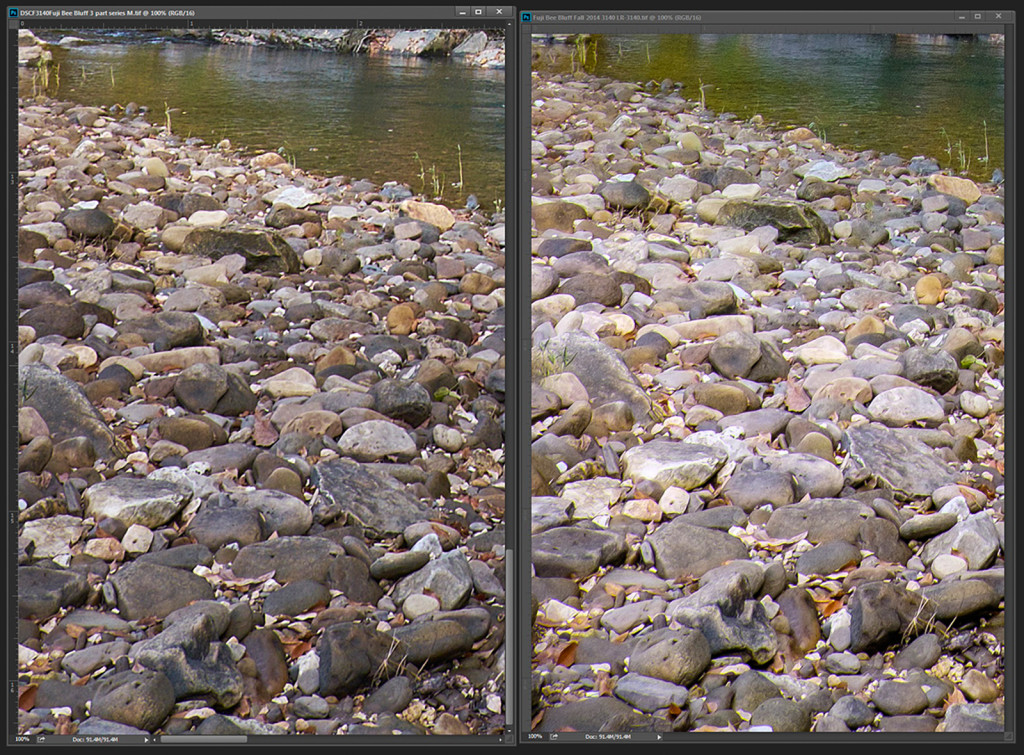
A close up on the lower left of the shot. Rocks can pose problems and usually I have given C1 the edge here, however with the latest round of ACR in LR, it’s improved and I have to give LR just a slight edge. The LR conversion has a bit more even look to it, but the overall amount of details seems about the same to me. The details left out of C1 could easily be picked up again with any third party sharpening solution such as “Focus Magic” or “Topaz In-Focus” both of which use deconvolution algorithms.
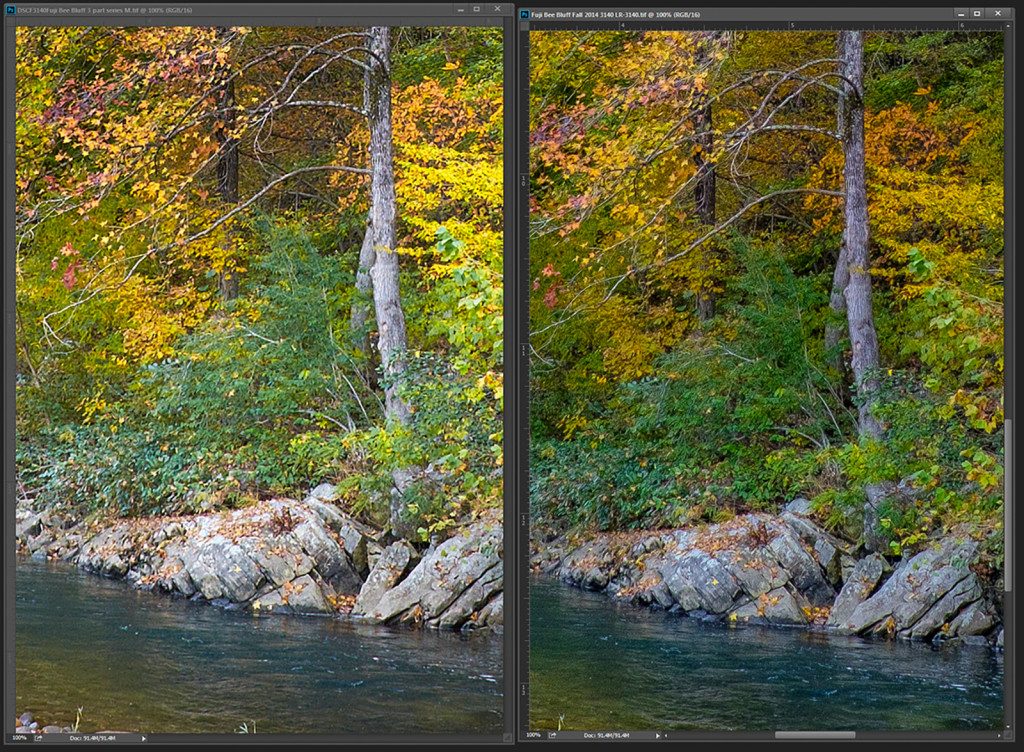
NOTE again the greens on the LR image appear overdone. Looking closely at the greens you can see some of the issues that LR has. LR picks up the outer edges a bit too much and when you have a lot of greens then you can start to get a painterly effect if you are not careful with the sharpening settings. I still prefer the LR conversion as overall it appears sharper to me. Also look for the finer details in the shadows as the LR file has more there also. Top left of the crop look for the finer branches in the gun tree, they stand out much better in LR. Here I found that C1 pulled a more pleasing look to the large rocks in the foreground than LR and LR also has a bit of red showing in the large gum tree trunk. Both of these issues could be fixed with a slight color balance tweak and a bit of shadow recovery. The water in the immediate foreground looks pretty much the same. But again make sure to click on the image to view it larger. Then compare the green branches on the left side right above the rocks. There just is more definition on the LR file. Also look into the yellows just above the already mentioned greens and see if you don’t agree that there is more detail present in the LR image.
This last crop shows how well LR has improved on pulling out finer details against a blue sky. There is just more there and the areas in shadow right above the bluff look better in the LR conversion. But the strongest example is the yellow gun tree, again this is a view taken at 100% view, there is just more detail in the yellow tree and it’s going to allow for a larger print in follow on.
Let me say, there is not a right answer here. Sometimes I go with LR, others with C1. However I often do hand held panos with the X-T1 and now that LR allows the ability to create a pano in LR and save it as a dng I tend to start in LR first. The ability to work on a pano as a dng to me is invaluable as before you had to try to get all the segments close then export and use a stitching software to combine. Now you can work on the dng as one large image before you export. So far I have been very impressed with what LR can do with a pano on the Fuji Files in outdoor landscape situations.
You can get sharp conversions from LR on Fuji files, and to me the end results look better. But you do have to really control the details and sharpening sliders in LR to get the best look. Is it perfect, no, and I had hoped that LR/Adobe would have a newer process available now since back in June there was such a bit announcement by Adobe about working closer with Fuji on the raw conversion. So far only the fix for haloing on finer details seems to have been done.
Is there a better raw converter for Fuji? Yes I feel that Iridient Developer by far gives the best look to the files especially one like my example, but:
Iridient is MAC only, has a very limited toolset, all adjustments effect 100% of the image (no adjustment brushes or masks at least last time I checked), and Iridient will not export as a DNG, which to me would be a great solution. You can download Iridient for a trial and run conversion tests. The difference is pretty impressive most of the time unless you are working a Macro type of shot.
Just more food for thought.
Paul C
Moonset in Boxley Valley on the Buffalo National River–02/18/15 Featured Arkansas Photography
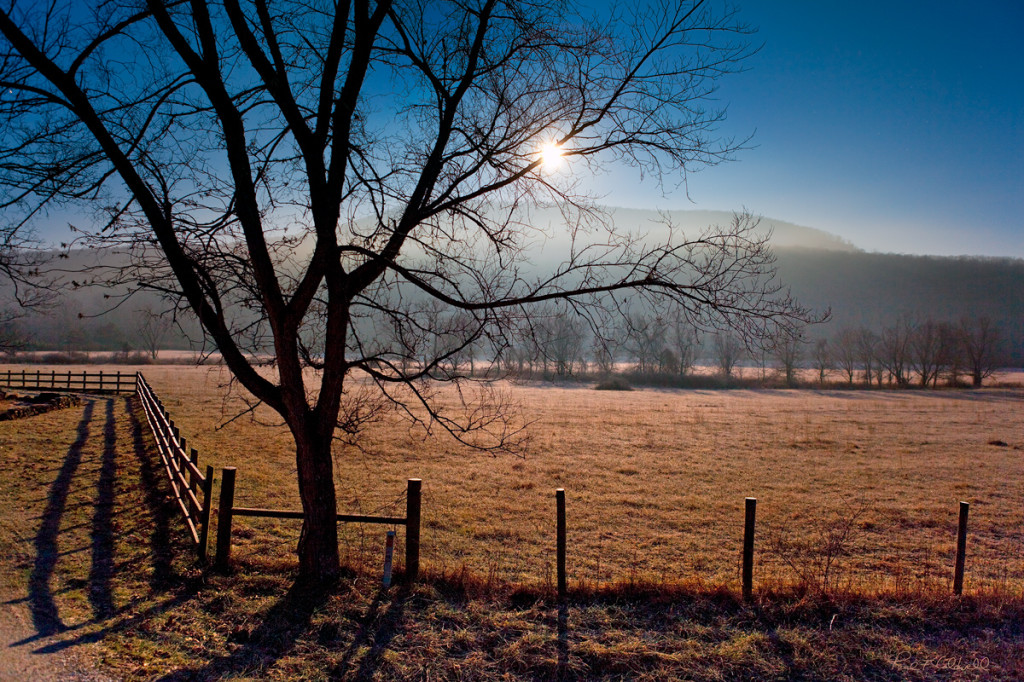
Taken with a Canon 5D MK2, Canon 24-70 lens at F5.6, iso 400 for 40 seconds.
This photograph was taken in early January 2009, back in the good old days for me at least, (if you know me well, you know what happened in February of 2009). I was on a trip to photograph Elk in the Boxley Valley and this was my first field use of my new Canon 5D MK2. Before I purchased the Canon 5D MK2, I had been using my older Canon 1ds MKII, which just did not have a very good higher iso range. On this morning, I came around the last bend of Hwy 21 as it drops down into the western end of the Boxley Valley and saw this view of the moon setting over one of the larger mountains that surround the valley. What caught my eye was how the shadows played with the fence row in the foreground. The old oak tree provided a nice touch also as I framed the shot between the branches. You can see just a very light layer of clouds or fog that was starting to rise up over the mountain in the background.
When you view this photograph up close, you can also see all the frozen dew drops on the grasses and fence posts. If you have never taken a trip to the Boxley Valley, which is on the western headwaters end of the Buffalo National River, it’s well worth the time.

