01/23/14 Drobo does care–A revisit to my original complaints with support for my Drobo 5D
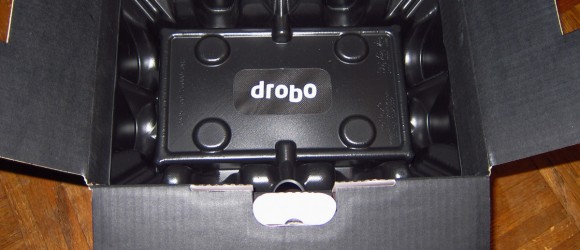
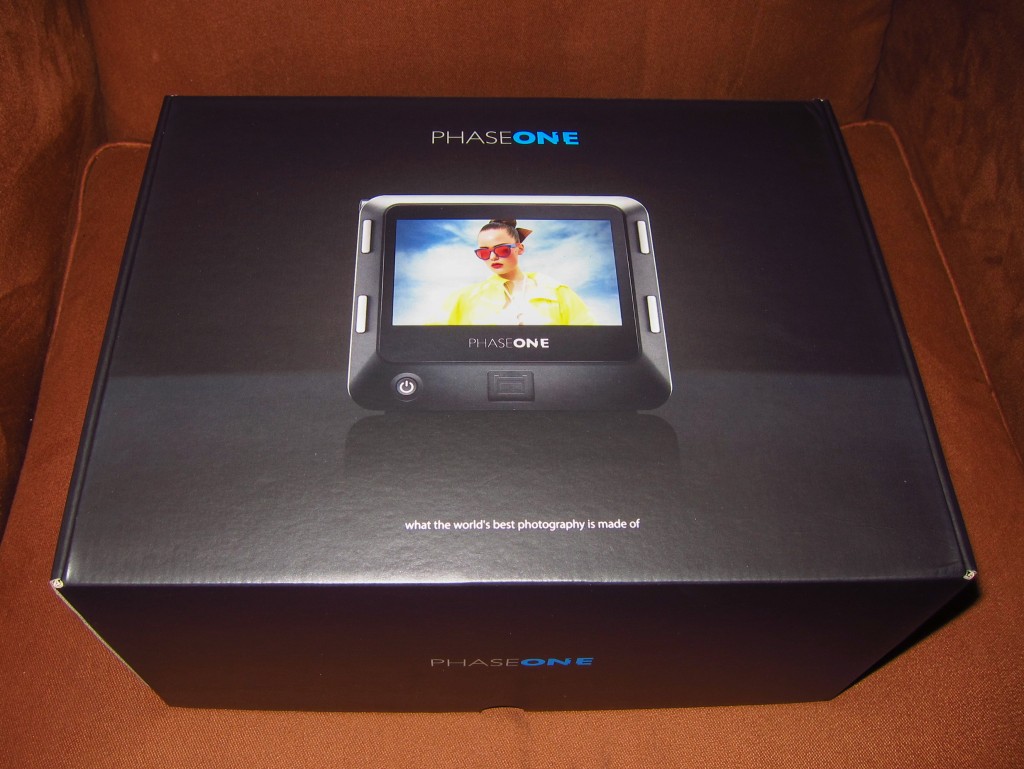
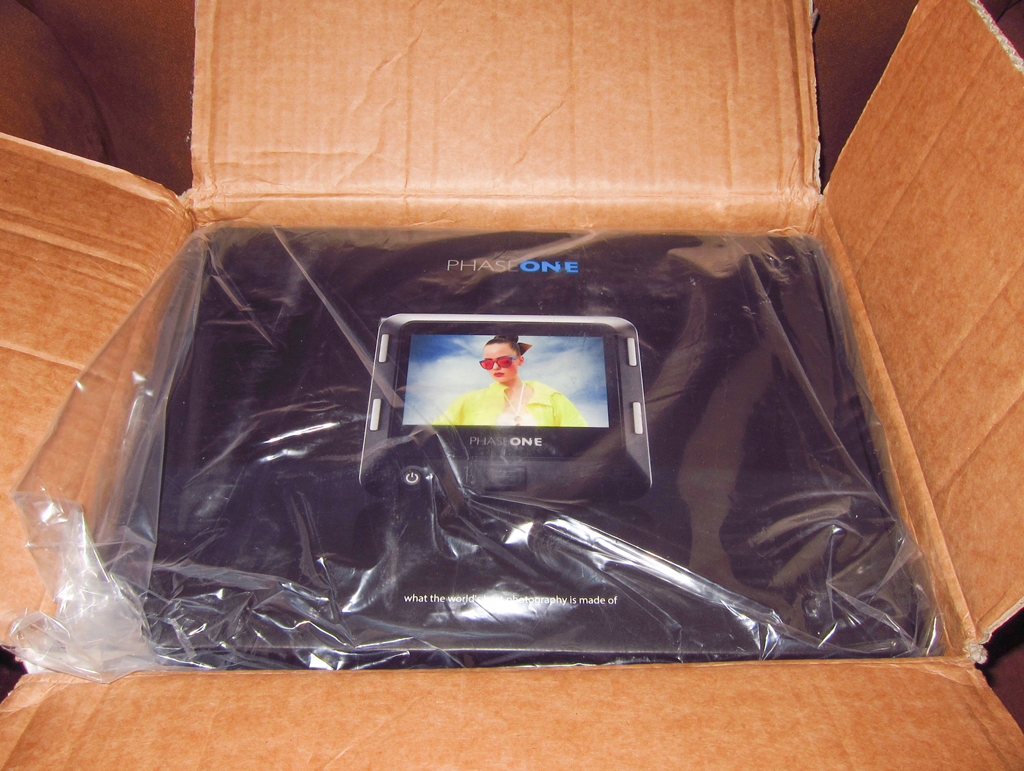
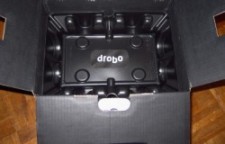
- Drobo offers an excellent packaging solution to their products
- The Unit arrives in a totally protected package
Recently, I wrote a article about the issues I had with Drobo Corp. in regards to the trouble that occurred when I attempted to upgrade the firmware on my Drobo 5D.
Not long after I wrote that article I was contacted directly by Drobo by a phone call. They had read my article and were concerned that my support experience had resulted the way it had. The phone conversation was with the Vice President of Drobo’s Service and End User Support. During the call I went back over my previous case and the problems I incurred trying to get my original 5D to run the latest firmware and still connect via USB3. One of the points I made was that I had been surprised to come away with such a negative impression since previously all of my support issues with Drobo products had been very positive.
What I took away from this call was that Drobo does care about the end user. As a company, Drobo is focused on supplying a high level of quality for their hardware/software and support of these products. The V.P. of service agreed that my previous experience with Drobo’s support process was not the impression that the company wanted to impart.
The fact that Drobo’s V.P. of Service reached out to me was most impressive. I did not expect this and because of it, I realized that my most recent impression of the Drobo Company and their support process was incorrect and with his guidance should give this process a 2nd chance. From our conversation I we put a plan in place that we both agreed should get me to a final resolution that was better than the first. Based on our conversations, here is what Drobo agreed to do for my problem:
- Ship a new 5D off the line to replace my 2nd refurbished unit
- Assign a new support case and give me the support from a dedicated 3rd level engineer who would follow the case until resolution
- Provide phone numbers so that I could talk with the tech when I felt it was required
- Pre-test the new 5D before it shipped to make sure it operated to specs.
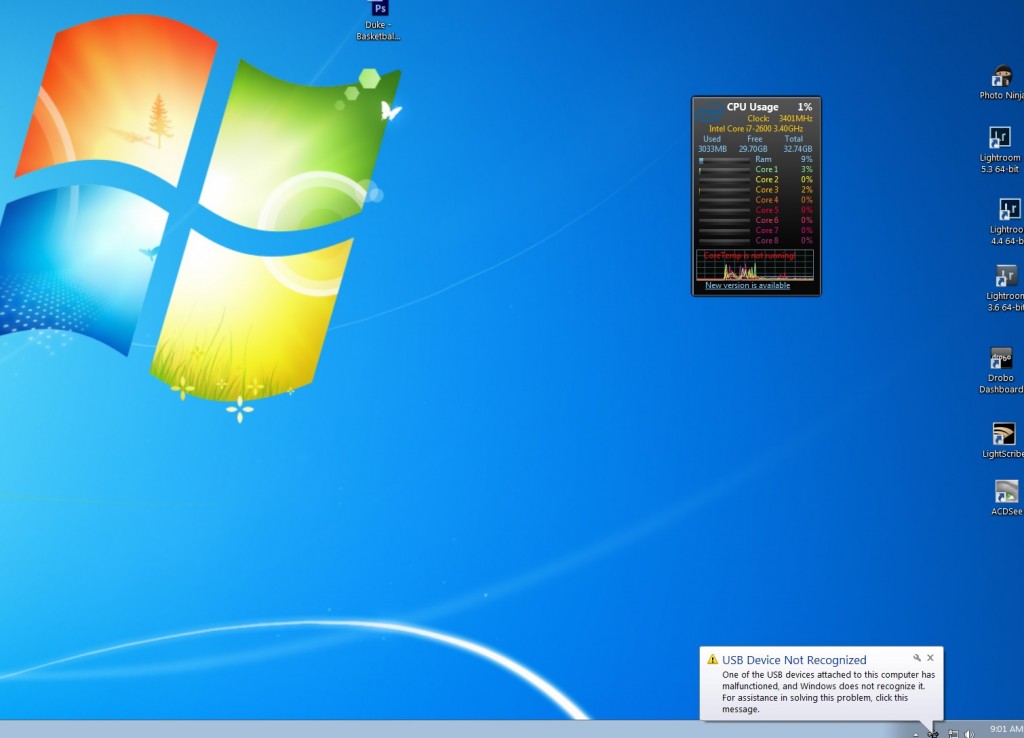
The end result was that I received a replacement unit and a set of (2) 2 TB drives that Drobo had pre-tested. The new unit arrived with the latest version of the 5D firmware, 3.0.9 and it installed clean on my production win7 64 machine. I was able to move my (5) drives over to the new 5D and the array came up clean. All the data was immediately accessible with no errors that I could determine. The throughput of the USB3 connection was as I expected with no slow downs and there were no USB3 mass storage device driver errors in device manager (indicated by yellow exclamation points). During the boot up process of the new 5D, I did see the “USB device not recognized” screen but this is only temporary with the box going away after about 5 seconds. The new unit boots up and is assigned a drive letter by the win OS like it should. It is very possible that my Asus P8P67 main board and it’s corresponding NEC/Renesas USB3 drivers have a slight issue with the Drobo boot process, however the key factor is that the 5D comes up clean and operates correctly.
I came away from this experience with a totally different opinion of Drobo and their products. Drobo is a company that does care about the end user. It’s also clear that they are concerned about situations like mine, enough so that they were willing to reach out to me directly. It’s clear to me now that one of their company goals is to produce an environment that allows the end user have the best experience with their products.
I also came away with a few thoughts about my operation that may have helped in this situation:
- When my problem first happened during the upgrade of the 5D’s firmware I had not registered my 5D with Drobo. They are very clear about needing to have this done and it was a oversight on my side for not getting it done when I first received the product. By registering your device, you are letting Drobo know that this serial number is now in use so they can can track it.
- I did a firmware upgrade without having my 5D fully backed up. Normally I will have a backup of a Drobo in use. It may not be 100% current but will be within 90%. In this case my backup was only about 25% of the 5D before I attempted the firmware update. Having a full backup is very important, as it can reduce the stress of trying to get your unit back on-line or operating with the most.
- I should have pushed harder to ask to speak to a representative. I made several attempts of this in my online case, however I never reached out to Drobo from outside the confines of my on-line case.
Overall I feel the 5D is still an excellent value when compared to other raid solutions (for a win7 platform). I was trying to figure out where to go next as I really did not want to dedicate a new PC just for a raid array. The Drobo 5D still offers a great overall solution for a raid device for a end user like myself.
Drobo is aware of the fact that some customers may have run into situations like my previous one and they are working to add support solutions that will give the best possible answers. They have re-done the support website and it’s now much easier to navigate to your open cases. Most cases will have an initial response within 12 hours or less. I also feel it’s safe to say that the Drobo Company is very concerned about their support for the 5D as it’s one of their best selling products. The company is making some internal changes with the support process to make sure that a 5D support case does not get sidelined as mine did back in September.
01/08/14 Problems with Drobo 5D after upgrading past Firmware 3.0.7
This information was originally posted to my blog back in October of 2013. However I am still receiving emails from other users who have run into this same problem with both Win7 64 bit and now Win8 64 bit and USB 3 connectivity. I would strongly recommend you do not upgrade your Drobo 5D unless there is some other pertinent reason for the need. I don’t feel that Drobo has a good grip on this issue based on my month long open call with them. Once again, it should be noted, Drobo no longer offers free tech support for any of the Drobo consumer lines, after the first 90 days of purchase. After that you will be required to purchase a 1 year contract from them for around $179.00. U.S. This gives you the right open a ticket and email back and forth, but not “talk” to a human. Based my my 25 years of experience in the tech field, I feel this angle is wrong. In my case, one simple phone call with a tech or “engineer” as they are called would have easily solved this issue. Remember my 1st replacement unit was defective with the power switch. Something that anyone who has used these products for any period of time would know. Instead my tech or “engineer” implied that I was “stupid” and did not understand the basics of how the 5D operated. Interestingly enough after a huge amount of my time wasted on emails, the same tech or “engineer” was astonished to see that “yes it does appear that your current replacement Drobo 5D chassis has a power supply issue”. What was even more interesting was that when the 2nd unit arrived, it worked just like the 1st unit I had purchased (which failed after the firmware upgrade past 3.0.7). Personally, I do have a problem when I company takes the position that (A) Your time is not important to us, and (B) We know more about the unit’s basic function than you even though you have operated it daily for almost 8 months.
Drobo used to have excellent support, dedicated tech’s who followed up with your issue. This was all provided with the base 1 year warranty. Now it’s 90 day’s and after that pay up. Also remember that the price of the Drobo 5D is around 800.00 U.S. well actually that is a bit misleading, as you do need support so the price is really $979.00.
Drobo had a great idea, not sure if the original company founders were bought out (more than likely the case) or if something else happened. But my future raid solutions will all be based on a raid card (LSI for example) and a simple PC board/tower case. This will actually cost out cheaper than the current price point of the Drobo 5D with necessary support.
FOR NOW I WOULD NOT UPGRADE TO THE LATEST FIRMWARE ON THE DROBO 5D IF YOURS IS WORKING OK WITH A WIN7 64 BIT MACHINE AND USB3. Once you upgrade, there is no longer a way to downgrade. Drobo used to offer this option with their older superior support on the old 4 bay models, but now they are only looking forward. For a single owned shop like myself that puts a large dependency on a raid 5 or raid 1 setup for primary backup this product is no longer a valid consideration.
Update on 10/12/13
What I thought was a fix, turned out to be a dead end as the replacement Drobo would not work correctly on my production PC. It would boot up, and briefly showed all the correct lights, but as soon as windows gave the new hardware tone, the Drobo rebooted and started this process over and over, never coming on line. I was able to bring up a new disk pac with the replacement drobo, (2) 200GB drives. This worked correctly, but for some reason, my (5) 2 TB drives would not work. I also received a windows error about “A USB device attached to this computer cannot be recognized”. This error comes up with either Drobo, mine or the replacement.
I went back to my original Drobo 5D with my hard drives and booted it up. It came up fine, still getting the USB device error, but still it comes up and is recognized by windows and assigned a drive letter.
As of Friday, Drobo is sending me yet another replacement 5D now stating that the original replacement was defective!!. Something I believe I tried to tell them after I first tried to use it. As of today, I still have not SPOKEN to anyone at Drobo, from a tech to supervisor and it’s quite apparent now based on the information I have inputted to the case, that Drobo is not interested in talking to me. I am sorry to see that this is the way that Drobo has gone and I have for sure purchased my last piece of equipment from them. I love their website showing all the “happy” users, well, that is pure fiction.
Update on 10/05/13
After working through two more days, and getting a better feel for the tech support with Drobo, I finally was able to fix this issue. The problem stemmed from the fact that both of my PC’s (with Asus boards) were running very back level USB3 drivers. On one PC drivers dated back to 2010 and the other 2011. I am planning to write up a bit more about this, but I did want to state, that DROBO DID RESOLVE THIS MATTER AND MY 5D IS NOW RUNNING ON BOTH MY PRODUCTION AND TEST PC’S WITH NO PROBLEMS. I am willing to take some of the blame for this entire debacle, however Drobo could have made this so much easier with just one phone call explaining the issues with the USB3 drivers. I will also note that Drobo was helpful in providing an updated driver for both of my Asus mainboards, something that Asus was not able to do since they quit updating the P8P67 mainboard over 1 year ago. Net, to this story, things have changed at Drobo. In the old days, you could talk to a person, and that person gave you an extension and you could call them back until the problem was resolved. Now you are going to work on-line, (the way of the world) and no doubt there will be some misinterpretations of instructions. However I have to state that my initial extreme disappointment with the Drobo support group has now been lessened and in the future I will know how to proceed with them.
Update 10/02/13
Amazingly since I started this problem after trying to upgrade my Drobo 5D firmware, I still have not been able to talk to a “supervisor” within the Drobo tech support organization. Yesterday I received a “replacement” unit, which was dirty, smelled burnt and was scratched on the faceplate. This was the unit that was supposed to work correctly with USB 3, however when I brought it up on my PC, it had the same issue: The Drobo comes up, is seen by Win 7, Win 7 makes the tone for adding a new device, immediately after that the Drobo drops back to standby and on a detailed inspection the USB mass storage driver has failed. ON THIS REPLACEMENT UNIT I WAS NOT ABLE TO GET THE UNIT TO EVER COME BACK UP EVEN BY RELOADING THE USB MASS STORAGE DRIVER.
Based on my 20 years experience in the PC market, where I worked for IBM for close to 30 years, I am amazed by this response, especially from a company like Drobo that just a years ago had excellent customer service. If you can’t get through to a supervisor especially after having an open call for over 60 hours and the unit is still not working, then THERE ARE SOME PROBLEMS IN YOUR COMPANY. Sadly this seems to be the trend in business today and I hate to see Drobo go this route. They have obviously spent a ton of money on marketing, just look at their current website. However I WOULD STRONGLY warn anyone or any company not to make a large investment for data protection with Drobo products. Their lack of ability to communicate, reach out to a customer who has a Drobo that was working perfectly before attempting a Drobo firmware update, and lack of management follow up is pretty telling.
As long as you bring up the 5D in a USB 2 environment it still works fine, however this totally defeats the over $800.00 dollar cost of the chassis in that you are dropping back to a USB2 transfer speed and you can get a 1st Gen Chassis for that. Sure they are no longer sold by Drobo, but there are plenty of them around. However now that I think about it, that might not be a good idea either since the support for an existing product is pretty much terrible, I can’t imagine what it would be like for older 4 bay.
I understand I running a Asus mainboard, but the USB3 drivers with most board companies are pretty much the same as long as the board is a Intel board.
From here it’s back to chassis and LSI cards, with drives for me.
This is my earlier post when the problem first started.
IF YOU ARE RUNNING A DROBO 5D, ATTACHED TO A WINDOWS 7 PROFESSIONAL 64 BIT MACHINE VIA USB3, I STRONGLY RECOMMEND YOU DO YOU NOT UPDATE THE FIRMWARE OF THE DROBO 5D TO 3.0.8 UNTIL YOU CHECK ON THE DATE OF YOUR INSTALLED USB3 DRIVERS, ESPECIALLY IF YOU ARE RUNNING A NEC OR RENESEAS USB3 CHIPSET.
I have been using Drobo products for storage/backup now for almost 4 years. For most of those years I used the original 4 bay 1st Gen Drobo that connected via USB 2. This device has been stable for most of this time, and had worked as a external raid 5 enclose would be expected i.e. notifying me when a drive was close to failing or failed and allowing me to replace said drive with no data loss. My only issue with the 1st generation Drobo was the fact that is slow for reads/writes mainly due to the fact that it’s only connection was USB2.
When the Drobo 5D, 5 bay product was announced I did not immediately move to purchase one. I felt (and now still do) that the price point of close to $850.00 was too high for my budget. However early in 2013, I was totally out of space on my 1st generation Drobo so I purchased the Drobo 5D. I installed the 5D on my main windows 7 64 bit machine, utilizing the USB 3 interface. I used all 5 drive bays and filled them with 2TB drives. Since I made the installation of the 5D, I had had no problems, until this past Friday night, when I made the FATAL mistake of allowing the Drobo dashboard to download and install the latest firmware for the 5D. Normally my thought process on firmware updates are “don’t update to them unless you see a specific need fixed”, however on this night I went ahead and allowed the Drobo dashboard to upgrade both the firmware on the Drobo 5D and Drobo Dashboard.
From here, things went downhill fast. The firmware update on the hardware failed. This pinged my memory back to when I tried this on my Drobo 4 bay, and I remembered that I had had the same issue with it. On the installation failure the Drobo 5D rebooted and then attempted to come back up. It went through the entire reboot, and then just as I received the tone of a new device being added to Windows, the Drobo 5D went into standby. I attempted one more hard restart and the same thing happened. From here I called Drobo customer support, and again I was in for a rude awakening. One thing I forgot, was my old 4 bay never worked correctly on firmware updates from the Drobo dashboard software, instead I had to always do a manual firmware update.
In the past I all of my tech support calls with Drobo support have been positive. They have been prompt, informed about the product, and have been able to provide a fix, either software or hardware. On this call in I was told that I had not “registered” my Drobo 5D, even though I had placed a tech support call with Drobo when I received the unit and I could see both the call record and serial number of the 5D in “my support” portion of the Drobo website. The tech I spoke to was polite, but would not proceed until I registered the product. I went ahead with the registration and then found out that Drobo no longer provides “free” tech support after the 1st 90 days of ownership. After this, you have to purchase a 1 year support contract for $162.00. This surprised me, but at this point, I didn’t care, as I needed to get to the data on this Drobo 5D. Most was backed up offline, but not in a local backup. NOTE TO DROBO, for the price of over $800.00 for a empty raid enclosure, I believe you should be able to continue to provide tech support for no charge for at least the 1st year of warranty. However Drobo has taken the sad path of most companies, if you need help, prepare to pay. This needs to be spelled out a bit better up front.
After paying the 1 year contract, not much else improved, except that I figured out on my own that my 5D was still OK, and somehow the firmware update had created an error on the Windows 7 mass storage USB device driver. After taking to Drobo tech support, it became quite clear that the firmware update had not taken and I had to download the firmware and do a manual update. This did not fix the problem and the 5D still came up and went into standby. A NOTE TO DROBO, you need to post a bit more information on this upgrade as when I spoke to a 3rd tech later on Saturday, I was informed that this is a known problem after you upgrade the firmware on the 5D to 3.0.8. This is terrible customer service, period. If you are using a raid enclosure, you are using it mainly to protect your data and provide a level of security, NET, if I had not followed the prompts on the screen, my Drobo 5D would be working fine. The 3rd tech I spoke to on Saturday also told me that there currently was not a fix for this issue and blamed it on the Windows 7 mass storage driver. Really? Did Windows suddenly change this driver? I checked as far as I could and the date on my system for the USB Mass storage driver showed no change, in fact it’s the same date as when the OS was loaded.
Here is where things are currently:
- If you are running Windows 7 64 bit and have a Drobo 5D, using USB 3 connections, then if you update to the latest firmware of 3.0.8 for the Drobo 5D, you have a very good chance of getting this same issue. I am running an Asus XXXXXX board, with a Intel i7 processor. This is no way I know to get this driver/firmware screwup fixed. Net each time from now on, when you attach the Drobo 5D, it will come up normally, then go into standby. I tried a full system restore back to the date before I did this firmware update, the system restore was successful, however the problem was still there. Based on this it’s a fair conclusion that a full image restore of the OS (Win7 64 bit) would not fix this problem as the issue is with the Drobo firmware 3.0.8 and the stock Windows 7 64 bit Mass storage driver for USB. The only way I can think to fix the issue is to back off the firmware to a previous version than 3.0.8 on the Drobo 5D.
- You can fix the problem and continue to use the Drobo 5D by either unplugging the USB 3 cable from the PC or back of the Drobo 5D, while leaving the power on the Drobo 5D. Windows 7 will then see it correctly and add the drive letter for the Drobo. You can also go to control panel==device manager and locate the USB mass storage device driver that has failed. It will have the dreaded yellow ! next to it. Select this component and go through the process to reload the driver using the 2nd option. This will get the drive back online, and the Drobo will come out of standby and Windows will assign a letter to it and you can operate as normal.
- You can also plug the Drbo 5D in to a USB 2 port and it will work fine. This was one answer I received from Drobo tech support. This makes no sense as you have now brought your 5D back to the speed of the older 4 bay models.
Overall I still have a ticket open with Drobo tech support and if I get some form of resolution, I will post the results here. Currently I can only get my 5D to operate at the correct level, by unplugging the USB 3 cable, or reloading the Windows 7 mass storage driver.
06/15/13 Phase One Back failures using Silver vs Black batteries
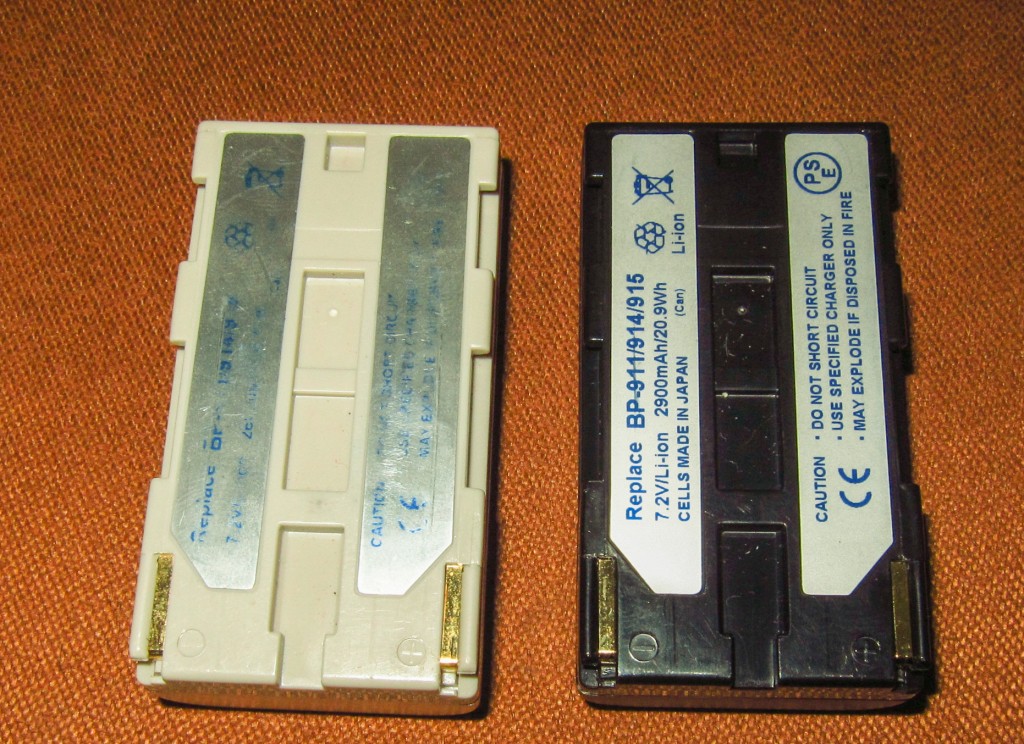
As many Phase One users may know the main battery used in most modern Phase One Digital backs, is based on a Canon Video camera battery. In fact in the older Phase One cameras which had the battery external to the back, like the P45+, P65+ etc. you could use Canon’s AC adapter/battery setup on Phase One cameras which gave you a much longer life in the field. This all ended however when Phase One decided to place the batteries inside the case as in the newer IQ series of backs.
One issue I have had with all Phase One batteries, is that they don’t’ tend to last very long in the field. The older batteries were 2600 millamp hours and in most cases with a IQ160 I would get about 2 hours or less in the field. When Phase One announced the IQ backs, they also increased the millamp rating on their batteries to 2900. In a nutshell millamps tells you how long a battery will last at charge i.e. 2600 will last a shorter period of time than 2900. However as I also moved to a tech camera setup with my IQ 160, I found that my battery use increased considerably. Since the IQ backs don’t really have a very good live view I tend to do a considerable amount of checking after a series of shots. In the past 6 months, I have found that some of this review is no longer necessary as I have gotten much more confident with my tech camera and focus. The ultimate solution is still a better live view but as long as Phase uses CCD technology, I have been told this will not happen.
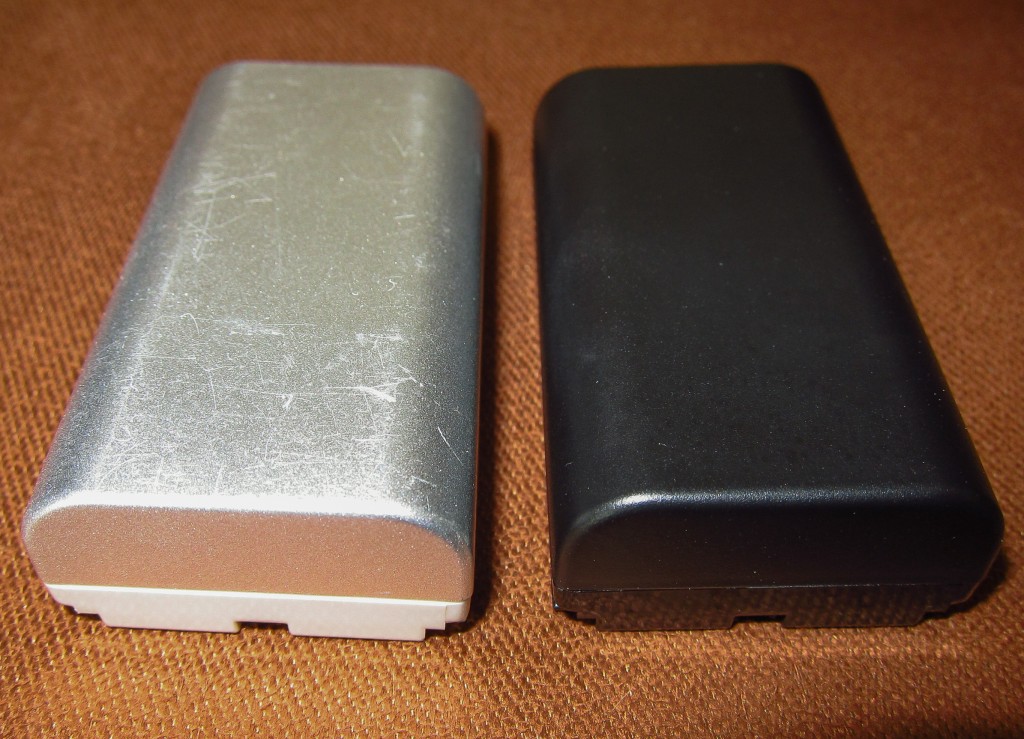
So what do you do when you know you will be in the field all day or maybe two or three days? You carry a bunch of batteries. About the time I was introduced to the Phase One IQ series of digital backs, I also discovered that there was a much cheaper battery alternative. Capture Integration, based out of Atlanta sells a silver battery which looks and feels just like the black Phase One branded cells. They are all 2600 millamp but at 1/2 the price. My thoughts were to just purchase more of the silver cells and then carry them on trips. They don’t weight that much and charged up with the same Phase One charger. In fact I designed a battery sleeve that I could carry over my shoulder, based on a hunters belt. The Phase One batteries will fit into the same size as a 12 gauge shotgun shell!
At first, I really noticed no differences and pretty much stopped using my older Phase One LI batteries. Lithium cells in theory should not have a “battery life” issue but I noticed that my batteries that dated back to 2008 and 2009 where definitely getting shorter run times. There is no way to “re-condition” a lithium cell like you can with Ni-Mh cells. However in early 2013 I started to notice some strange issues with the Silver batteries, on my IQ160.
- The first silver battery I installed, did not power the back up. I double checked that it had locked and it did. This battery had come straight from the Phase charger, and showed 100%, one of the silver batteries. I went back and pulled the 2nd silver battery from the charger, which also showed 100%
- The 2nd fully charged silver battery did power up the back. All seemed fine so I continued to shoot. However after each shot, I noticed that the battery indicator would drop from full, to 1/2, to the lowest indicator while the back was writing the file. As soon as the file was finished writing the battery indicator would return to 100%.
- When I attempted to zoom to 100%, the zoom went to over 200% and locked. I could not go back down to normal view with a double tap. I had to power off and power back on. This series of errors happen several times, then I noticed on the right side, where the histogram should be there was nothing even though I could double tap the histogram to view it at 100% and then it showed up. Also both focus mask and the highlight warning would not engage when tapped.
Out of curiosity I went back to the silver cells and worked with them in the IQ160. I had two of them that had been in my pack which had been sitting in the sun. The batteries were at 100% full charge, and when I placed one of them in the IQ160, I noticed that it was not fully engaging the brackets that hold the battery in place. When a new battery is placed in the IQ160 back (or older P series backs) the back always powers up. What happened when I placed the silver battery inside was that the back powered up, briefly then the screen went blank and the back powered off. I double checked that the battery was still locked into place and it was. However even locked in place you could still move the battery around and as I did this the back powered back on again. It seems that over time the outer casing material of the silver batteries, may expand, and contract and as it contracts it slightly deforms the shape of the battery enough that the slot where the battery fits on the IQ160 does not hold the battery firmly. I have also had several silver batteries that did not want to come out of the back after they were used. I first noticed this about 6 months ago, on silver batteries I had been using for about 8 months. This behavior implies that as the silver battery is used it gets hot (normal for a LI battery during discharge) but the silver case is also expanding and contracting causing deformations. Over time these deformations can cause the silver batteries to either:
- Stick inside the IQ back, and become very hard to remove
- Not fit snug enough in the case and allow movement which will either not give the correct voltage to the back and cause errors.
With the older P series backs where the battery is external to the back, this issue is moot since the battery is held in place by a hard metal sleeve and it can’t slide around.
I have not noticed any cracks in the silver batteries, but as a safety measure, I have stopped using them. I would not have any issues using them on a older P series back however like P45+. It’s also my understand that Capture Integration (Phase Dealer in Atlanta) no longer recommends using these silver batteries on a IQ back. However I never received a warning or notice from them about the possible issues of continued usage.
These are the results of one person’s usage of a IQ160 and the silver batteries that are sold to replace the standard black Phase One cells. If you have using these silver batteries and are experiencing any of these issues, before you send your IQ off to Phase One, try working only with the black Phase One batteries and see if your problems persist.
01/04/14 Some issues for IQ260 and IQ280 owners on the Wifi top cover
This only applies to photographers that purchased a IQ260 (possibly IQ280) early in the product life. I would say back to about July to October of 2013.
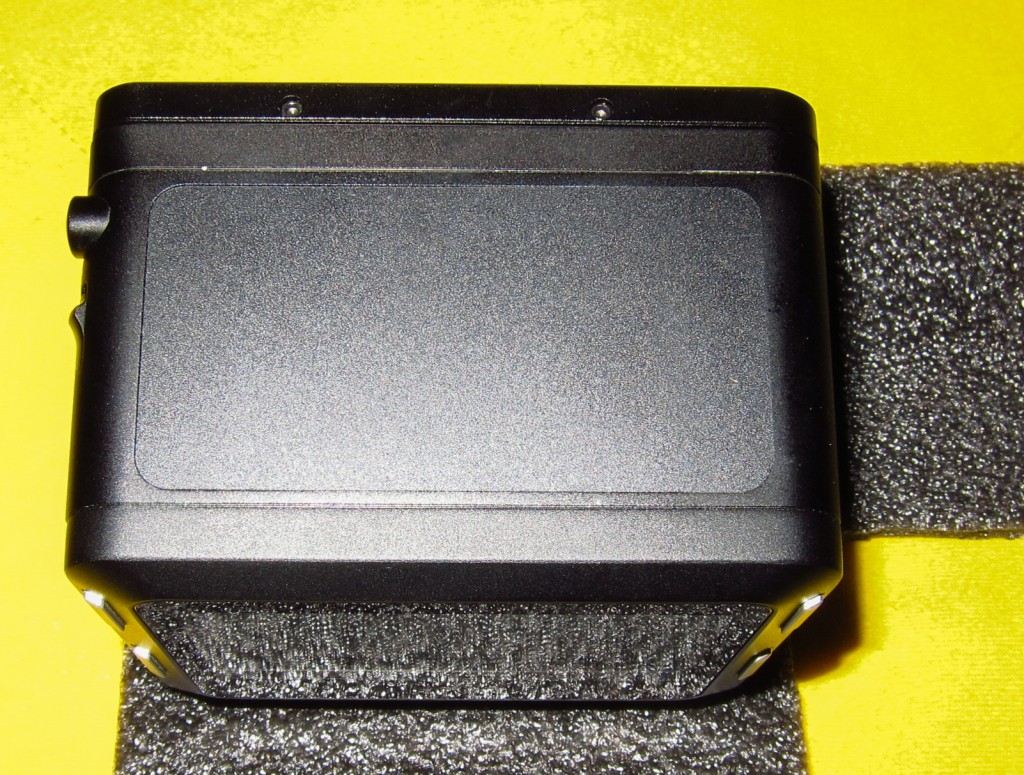
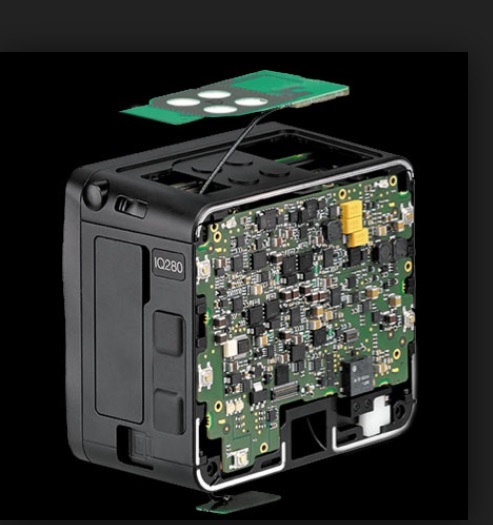
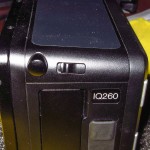
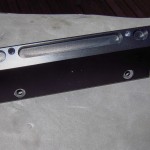
One of the features of the IQ2 backs is the built in Wifi capabilities. When you first get the back, you will notice that the top has a rather large plastic rectangular piece. You can clearly see this in the photo below:
With the older IQ140, 160 and 180, this part of the back was solid and there was no plastic top. However with the placement of the WiFi Card on the top, Phase had to apparently cut the top open to allow for signal strength. As you can see from the next picture that there was probably no way to place this card on the bottom of the back and it’s appears to be too large to go down the side.
So instead of the hard shell across the top you now have a ridge plastic piece that fits into the rounded cut out. This piece should be flush to the top and not have any raised edges.
I had noticed a post on the Luminous Landscape forum where someone had tried out a used IQ260 and noticed that the top piece was raised and it was possible to feel a gap between the edge of the frame of the back and this cover. It’s interesting to note that since I purchased my back in March of 2013 and took delivery in mid August of 2013, I have had it out in the field at least 20 times now. I have used it on hot days and cold ones and only in passing had noticed this plastic top on the back. However until I read the the post, I had never really checked to see if my plate was fitting flush to the top.
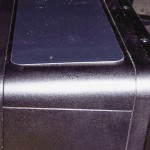
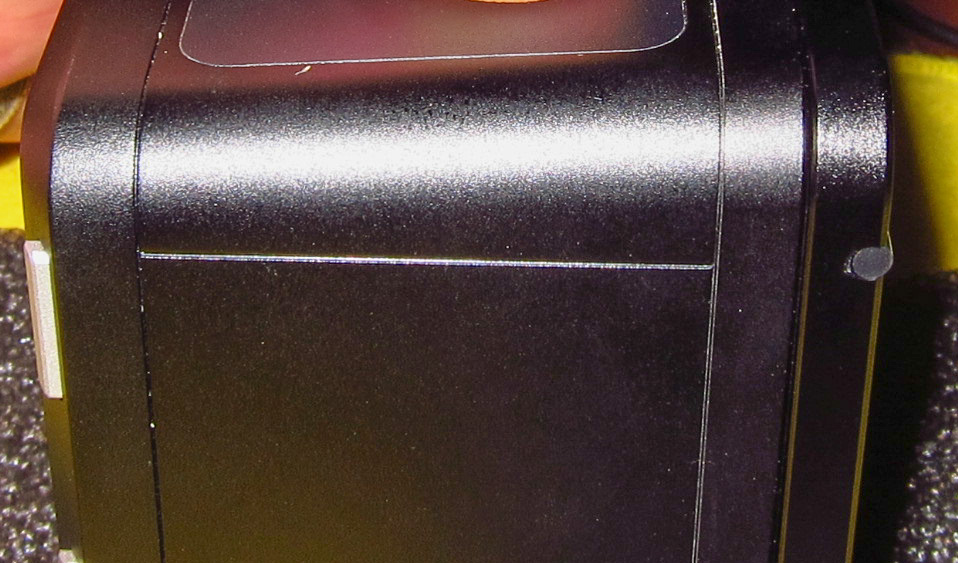
Curious I checked my back and noticed immediately that from the back where the LCD is, the entire right side of my top plate had indeed raised up a considerable amount. You can see the difference between the right and left sides in these two photos.
- Left side my my IQ260 showing edge of WiFi cover
- Right side of my IQ260 showing top of cover and gapping
I attempted to push the plate back down, but in a minute or two the plate had pushed back up to the same position. The top plate had raised up enough that I could easily catch it with my fingernail and feel it trying to pull up. The plate was loose and what concerned me more was the fact that it might now somehow have compromised the integrity of the seals for the back. I have more to show on this in a different post, as I had been getting some fogging on the inside of my LCD for sometime now.
With a simple push you can get the top plate to go back down, but as mentioned before it’s not going to stay there. I don’t know exactly how long my back had been doing this and this surprises me as I am usually pretty quick to see such things. If I had been using a Phase One DF+ body with the back, I could easily have missed this since the viewfinder of the DF+ comes right over the top of the back, but with the Arca rm3di that I use the back sits out at a 90 degree angle to the camera and nothing covers this piece.
As you can see in this shot, with simple pressure you can get the plate to go back to the original position but of course you can’t keep pressure on it and I was a bit worried that pressure might not be the best idea since you might be pushing down on the wifi card also. From the pictures of the card on the Phase One website it appears that the wifi controller card is directly below the plate. The other issue is that the plate is surrounded by the hard metal of the back so if anything does push on this part of the back, the plate will give in long before the back frame does. NET: Don’t drop this back on it’s top. I have a few ideas for mine since I am always in the field and protection is important.
I have one other concern that I have not heard back from my dealer or Phase One yet. What is the amount of weather sealing that this plate is given? I am a outdoor photographer, not indoor and my older P45+ or IQ160 was pretty much bombproof. I had 2 close calls with my P45+ and neither time did have any damage. If anything the 160 was even stronger than the P45+, the only areas that really need protection being the LCD and the sensor. Working outdoors, it’s always possible for a errant drop of moisture to hit the top of the back. In fact it’s more possible than not. Have you ever worked in the woods directly after a rain? Drops are constantly coming down and they are going to hit the flat top of this back really quickly. The older IQ160 does not have an issue here since there is no opening, just the metal frame. Now you have a huge opening almost all the way around the top of the back and the opening has a small gap (even when the plate is where it should be). Water will always seek and find the weakest part of a seal and it will also get down into the gap no matter what you do. I can only hope that there is very tight (well mine was not very tight) weather seal on this plate. This would be one way to fix it, but it’s rather ugly and I am hoping to hear back from Phase One that the correctly mounted plate can handle a few drops of water.
This whole issue caused me to email my Digital Transitions (DT )Rep, who quickly put me in contact with one of the dedicated technical support staff with DT. Scott, one of the techs at DT, took my information and opened a case with Phase One. About the same time I found another forum post where Phase One had responded to another user informing them that the first round of backs released to the field (mine was one of them) had a different method of attaching the WiFi plate and if you saw gaping, the back needed to go back to Phase One to have the plate replaced with the newer style or method of gluing it down in place.
NOTE: If you are considering purchase of a Phase One back, I strongly recommend you work with a dealer like DT. They can sell used or new and have a direct line to Phase One. As a end user, it is very hard to reach Phase One in Denmark. They have no phone support. They do have a location in Mellville NY, but it’s more of a marketing support arm and I don’t believe that any repairs like the ones I needed will be done in the U.S. If you purchase a back over the web and it has a Value add warranty, then that warranty will be supported by dealer, however you will need to develop a relationship with that dealer. If you purchase a used back with no warranty, then you just spent a lot of money and you may end up with no recourse at all. Save a bit up front and pay a lot in the rear. The dealer can get through to Phase One much faster and they can also contact Phase One in Denmark. The only way I know to reach Phase One in a situation like this is open a trouble ticket with Phase One via the main Phase One website. You will get a response but it will take a while and you will not get any phone calls. I prefer a phone call in situation like this.
I purchased a Value Add warranty with my upgraded IQ260 so Phase One has sent me a loaner back, in this case a IQ280. I did check the top plate on the replacement back and it’s definitely more secure than my back was. I will update this post when my back returns and when I hear back about the weather seals on the plate when it’s mounted correctly.
Hopefully this is just a slight hiccup with my IQ260. So far I have only had this issue and fogging inside the screen and I am wondering if the fact that the seal for this plate being loose had allowed some moisture inside? I had DT also add this issue to my case.
07/17/13 IQ260 Arrives in Little Rock Arkansas–The unboxing
I can remember back when I was a fan of collecting watches, when someone purchased a new watch, they always published an “unboxing”. I never did it for a watch, but did go ahead for the IQ260. I am pretty sure this is the first one in Arkansas and I am very happy to be the owner.
After a lengthy decision process, I upgraded my IQ160 go the new IQ260. I have been on the fence for quite a time on this but after working with Digital Transitions, out of New York I found that there was enough value in the IQ260 to move from the 160. I was able to demo the IQ260 in Dallas TX, on a hot clear day. The outside temperatures were approaching 100 degrees so longer exposures were out of the question. However I was more interested in the file quality of the IQ260 vs. the IQ160. I was hoping to see a bit more room in the shadows and a bit more top end with highlights. I was also interested to see if there was much improvement in iso 200 and iso 400 results in the long exposure mode. These are areas where I tend to get pushed with my my outdoor photography. The IQ260 at first blush does seem to provide a bit more top end at iso 200 and 400 and definitely seems to show a smoother tonality in the shadows. Since I moved to the IQ160, I have never seen the need for any larger MP output. The IQ280 loomed on the horizon but since I am mainly a tech camera user with Schneider lenses, I was not ready to make the switch to 80mp.
One consideration that I considered was where Phase One was in the development stage of the IQ160 vs the IQ260. The IQ160 was the same chip as the older P65+. Images are identical. However with the IQ160, you picked up the excellent IQ interface to the back. I feel that Phase One will continue to produce enhancements to the IQ260 over the next year or so, whereas I don’t think there will be any more improvements to the IQ160/P65+. I am betting on the future here. It’s also the 1st new chip that Phase One has brought to the market in over 2 years. The IQ280 is still based on the same chip as the older IQ180, however it does have a newer processor/logic card that supposedly gets a bit more DR from the current chipset.
I had also looked at the financial situation on the upgrade (something many people don’t seem to consider when making such a large purchase). My IQ160 was fully depreciated so I wasn’t going to take a book loss. Also after reviewing the numbers that Digital Transitions shared with me for the trade in, I felt better about trading in my IQ160.
One nice new feature is the ability to review the images in Black and White. It’s not a black and white conversion, but if you are looking for focus checks, depending on the lighting, viewing the image preview in black and white is sometimes easier. It’s my understanding that the latest version of the firmware for the IQ160/180 also will have this feature.
As I mentioned I worked closely with Digital Transitions, my dealer out of New York, I was able to demo the IQ260 against my IQ160. So far I have found several areas where I believe the IQ260 is superior to my older IQ160.
- Better tonal transition from shadow to lighter areas at iso50
- Very clean 60mp image at iso140, cleaner than my IQ160 at iso100
- The ability to glean an extremely clean file at iso140 in Long Exposure Noise Reduction mode
- Wifi connectivity to an iPad for checking focus on Tech camera shots.
I have not been able to do anything in the long exposure mode due to the extreme heat we are experiencing here in Arkansas and more than likely will not be able to test this feature until late September or October.
It’s interesting to note, that the wifi feature has actually become a more positive feature for me than I first realized. I originally felt that the wifi feature would be moot for me, but with a bit of trial, I am finding that it’s actually a very important feature, especially for tech camera work. Since all the IQ’s (for that matter all current Phase One backs) use CCD instead of CMOS chips, live view as most people are used to does not work. Yes Phase One offers Live View on the IQ backs, but in actual daytime use it’s not very helpful. With the wifi feature, you can shoot a series of images with the back on a tech camera, then view them with Capture Pilot on a ipad, This allows you much more flexibility to check your shots. Sure the IQ LCD is loaded with features, but it’s still small and it’s also locked into position on the tech camera. Many times I will setup a shot on my knees or bent over double. Exposure is easy but bending over to see the screen is harder and even then it’s a bit difficult to see all the details. With the wifi feature, you can leave the camera in position, and pull out the ipad and find a comfortable viewing position to check the images. You can also delete them from Capture Pilot. Sure it adds one more thing to carry, but it’s not a bad compromise.
I hope to add a lot more to this report as I get out and shoot the IQ260. One thing I found surprising, it seems that speed of the processor in the IQ160 and 260 is about the same. I base this on the fact that the latency between shoot and review is pretty much the same.
Thanks again to Digital Transitions for all of their help in making this upgrade possible.
D800 Reticulation issues during night photography–white dot problems
- At August 02, 2013
- By paul
- In Articles/Reviews, Nikon Gear
 0
0
I have been using the Nikon D800e now for about 10 months in outdoor night photographic work. Recently I have noticed a disturbing issue with the results which I believe look very much like reticulation errors from the old darkroom days. If you over processed a B&W negative during the you could get a coating of very faint white dots on the negative. You can also sometimes get this in the print making but I found it more common on the film processing side. The net result was a ruined image that was covered in white dots. So far in my years working with digital files I have not seen this type of an error. With the D800e I noticed some a few white spots on some of my longer exposures when I first started to use the camera for night work. However they were not very numerous usually only numbering from 10 to 20 total. On my last night outing my D800 really had a problem with this. When you double click on the image shown above you can clearly see the numerous white dots throughout the image.
A bit of history, my night photographic work is done with stacking. I prefer the output from stacking over one single long exposure. If you work with a Nikon on a single long exposure with “long exposure noise reduction” turned on, there is a problem. Nikon like all other camera companies, basically runs a dark frame for the same time as the original exposure. However with Nikon you are locked out of the camera for the duration of the dark frame. So if you shoot a 45 minute single exposure, then after the original shot finishes, you will then have to wait another 45 minutes while the dark frame runs. You cannot take any other pictures or make camera adjustments until the dark frame finished. There appears not to be a buffer that the dark frame can be run in the background. With Canon (at least on the 5D MKII and 5D MKIII) you are not locked out and the dark frame is done in the background in a buffer. You will eventually buffer out after about 3 exposures, where on the 3rd shot you will have to wait for about 20 minutes for the camera to free up, but this is still much better than Nikon’s implementation which is the same as Phase One’s on their medium format backs. I always recommend long noise reduction to be on with single long exposures as there tends to be way too many stuck pixels created and the dark frame will remove these along with some of the base line noise created.
In night photographic stacking where I am shooting to create star trails, dark frame noise reduction creates way too many gaps. An example during a a series of 1 minute 50 second exposures where I might take 25 total frames to get to around 45 minutes I will have only 12.5 total frames of data, the other 12.5 frames will be taken up during the dark frame. Yes there are tools like Star tracer to fix the gaps but to fix this many large gaps really causes some overall problems putting the final image back together since Star Tracer has to really move the file to close the gaps.
When a digital camera gets hot you start to see strong image depredation. With Canon files this seems to show in dark black splotches that can become way to numerous to remove. Traditional dark frame subtraction will not get these out since they are already black. Dark frame subtraction is looking for solid colors (red, green and blue) from stuck pixels, and large areas of noise. So in the past before I started to stack my exposures, once I started to see the black splotches on my images I tended to stop for the night. In Arkansas, where summer temperatures can get 8o to 85 degrees at midnight with high humidity you are limited to just how much your camera can handle. Because of this I prefer the wintertime, fall or springtime to get in most of my work. But it’s still hard to resist a clear night in July and August.
With the Nikon D800e you are taking a file that is approximately 2x larger than the output from either a Canon 6D or 5D MKII, even a 5D MKIII. Canon also offers the small and medium raw output which I often use. The reason being that in night work you are not as concerned about the finest details. I would love to see Nikon offer at least a medium raw size output on their their D800 family of cameras in a firmware update. A medium raw output would be around 20mp in size from the D800 and you might not work the chip as hard as with a full resolution output.
As I mentioned earlier when I first started to shoot with the D800e at night I would always see just a few solid white dots. Never more than 20 and usually around 10. These dots were the size of a normal stuck pixel and easy to remove. Lightroom which normally does a good job at removing stuck colored pixels ignores these however and I had to go into the file and manually remove the. I did notice a slow increase in the numbers of these “stuck” white pixels but they were never a big deal. On my last night shoot with the D800e I did start so see many hundreds of smaller white dots. They were about half the size of the stuck pixels sized dots but way more numerous. You could see them on a 100% review of the image on the LCD of the D800e. When I returned to my studio and started to work on the files I found that these white dots numbered more in the thousands. Way too many to manually remove.
The dots are small and faint but depending on the conditions where you shot the stars but if you are stacking then they really pose a big problem. This is because with all stacking, you tend to get faint gaps between the start trails. The gaps can become larger, if you briefly stop the stacking process to check your exposure. On a 45 minute or longer stacking series, I will tend to stop the camera several times to check my exposures to make sure for example the moon has not started to create destructive flare, or due to the amount of moonlight I need to increase or decrease my shutter speed/iso setting. To close up the gaps, I use a software tool call Star Tracer and it does a great job. However the way it closes the gaps is to move the image up and down slightly and by this it moves the star trails over the gaps closing them. If you have dots or stuck pixels, you will see the dots take on a stepping pattern the number of steps is determined by how many times star tracer had to move the actual file. This creates a dotted line throughout the image and can ruin the image. The only way to fix it is to manually remove as many of the dots as possible before you run Star Tracer. Here is a closer view of the problem areas in one of my shots.
After first seeing this, I found that I could remove about 1/2 of the problem dots by increasing the amount of noise reduction I was using on the file. In Lightroom I increased the noise detail slider, the color noise slider and the overall luminance slider. This in effect blurs the dots enough many of the more faint ones will not show up. Since I also stack the images in Photoshop I run both a maximum and mean stack mode and then combine the two. By combining these outputs you can reduce the number of dots by as much as 1/3 more. I also have found that by using Capture One instead of Lightroom I can remove almost all of the dots since Capture One has a different noise algorithm which seems a bit more sensitive to this type of problem. Capture One also offers “single pixel noise reduction”.
I also ran the same D800 Raw files through Capture One version 7 and with the single pixel noise reduction slider moved to about 50 percent these dots are almost all removed. On this particular shot the moonlight was also causing a similar issue that one sees when using a circular polarizer. The lens I was using was the Nikon 14-24 @ F3.5 and the sky consistently was darker in the center than on the sides. This is not classic vignetting, as the amount of light and dark areas far exceeded normal vignetting. Here is a small shot from a Capture One processed image.
Capture one actually processed out the files quite a bit easier than Lightroom 4.4. I tend to still lead with Lightroom 4.4 with my D800 shots especially the night shots. This due to the fact that Capture One tends to have a bit more problems with the blue hue of the night sky which is due to the moonlight. Capture one does apply a bit more noise reduction to the files than Lightroom as a default. This will generate a very clean sky, but tends to make trees and rocks a bit tool soft. This is not really a big issue since I am stacking and generally only will use one image’s foreground for the final output. It’s very easy to go back and reduce the amount of noise reduction and then re-output the file. On these images where I was working with about a 4/5’s moon, Capture One was able to pull out quite a bit more of the distant stars than Lightroom. Here is an side by side showing the difference the noise reduction settings can have on the more detailed parts of files in Capture One.
I am hoping that this issue does not get worse, as if it does I will have to send the camera back to Nikon to see if they can determine what might be causing the problem. So far I have only seen this type of noise in my night shots, however they seem to show up even in the lower iso ranges of 200 through 400. As I only own the (1) D800, I can’t state that this is an issue with all Nikon designs or if it’s just an issue with my D800e or all D800e/D800 cameras. In May when I last shot the D800e at night the ambient temperatures were about 82 to 75 degrees which should not be that much of an issue. I would expect this more in temperatures of around 87 to 96 degrees.
The other option would be to try the D800 on a single long exposure with the long noise reduction on. This would limit me to about only one shot per night, maybe 2. Or I might try to stack with the long noise reduction on and see if I can get Star tracer to close up the gaps. Either way it’s a major inconvenience.
03/30/13 Adding a Grip Extension to a Arca Swiss Rm3di–Getting a better handle on things
- At March 31, 2013
- By paul
- In Phase One & Arca Camera
 0
0
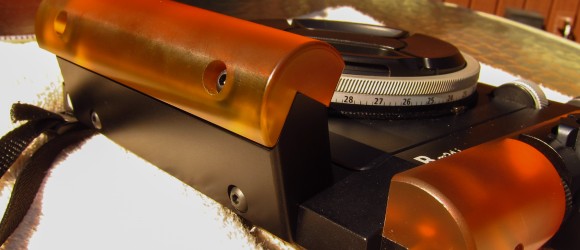
- Stock Arca Swiss Grip
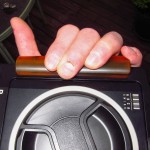
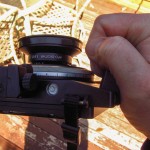
- Attempting to grip a Arca Swiss rm3di camera
One of the more unique aspects of the Arca rm3di camera are the orange/yellow horizontal and vertical grips. These grips are made from a smooth plastic material that seems very durable. However the grip for the vertical extension has one rather minor issue, clearance for fingers around the grip. Arca does not allow for any extra height and the stock grip fits flush to the camera body. Also Arca does not allow for a left side grip. This to me is a huge oversight in the design since you can only grip the camera/lens and digital back on the right side. If you are right handed, you have to dedicate your control hand to move the camera around, similar to how a DSLR works. In my workflow, I would like to be able to hold the Arca with my left hand, which would allow me to make easier adjustments, like for tilt, shift, aperture, shutter speed and focus.
The larger issue however is that you don’t have a solid and secure grip when using the stock vertical grip. I have a large hand, but even with a smaller had, there is not enough height to get any purchase on the grip. When you consider the fact that you are holding a camera, lens and a digital back with a value of over 30K, you want to be sure when you grasp the vertical handle that you have a solid purchase. Since the handles designed by Arca don’t have finger indentations, you are looking for the ability to wrap your fingers around the handle and dig into something solid. After I worked with my rm3di for a few months, I realized I needed something more, and I reached out to Rod Klukas, the U.S Arca Rep. Rod informed me that Arca made a “grip extention” and I ordered one immediately.
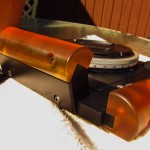
- Close up of grip extension for Arca rm3di
- Arca rm3di grip extension mounted to camera
The Arca rm3di grip extension made from one piece of material. It is concave on the inside which will allow the user to get a very secure grip on the handle. To install it one simply unscrews the current handle and places the grip extension in the same place. The holes line up perfectly and you use the new screws that are included with the grip extension. Then it’s simple process to screw back on the stock Arca grip. Arca has designed a very secure solution here. The grip is angled outward and presses right up against the back of the camera. The fact that it’s angled outwards gets the grip away from the mounted lens and thus your fingers will not be hitting the lens or shutter.
- View looking directly down on the Arca rm3di showing how secure the grip is
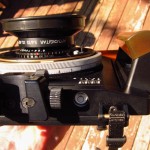
- Arca rm3di with grip installed showing outward angle
- Arca rm3di with grip extension mounted view from back of camera
Once it’s mounted, make sure to place the included allen wrench somewhere secure. I just keep mine with the camera body in the case I use. I have had my grip installed now for over a year and I have never had anything come lose. When I installed it I put just a bit of blue thread locker on my threads. The grip extension gives me total confidence when I pick up the rm3di with a Phase One digital back installed. I have carried this camera/digital back combination over pretty rough terrain and in streams with no concerns at all. My only issue is that Arca just don’t include the grip extension with the base price of the camera. The additional cost of the grip extension is approximately $385.00 and you may have to wait a while to get one. I ordered mine from Rod Klukas directly.
Here is a link to Rod’s website: www.Rodklukas.com
03/14/13 Review of the Breathing Color Stretch Relief Pliers
- At March 14, 2013
- By paul
- In Articles/Reviews, Printing & Framing
 0
0
04/24/13 I have added some new information to this article in regards to working with the stretch relief pliers and 2″ stretcher bars you can read more about it here:
When working with inkjet canvas, by far one of the most time consuming aspects of the workflow is the process of stretching the canvas. Inkjet canvas is a much more delicate product and requires careful stretching or issues like corner rubbing or tearing/straining of the weave will ruin a finished canvas print. Rework which involves staple removal can ultimately damage an inkjet canvas enough that it has to be reprinted.
For stretching there are two basic methods that I am familiar with, hand stretching with a pair of canvas pliers (most often a pair of Fletcher style) or the use of a stretching machine. Machines take up a lot of space, are expensive and require a fairly large canvas volume to justify their cost. However they do a great job and once you have a workflow down can produce a very even and tight stretch. Pliers on the other hand are tedious and hard on the hands, as most require a constant pressure while stapling. They don’t have a large width so a lot of time is wasted in just working the canvas. Here is an example of such a pair of canvas pliers.
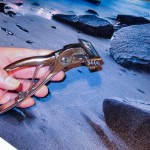
- View of Fletcher Pliers No 2
- View of Fletcher Pliers No 1
Canvas pliers like these don’t begin to share the expense of a stretching machine but only grab a small amount of canvas and are mostly designed to be used on the non-inkjet canvas. They also require a workflow where you are constantly working around the canvas in a circle in an attempt at keeping even tension while stretching. This style of plier is also really meant to be used with a wider stretcher bar. The 1 ½ inch style bars that are used for most inkjet canvas stretching will not allow this style of plier any purchase as they need to find a fulcrum point to gain leverage on the canvas. The only way in the past to gain this advantage on this type of stretcher bar was with the use of a stretching machine, however with the introduction of the Stretch Relief pliers by Breathing Color, the game has changed dramatically.
- Breathing Color Stretch Relief Pliers
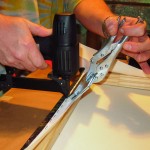
- Stretch Relief Pliers in action
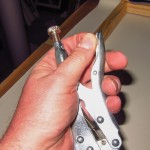
- Stretch Relief Plliers adjustable tension screw
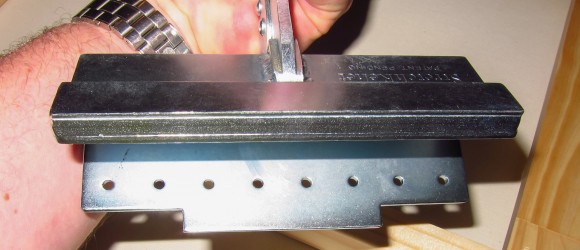
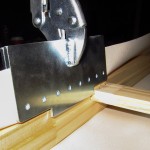
These pliers are a combination of a vise grip style of pliers which offers the ability to let the user lock the jaws of the pliers in place on the canvas, thus freeing up the need to constantly force the pliers closed. While making the stretch, the pliers offer adjustable tension with a screw at the back of the pliers. Stretch relief pliers jaws offer a 4.5 inch surface for the canvas. The flat part of the pliers have a set of teeth which will aid in holding the canvas during the stretch and not allow for any slack. The pliers have notches in the back to allow the user to work right over a center support bar and get in right to the edge of the corners. Now for the first time with a set of pliers you have the ability to get a grip right up to the corner with 100% control over the tension which aids tremendously in creating a good finished look to your canvas.
To me, the real key to the design is the notched back of the pliers which will grab at the back of a stretcher bar and create a perfect fulcrum point. The fulcrum allows you to draw back on the canvas with no need for any extra force but two fingers and hold that tension in place while you staple the canvas. You are applying tension to over 4.5 inches of canvas at one time which is over 2.5 times a normal set of pliers. I have found that the best set of stretcher bars for the stretch relief pliers are the 1 ½ inch style. Here is a picture of this style of stretcher bar with canvas wrapped over the bar with a pair of stretch relief pliers.
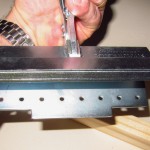
- Picture of Stretch Relief Pliers showing the back notches and holes for teeth
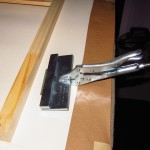
- Stretch Relief Pliers locked down on stretcher bar prepared for stapling
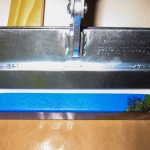
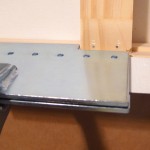
- Stretch relief pliers up against a center support showing how the notches work
- Stretch relief pliers engaged close to center bar showing 100% coverage
This style of bar is notched on the backside. The notches are meant for the placement of center and corner supports but the stretch relief pliers will utilize the notch and fit up against the back of the bar. In the middle picture shown above you can see the cut out notches on the back side of the pliers. The third picture shows the pliers up against a center support bar. The recommendation is to allow for 1 ¼ inch of free canvas but I have made great stretches with 1”. Much less than this and the teeth will not bite the canvas and this will allow for slippage.
I feel that the main strength of the stretch relief design is that they act similar to the way a stretching machine works. This is because they allow you to finish one side completely then flip the canvas over and finish the opposite side. Usually I will start with the long side first. The older style pliers are designed to work from the center of the canvas out, and you rotate the canvas each time after you staple. For example starting in the middle on the long side, flip to the opposite side staple there and then do the short side. Repeating the process till you have neared the corners.
I prefer to start my stretch on one long side with 4 temporary staples. I then move to the opposite side, and use the stretch relief pliers to gain purchase and tension. It’s important to standardize on one style of bar and allow a standard amount of extra canvas on all your prints. For example I use a Larson 6011 bar, 1 ½ inch, and on all my prints I add 2 inches of extra printed material. Thus I have the 1 ½ inch width of the stretcher bar covered and have ½ inch printed material to wrap around the back. This allows me to line up the print on the stretcher bar as I know that when I am centered on the bar, I will have ½ inch of white canvas and ½ of printed material.
Once I am lined up, I will lay in the first series of staples. I then move to the opposite side and pull my temp staples and again use the stretch relief pliers to pull the canvas tight and finish that set. Now you have approximately 4.5 inches of canvas down on each long side in the center. I quickly move to the short sides and apply one staple to the top of each corner. I feel this helps keep the canvas from getting waves in it during the stretch. Once this is done I complete one long side, then the other long side. This whole process takes about 2/3 less time as trying to do this with a normal set of pliers. You will tend to forget and run out of staples because you are moving along so fast. Remember on the long sides not to staple all the way to the edge as you still have to form a corner. Once the long side as done, simple flip, pick a short side and finish one then the other. I will then quickly examine the face of the canvas to make sure I don’t have any waves. At this point you are basically done with the stretching. The only process left is the cornering/finishing.
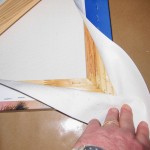
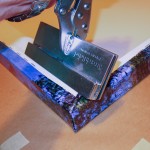
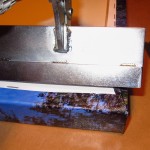
On a corner the notched edges of the Stretch Relief pliers allow you to get right up to the edge of the stretcher bar. Being able to get close like this with the added advantage of the fulcrum allows you to get an even and very tight tension on this key part of the canvas. How one finishes off the corners is up the individual, I prefer to cut out some of the extra material and then tuck the corner over. The Stretch relief pliers will still make a strong enough grip to include this extra material and still provide a tight stretch. This is so important since usually the cornering requires some doubling of the thickness of the canvas. When finished the stretch relief pliers will create an excellent stretch and create a drum tight product.
- 2nd View of Stretch Relief pliers showing how assist in creating an excellent corner
- View of Stretch Relief pliers engaged in finishing a Gallery Wrap Corner
In summary, the stretch relief solution give the user a similar type of control afforded by a stretching machine. This is possible due to the several design features:
- The greater surface of the pliers
- Teeth which bite and hold the canvas
- Piers which allow the user to free up the hand and don’t need as much constant tension
- The cut out notches on the back edges which allow the ability to get close to opposing edges
- The notch in the center of the back which creates a fulcrum and provides excellent tension
- A screw on the back of the pliers that allows the user to adjust the totally amount of tension
With these pliers you have an equaled amount of control and tension during the stretching process. You are able to do this with just the control of two fingers due to the fulcrum created by the pliers. The time savings and actual relief to your hands from not having to grip and hold the pliers/canvas in place will justify the extra cost of the stretch relief pliers. My only reservation is that the pliers only come with a 6 month warranty. Construction and welds all seems to be very well done and hopefully his warranty period can be extended to 1 year. I feel that by using these pliers you will get a much more professional product which is evenly stretched and better looking than a stretch from conventional 2” pliers. Over the years I tended to lead with paper/matted/framed prints on anything larger than 20” x 30”, but with the advent of the stretch relief pliers I am now much more at ease with larger canvas projects. I will get more work done, which is right the first time and needs no re-tensioning later on or rework.
You can learn more about the stretch relief pliers here: www.breathingcolor.com
Equipment in Use–Nikon MB-D12 Grip for D800
- At July 20, 2012
- By paul
- In Articles/Reviews, Nikon Gear
 0
0
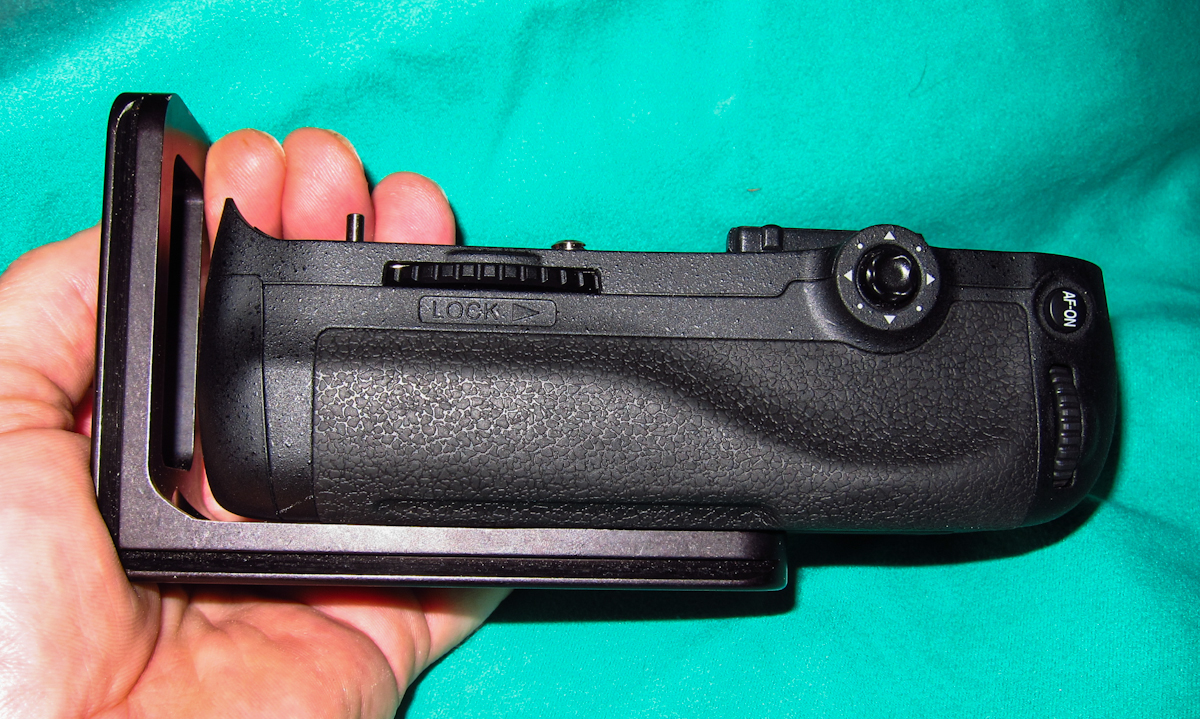
- Nikon MD-B12 installed on the Bottom of a NIkon D800
- Nikon MD-B12 grip with L bracket installed
- A breakout of the battery holders for the Nikon MD-B12
Click on any of the thumbnails for a larger view of the image.
Since I purchased my Nikon D800, I have added the new Nikon MB-D12 battery grip. I am planning to write a full review of the grip in use with the D800, but this is a quick view of the grip. The pictures show the grip installed on a Nikon D800, the various battery holders that come with the grip and the grip and an L bracket. Overall the grip is nice addition to the D800 and with it installed you gain quite a bit of extra run time by using either another Nikon battery or a series of 8 AA batteries. It’s a nice feature to be able to use AA batteries as if you are in the field/remote parts of the United States, you can almost always find somewhere to purchase AA batteries. Also if you used the energizer AA lithium AA batteries, you may be able to last for 3 to 4 days without having to change out the cells.
There now appear to be several clones available for this product costing hundreds of dollars less. You can find both of them along with the NIkon MB-D12 on Amazon.com The early reviews are that both the clone grips seem to have similar build quality to the Nikon MB-D12.
From my daily usage I have found that the MB-D12 adds a good deal of heft to the entire D800 camera when carried. The grip is rather wide at the bottom, considerable wider than the build in grip in the higher end Nikon D4. When you add a L bracket like the one from Really Right Stuff, the camera, Grip, AA batteries, and L bracket with a Nikon 14-24 lens mounted are close to around 5 lb. total weight. I have not yet tried the standard Nikon Lithium battery in the grip yet, but it will have a bit less weight than 8 AA Ni-Mh cells. I was able to use a Nikon D4 for a few days and the weight/heft of the D4 is much more manageable however at a much higher price point with considerably less pixels. The run time with both the internal Nikon Lithium battery and the batteries in the grip allows for a tremendous amount of shots and review of those shots. It also makes the use of live view in the field a bit more manageable since with only one battery installed live view seems to drain the camera pretty quickly.

