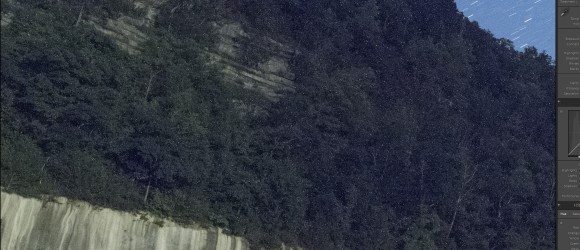
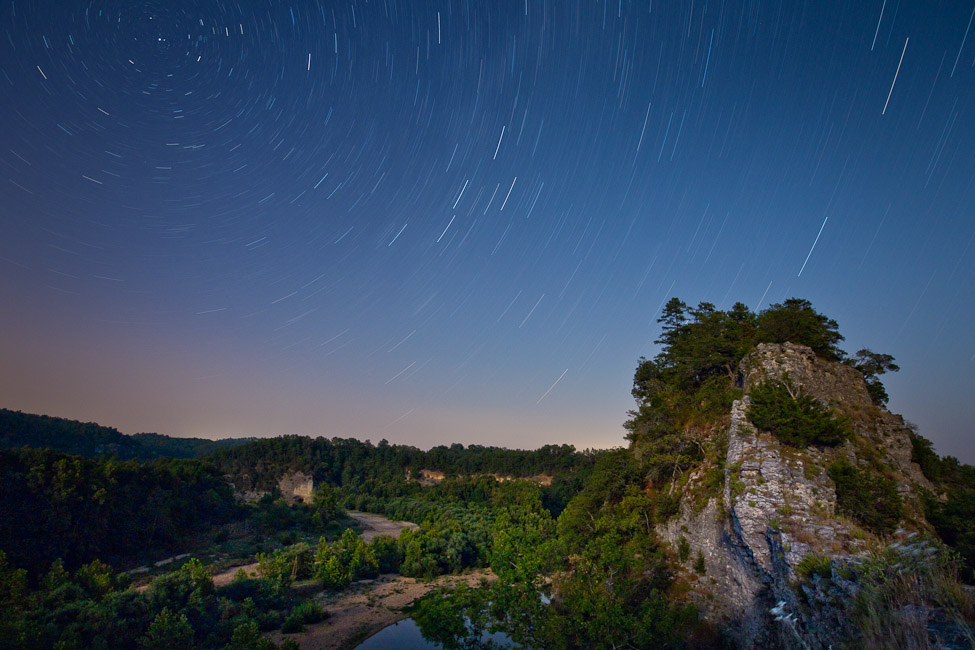
Pentax K1 White Dot Issue on Longer Exposures–Same as the other cameras using the Sony 36MP chip
With the introduction of the full frame Pentax K1, Ricoh Imaging appears to have made a giant stride forwards with technology, however it appears that they overlooked one critical issue with the 36MP Sony sensor–White Dots with longer exposures.
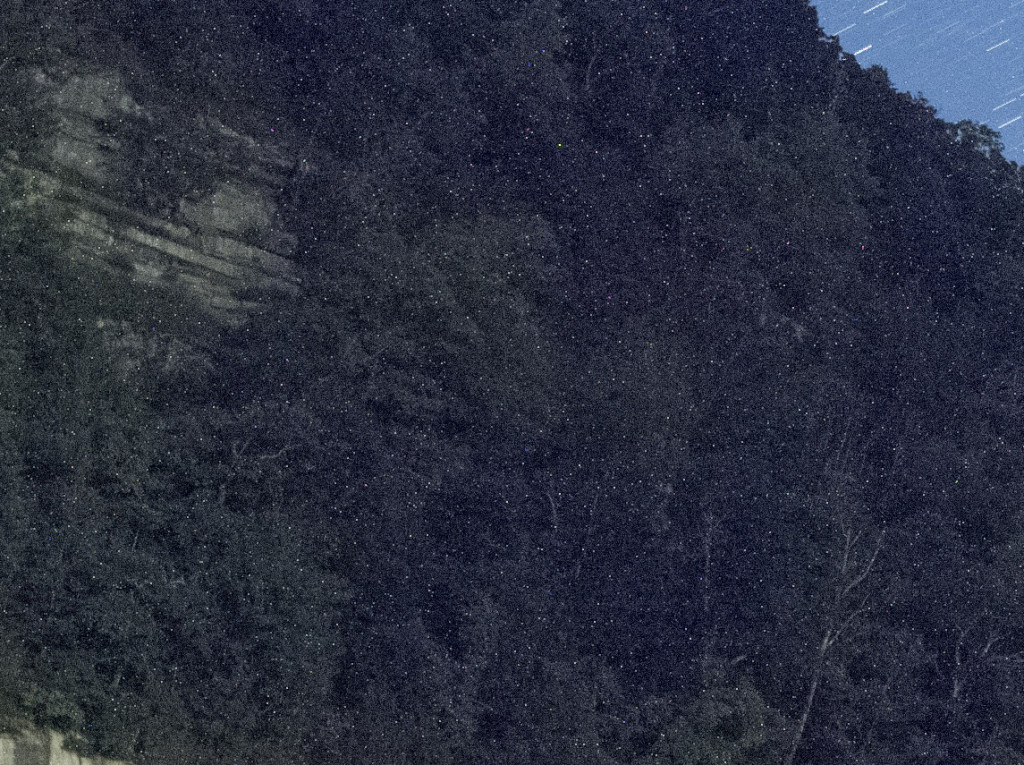
I have worked with the K1 now for several months and have found it to be an excellent platform for most photography, however one of my main reasons for the investment in the K1 was astro-photography. Night sky work, not telescope work. Photography of both the MilkyWay and star trails. Both of these forms of photography require long exposures and in most cases multiple stacked exposures for the best results. What you quickly find, that when used in this fashion, the K1 creates thousands to millions of fine white dots, as shown in the photo above. These are not traditional noise, as we know it, as that tends show up as stuck pixel (red, green and blue) or extra grain in the shot. This exact same problem was visible in early shots taken with the Nikon D810, and Nikon quickly recalled all the early shipping D810’s and made some type of a firmware and hardware fix. It was not a standard firmware fix, as the camera had to be sent to a Nikon service center for the fix. But it worked!!. The D800e also had the same problem, but Nikon did not fix these with a recall, they just fixed the problem on later shipping cameras. I know this because I owned 2 D800e’s and the first camera had the issue terribly and the 2nd camera was clean. My D810 also showed the problem immediately but was much better after the Nikon fix.
Read more about the Nikon recall here–Nikon Recall for White Dots.
Read more about the Nikon D800e Problem here–Nikon D800e White Dots.
I have noticed this issue in all my long exposures with the K1, from 30 seconds to 2.5 minutes, at ISO ranges from 320 to 5000. The issue becomes worse over time so it’s fair to state that it’s a temperature related issue from the sensor, just like Nikon noted. How does this issue effect your photography? Read more below.
Photographer’s Notes:
- The main concern here is that the millions of white dots are not easily removed in post. Currently Adobe Lightroom does nothing to remove them and Phase One’s Capture One with the single pixel noise reduction slider will take most of them out, albeit at a possible loss of details.
- Where will you see this issue? With any long exposure of 30 seconds or more and if the outdoor temperature is above 85 degrees F, expect the problem to be very severe.
- Will you see this issue with Astrotracer photography? Yes, with the Astrotracer feature of the camera enabled, you will see the white dots unless you turn on the “Long exposure noise reduction” feature in the camera
- OK, if I can remove them with the “Long Exposure Noise Reduction” what is the big deal” Good question and I will answer this in more details later on, but the main reason is that LENR (long exposure noise reduction) requires the camera to take another exposure the same length as the previous exposure so you are wasting battery life, shooting time, and heating the sensor up.
- Why do the White dots bother Stacking work? The white dots remain fixed throughout the exposures, however over time expect to gain a few thousands more. If you are stacking and want to remove gaps created by stacking, the white dots become very problematic.
Read more about why stacking for star trails is important here: Stacking for better night photography.
Why the White Dots are a concern for Night Photography:
There are many reason, but for sure 2 come to mind immediately.
If you stack for star trails. This allows you to use partial moonlight to illuminate the foreground of your subject which gives you a much more natural look to your image. Stacking requires a intervalometer to be used as you need to have a timer and control over the interval, which in this case is 1. The fact that the intervalometer will close the shutter between each stack, means you will have a slight gap in your star trails. This is easily fixed with the use of software that will slightly rotate your final image to cover up the gaps. Examples of this type of software are “Star Tracer” If you rotate the images with the white dots, they become dotted lines though out the entire file and contrast sharply with you star trails, in effect ruining the image. There is no easy way to remove all the millions of dotted lines either.
So this says you have to work up the images in a raw converter that will removed the dots to a good degree and so far the only software I have found that will do this is Capture One, by Phase One. You are eliminated from any Adobe product like ACR or Lightroom as both just seem to magnify the dots. Also any image work, where you might add clarity to help brighten the stars will also brighten the white dots.
If you use the Pentax LENR (long exposure noise reduction) most of the white dots are taken out, but this brings up some more issues.
The LENR takes an exposure that is just as long as the original, so if you just complete a 2 minute exposure, the camera will lock up while it takes a 2nd matching dark frame. You cannot make any other adjustments to the camera or view anything during this time frame. The resulting dark frame create a much larger gap in your star trails photography, and Star Tracer can remove them, but at a huge price since your image will heavily blurred by the rotation to fix this large a gap. Sure you cut back on the time from 2 minutes to 30 seconds, but then you more than likely will have to increase your ISO to a point that the increase in will degrade your details in the foreground portion of your image. But that still may be something I try with the K1 and Star Tracer to see if I can get an acceptable solution.
LENR is also very wasteful. Thing about it, you are just using up both battery life and possibly heating up your sensor due to extra processing going on. The use of LENR, also precludes using a intervalometer as it will throw off your sequence. If you are set to shoot at an interval of 1 for 2 minutes etc. then when the dark frame kicks in it will start to run into your actual next exposure time, and shorten it. This also adds up over time and creates unbalanced exposures.
If you are using Pentax Astrotracer for night shots of the Milky Way, odds are you should go ahead and enable LENR, as the max time you are going to kept out of the camera is 5 minutes and the difference in the images is most impressive. This also precludes you using Pixel shift for night work something I was curious about since pixel shift seems to give better results at higher ISOs with the K1. But if you are working traditional star trails, then LENR is not a great idea and thus you have to consider using Capture One for your raw. Make another note, do not capture as jpg as even Capture One won’t remove the white dots from jpgs, they are fixed forever in the image.
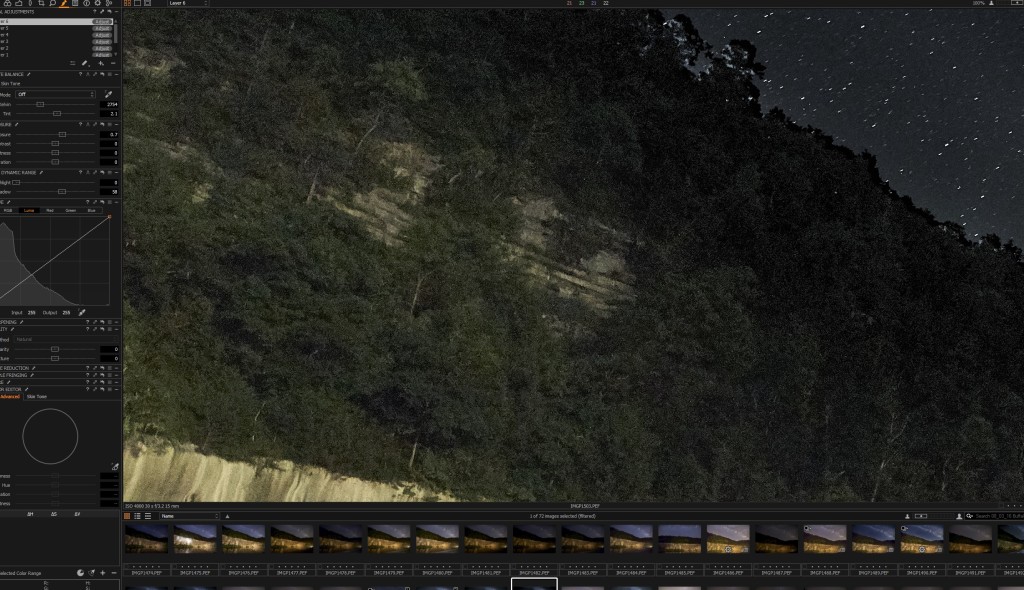
Here is an example from the same crop shown at the top of this article that was worked in Capture One. Click on the file to view at 100% and you can see that Phase One has done a very good job here on the raw conversion for the K1, as most the white dots are removed.
The Arca Swiss DSLR-2–A perfect companion to the Sony A7r (Part 1-camera review)
Authors note: Since this review was written, Arca has started to ship the new Universalis. This is a smaller and more compact version of the DSLR2, which will have some new features and functions, however the basic operations of the Universalis will mirror the DSLR2.
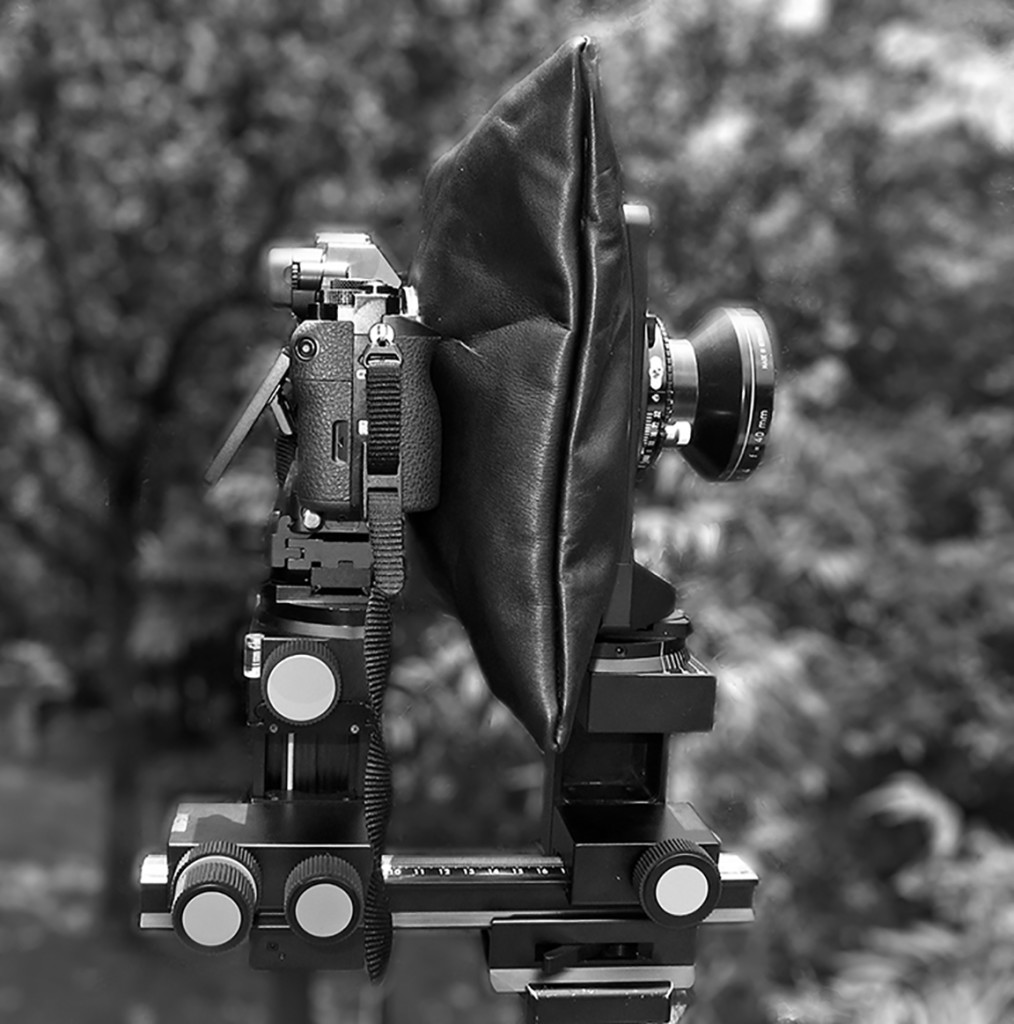
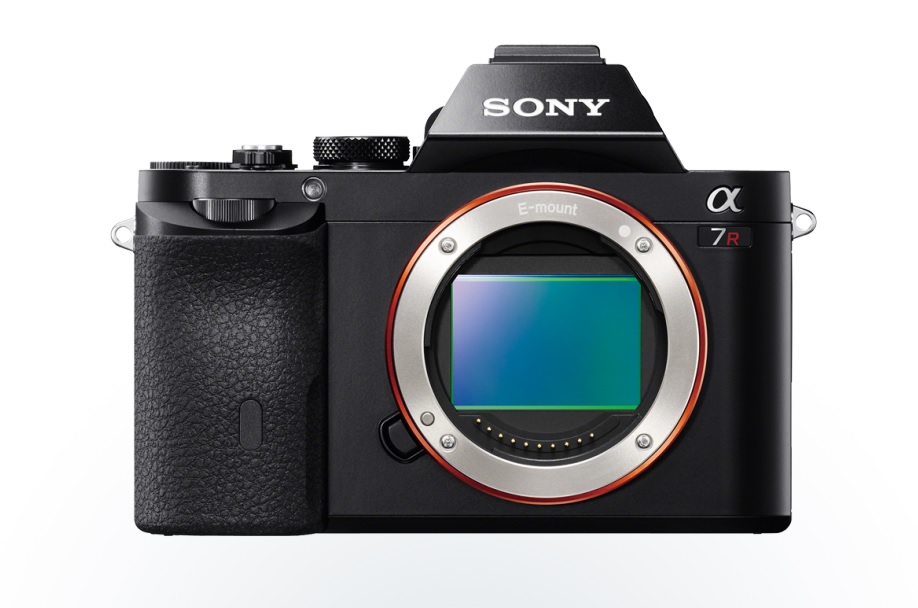
For the landscape photographer, one camera in the mirror-less category stands out by far more than the rest, the Sony A7r. This camera, with its 36MP sensor and excellent dynamic range offers a huge range of photographic options. However there is one area where the Sony A7r is weak, the range of lenses in the FE (full frame mount) that Sony offers for it. In fact it seems that most photographers using the A7r, bypass the Sony lenses and work with non-Sony lenses and adapters. With this in mind, I recently was able to use the A7r with a modern in-line view camera, the Arca M2 configured to work with DSLR’s. In this configuration is is called the Arca DSLR2. With this setup, the photographer is given a new level of photographic capability with the use of Rodenstock and Schneider Digital lenses and any other lens with a manual aperture ring that will accept the Arca R mount.
With the Arca DSLR2/Sony A7r combination the photographer has a huge advantage as they now can take advantage of traditional view camera movements. Why would this be something a landscape photographer would be interested in? Since the Sony lenses available for the A7r (4 at this writing) is very limited. Secondly, no Sony lenses have ever been produced in a Tilt Shift design, like the Canon TS-E or Nikon PC-E lenses. With the DSLR2 you now have the ability to use Rodenstock/Schneider lenses, which are the pinnacle of lens design, both wide angle and telephoto. On top of this with the DSLR2, you have the ability to add movements to any lens. This will allow you so much more control over the depth of field of the subject. With this combination you now have the ability to use one of the most powerful 35mm digital sensors so far developed, the Sony 36MP CMOS, with the best optics currently available. In the past, these lenses were only an option with higher medium format digital cameras, or film/view camera combinations.
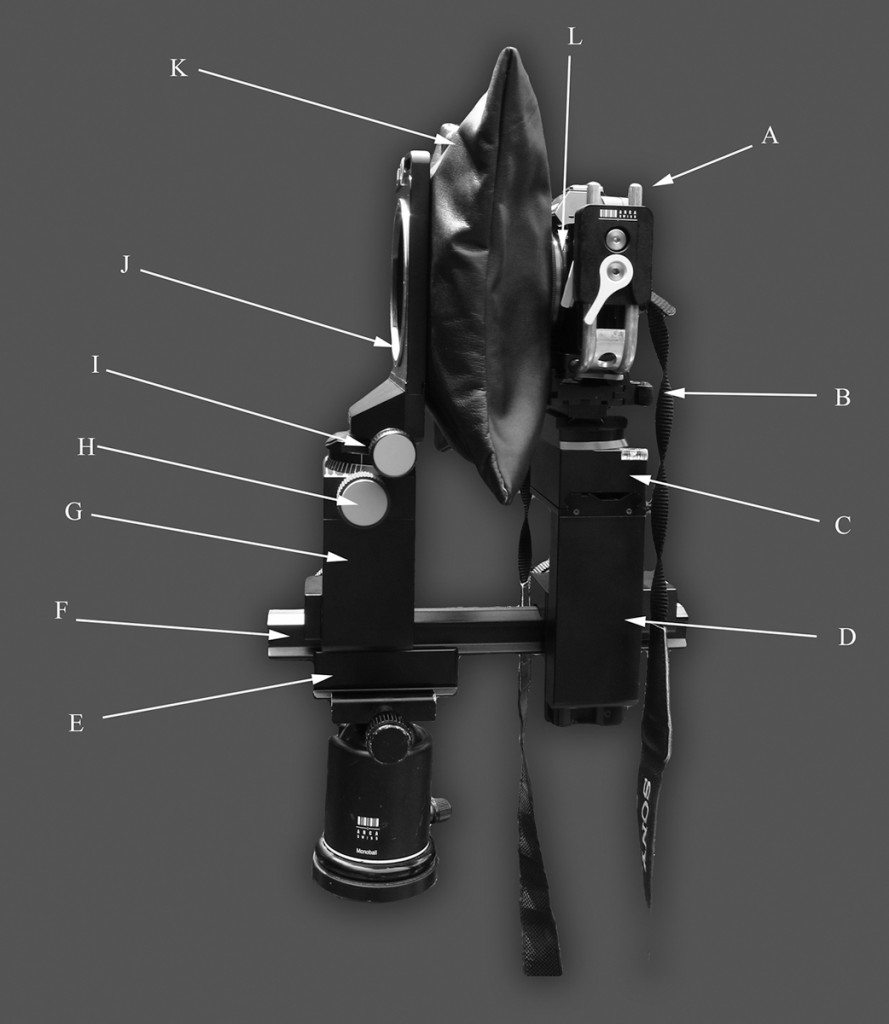
Major Components of the Arca Swiss DSLR-2
A. Acra L Bracket with Sony A7r G. Front Standard with Swing and Tilt Control
B. Arca Lever operated Quick Release H. Swing Control Knob
C. Shift Control I. Tilt Control Knob
D. Rear Standard with Focus Control and Lock J. Arca R Bayonet Mount
E. Arca Connecting Bracket K. Leather Bellows
F. Arca Main Rail L. Arca Magnetic Bellows mount to Sony E mount
The Arca M2 has been around for many years, but in the past most of the use of this excellent platform has been with film and medium format digital backs. Now with some slight improvements, the photographer can use all of the advantages of an in-line camera on the A7r:
- Tilt
- Shift
- Swing
- Rise/Fall
- Precise focus control
In addition, these important movements can be used with various digital lenses:
- Rodenstock: 32mm HR-W, 40mm HR-W, 70mm HR, 90mm HR 105mm HR
- Schneider: 35mm SK, 43mm SK, 47mm, 60mm SK, 120mm
This is all done with the implementation of the Arca R mount for the various lenses, and a special bellows for the A7r that uses a magnetic attachment for the bellows to the e-mount of the A7r.
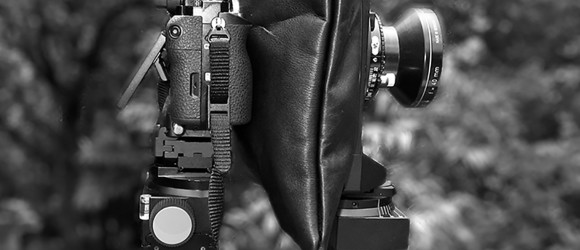
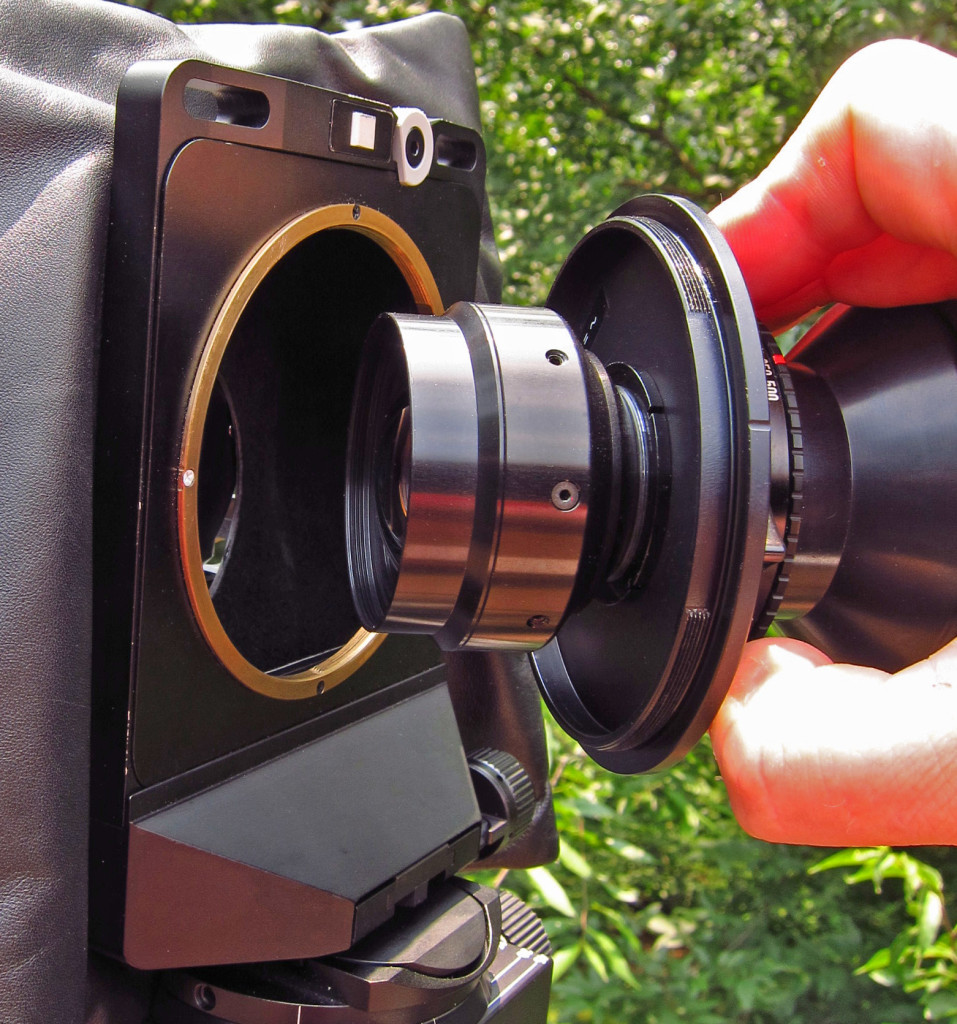
(In this photo, you can see the brass mounting ring where the R mount receptor is, attached to the front of the bellows. The large circular threaded mounted (black) that is on the Rodenstock lens clearly shows how the threads on the R mount. Notice in this picture, a white dot on the brass ring and a slight indentation on the lens mount, these are to assist in lining up the lens when mounting.)
First let’s take a look at the Arca DSLR2 and the various components.
The Arca DSLR2 consists of the following basic parts:
- Bottom rail and Arca lever locked attachment, with traditional Arca foot
- Front standard with swing and tilt control
- Rear standard with rise/fall and shift control and focus control–both gross and fine
- Bellows with magnetic mount
- Arca e-mount magnetic bellows attachment
- L-bracket for A7r
- R mount bayonet attachment for lens
Bottom rail and Arca mount:
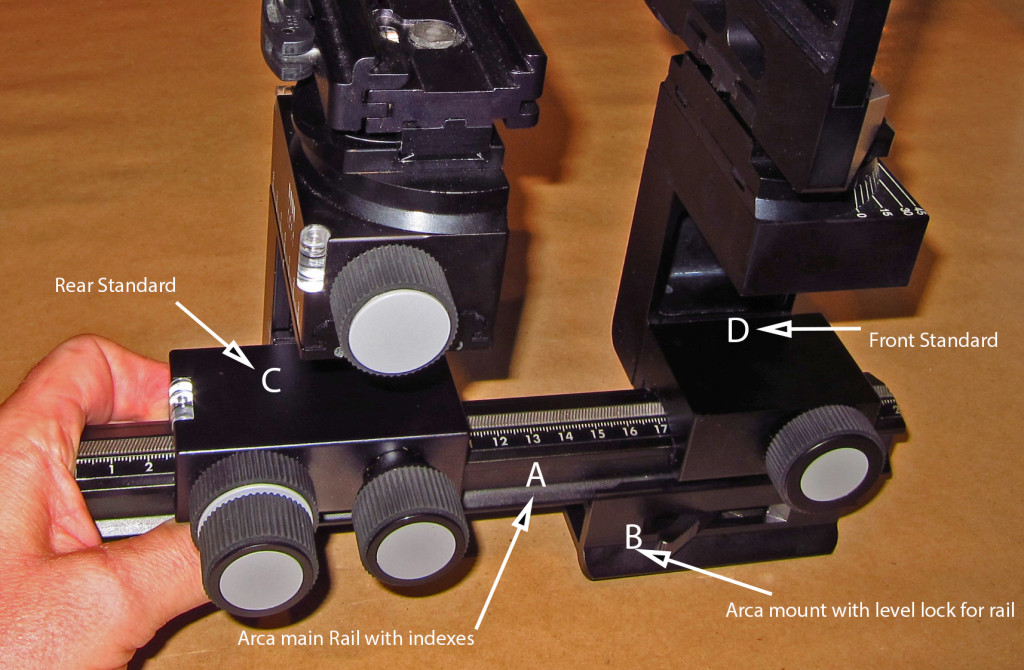
This portion of the DSLR2 is what everything else will be attached to. The rail is geared and allows movement of the front and rear standard forwards or backwards to obtain precise focus. You can also add a 2nd rail which will double the length which is good for macro or table top photography. There is a bracket on the bottom of the rail that is placed in any tripod with an Arca compatible head. In this photograph at the beginning of this review, you can see the top of an Arca B1 tripod head and how the entire DSLR2 is placed into the tripod. The Arca attachment bracket is lever operated to allow for quick removal from the rail when necessary.
Front Standard with swing and tilt control:
The front standard holds the R lens mount, the front part of the bellows and has the tilt and swing controls. The lens will mount with a simple twist into the R mount and then is locked into place.
[new_royalslider id=”2″]
(To view the images in full screen, hit the double arrows towards the upper right corner)
You can see on the right side of the front standard, two adjustment knobs, the top knob is for tilt the bottom knob is for swing. A lens can be tilted as much as 25 degrees, up or down and the tilt amount is shown in a clear white numeral scale. The amount of tilt is very precise as the tilt is geared. The swing can be as much as 45 degrees to right or left and is also controlled by a geared process that allows for very small adjustments. Here is a close of the front standard showing the tilt and swing controls.
[new_royalslider id=”3″]
(To view the images in full screen, hit the double arrows towards the upper right corner)
Rear standard with rise/fall and shift control and focus-both gross and fine:
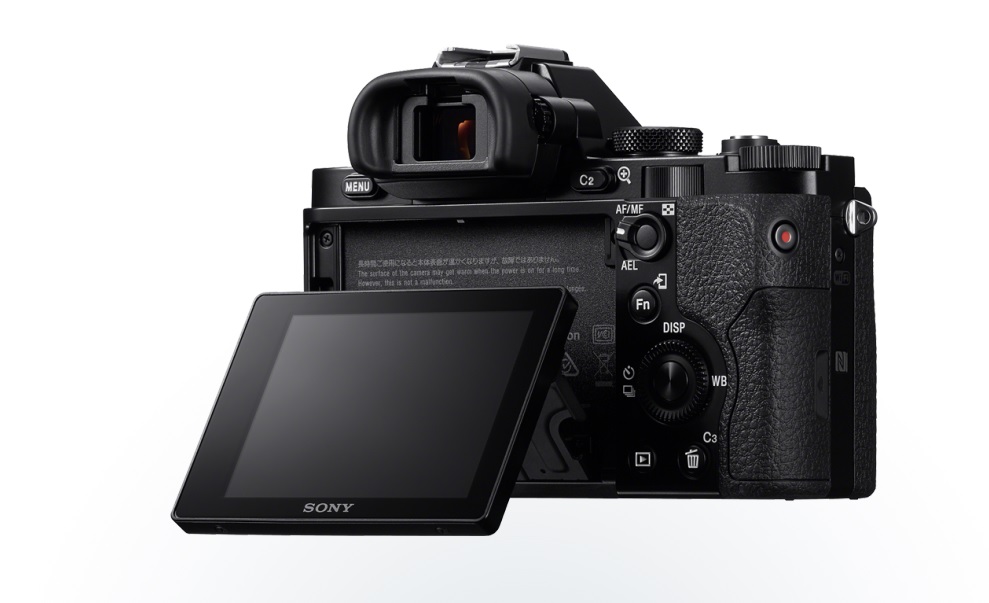
This part of the Arca DSLR2 is where a lot of control occurs, at least with my style of photography. The rear standard has a push pressure attachment spot where you will insert the L-bracket with the A7r mounted. Once the camera is centered (more on this in a bit) you now have control over focus, tilt and rise and fall. The focus control is in two knobs, a gross movement and fine movement. You focus the camera simply by using the Live View screen and then moving the camera forwards/backwards until the subject comes into sharp focus. With the Sony A7r this is very easy since the camera has both an excellent LCD and EVF both with focus peaking. I was able to obtain sharp focus with each lens I used.
[new_royalslider id=”4″]
(To view the images in full screen, hit the double arrows towards the upper right corner)
From the rear you can shift the camera body as much as 30mm right or left. I found that with the A7r and the Arca DSLR2, that I was able to obtain useful images with as much as 18mm of left and right shift. You can also combine that with rise and fall and create a huge 9 part image that would be well over 150mp in overall size. The maximum rise and fall will be limited by how much of the rise is needed to center the camera, this then becomes your new starting zero. Since the Arca DSLR2 was designed around full size 35mm DSLR bodes, when you use the Sony A7r, you need to adjust the height upwards to account for the much smaller size of the Sony A7r. One facet of this design is that Arca may want to create a more specialized mount for the A7r which will allow you to start at zero on the rise fall scale. However due to the large amount of rise and fall that is available, over 40mm total there is plenty left to shoot with.
Bellows with Magnetic mount
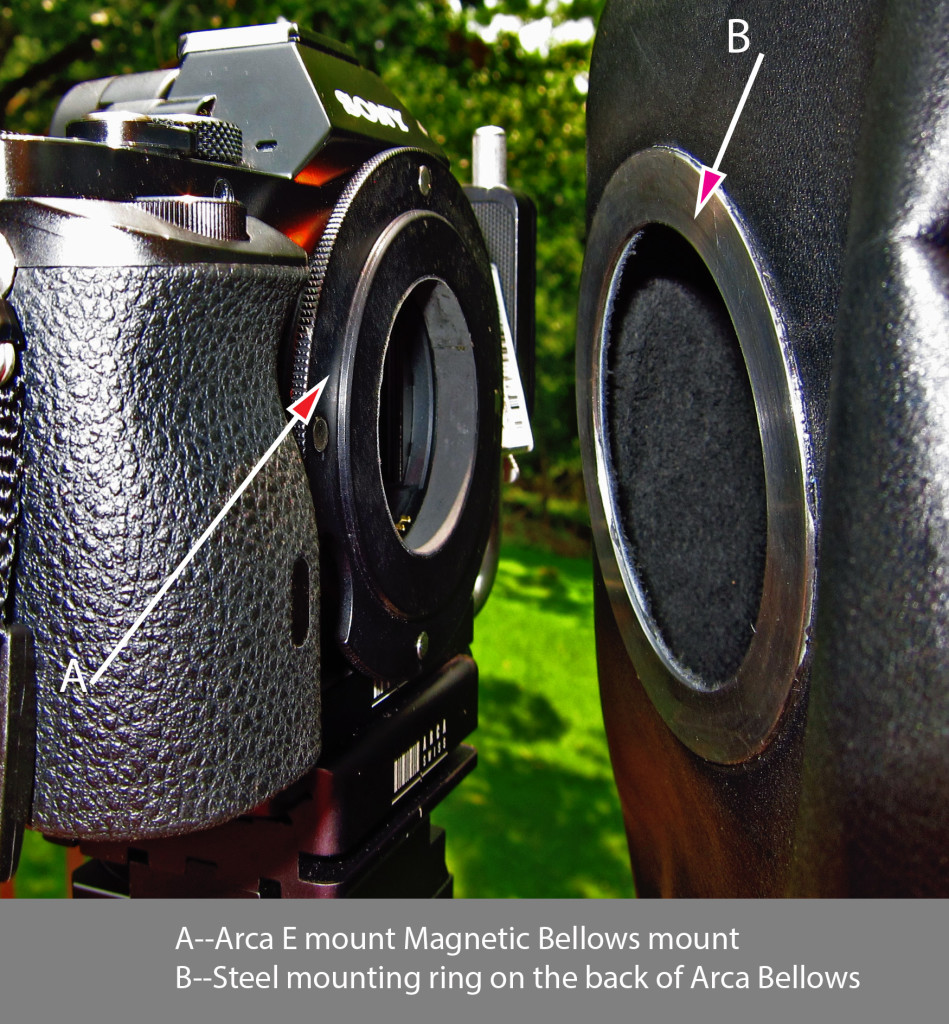
Arca provides a black leather bellows to cover the space between the Sony e-mount lens opening and the rear element of the lens in use. This bellows is permanently attached to the rear of the R-mount on the front and has a round magnetic attachment which fits very snugly to the e–mount bellows ring. The bellows has enough give to allow a huge amount of forward/rearward focus movement and front swing and tilt. I had no light leaks with the bellows when attached with the magnetic mount. The magnetic mount allows for a very quick snap on an off of the bellows when either changing the lens or moving the camera from a horizontal to vertical position.
Arca e-mount magnetic bellows attachment
[new_royalslider id=”5″]
(To view the images in full screen, hit the double arrows towards the upper right corner)
Simply stated, this is an e-mount ring. It quickly fits into the lens mount of the A7r and the front side is smooth and allows for the attachment of the rear of the bellows. The ring is anodized in a matte black color to keep reflections to zero and is very effective.
L-bracket for A7r
With the Arca DSLR2 configuration, Arca includes one of the adjustable L brackets to mount to the A7r. This bracket is very sturdy, light weight and allows for a very easy adjustment of the A7r during the centering process. It also allows for a very quick 90 degree rotation of the A7r from horizontal to the vertical orientation. In the field, I found it best to just leave the L bracket attached to the A7r. The L bracket attaches to the A7r via the tripod attachment threads in the base of the A7r camera body.
R mount bayonet attachment for lens
The standard for all Arca lenses is the R mount. This is circular mount that is threaded on both sides, mount and lens mount. The threading is very similar to how a deep sea diving helmet is threaded, so only a very short twist and the lens is securely mounted. The mount is brass and should last forever. The teeth are very closely spaced so you need to be sure not to cross thread the lens when mounting. With the Arca DSLR2, the photographer can mount pretty much any lens that will accept the R mount plate, which should include any of the Rodenstock/Schneider lenses available, not just the more recent digital lenses from these companies. Note, that the Rodenstock 23mm and 28mm will fit, but you will not be able to obtain infinity focus as the rear element can not be moved close enough to the Sony sensor. Each of these lenses will have a Copol 0 or 1 shutter so you need to remember to set the lever on the shutter to open the lens wide open as you will be using the shutter of the A7r. However the aperture will still be set on the Copol 0 or 1 shutter.
The widest lens I was able to use on the Arca DSLR2 was the Schneider 35XL. I have been told by Arca that the Rodenstock 32 HR-W will also work, but I did not have one of these lenses to test with. On the longer side, really any telephoto lens should work with no problems, you will just have to make the necessary extensions on the rail of the front standard.
Setup of the DSLR2 with the A7r
Once you have assembled the Arca DSLR2 it can be carried in one piece. It’s a bit bulky but I found it fit in about the same amount of space as my Arca rm3di. The DSLR2 is about 4.5lbs with the A7r mounted and I was surprised that it weighed about the same as my Arca rm3di with a digital back and lens mounted. I carried the DSLR2 without a lens mounted in the field since it’s such a simple operation to mount the lens in the bayonet when you reach your shooting location. So from my pack, I had the front and read standards mounted and the front lens mount/with bellows.
Setup is very straight forward. Simply mount the rail to your tripod head with the foot. Remember the foot is released via a lever so you can slide it to the optimum location before you mount it to the tripod head. Your tripod head needs an Arca style mount, which is very common in the industry.
Once the DSLR2 is secure in your tripod head, mount your lens. Be careful with this step so you don’t cross thread the R mount. Once this is done, all this is left is to center the rear lens element on your A7r sensor.
This process takes a bit time as each lens used will be a bit different. The goal is to line up your camera sensor with the rear element of the lens in use so that the rear element is centered on the sensor as best as possible. This is done all by visual sighting with the rear cover of the bellows pulled back over the rear element of the lens. Take your time here since if you are off left/right or up/down then you image will not be on the center of the sensor to start so if you apply movements they will be off also. Once you feel you have the rear element lined up, take the bellows back over the rear element and attach it to the Arca magnetic e-mount ring, and you are ready to shoot.
Impressions from shooting with the Arca DSLR2 and Sony A7r
This is very impressive setup. I use an Arca rm3di camera with a Phase One IQ digital back in a lot of landscape photography. I moved quickly from a 645 style DSLR camera body to the rm3di, mainly because of the overall lack of optical quality in the wide angle medium format lenses currently available. The rm3di is only an enabler, but it gives me the ability use much better wide angle and normal lenses on my Phase One digital back. I prefer to use movements in most of my photographs to enable a greater DOF and I tend to use wide angle lenses in my photography. By allowing for tilt and shift, I can gain a greater focus perspective on my subject and create panorama style photographs with great precision. However there are many limitations to this setup.
With the A7r, and the DSLR2, I was able to use a “real” live view screen with focus peaking. With the addition of the ability to zoom into 100% to check focus, there was never any doubt that my subject was in perfect focus. The fact that I was no longer limited to the base ISO of my camera (as is the case with a CCD based MF back) and instead roam from ISO 100 to 1600 with impunity was a huge benefit to me. I could set an aperture on my lens then with live view on the A7r, focus on my subject and thus eliminate any issues of focus shift. I no longer needed a scale and distance meter to gauge my focus, I could see it as I was now using a camera with excellent live view.
The camera controls of the A7r, were simple for me, I shot in manual mode and set the camera to accept non-Sony lenses. THIS IS A MUST OR THE CAMERA WILL NOT FIRE. I quickly tried all the various lenses I have and was impressed with the results from all of them. Since these lenses are coming in closer to the sensor, I would recommend still shooting an LCC frame especially if you do any movements. I used Phase One’s Capture One Pro Vr 7 for all the conversions and had no trouble with any of them.
I quickly realized that this solution was a perfect one for my style of photography and found I developed a working rhythm, where I shot everything I needed in the horizontal plane first, then rotated to vertical and shot those series. Once you get used to the process, the setup time is much less then bringing an Arca Rm3di/Digital back into operation. You can carry the entire Arca DSLR2 assembled in your pack if you wish, but I chose to remove the lens and bellows just for precaution. I did leave the A7r mounted to the DSLR2 the whole time, and used the body cap to protect the sensor when the bellows was not mounted to the A7r.
I have long known just how good the A7r sensor is and the amount of dynamic range it’s capable of, but I never considered that I could be using the same lenses I use on my digital back with an A7r. The cost of entry to this system is much less than a Medium format digital solution. The costs would be:
Sony A7r $2,300.00
Arca DSLR2 $4,300.00
VS
Phase One IQ260 $39,999.00
Arca Rm3di $ 5,870.00
You still have to pick up a lens or two, but you have so many options here it’s hard to list them all. It’s very easy to place an R mount on any of these lenses, by simply unscrewing the rear element. Most of the lenses will come with a Copol Shutter 0 installed already. The cost of the Arca R mount is around 500.00 per lens and each lens would need such a mount. NOTE, any Arca lens already in the R mount works perfectly. If the lens is configured for the rm3di, all that has to be done, is remove the R mount from the various Arca lens tubes which are used for the rm3di. There is no issue with offsets or other critical adjustments as your focus is determined by the simple process of moving the camera body forwards or backwards. The lens stays in one location.
After I used the DSLR2, I quickly realized that if this solution had been available when I bought into medium format digital, I would have gone the other way, and purchased the Sony A7r and a DSLR2. For someone just starting out with large format photography, and wanting to learn about movements and how they affect photography, the Arca DSLR2/A7r solution is an excellent place to start.
Lenses I used and feedback on each:
My main goal with each lens was to see just how far I could shift each before color cast became too harsh. I was not as interested in rise and fall for this testing.
- Schneider 35XL apo-digitar with center filter. On center, the 35XL worked very well, but when I attempted to shift, I saw considerable color shifting by 8mm of shift. If I took the lens to 10/12mm of shift, the amount of color saturation loss was too much to recover with a standard LCC in Capture one.
- Rodenstock 40mm HR-W. This lens allows for excellent movements. I found I could get to 16mm of horizontal shift with minimal loss of color and saturation loss. The shots were easily cleaned up in Capture One with the LCC. The 40mm will actually get to around 18mm of shift but on such extreme shifting, many times I felt that the color loss was pretty extreme especially with a blue sky.
- Schneider 60mm XL apo-digitar with center filter. This lens was by far the best all-around performer. Shifts of 15mm were easily obtained and even 20-22mm was useable. The Schneider 60mm was a perfect companion to the A7r.
- Rodenstock 90mm HR sironar-digital. The 90mm Rodenstock gave me the best range in movements, up to 25mm of shift. There was very little color cast even with 25mm shifts. The ability to use Live View to focus made the 90mm a pleasure to use. Even though the 90mm HR give the best range in movements, the focal length is a bit too long for most of my work.
Pros:
- Low cost of entry
- Excellent solution that allows upgrading to Medium format at a later date
- Allows the use of the best optics available to photography to date, Schneider/Rodenstock digital lenses
- Sony A7r has excellent dynamic range and ease of use features
- Very stable shooting platform with moderate size and bulk
- Can be easily carried in the field
- Allows for a vast array of movements which improve the overall photographic solution
Cons:
- Need for understanding of a rail focus system
- Very manual shooting style no Auto Focus
- Setup is very critical in that you need to be centered on the sensor
- Sensor is exposed to the elements a lot more than normal use, it’s going to get dirty
- LCC frame is recommend especially for shots with movements
- There is a bit of a learning curve for someone coming from a non-technical camera environment.
Overall I would highly recommend this solution to any landscape photographer interested in the best optical performance for their work.
01/29/14 Why I didn’t purchase a Sony A7r
When Sony Announced the A7r I was very impressed. In the past Sony has produced some very impressive camera solutions and I was almost moved enough by the A99 DSLR to purchase one. However my local dealer, Bedford Photo in Little Rock Arkansas, pointed me toward the fact that Sony was working on a full frame Nex style camera. A camera that was going to revolutionize the market. It was enough to make me wait a bit.
It’s now been about 4 months since the initial roll out of the A7 family of cameras. Sony ended up producing the A7r without a low pass filter at 36MP and the A7 with a low pass filter at 24MP. Both cameras are mirrorless and were put into a very compact mostly all metal body. I was in line at Bedford’s when they had their Sony day in late December 2013 and was able to work with an A7r. My reaction was different as I did not purchase one. Instead I backed off to evaluate the entire A7r solution and after giving it some consideration, I found for me it did not make much sense. Here are the main reasons:
- Sony FE lens support current and future
- Concerns of current Sony Alpha (A) lens support for the A7r
- Nikon lens support issues on the A7r
- No on Chip image stabilization on the A7r
- Concerns with non-Sony lens adapters
- Sony history of 1 and done firmware updates
- Weight of body with larger lenses
- Lack of intelligent remote or intervalometer
Let me give a bit more detail behind each of these.
Sony FE lens support current and future:
With the new Nex A7r, Sony also announced a new line of Full Frame lenses, the FE lineup. Currently there are 4 lenses announced with more to come.
- Sony FE 28-70mm F3.5-F5.6
- Sony FE 35mm F2.8 (Zeiss optics)
- Sony FE 24-70 F2.8 (Zeiss optics)
- Sony FE 55 F1.8 (Zeiss optics)
This is a start but only one of these four lenses has OSS (image stabilization). With a 36MP sensor in such a slim body, there are going to be situations where vibration may cause some overall sharpness issues. I used the Sony Nex-7 for over 2 years with many of the older E lenses before moving to the Fuji X cameras. The E mount lenses are mainly plastic bodies and on the Nex-7 they were not the best solution. Fine for video work, but detailed sharp landscape images, I was not impressed. It seems that Sony is moving up in overall quality with their newer FE glass, but however these lenses will only work in full mode on a Sony A7 family camera body. They won’t work on a Alpha body even though they are full frame. I also don’t see much movement in the ultra wide solution for this camera. In the field for my work, I most often lead off with a 14mm lens and so far I have not seen anything from Sony showing a platform with a 14mm in the native FE mount.
Concerns of current Sony Alpha (A) lens support for the A7r
With my Sony Nex-7 I used the Sony LA-EA2 adapter which allowed me to have the ability to mount standard Sony Alpha lenses. This adapter had the translucent mirror technology that Sony uses in the A99. Of course Sony puts OSS on the sensor on their DSLR bodies which is a great idea. So all of the Alpha lenses I used would not have any OSS (image stabilization). The AF with the Sony LA-EA2 adapter was good, a bit slow but most times accurate. The adapter added a lot of mass to the Nex-7 but with the Alpha 16-80mm lenses it was a good solution. When I demoed the A7r I used this same adapter and the Sony Alpha 16-80mm lens. I found that with AF on, almost all of the shots were just a bit out of focus, but when I switched to manual focus and peaking I was able to produce some very sharp images. AF is important in my work and many times I would prefer to lead with AF instead of a manual focusing option. My medium format solution is a Arca rm3di which is always manual focus so I when I work with cameras like the Sony A7r, I want a rock solid AF solution.
Sony also announced a new Alpha lens adapter when they brought the A7r to market, the LAE4. I was not able to try this adapter to see if it produced more consistent results with AF.
Nikon lens support issues on the A7r
I should have listed this closer to the top. With Nikon lenses, there is no current adapter that allows for AF or VR. This is a huge deal for me since most Nikon lenses really aren’t designed with precision manual focus in mind. This is especially true with the new G lenses. It’s possible the the manual focus rings are just not that well calibrated and just a tiny amount of movement can make a major change. Since Sony did not put any stabilization on the A7 cameras sensor, you will need to rely on the stabilization in the lens. Several of Sony’s new FE lenses will have OSS (Sony lens stabilization), however all the Nikon lenses I have with VR, the VR and AF will not work. This is only true with Nikon lenses, as Metabones makes an adapter for Canon that allows the use of both IS and AF on the Canon lenses. If I was still heavily invested in Canon lenses, the Sony A7r would make perfect sense especially since Canon has yet to announce any new full frame DSLR with any more than 21MP.
No on Chip image stabilization on the A7r
Many users of the A7r are reports issues with vibration from the focal plane shutter on the A7r. It appears that the A7 has a different shutter design that does not cause this problem. However depending on the lens and selected shutter speed, the A7r can impart a slight blurring that may or may be able to be recovered in post. This oversight should have been expected with such a high megapixel count sensor in such a lightweight body. Some photographers are bothered by this worse than others, depending on the equipment they are using and shutter speed ranges selected. It’s a bit of a disappointment since Sony has such a good implementation of the sensor based image stabilization on their pro DSLR bodies, like the A99. I don’t see this being fixed via a firmware update.
Concerns with non-Sony lens adapters
Currently there any many different brands of adapters on the market to allow the use of non-Sony lenses on the A7 family of cameras. These range from exotic Lecia lenses to more common Canon and Nikon. The problem with many of these adapters is that they don’t seem to maintain the correct tolerances so that within a brand two of the same adapters may not reach the same degree of focus accuracy. Also it seems that some of the adapters can create either reflection issues or contrast issues when shift lenses are used. These issues may be worked out over time, but currently it poses just another problem that may or may not be correctable in post processing. For example the Metabones adapter for Canon lenses has shown definite problems contrast shifts when any of the Canon TS-E lenses are used, especially the excellent 17mm and 24mm TS-E2 lenses. Some people are fixing this by gluing a non reflective material inside the adapters, which is not an easy task due to the interior layout of the Metabones adapter.
Sony history of 1 and done firmware updates
Sony has a history of not releasing any major firmware updates to a camera once it ships, similar to how Nikon operates. This implies to me a pretty closed system and is unlike Fuji, Canon or Phase One. An example of this is the Sony Nex-7 which was shipped in early 2012. This camera had a huge issue for most shooter, myself included, where the video button was just too easy to engage while shooting stills. It took Sony at least 9 months to release a firmware to allow the user to change the button from always on. Sony seems not to release firmware updates that have any effect on image quality. The Nex-7 was a great camera in the ISO range of 100 to 400, however after than the amount of noise that developed became destructive to the image and by ISO 1600, the files were so noisy to make them only equivalent to 16MP images. I had hoped that Sony would add some firmware enhancements that would allow for some improvements on the higher ISO ranges for the Nex-7, but it never happened. Canon and Fuji both have had several major firmware enhancements to several of their camera lines that allowed for major improvements in image quality. I like to see a company continue to develop a camera’s capabilities after the initial announcement, and this is not a practice of Sony.
Weight of body with larger lenses
The body of the Sony A7r is so light that most modern 35mm lenses seem to unbalance it. If you are only using a older prime lens this might not pose much of a problem, but try placing the Nikon 14-24 on the A7r!. The weight of the lens totally outweighs the camera’s small mass and it makes it pretty much impossible to just shoot by holding the camera. So both hands are occupied in holding the lens/camera and you really don’t have a free hand to switch a setting once you are lined up for a shot. If you are using the camera/lens combination on a tripod, then most definitively the lens will need a tripod mount (which none of the current FE lenses do) or the lens adapter (like a Metabones or Novoflex) will also need a tripod foot. The lens mount flange on the Sony A7r cannot handle the sheer mass of many of the lenses you might want to use and long term you will either bend the flange or pull it out of alignment. Either way the fix will be out of warranty and depending on how the mount flange is installed may or may not require an entirely new A7r body.
Lack of intelligent intervalometer for A7r
As with all Sony DSLR’s and Nex cameras, there is no intervalometer for this camera. Sony once again is depending on a app called Timelaspe that will run on the iOS or Android OS. This tool limits you to the power left on your phone and since it requires the phone to be on for an extended period of time, it will drain the phone’s battery. The timelaspe app is designed to give the user the ability to create the actual video on the camera so for the night photographic use I would need it’s not a tool I could use. I much would prefer to use a cabled intervalometer that will let me set the time of the necessary exposure and the interval needed, removing all of this from the camera. I have also not found any built in timelaspe tool that will let you take a shot longer than 30 seconds since they all are dependent on the camera’s built in set shutter speed of 30 seconds. This is the longest shutter speed that most cameras will allow. Sony once again has used their proprietary port for a wired remote so that none of the third party intervalometers will work. This limits tremendously the use of the camera in night photographic applications and even limits it in the more traditional timelaspe applications. Personally I don’t want to be tied to my iPhone for any type of intervalometer use. The amount of heat that may build up in the Sony A7r may preclude it from night photographic operations anyway.
The Sony A7r is a great concept and for many photographers, it’s a great way to reach the 36MP threshold, especially a Canon shooter. In my situation, I already have the Nikon D800 and find it’s mass/weight are a benefit in keeping everything in sharp focus. I love the idea of a EVF that allows 100% magnification at the viewfinder level like Sony has along with the excellent focus peaking that Sony has had for several generations of DSLRs and Nex series cameras. However the inability to use my current lineup of Nikon lenses (with AF and VR) is a huge issue for me. This is a first round release for Sony and no doubt they will follow up with a more refined product either later this year or early 2015. I can also hope that Nikon improved their Nikon1 lineup of mirror-less camera to include either the Sony 24MP or 36MP sensors as then I should be able to use all of my excellent Nikkor lenses to their best capabilities.


