02/28/25 A brief explanation of Helicon Focus, and possible errors
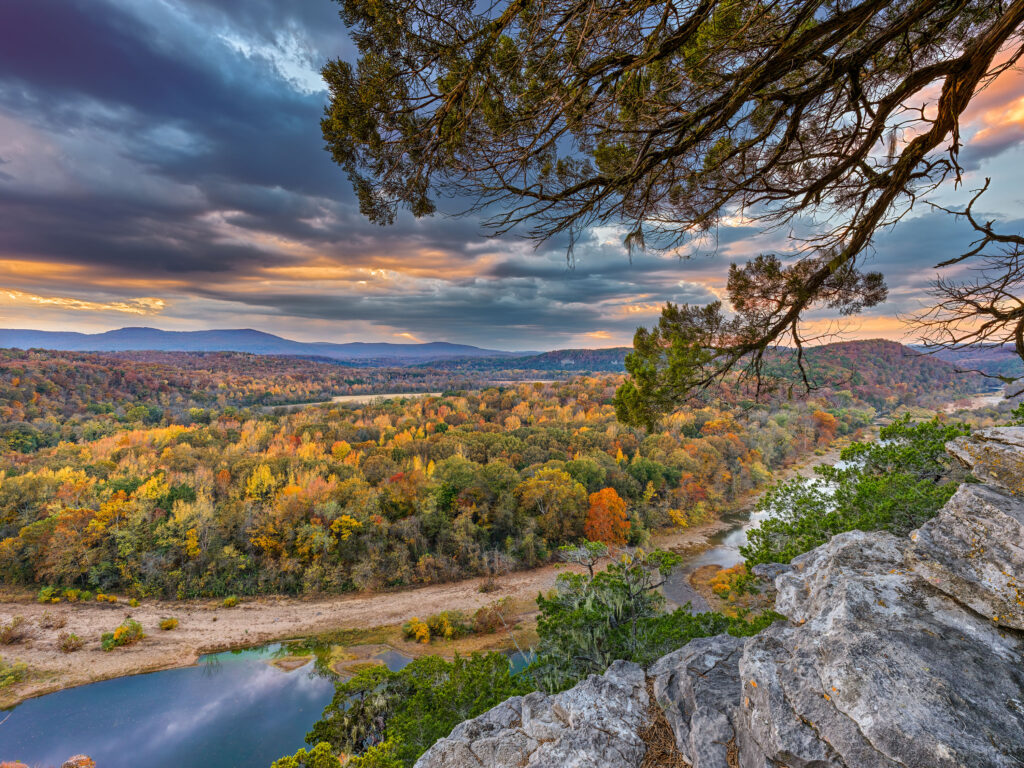
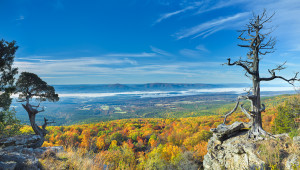
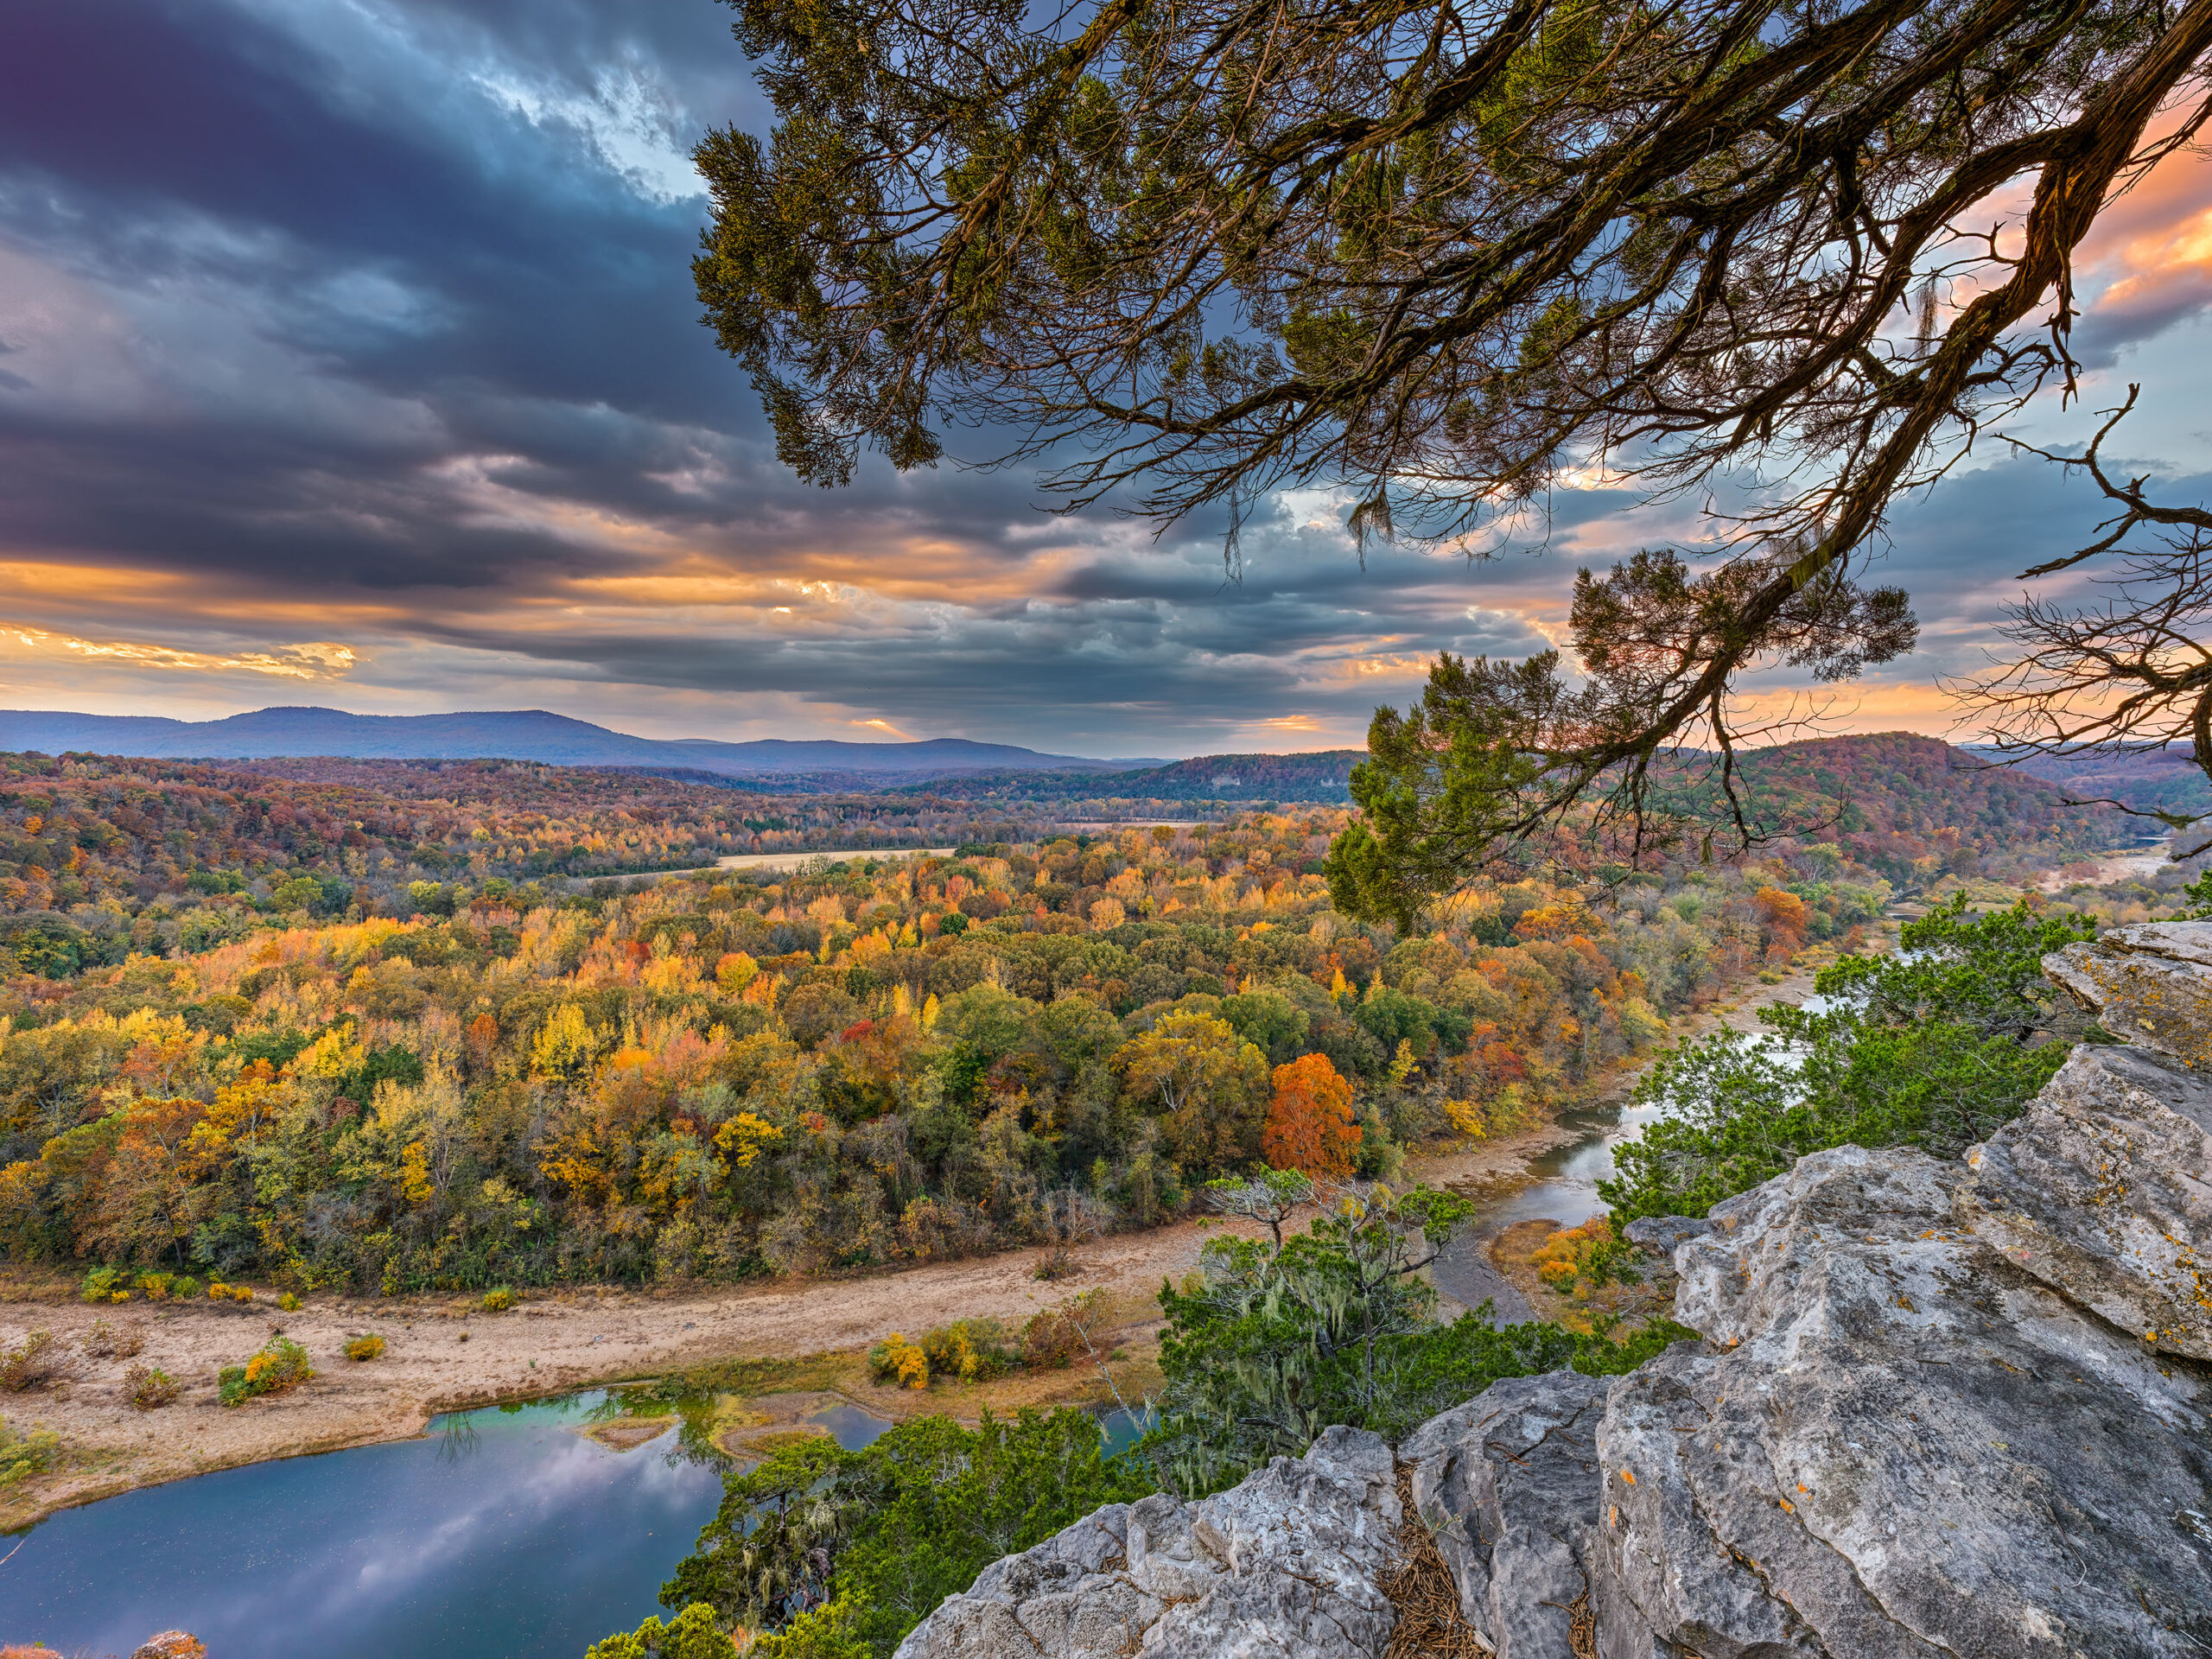
This image was created with a Hasselblad X2D, using the camera’s focus bracketing setting. This allows the camera to take multiple photographs of the same subject, and only moves the focus point. So in this case, the camera will take images from infinity all the way to the rocks on the foreground. It’s impossible to manually combine this many photographs with different focal points, however with software like Helicon Focus, you can. I wrote a very detailed post on the process of creating this image here: https://photosofarkansas.com/2025/02/03/02-03-25-focus-bracketing-example-hasselblad-x2d-and-21mm-lens
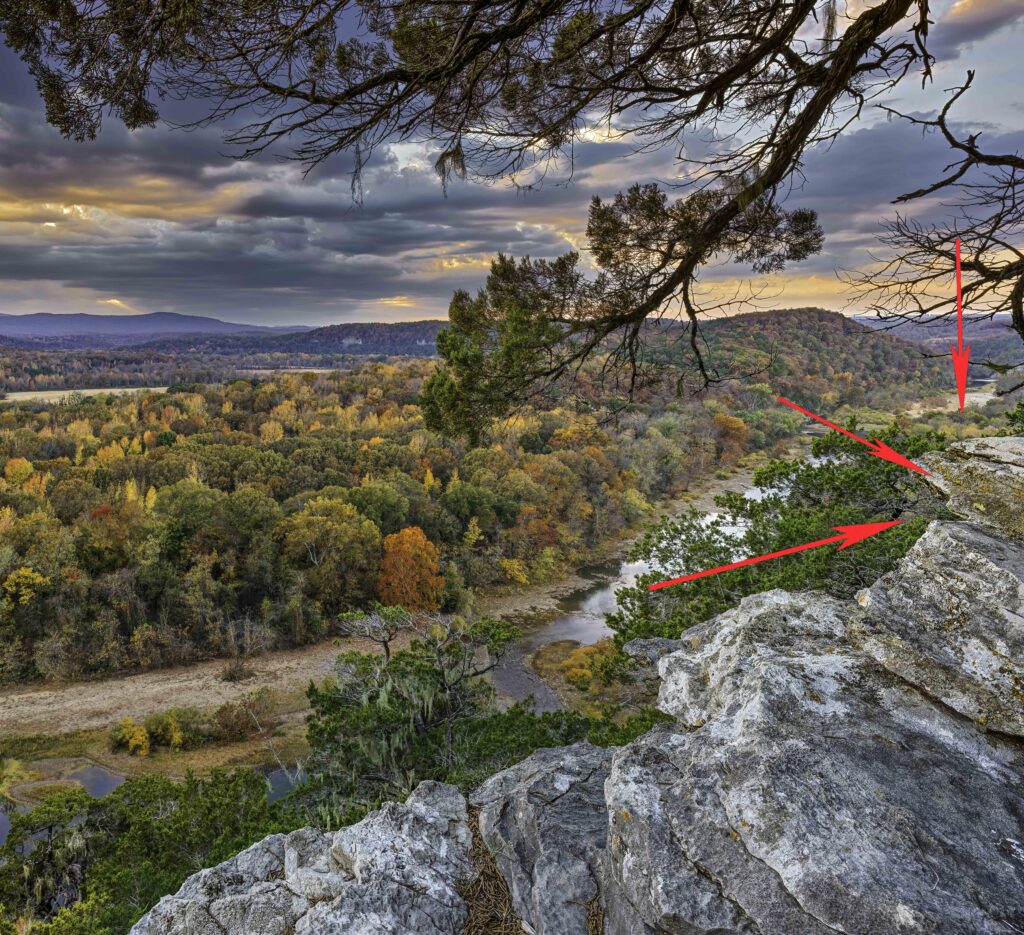
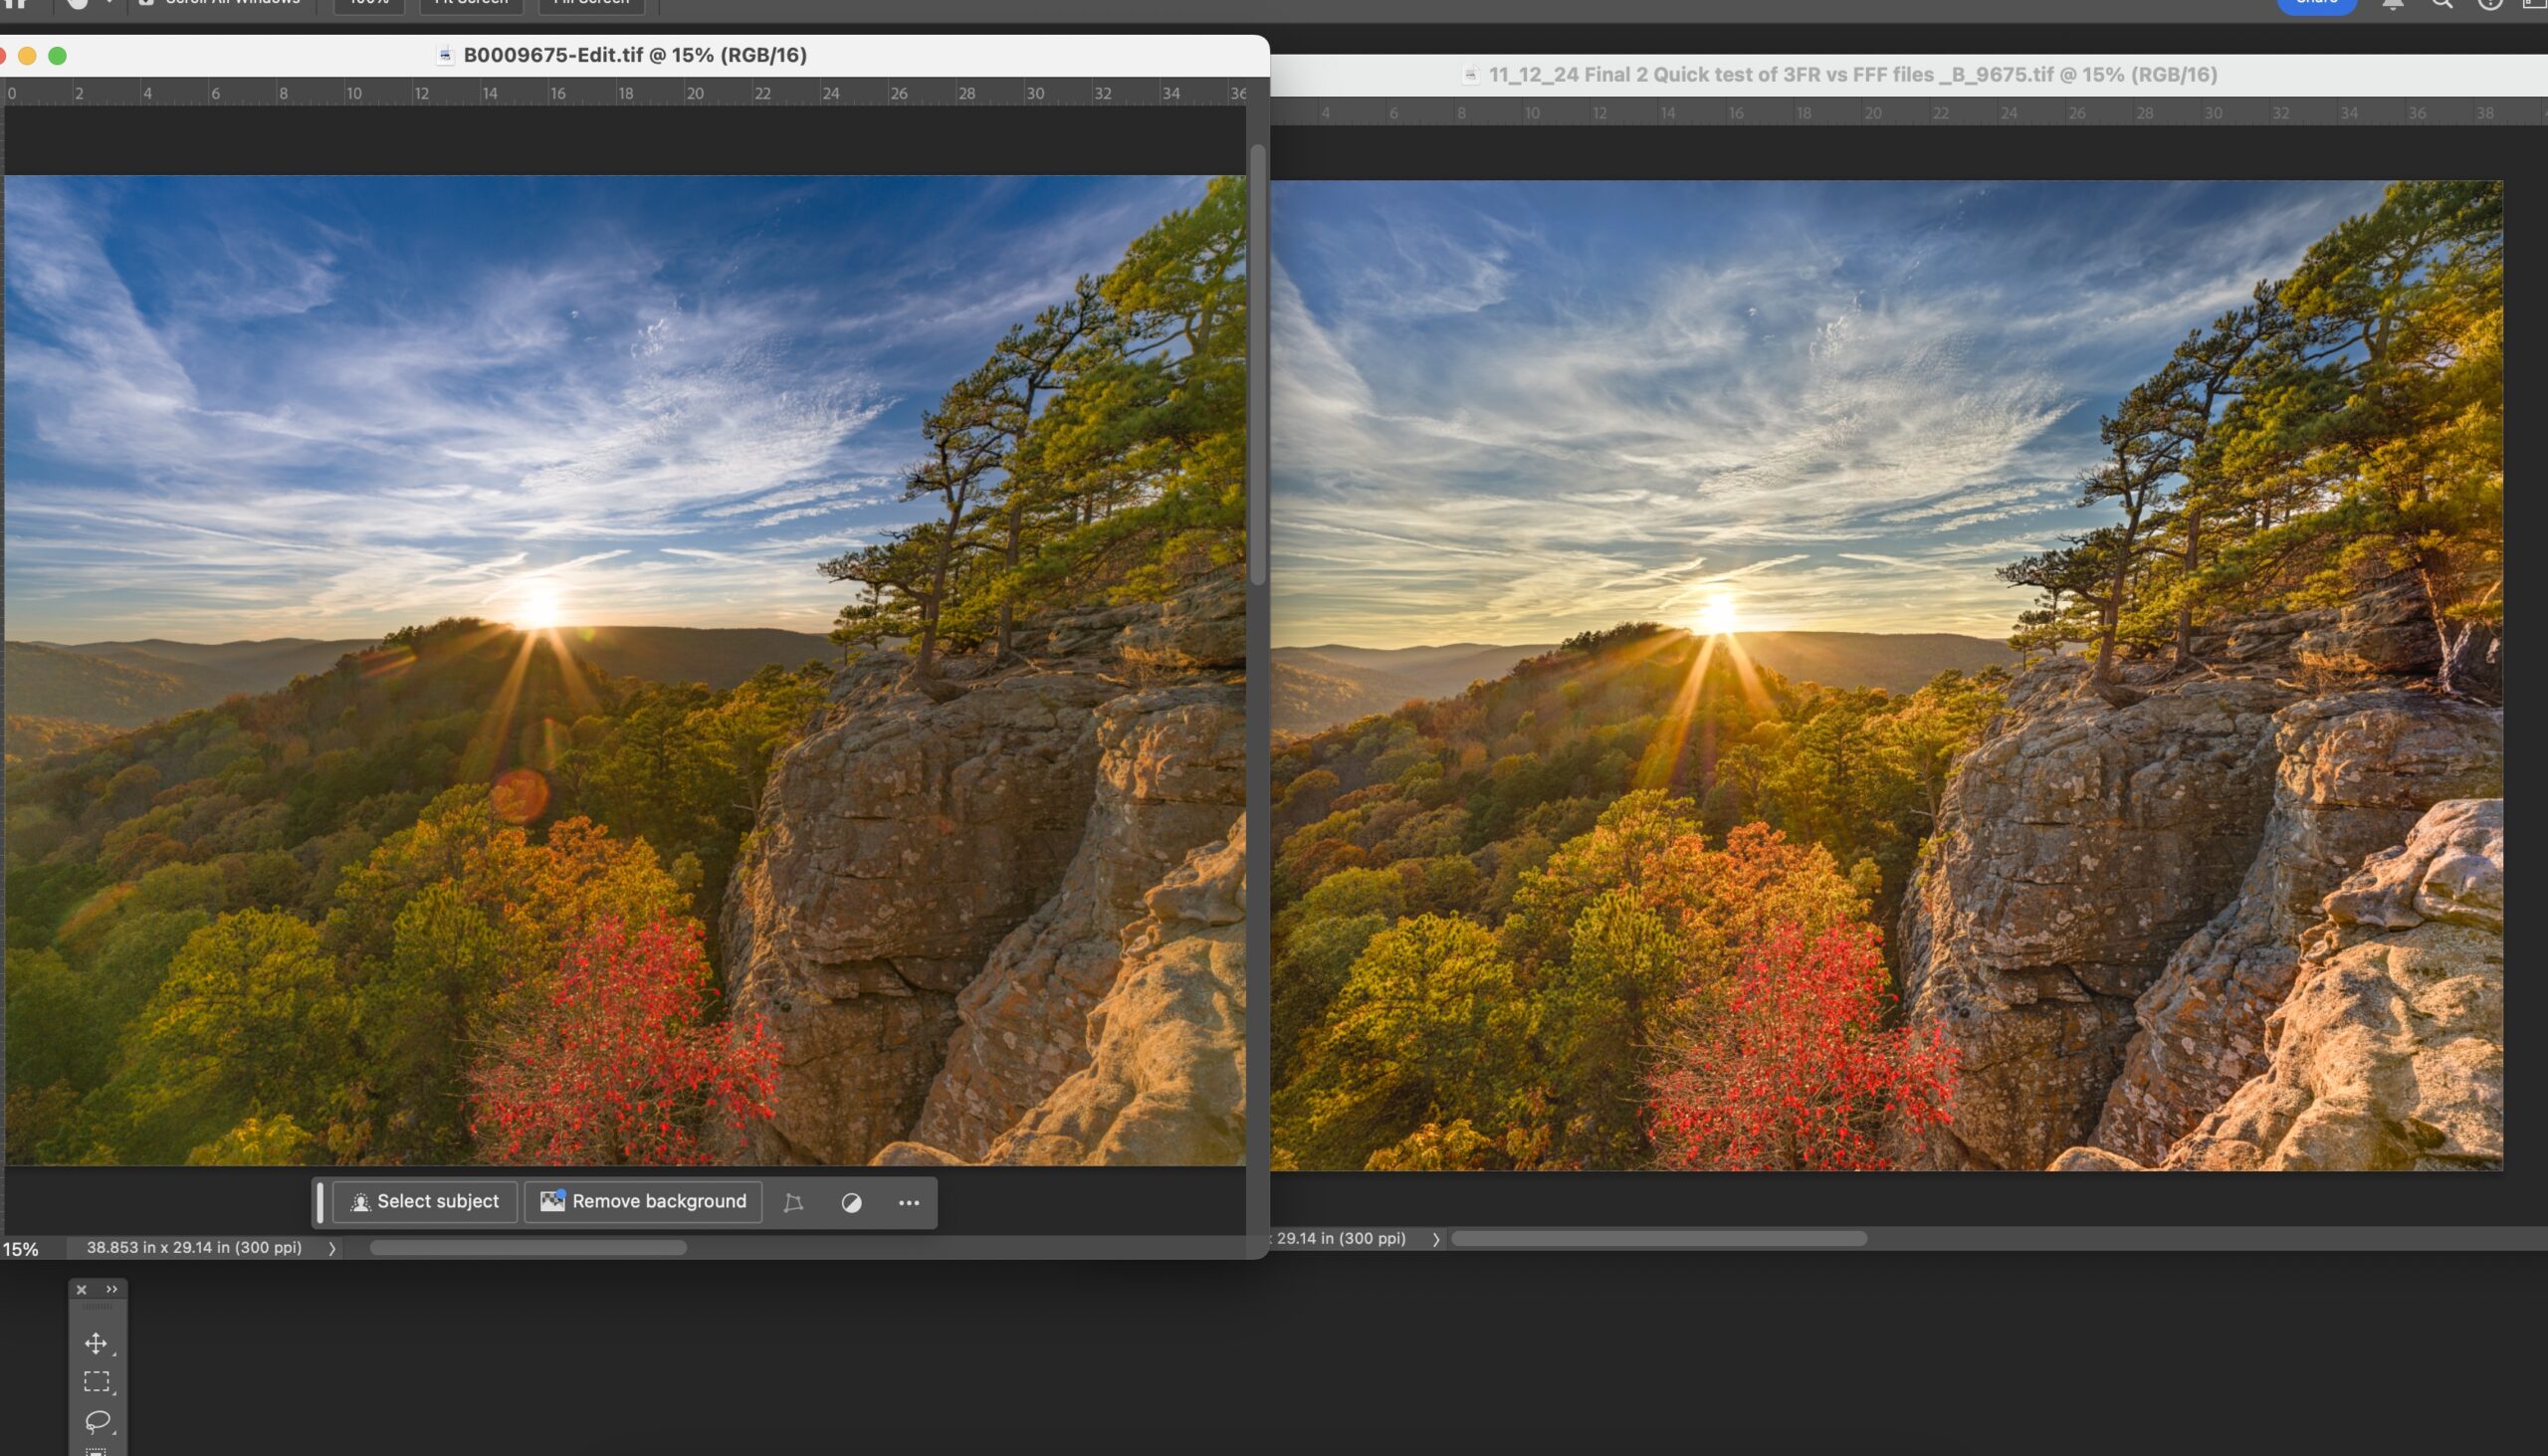
- Helicon Focus errors on image
- Errors from First run of Helicon
The image on the right has arrows showing the errors. They are not obvious at first, especially if you are only looking at this image in a screen view, or a jpg. However it’s a 100MP image and when you zoom into it, these errors now start to be more obvious.
With Helicon, you load in your images, and then select one of three “rendering” method. I usually use option B, set to the Helicon defaults. NOTE, you can change these defaults, but make sure you remember the true defaults that the program started with. Once you change them they stay where you set them, even if close and reload the program. This can be problematic for a later set of images as most times the program defaults are what you need.
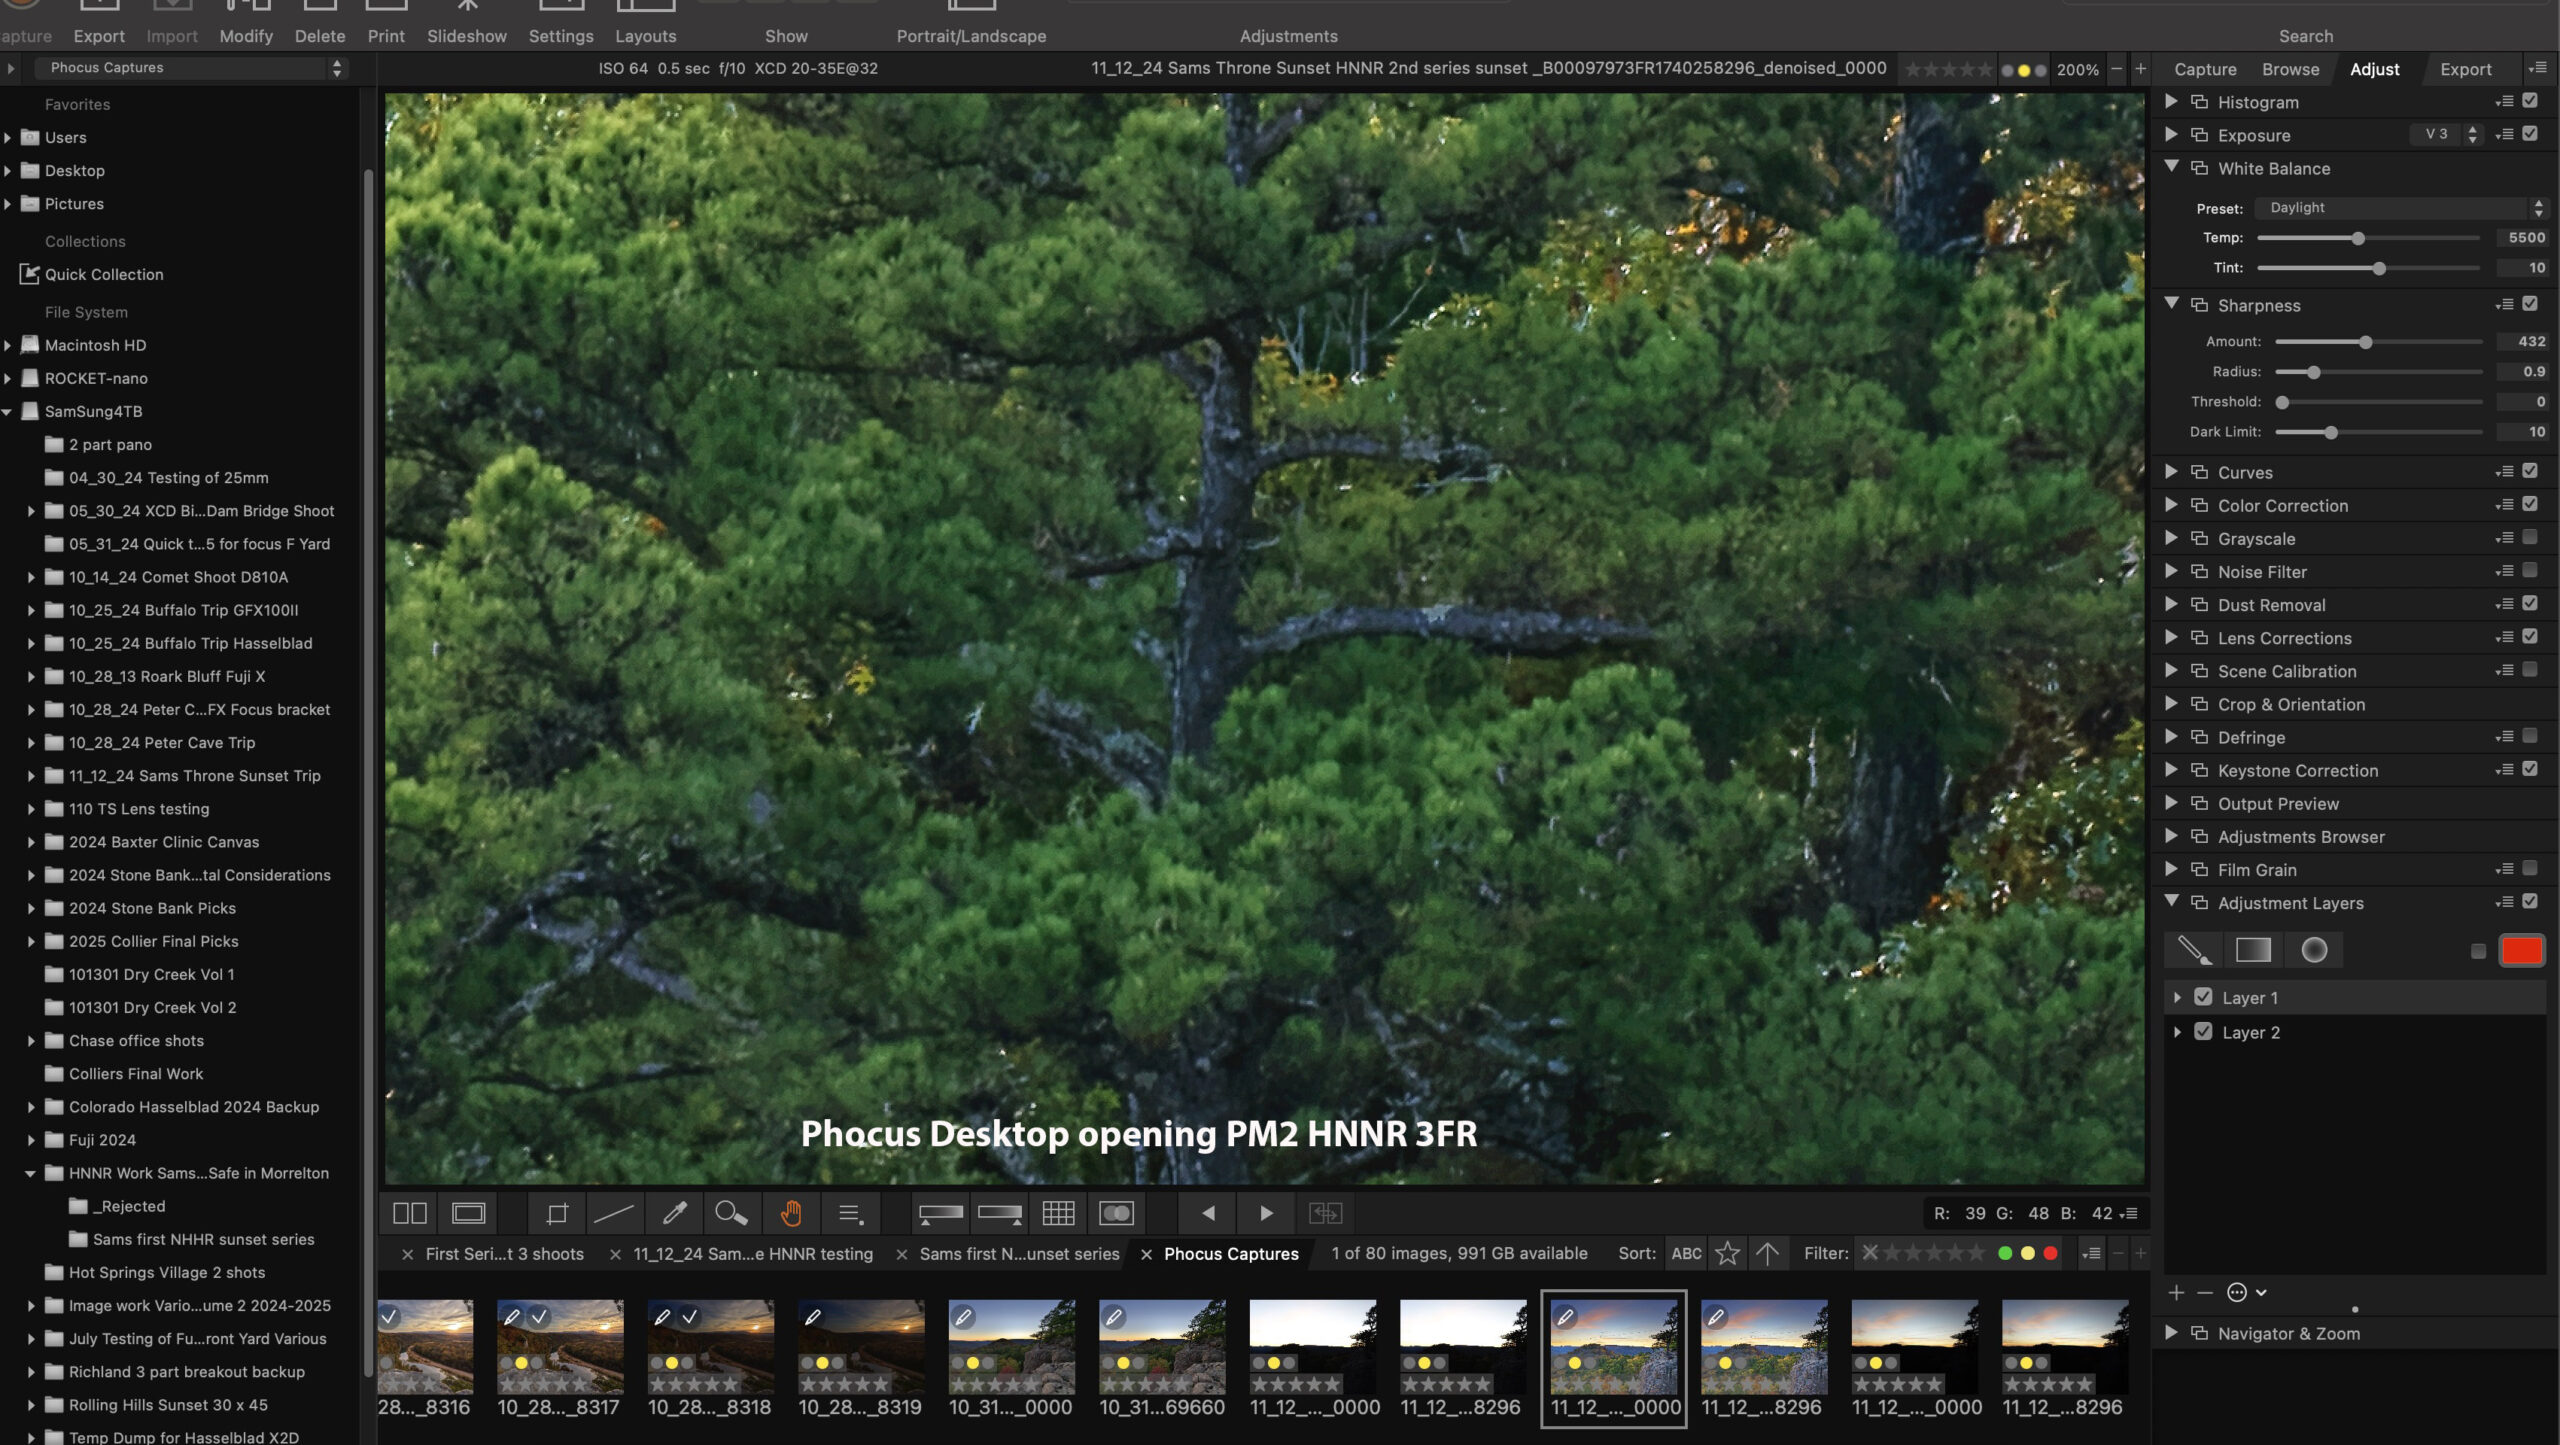
This is a quick screenshot of the main Helicon Focus page. Note the three different methods listed in the lower right corner.
My first thoughts were to just re-load the 7 images and try option B again. Upon doing this the same errors occurred, so I tried Option C and this time I was able to get a perfect separation between the rocks and the area in the distance.
When using Helicon, take make sure you take a few minutes to view the entire image checking to see if any issues with mixed blending occurred. This image was actually a blend of 14 images, 7 were taken for the sky and cedar tree and the remain 7 were taken with exposure set for the foreground and trees in the distance. I was not able to get a single exposure that gave me good shadow recovery and keep the highlights in the sky from blowing out. So I ran 2 sets of 7 images through Helicon and then merged the two. Since I already blended the images with the errors, it was a simple fix to just rework the 2nd set of 7 images with option C and layer the fixed image on top then blend in the correction.
The point of all of this is that if you are only working for TicToc or Instagram use, odds are you would not even notice these errors, but then why would you be using a 100MP camera. My reasoning for 100MP is that I want have the ability to make large prints, and errors such as these would definitely show up in a print larger than 12 x 18.
02/16/25 Using Adobe Generative Fill to remove lens flare–Example an X2D image with 20-35 lens
If you like to shoot sunrise or sunset images one of the issues that always has to be considered is lens flare. The effect is destructive as it tends to totally change the color of the subject, remove or change saturation levels, and totally alter the overall color of the image. Depending on the lens the flare tends to be in the corners or off of a diagonal from the sun. There are times where this type of flare can add to the overall image, but most times I find it distracting and destructive. In the past, the only way I knew to remove it was either cloning over the flare with a part of the image that is free of flare or attempting to use software tools like “Content Aware” in Photoshop. I never found content aware to be very effective for this and ended up usually either cropping the photo or using cloning. You can always try to hold your finger over the sun when shooting but this is tedious, and at time hard to due. I used to carry a flare buster to this as I could attach it to the flash bracket on my camera but many times I forgot it and knew I was going to have to work on the flare in post.
It’s also hard at times to see the flare when you are looking through the EVF or viewfinder of your camera, especially if you are using exposure brackets. In the image at the top of this article, you can see the sun was muted through some soft clouds, but there was still a flare issue. The camera I was using was the Hasselblad X2D and the 20-35 lens. I have found that the 20-35 is very flare prone anytime you are working with the sun in the image. The flare is especially large and damaging at times. In the crop below, you can see the amount of flare that occurred.
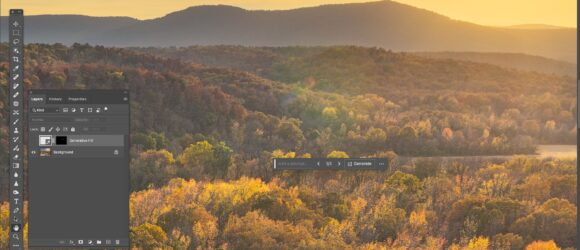
The flare in this case was rather large, and had the typical rainbow color spectrum on the outside edge. You can clearly see that the colors of the trees have been totally changed by the flare and overall the area has a more yellow look.
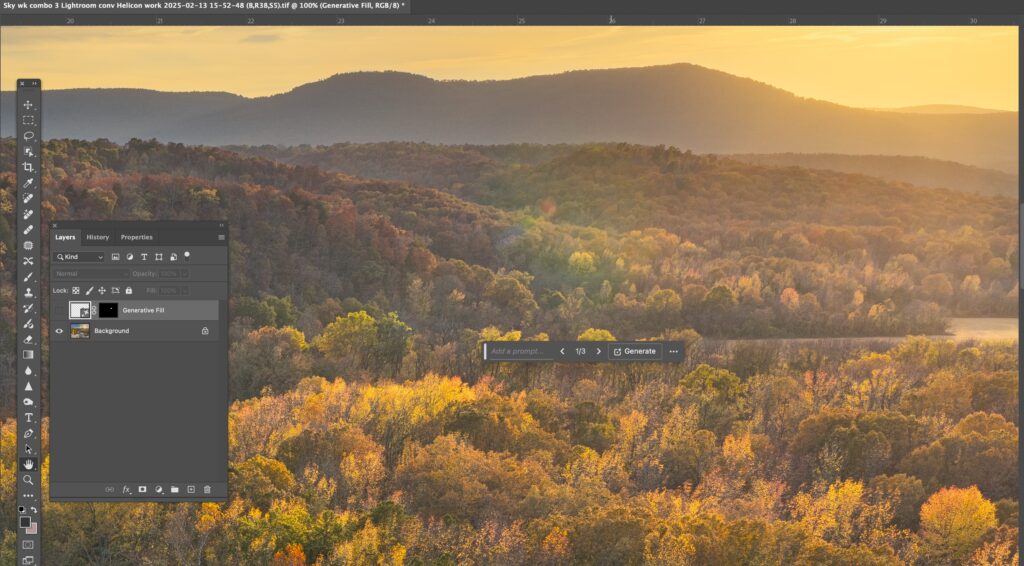
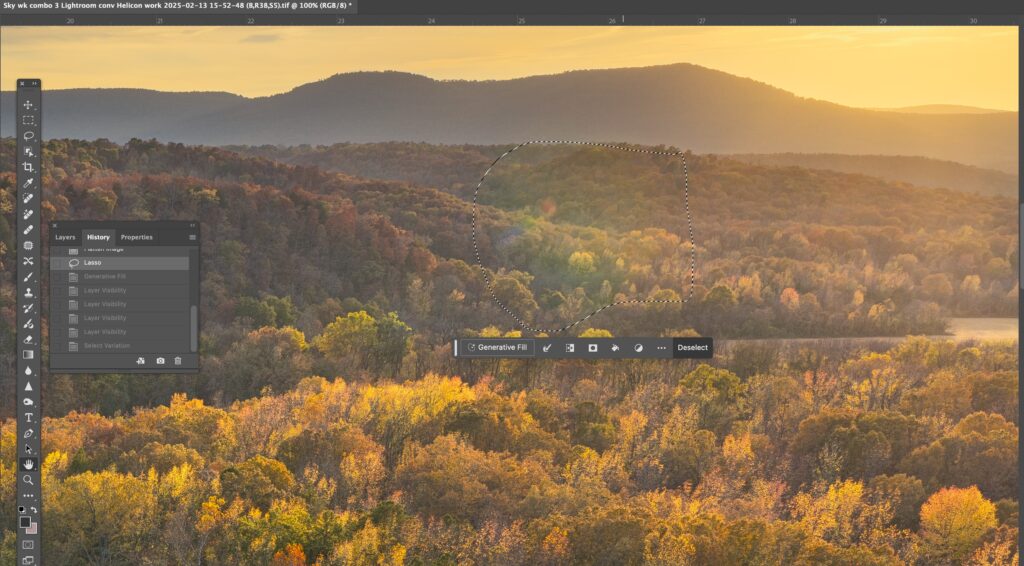
In this screenshot, you can see that I used the lasso in Photoshop to select an area which slightly exceeds the amount of the image that is effected by flare. Once you have made a selection, click on “generative fill” and Photoshop will give you three solutions. There is an option to name this fill selection, I never do that. Once you have run the fill process you can then click through the three options to find the one that works best for you. Once you make that decision, simply flatten your layers and you are done. If you don’t feel any of the fills that Photoshop created work, then cancel and start again. Sometimes it can take a few runs to get the best possible solution. However I have always found that Photoshop can get something that works much better than content aware, or cloning.
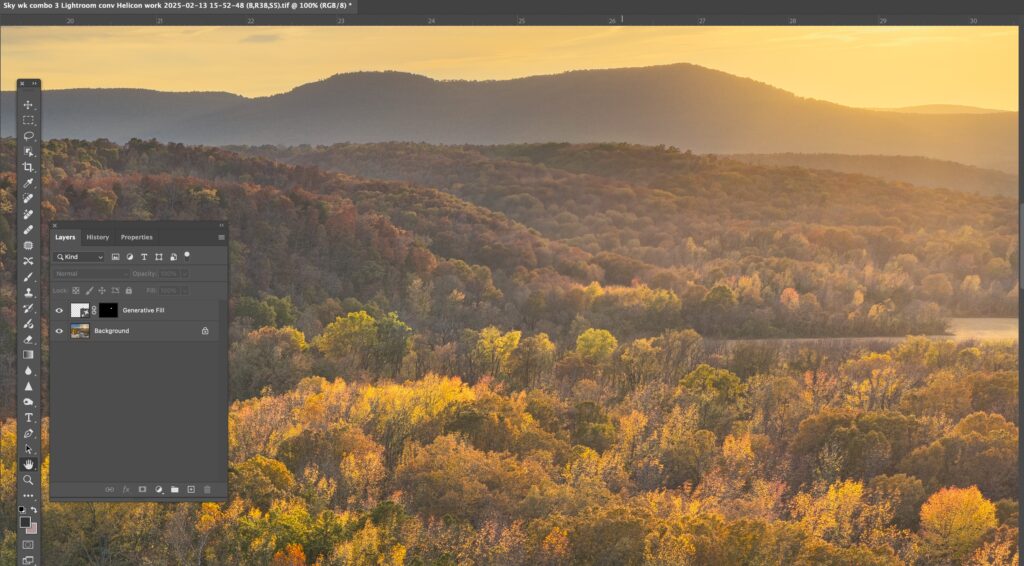
Now it’s possible to see the same area after generative fill has been applied. No more flare, or discoloration. A perfect blend.
Written for Photos of Arkansas by Paul Caldwell
09/23/14 Using Stacking for better Night Photography results
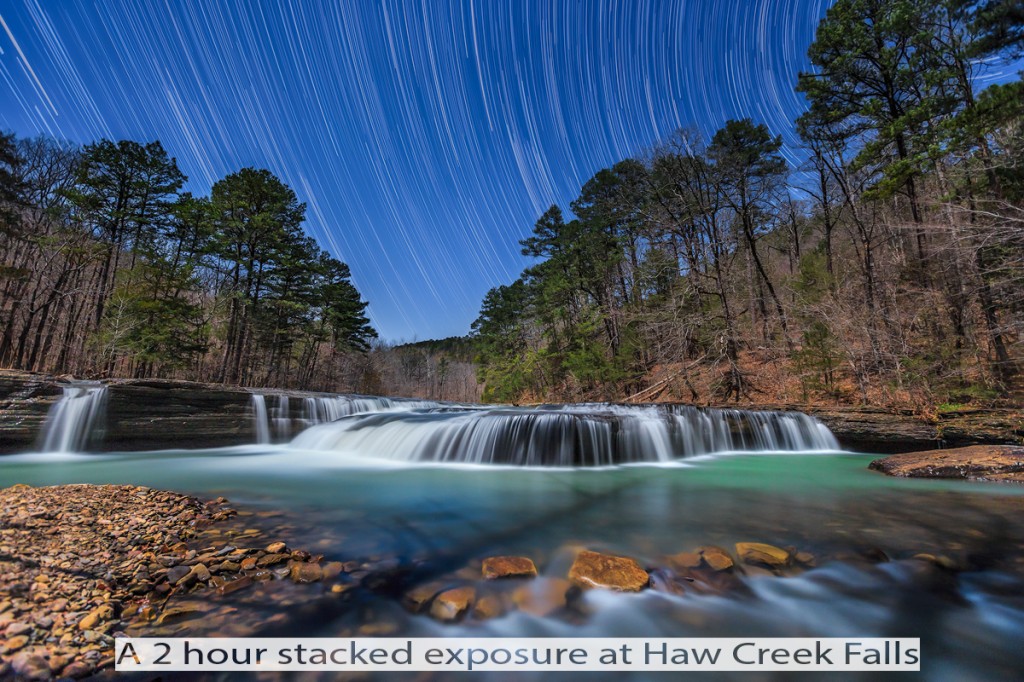
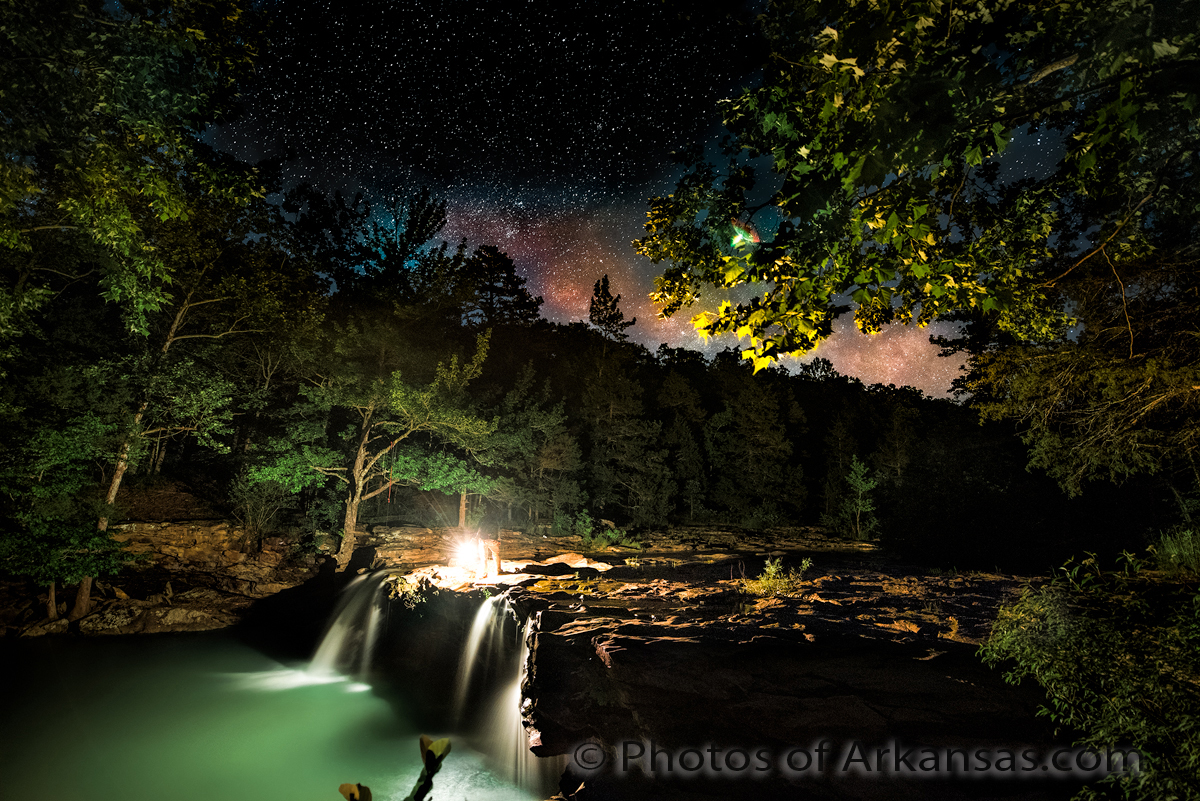
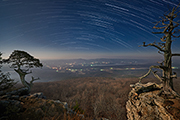
I have found that working at night in Arkansas can bring out some amazing photographic opportunities, like the photograph below.
Since early in 2008 I have been fascinated by one facet of night photography—the creation of star trail photographs. Capturing the motion of the earth over a period of time and blending the light of the distant stars into different lines of varying brightness is my mission. My first attempts consisted of just leaving the shutter open over a period of time and varying it from 30 minutes to 1 and half hours. My initial thoughts were that the best conditions for shooting the stars would be nights with little or no moonlight. The results in my location (Arkansas), were a bit disappointing since the ambient light from nearby towns and even a single home would give the sky a yellow/orange color. If I tried to change this yellow sky color in post processing it also influenced the color of the star trails making them red/yellow.
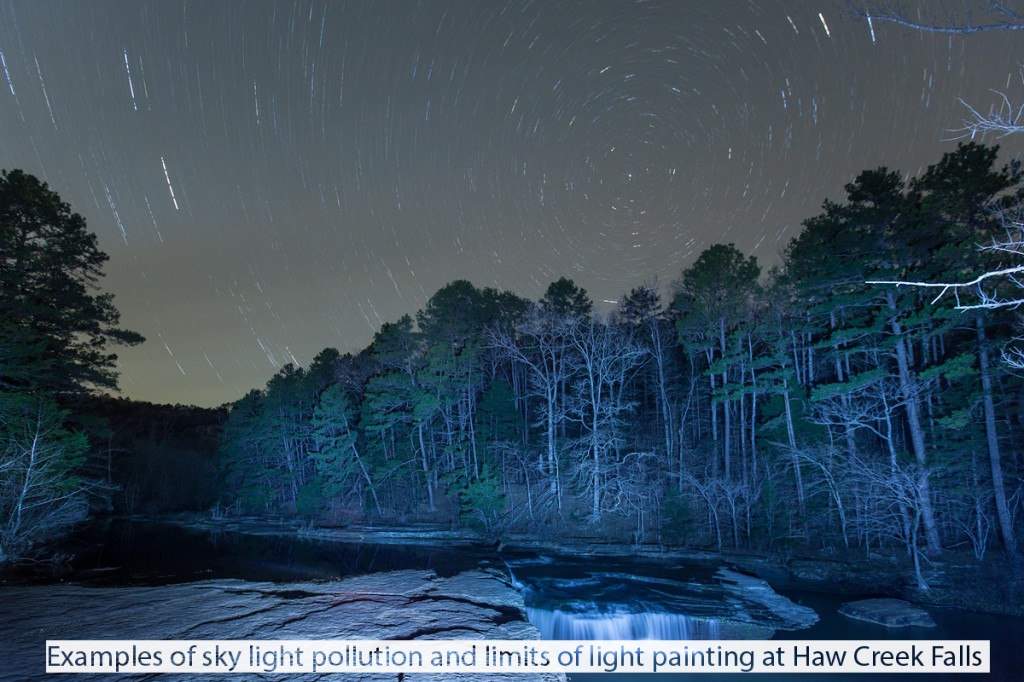
In this image, you can see an example of how light pollution can totally turn the night sky yellow/amber and the non-sky parts of the image have no details. Attempting to pull up the foreground produces a noisy and non-detailed image.
Things changed for me quite by accident as one night I was out when there was a half moon. The results from this short 20 minute exposure with moonlight moved things in a totally different direction for me. Instead of the yellow/orange sky, I now had a beautiful blue hue, with pure white star trails. Even more impressive was just how much the surrounding landscape had been illuminated. Now instead of a dark silhouette I could now see most of the details of the landscape. The colors all had a naturally strong saturated look and I was hooked. However after a few months of shooting in this mode, I noticed that as my single exposures approached 40 minutes the trails started to become faint to a point where only the strongest stars continued to show trails.
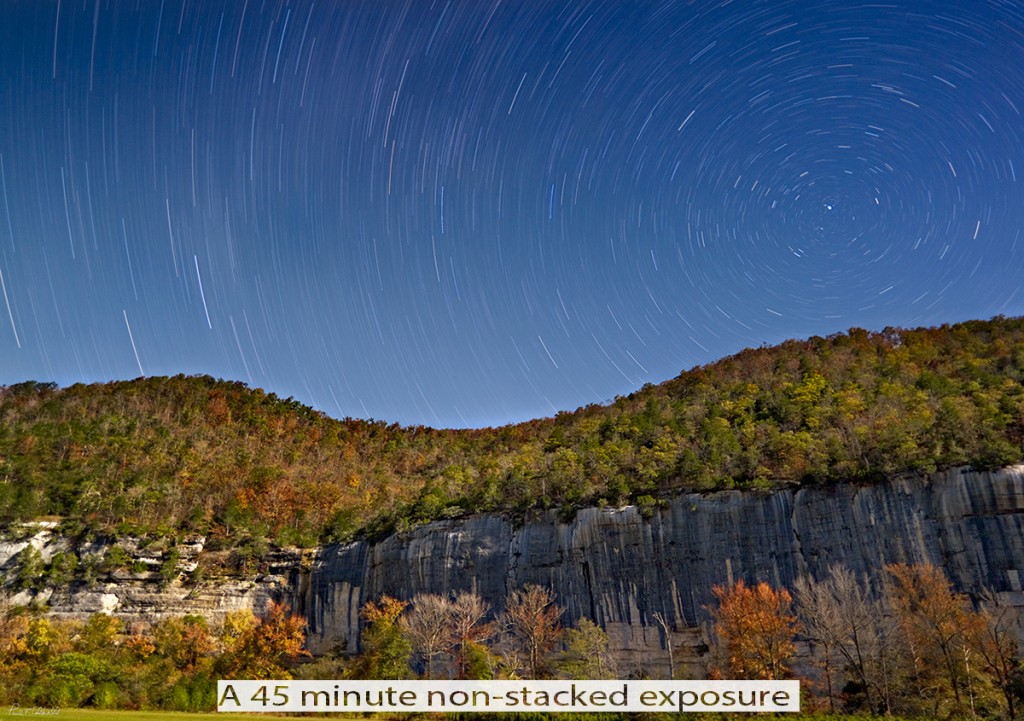
This is a 45 minute single exposure from a Phase One P45+. There is a good balance however only the strongest stars are showing through. There is considerable wind blur on the trees along the bluff.
If I tried to pull the exposure of the sky down, I lost many of the faint trails. I tried a few different solutions with filters, but nothing seemed to really give me the sky that I was looking for, one with a nice deep blue hue and filled with star trails. Then I read about some photographers that were stacking their exposures and I became very interested in what my results might be from night exposure stacking.
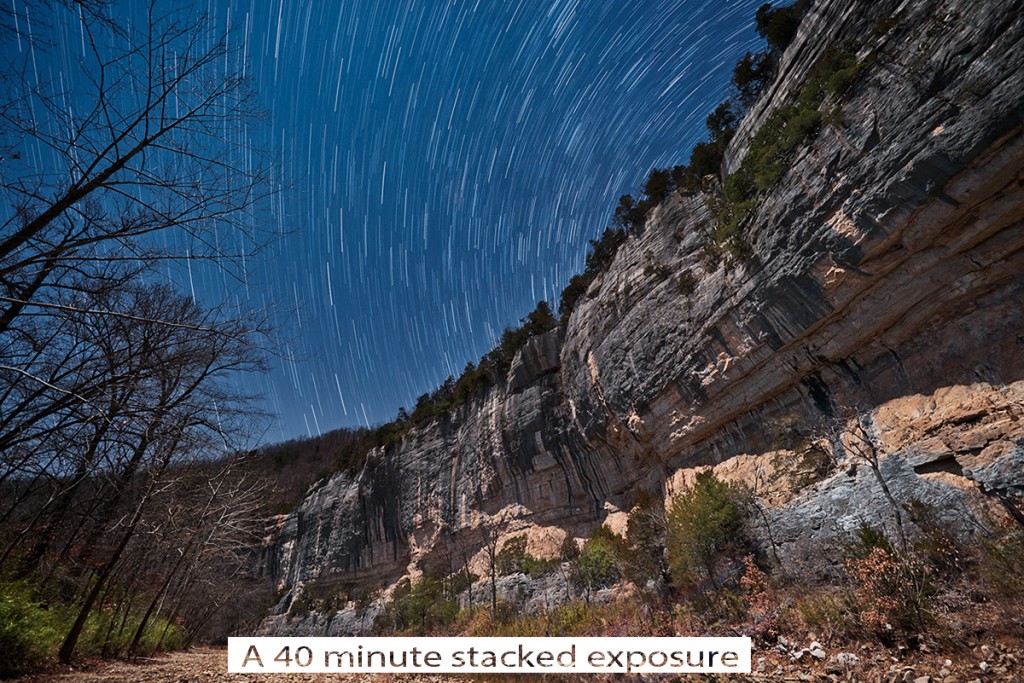
This is a 1 hour exposure taken in approximately 2 minutes stacked exposures. Notice the vastly greater number of star trails and the lack of motion blur.
The idea of stacking comes from photographers working with time lapse capture. The idea is simple enough, instead of one long single exposure, take a series of short exposures and then blend them together in Photoshop. By using Photoshop I found that you can create a smart object from all the stacked exposures and then run a series of blending modes on the smart object that capture only the movement of the stars in the night sky, creating the trails. Each night the period of time of each exposure will vary and it takes a few attempts to get just the right time for the best segment. Ideally I can find an exposure/aperture combination that shows bright stars but also allows for illumination of my landscape features. Since most exposures will be longer than 30 seconds, you need an intervalometer. With the intervalometer, set the interval to 1 and then set the total time of each single exposure. Then set the camera to continuous mode and for blub exposure. For example, if your exposure time for each segment is 2 minutes and 30 seconds, for a 2 hour exposure you will take 52 individual images to stack together later.
Stacking has several advantages over a single long exposure:
1. You have more interesting subject matter overall
- Since you now have the ability to see the landscape subjects that are illuminated by the moonlight, you have a much more interesting photograph. The illumination provided by the moon can be quite eerie at times and offers a unique look to the final photograph.
2. The ability to handle wind motion:
- During single long exposures, more than likely you will have some wind. The wind over a period of 2 hours can totally blur your trees to the point that it will actually ruin the photograph.
- Stacking allows you to find the best single exposure of the foreground and layer it back to the final image.
3. Hundreds of distant stars are brought into view:
- With night photography, you will get more distant stars the wider you can open the aperture so ideally you would try to work with aperture ranges of F2.0 to F4. Any wider and you will start to run into DOF issues with most lenses. Stacking allows you to work with these wider apertures. In contrast, working at F2.8 to F4 with a single long exposure of 1 hour most likely will cause the sky and stars to be overexposed.
4. Much more flexible workflow:
- Since you are stacking you will have many different images to work with in your landscape portion of the image. You may want to pick several and blend them together to take the best parts of each. You also may want to experiment with light painting on one segment. If it doesn’t work out, you don’t have to use that part of the stack, however if you light paint on a single long exposure and make a mistake, then you have ruined the entire sequence.
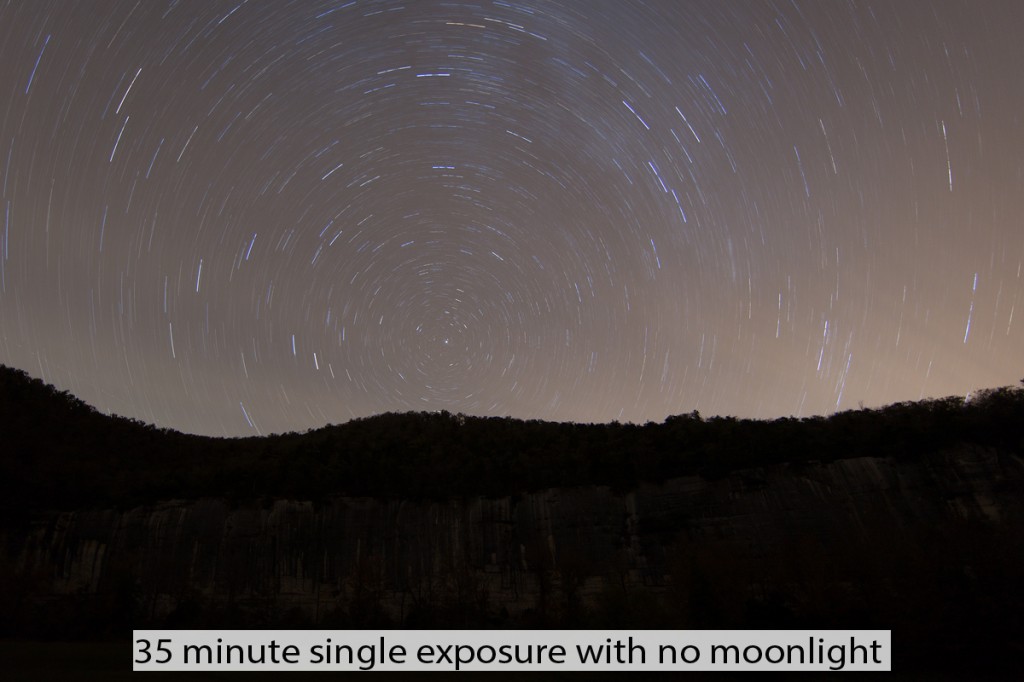
This is a 35 minute single exposure where no moonlight illumination was used. The combined light painting still really did not begin to pull out the details of the tress along the bank and the light painting only provides a 1 dimensional form of illumination.
5. Better control over plane trails:
- I have yet to work a night where planes did not fly over. If you are stacking, you can take out the plane trails before you run the blending modes to combine the images. Plane trails will always be some form of a straight line and will contrast sharply with the curved star trails in the night sky of your image.
6. Noise of a single long exposure vs stacking multiple exposures:
- Over the time of a single long exposure you can expect your camera to generate quite a bit of heat and thus get excessive noise and stuck pixels. If you stack, the shorter exposure times will contain less noise and fewer stuck pixels. This can make a big difference in the final image.
My current camera selections are the Nikon D800E with the 14-24 F2.8 lens and the Canon 6D with the 16-35 F2.8 lens. Both of these cameras allow you to turn off the long exposure noise reduction, which is critical. If you leave it on, then you will have a mandatory dark frame between each segment, which creates gapping. For both of these cameras, I use the accessory grips with extra batteries so I can get the longest operating times from each camera. I use a wired intervalometer with each camera to control the exposures. My goal for night photography is to maximize my sky view so I tend to work with focal length ranges of 14mm to 20mm. For the night exposures, I set the white balance to around 4330K.
For this night work, I like to shoot raw files as I feel you have more control over the file in post processing than with a jpg. I will then take 5 or 6 images from a series and work them up in both Lightroom and Capture 1 to see which software seems to handle the series better. On a 2 hour series, you will have to make some minor adjustments to the images to help balance out the sky illumination, since the motion of the moon will change the color of the night sky over time.
Once all the images are worked up, I will export them as 8 bit tiffs. I have found that the 8 bit quality is more than enough for the images I am creating. I will load the files into Photoshop layers from Photoshop Bridge, then select all the layers and create a smart object. This process may take a while with 52 tiffs especially with a series of 36MP images. Once the smart object is created, I recommend to save it, in a large document format with a .psb extension as odds are the file will be larger than 2GB in size. Then you can run the stack modes on the smart object.
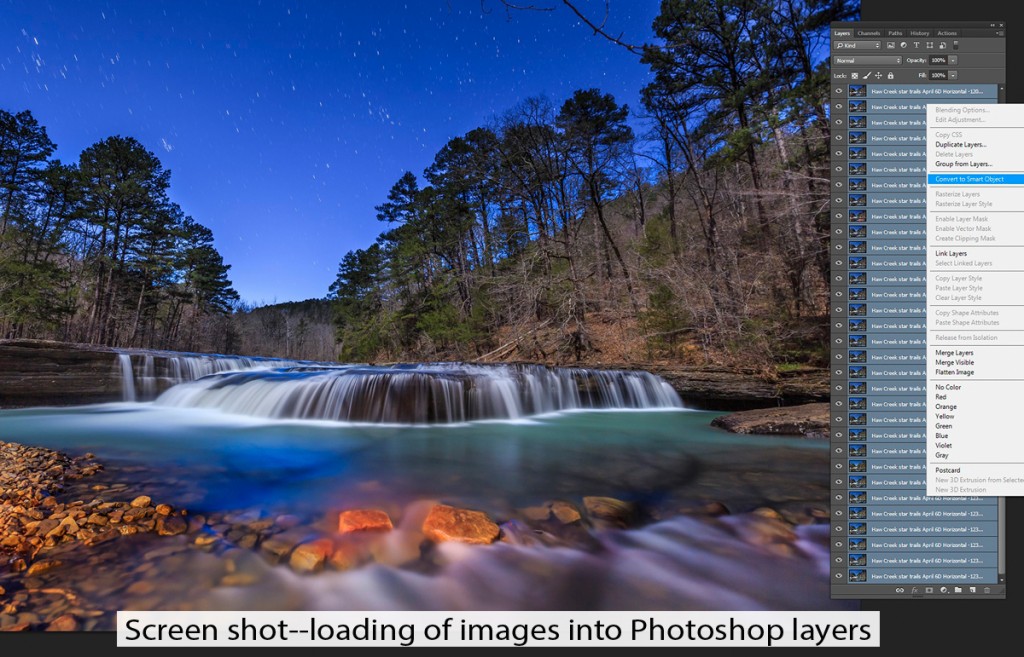
This is a screen shot from Photoshop. All the individual images have been loaded into Photoshop as layers and the stack is now ready to be turned into a smart object.
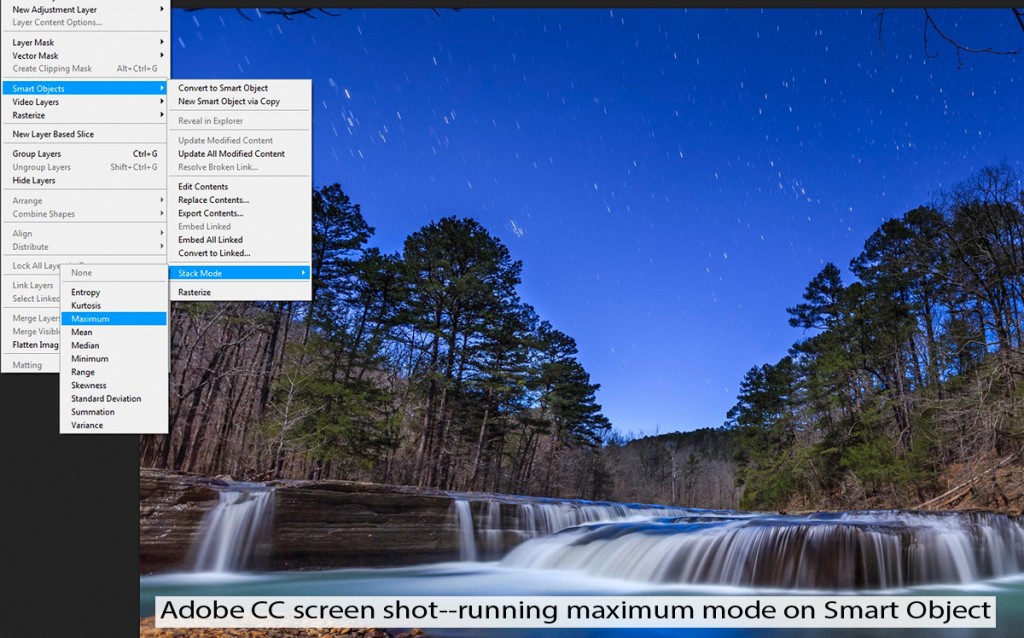
The stack blending modes are now part of Adobe CC and CS6. If you have an earlier version of Photoshop you will need to download them from the Dr. Brown website (www.Adobe.com). I like to run the Maximum and Mean modes and save the results. Maximum gives you the greatest amount of light to the stars but may be a bit too much, so by running the mean mode, you can layer the two and blend back to a good balance of the sky and stars. The mean stacking mode will also contain less noise.
Once the smart object has been created, you are ready to run the various blending modes on it. In this screen shot, I am about to run the “Maximum” blending mode.
Once the stacking work is done you have finished the lion’s share of the process. All that is left to work on is the landscape (non-sky) portion of your photograph. During a 2 hour stacking set, the moon will move across your scene. Most often you will find that the moonlight movement has illuminated different portions of your shot. One technique I use is to take parts from several images to get the best overall result. An example of this, is when you start the moonlight will only be on the right side of your scene. Towards the end of the series, the moon will have moved higher in the sky and is casting light on the subject matter on the left of your scene which earlier was only in shadow. You will also want to hunt through the images to find the ones with the least amount of motion blur on trees or bushes.
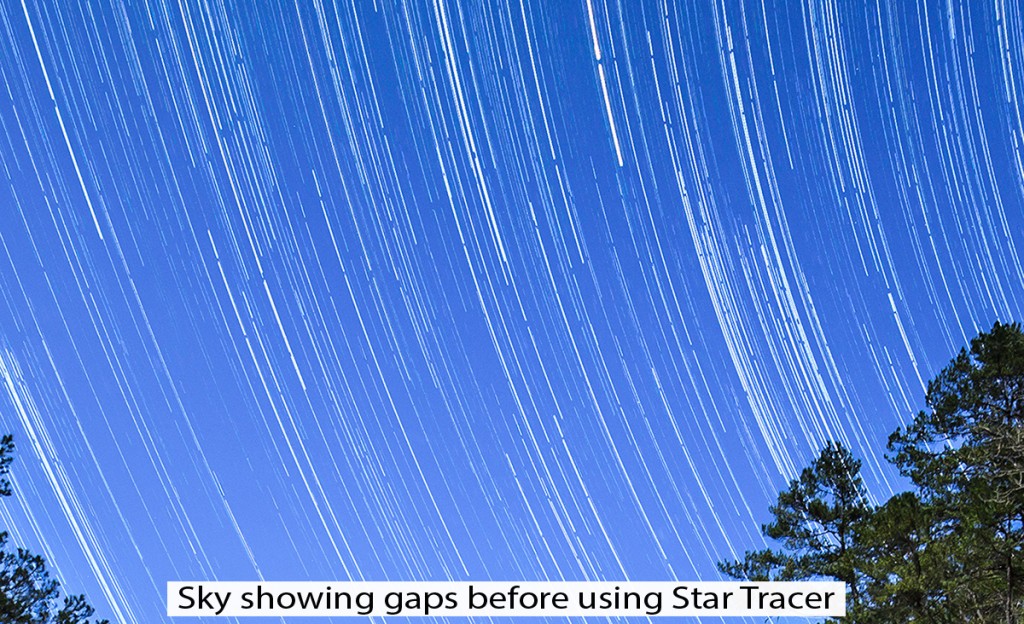
Stacking does introduce faint gaps between each exposure. After you have run the blending modes and combined the files, you can see the faint gaps created between the exposures. If you happened to stop the camera to check a file or move a flare buster to a new position, you will have an even longer gap. These gaps do detract from the star trails as they break up the continuous flow of light you are attempting to capture.
In this crop taken from the sky after the blending modes have been run, the small gaps between the segments can be seen along with larger gaps created by my stopping the process briefly to check the exposure balance.
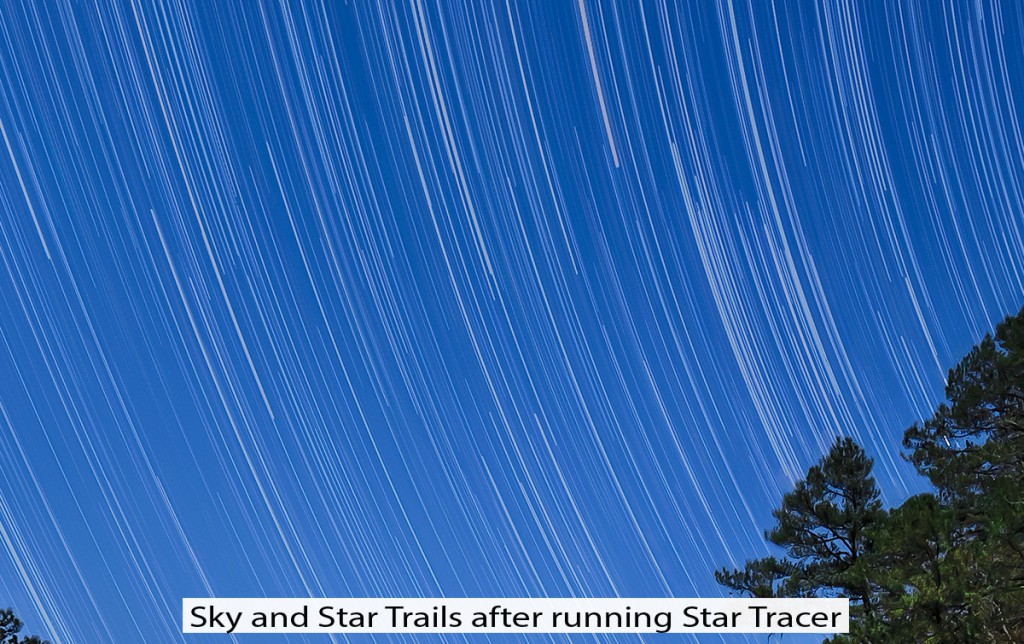
I have found that the easiest way to remove the gaps, is by using software called “Star Tracer”. Star Tracer is a stand-alone Windows based software. There currently is not a MAC version. Star Tracer uses some pretty advanced algorithms to move the image forwards and backwards to adjust the existing trails over the gaps, thus closing them. I feel that closing that gaps makes for a much more appealing final image. Star Tracer comes with a nice help section and is pretty straight forward to use. The most critical data is making sure the FOV (Field of View) of your lens has been inputted correctly into Star Tracer before you run it.
In this crop, of the same image after I have run Star Tracer you can clearly see how the various gaps have been closed, giving the final image a much more pleasing look.
The end result will have an amazing amount of detail for a photograph taken during the black of night and I feel much more pleasing to the eye. With stacking you can create images that will appear as if they were taken in daylight, in fact many people will try to tell you that the final images are combinations of daytime and nighttime exposures. Of course that is not true and all they have to do is go out and try it. One of most fascinating aspects of this process to me is just how light is available when the correct exposure/aperture sequence is determined. There is more work involved, but the final image that can be produced is more than worth the effort.
01/23/14 Drobo does care–A revisit to my original complaints with support for my Drobo 5D
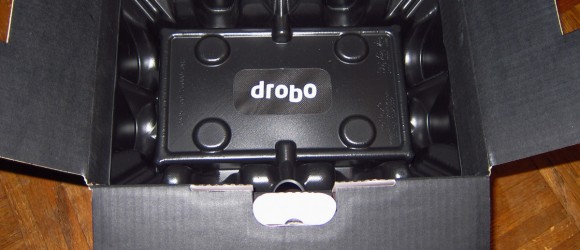
- Drobo offers an excellent packaging solution to their products
- The Unit arrives in a totally protected package
Recently, I wrote a article about the issues I had with Drobo Corp. in regards to the trouble that occurred when I attempted to upgrade the firmware on my Drobo 5D.
Not long after I wrote that article I was contacted directly by Drobo by a phone call. They had read my article and were concerned that my support experience had resulted the way it had. The phone conversation was with the Vice President of Drobo’s Service and End User Support. During the call I went back over my previous case and the problems I incurred trying to get my original 5D to run the latest firmware and still connect via USB3. One of the points I made was that I had been surprised to come away with such a negative impression since previously all of my support issues with Drobo products had been very positive.
What I took away from this call was that Drobo does care about the end user. As a company, Drobo is focused on supplying a high level of quality for their hardware/software and support of these products. The V.P. of service agreed that my previous experience with Drobo’s support process was not the impression that the company wanted to impart.
The fact that Drobo’s V.P. of Service reached out to me was most impressive. I did not expect this and because of it, I realized that my most recent impression of the Drobo Company and their support process was incorrect and with his guidance should give this process a 2nd chance. From our conversation I we put a plan in place that we both agreed should get me to a final resolution that was better than the first. Based on our conversations, here is what Drobo agreed to do for my problem:
- Ship a new 5D off the line to replace my 2nd refurbished unit
- Assign a new support case and give me the support from a dedicated 3rd level engineer who would follow the case until resolution
- Provide phone numbers so that I could talk with the tech when I felt it was required
- Pre-test the new 5D before it shipped to make sure it operated to specs.
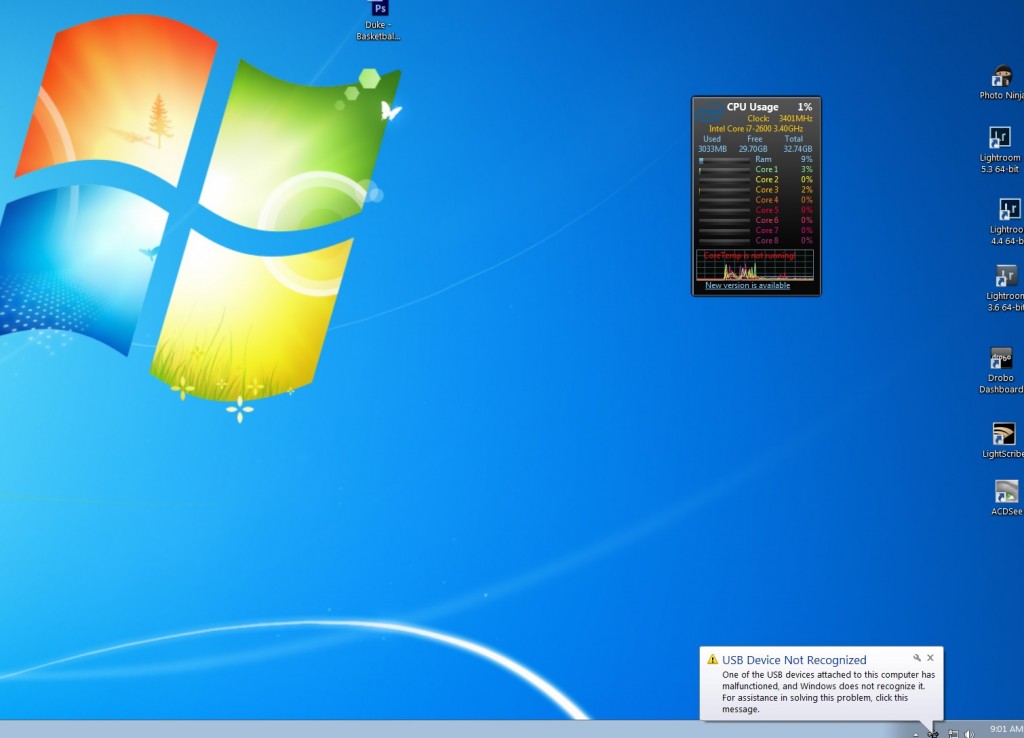
The end result was that I received a replacement unit and a set of (2) 2 TB drives that Drobo had pre-tested. The new unit arrived with the latest version of the 5D firmware, 3.0.9 and it installed clean on my production win7 64 machine. I was able to move my (5) drives over to the new 5D and the array came up clean. All the data was immediately accessible with no errors that I could determine. The throughput of the USB3 connection was as I expected with no slow downs and there were no USB3 mass storage device driver errors in device manager (indicated by yellow exclamation points). During the boot up process of the new 5D, I did see the “USB device not recognized” screen but this is only temporary with the box going away after about 5 seconds. The new unit boots up and is assigned a drive letter by the win OS like it should. It is very possible that my Asus P8P67 main board and it’s corresponding NEC/Renesas USB3 drivers have a slight issue with the Drobo boot process, however the key factor is that the 5D comes up clean and operates correctly.
I came away from this experience with a totally different opinion of Drobo and their products. Drobo is a company that does care about the end user. It’s also clear that they are concerned about situations like mine, enough so that they were willing to reach out to me directly. It’s clear to me now that one of their company goals is to produce an environment that allows the end user have the best experience with their products.
I also came away with a few thoughts about my operation that may have helped in this situation:
- When my problem first happened during the upgrade of the 5D’s firmware I had not registered my 5D with Drobo. They are very clear about needing to have this done and it was a oversight on my side for not getting it done when I first received the product. By registering your device, you are letting Drobo know that this serial number is now in use so they can can track it.
- I did a firmware upgrade without having my 5D fully backed up. Normally I will have a backup of a Drobo in use. It may not be 100% current but will be within 90%. In this case my backup was only about 25% of the 5D before I attempted the firmware update. Having a full backup is very important, as it can reduce the stress of trying to get your unit back on-line or operating with the most.
- I should have pushed harder to ask to speak to a representative. I made several attempts of this in my online case, however I never reached out to Drobo from outside the confines of my on-line case.
Overall I feel the 5D is still an excellent value when compared to other raid solutions (for a win7 platform). I was trying to figure out where to go next as I really did not want to dedicate a new PC just for a raid array. The Drobo 5D still offers a great overall solution for a raid device for a end user like myself.
Drobo is aware of the fact that some customers may have run into situations like my previous one and they are working to add support solutions that will give the best possible answers. They have re-done the support website and it’s now much easier to navigate to your open cases. Most cases will have an initial response within 12 hours or less. I also feel it’s safe to say that the Drobo Company is very concerned about their support for the 5D as it’s one of their best selling products. The company is making some internal changes with the support process to make sure that a 5D support case does not get sidelined as mine did back in September.
01/08/14 Problems with Drobo 5D after upgrading past Firmware 3.0.7
This information was originally posted to my blog back in October of 2013. However I am still receiving emails from other users who have run into this same problem with both Win7 64 bit and now Win8 64 bit and USB 3 connectivity. I would strongly recommend you do not upgrade your Drobo 5D unless there is some other pertinent reason for the need. I don’t feel that Drobo has a good grip on this issue based on my month long open call with them. Once again, it should be noted, Drobo no longer offers free tech support for any of the Drobo consumer lines, after the first 90 days of purchase. After that you will be required to purchase a 1 year contract from them for around $179.00. U.S. This gives you the right open a ticket and email back and forth, but not “talk” to a human. Based my my 25 years of experience in the tech field, I feel this angle is wrong. In my case, one simple phone call with a tech or “engineer” as they are called would have easily solved this issue. Remember my 1st replacement unit was defective with the power switch. Something that anyone who has used these products for any period of time would know. Instead my tech or “engineer” implied that I was “stupid” and did not understand the basics of how the 5D operated. Interestingly enough after a huge amount of my time wasted on emails, the same tech or “engineer” was astonished to see that “yes it does appear that your current replacement Drobo 5D chassis has a power supply issue”. What was even more interesting was that when the 2nd unit arrived, it worked just like the 1st unit I had purchased (which failed after the firmware upgrade past 3.0.7). Personally, I do have a problem when I company takes the position that (A) Your time is not important to us, and (B) We know more about the unit’s basic function than you even though you have operated it daily for almost 8 months.
Drobo used to have excellent support, dedicated tech’s who followed up with your issue. This was all provided with the base 1 year warranty. Now it’s 90 day’s and after that pay up. Also remember that the price of the Drobo 5D is around 800.00 U.S. well actually that is a bit misleading, as you do need support so the price is really $979.00.
Drobo had a great idea, not sure if the original company founders were bought out (more than likely the case) or if something else happened. But my future raid solutions will all be based on a raid card (LSI for example) and a simple PC board/tower case. This will actually cost out cheaper than the current price point of the Drobo 5D with necessary support.
FOR NOW I WOULD NOT UPGRADE TO THE LATEST FIRMWARE ON THE DROBO 5D IF YOURS IS WORKING OK WITH A WIN7 64 BIT MACHINE AND USB3. Once you upgrade, there is no longer a way to downgrade. Drobo used to offer this option with their older superior support on the old 4 bay models, but now they are only looking forward. For a single owned shop like myself that puts a large dependency on a raid 5 or raid 1 setup for primary backup this product is no longer a valid consideration.
Update on 10/12/13
What I thought was a fix, turned out to be a dead end as the replacement Drobo would not work correctly on my production PC. It would boot up, and briefly showed all the correct lights, but as soon as windows gave the new hardware tone, the Drobo rebooted and started this process over and over, never coming on line. I was able to bring up a new disk pac with the replacement drobo, (2) 200GB drives. This worked correctly, but for some reason, my (5) 2 TB drives would not work. I also received a windows error about “A USB device attached to this computer cannot be recognized”. This error comes up with either Drobo, mine or the replacement.
I went back to my original Drobo 5D with my hard drives and booted it up. It came up fine, still getting the USB device error, but still it comes up and is recognized by windows and assigned a drive letter.
As of Friday, Drobo is sending me yet another replacement 5D now stating that the original replacement was defective!!. Something I believe I tried to tell them after I first tried to use it. As of today, I still have not SPOKEN to anyone at Drobo, from a tech to supervisor and it’s quite apparent now based on the information I have inputted to the case, that Drobo is not interested in talking to me. I am sorry to see that this is the way that Drobo has gone and I have for sure purchased my last piece of equipment from them. I love their website showing all the “happy” users, well, that is pure fiction.
Update on 10/05/13
After working through two more days, and getting a better feel for the tech support with Drobo, I finally was able to fix this issue. The problem stemmed from the fact that both of my PC’s (with Asus boards) were running very back level USB3 drivers. On one PC drivers dated back to 2010 and the other 2011. I am planning to write up a bit more about this, but I did want to state, that DROBO DID RESOLVE THIS MATTER AND MY 5D IS NOW RUNNING ON BOTH MY PRODUCTION AND TEST PC’S WITH NO PROBLEMS. I am willing to take some of the blame for this entire debacle, however Drobo could have made this so much easier with just one phone call explaining the issues with the USB3 drivers. I will also note that Drobo was helpful in providing an updated driver for both of my Asus mainboards, something that Asus was not able to do since they quit updating the P8P67 mainboard over 1 year ago. Net, to this story, things have changed at Drobo. In the old days, you could talk to a person, and that person gave you an extension and you could call them back until the problem was resolved. Now you are going to work on-line, (the way of the world) and no doubt there will be some misinterpretations of instructions. However I have to state that my initial extreme disappointment with the Drobo support group has now been lessened and in the future I will know how to proceed with them.
Update 10/02/13
Amazingly since I started this problem after trying to upgrade my Drobo 5D firmware, I still have not been able to talk to a “supervisor” within the Drobo tech support organization. Yesterday I received a “replacement” unit, which was dirty, smelled burnt and was scratched on the faceplate. This was the unit that was supposed to work correctly with USB 3, however when I brought it up on my PC, it had the same issue: The Drobo comes up, is seen by Win 7, Win 7 makes the tone for adding a new device, immediately after that the Drobo drops back to standby and on a detailed inspection the USB mass storage driver has failed. ON THIS REPLACEMENT UNIT I WAS NOT ABLE TO GET THE UNIT TO EVER COME BACK UP EVEN BY RELOADING THE USB MASS STORAGE DRIVER.
Based on my 20 years experience in the PC market, where I worked for IBM for close to 30 years, I am amazed by this response, especially from a company like Drobo that just a years ago had excellent customer service. If you can’t get through to a supervisor especially after having an open call for over 60 hours and the unit is still not working, then THERE ARE SOME PROBLEMS IN YOUR COMPANY. Sadly this seems to be the trend in business today and I hate to see Drobo go this route. They have obviously spent a ton of money on marketing, just look at their current website. However I WOULD STRONGLY warn anyone or any company not to make a large investment for data protection with Drobo products. Their lack of ability to communicate, reach out to a customer who has a Drobo that was working perfectly before attempting a Drobo firmware update, and lack of management follow up is pretty telling.
As long as you bring up the 5D in a USB 2 environment it still works fine, however this totally defeats the over $800.00 dollar cost of the chassis in that you are dropping back to a USB2 transfer speed and you can get a 1st Gen Chassis for that. Sure they are no longer sold by Drobo, but there are plenty of them around. However now that I think about it, that might not be a good idea either since the support for an existing product is pretty much terrible, I can’t imagine what it would be like for older 4 bay.
I understand I running a Asus mainboard, but the USB3 drivers with most board companies are pretty much the same as long as the board is a Intel board.
From here it’s back to chassis and LSI cards, with drives for me.
This is my earlier post when the problem first started.
IF YOU ARE RUNNING A DROBO 5D, ATTACHED TO A WINDOWS 7 PROFESSIONAL 64 BIT MACHINE VIA USB3, I STRONGLY RECOMMEND YOU DO YOU NOT UPDATE THE FIRMWARE OF THE DROBO 5D TO 3.0.8 UNTIL YOU CHECK ON THE DATE OF YOUR INSTALLED USB3 DRIVERS, ESPECIALLY IF YOU ARE RUNNING A NEC OR RENESEAS USB3 CHIPSET.
I have been using Drobo products for storage/backup now for almost 4 years. For most of those years I used the original 4 bay 1st Gen Drobo that connected via USB 2. This device has been stable for most of this time, and had worked as a external raid 5 enclose would be expected i.e. notifying me when a drive was close to failing or failed and allowing me to replace said drive with no data loss. My only issue with the 1st generation Drobo was the fact that is slow for reads/writes mainly due to the fact that it’s only connection was USB2.
When the Drobo 5D, 5 bay product was announced I did not immediately move to purchase one. I felt (and now still do) that the price point of close to $850.00 was too high for my budget. However early in 2013, I was totally out of space on my 1st generation Drobo so I purchased the Drobo 5D. I installed the 5D on my main windows 7 64 bit machine, utilizing the USB 3 interface. I used all 5 drive bays and filled them with 2TB drives. Since I made the installation of the 5D, I had had no problems, until this past Friday night, when I made the FATAL mistake of allowing the Drobo dashboard to download and install the latest firmware for the 5D. Normally my thought process on firmware updates are “don’t update to them unless you see a specific need fixed”, however on this night I went ahead and allowed the Drobo dashboard to upgrade both the firmware on the Drobo 5D and Drobo Dashboard.
From here, things went downhill fast. The firmware update on the hardware failed. This pinged my memory back to when I tried this on my Drobo 4 bay, and I remembered that I had had the same issue with it. On the installation failure the Drobo 5D rebooted and then attempted to come back up. It went through the entire reboot, and then just as I received the tone of a new device being added to Windows, the Drobo 5D went into standby. I attempted one more hard restart and the same thing happened. From here I called Drobo customer support, and again I was in for a rude awakening. One thing I forgot, was my old 4 bay never worked correctly on firmware updates from the Drobo dashboard software, instead I had to always do a manual firmware update.
In the past I all of my tech support calls with Drobo support have been positive. They have been prompt, informed about the product, and have been able to provide a fix, either software or hardware. On this call in I was told that I had not “registered” my Drobo 5D, even though I had placed a tech support call with Drobo when I received the unit and I could see both the call record and serial number of the 5D in “my support” portion of the Drobo website. The tech I spoke to was polite, but would not proceed until I registered the product. I went ahead with the registration and then found out that Drobo no longer provides “free” tech support after the 1st 90 days of ownership. After this, you have to purchase a 1 year support contract for $162.00. This surprised me, but at this point, I didn’t care, as I needed to get to the data on this Drobo 5D. Most was backed up offline, but not in a local backup. NOTE TO DROBO, for the price of over $800.00 for a empty raid enclosure, I believe you should be able to continue to provide tech support for no charge for at least the 1st year of warranty. However Drobo has taken the sad path of most companies, if you need help, prepare to pay. This needs to be spelled out a bit better up front.
After paying the 1 year contract, not much else improved, except that I figured out on my own that my 5D was still OK, and somehow the firmware update had created an error on the Windows 7 mass storage USB device driver. After taking to Drobo tech support, it became quite clear that the firmware update had not taken and I had to download the firmware and do a manual update. This did not fix the problem and the 5D still came up and went into standby. A NOTE TO DROBO, you need to post a bit more information on this upgrade as when I spoke to a 3rd tech later on Saturday, I was informed that this is a known problem after you upgrade the firmware on the 5D to 3.0.8. This is terrible customer service, period. If you are using a raid enclosure, you are using it mainly to protect your data and provide a level of security, NET, if I had not followed the prompts on the screen, my Drobo 5D would be working fine. The 3rd tech I spoke to on Saturday also told me that there currently was not a fix for this issue and blamed it on the Windows 7 mass storage driver. Really? Did Windows suddenly change this driver? I checked as far as I could and the date on my system for the USB Mass storage driver showed no change, in fact it’s the same date as when the OS was loaded.
Here is where things are currently:
- If you are running Windows 7 64 bit and have a Drobo 5D, using USB 3 connections, then if you update to the latest firmware of 3.0.8 for the Drobo 5D, you have a very good chance of getting this same issue. I am running an Asus XXXXXX board, with a Intel i7 processor. This is no way I know to get this driver/firmware screwup fixed. Net each time from now on, when you attach the Drobo 5D, it will come up normally, then go into standby. I tried a full system restore back to the date before I did this firmware update, the system restore was successful, however the problem was still there. Based on this it’s a fair conclusion that a full image restore of the OS (Win7 64 bit) would not fix this problem as the issue is with the Drobo firmware 3.0.8 and the stock Windows 7 64 bit Mass storage driver for USB. The only way I can think to fix the issue is to back off the firmware to a previous version than 3.0.8 on the Drobo 5D.
- You can fix the problem and continue to use the Drobo 5D by either unplugging the USB 3 cable from the PC or back of the Drobo 5D, while leaving the power on the Drobo 5D. Windows 7 will then see it correctly and add the drive letter for the Drobo. You can also go to control panel==device manager and locate the USB mass storage device driver that has failed. It will have the dreaded yellow ! next to it. Select this component and go through the process to reload the driver using the 2nd option. This will get the drive back online, and the Drobo will come out of standby and Windows will assign a letter to it and you can operate as normal.
- You can also plug the Drbo 5D in to a USB 2 port and it will work fine. This was one answer I received from Drobo tech support. This makes no sense as you have now brought your 5D back to the speed of the older 4 bay models.
Overall I still have a ticket open with Drobo tech support and if I get some form of resolution, I will post the results here. Currently I can only get my 5D to operate at the correct level, by unplugging the USB 3 cable, or reloading the Windows 7 mass storage driver.


