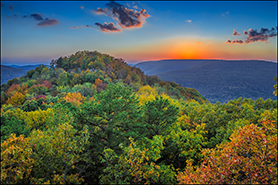
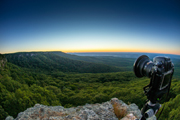
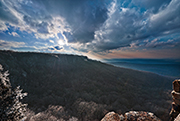
Hasselblad Phocus Color Comparison, Example Number 1
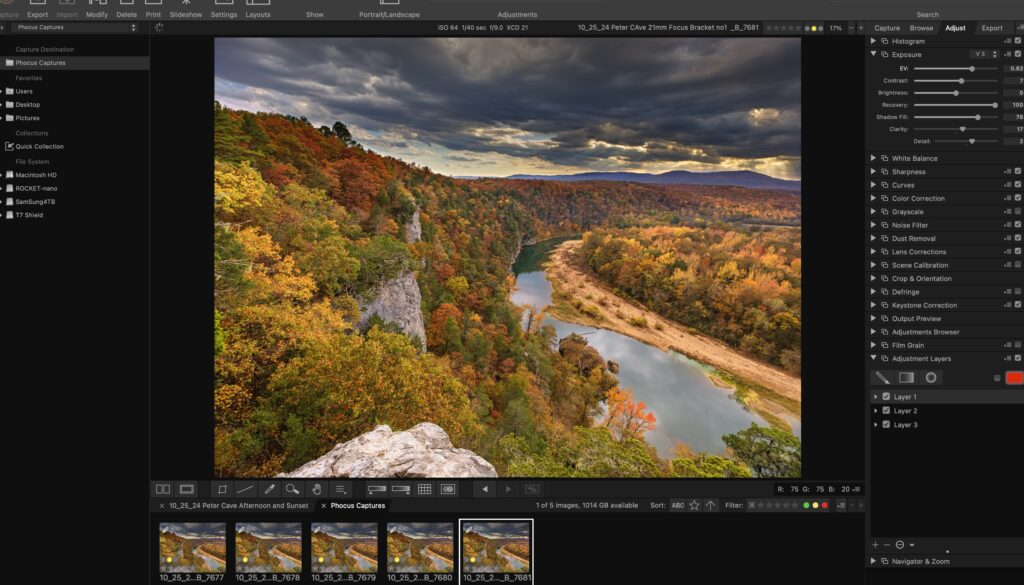
Hasselblad’s color or HNCS (Hasselblad Natural Color Solution), is one of the most highly touted features of the X series of cameras. From the X1D, all the way to the X2D. Before I purchased into the Hasselblad system, I had read about HNCS for years but had not given it much thought. I had used cameras from Phase One and Fuji and these seemed to give me a very nice response to color. I started working with the Hasselblad X2D in February of 2024. When I first started using the camera I immediately headed to Lightroom to work with the files. Lightroom has a modern interface, excellent toolset, and a catalog. After working with the X2D for several months, I became more interested in Hasselblad Phocus on the desktop just to see the colors and overall image response was going to be better. What I found was that in general Phocus does give a much more pleasing look to the images. However this look and feel comes at in extreme cost as Phocus Desktop (the latest version is 3.8.4) has to be the worst overall raw conversion software I have used and I have tried them all. I will write more on that later, but for the purpose of this article I want to show why it may be worth fighting the battle with Phocus as the color is truly amazing.
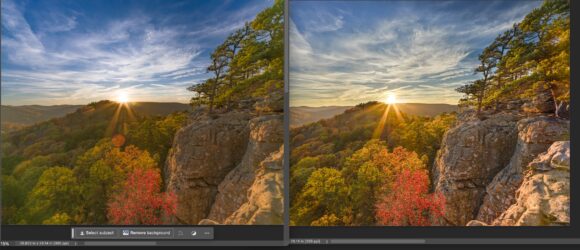
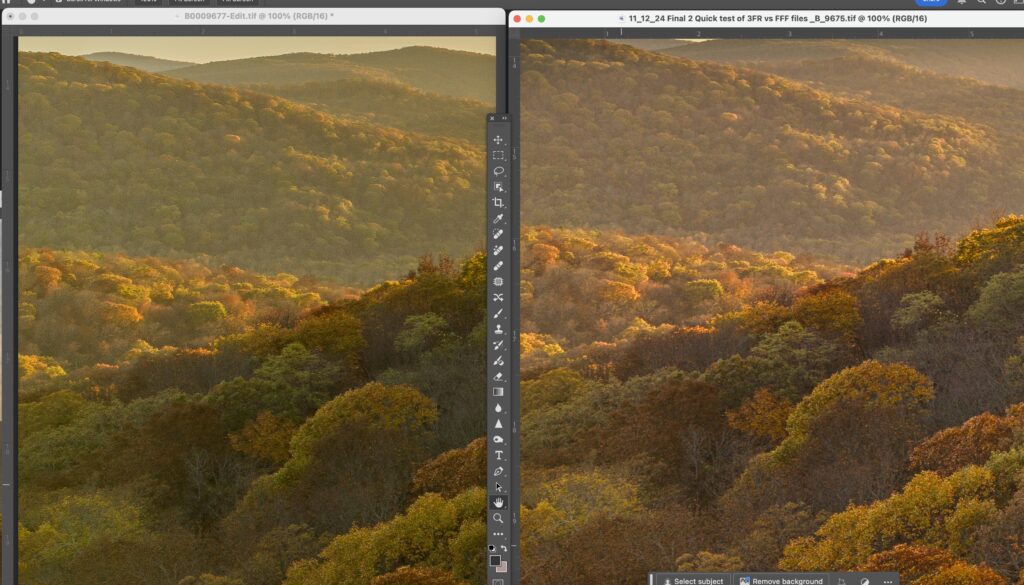
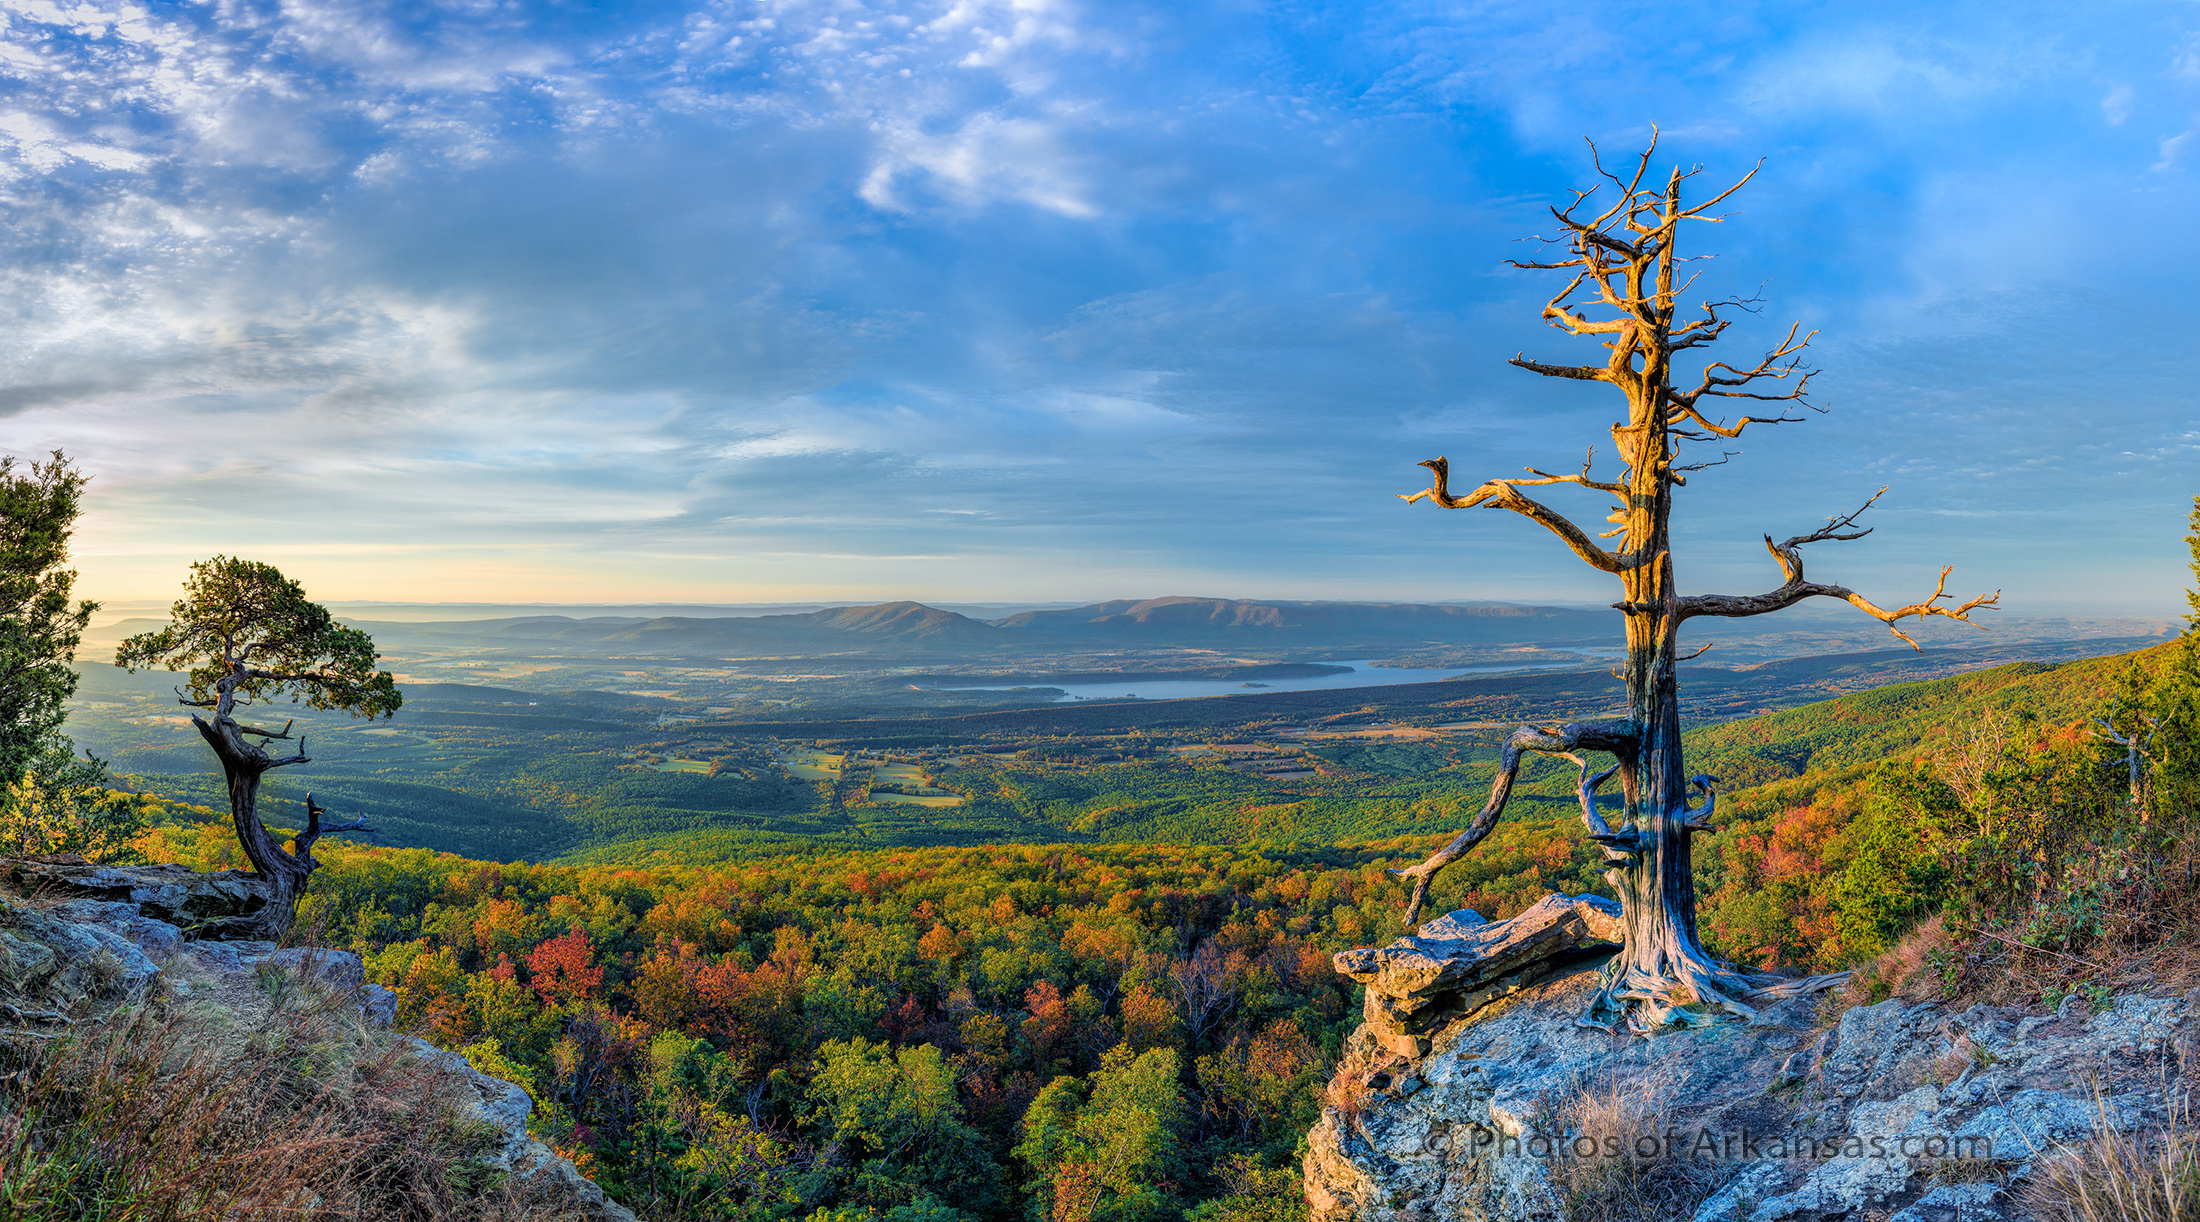
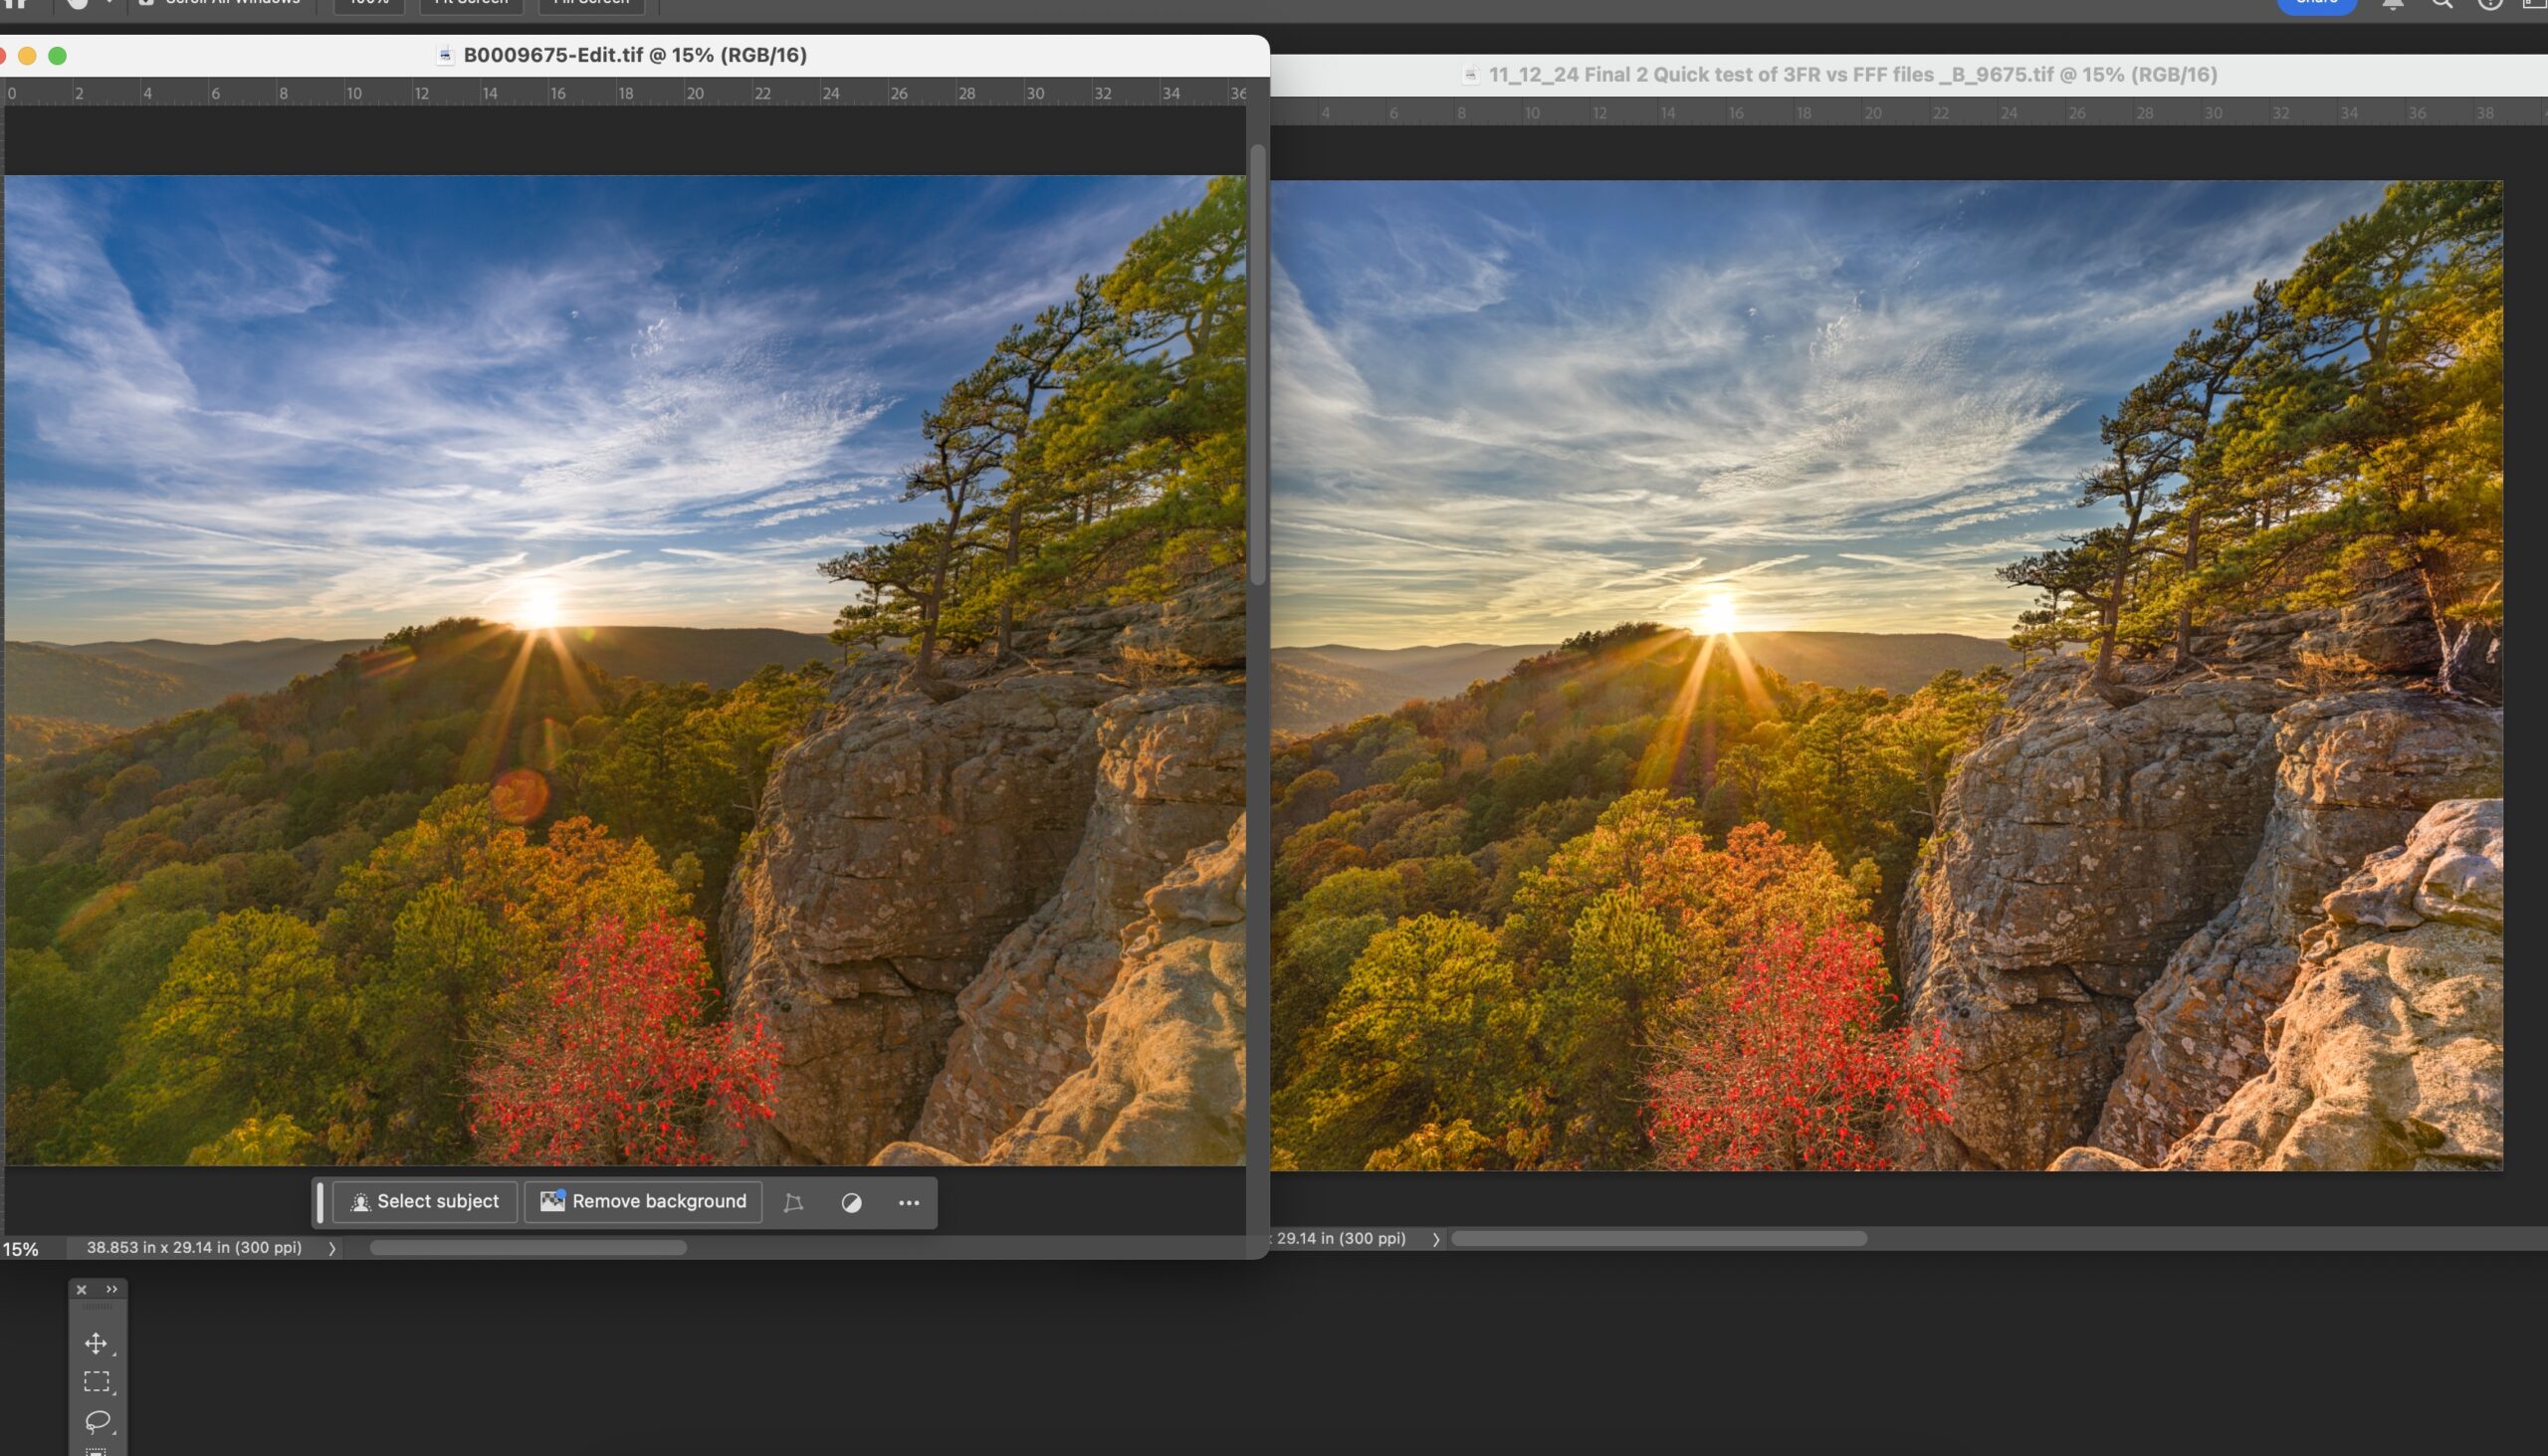
In the two images shown above, you can see the best I was able to get from Lightroom on the left and Phocus is on the right. To my eyes, the overall look of the image on the right is much more pleasing. There is much better shadow definition in both the areas on the left (trees) and the bluff on the right. The look of the sun on the black gum in the lower center is also much more effective. (note to make sure I did not get the images mixed up, I have left all of the flares in the Lightroom images). The lens used for this shot was the 20-35, which has an extremely bad response to direct sunlight generating terrible destructive flare. But more on that later.
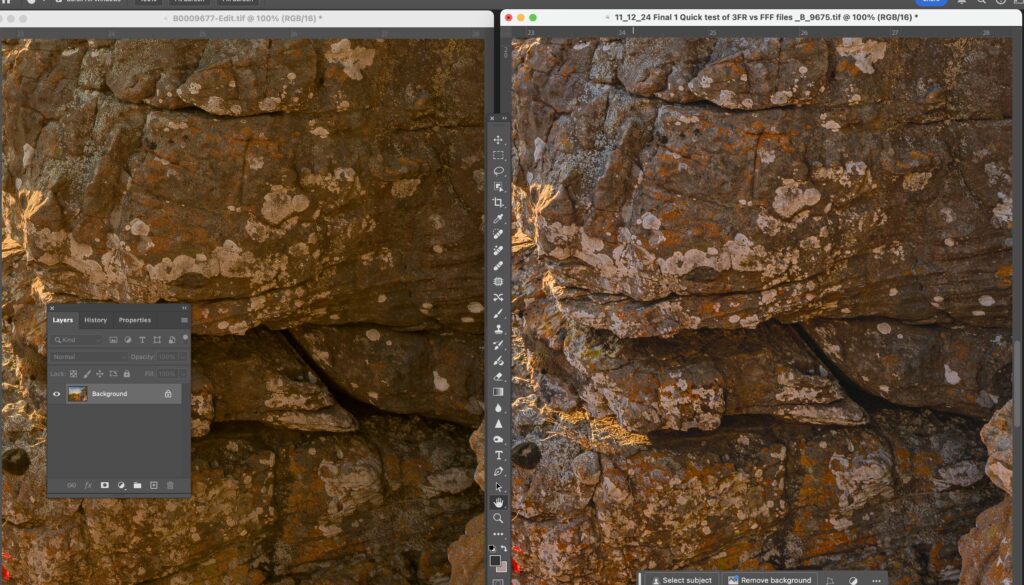
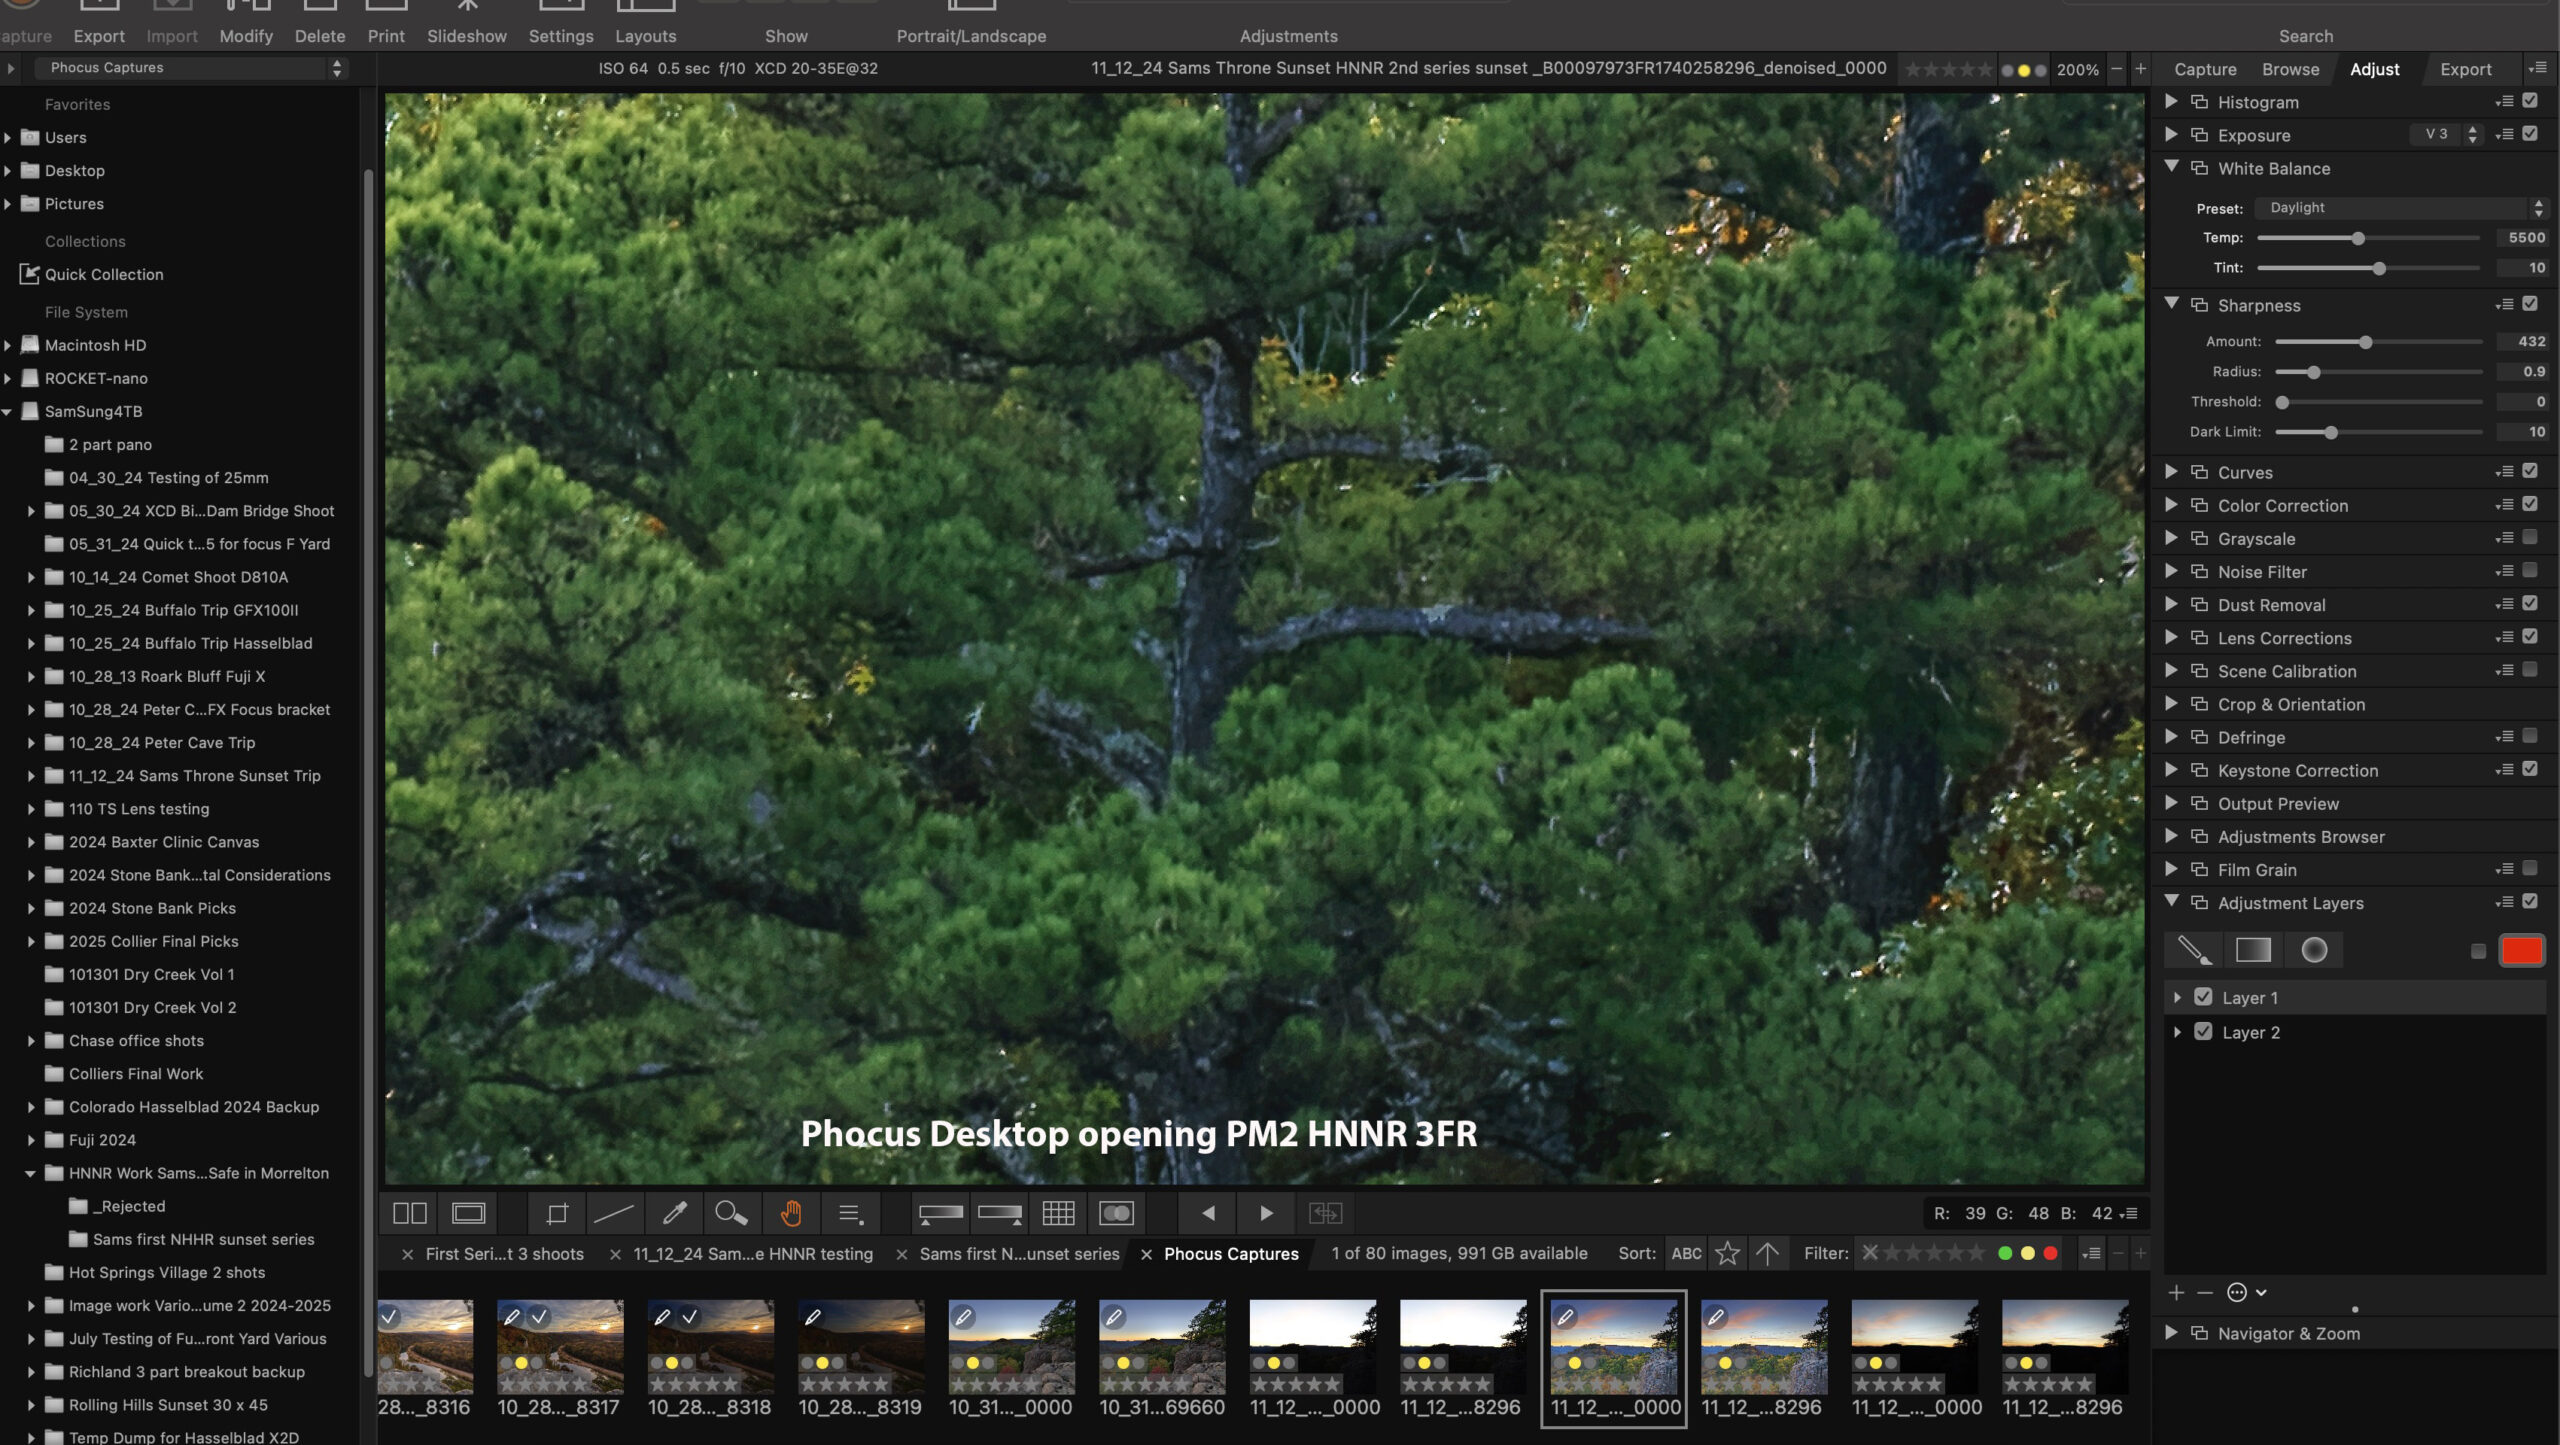
In this close up you can clearly see that the Phocus image on the right side has much more definition in the shadows. The color response is also much better. I should note here, I am not slouch to the use of Lightroom. I do not consider myself in any way to be an expert, but I have always been able to use Lightroom to get what I feel is an excellent rendition of an image from a raw file independent of the camera.
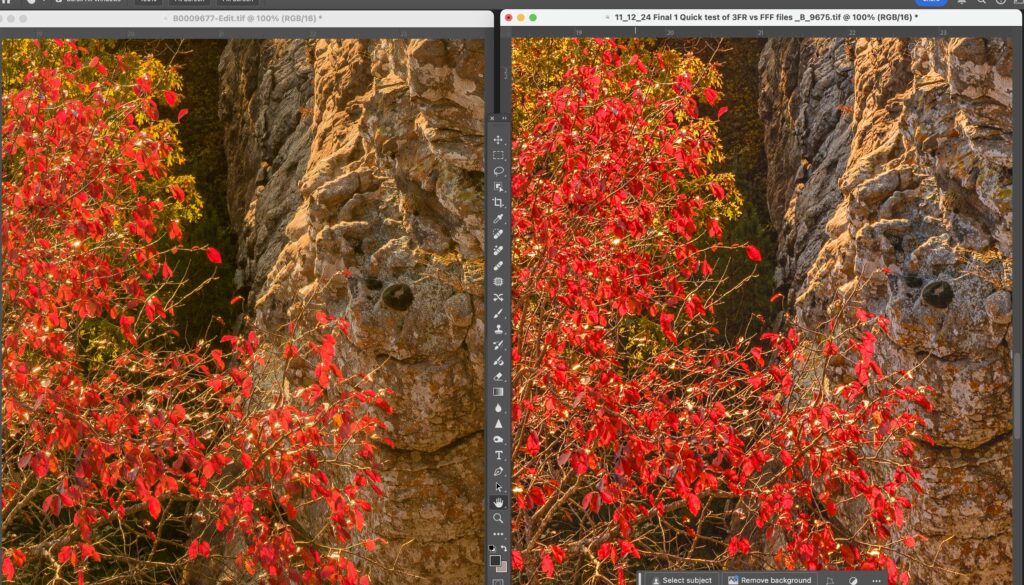
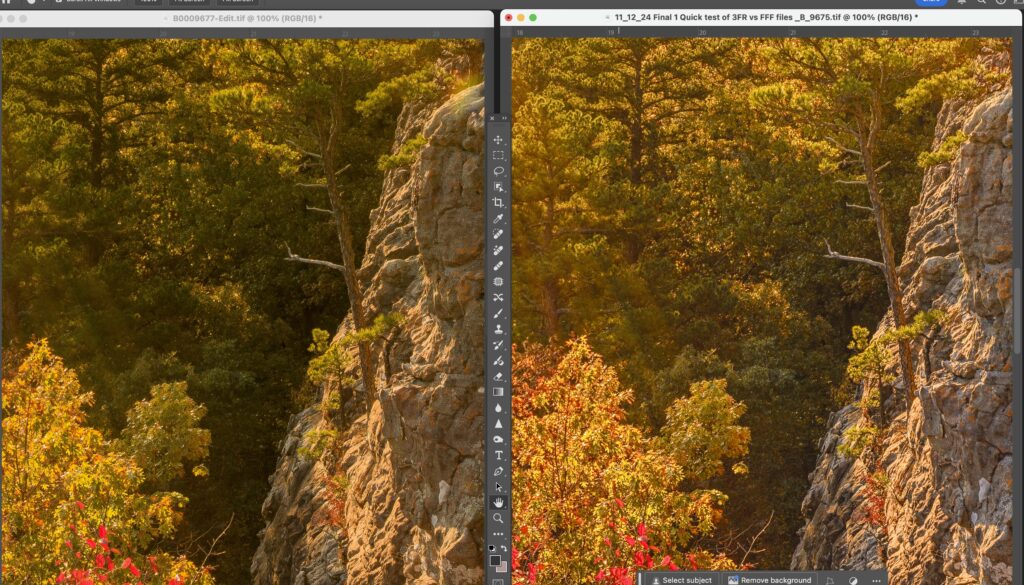
In this comparison look at the reds and how much better they are defined. Also the details on the bluff appear to be better. Note the shadow area behind the red tree and you can see there are better details. When you click on the image look at the details on the bluff. There is clearly more separation on the Phocus image.
I zoomed in on the bluff to show this in more detail. The bluff is covered with all forms of fungus and lichen mainly white and orange. The white areas have better defined edges and the orange stands out better from the color of the rocks. The Phocus image is on the right.
In this side by side look at the Oak tree in the lower left and then the trees in shade behind it. Much better shadow recovery by Phocus and you can still see the light rays from the sun in the shady parts of the image. Also note the lone pine tree growing from the bluff and how it is more prominent in the Phocus example.
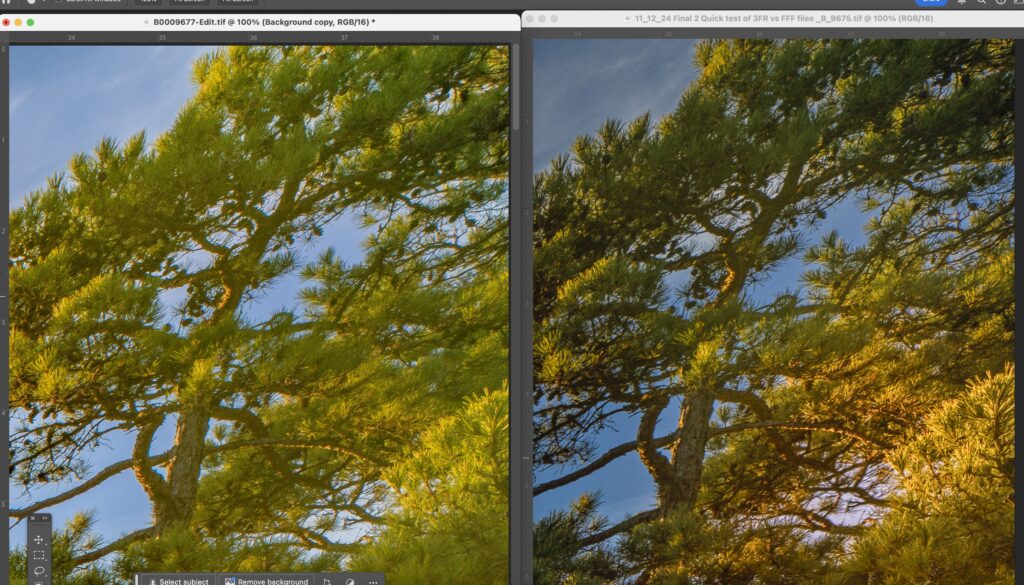
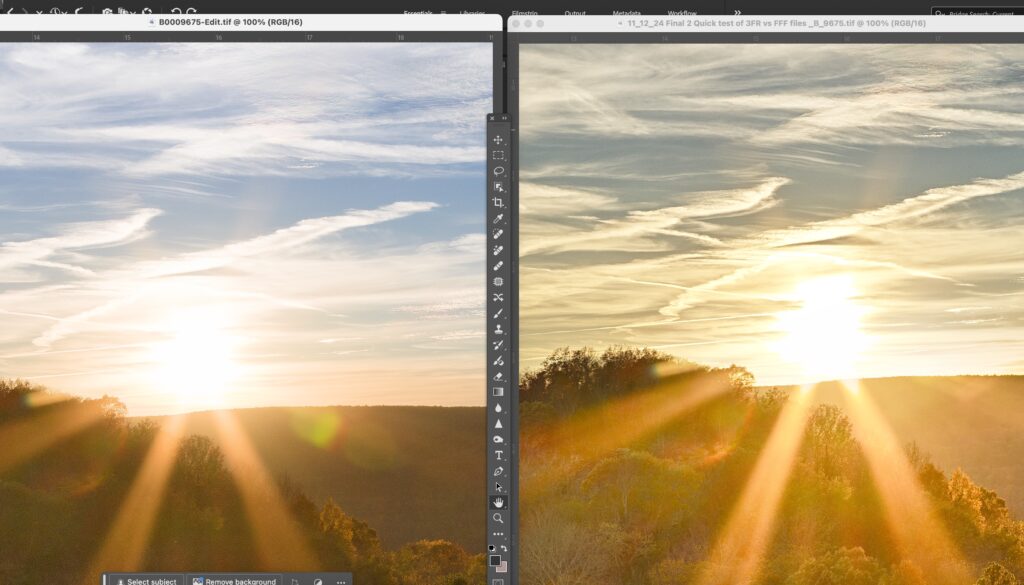
The Hasselblad 20-35 appears to have an huge flare issue when you are pointing it directly as the sun as I did to photograph this sunset. What I immediately noticed was how Lightroom (image on the left) lost a lot of the definition in the pine tree and pine needles. I realize much of this was due to the flare as it was very destructive. In masking this shot I used Lightroom’s Sky Select and it did a great job. Thus I was able to use sky select a second time, and invert it grab everything else. (THIS WOULD BE THE SINGLE GREATEST ADDITION TO PHOCUS LAYERS), in Phocus I was forced to manually draw a mask to get as much of the pine tree as I could. But even with the terrible toolset in Phocus layers, I feel that Phocus did a better job. To really see the differences please click on the image and look at it at 100%
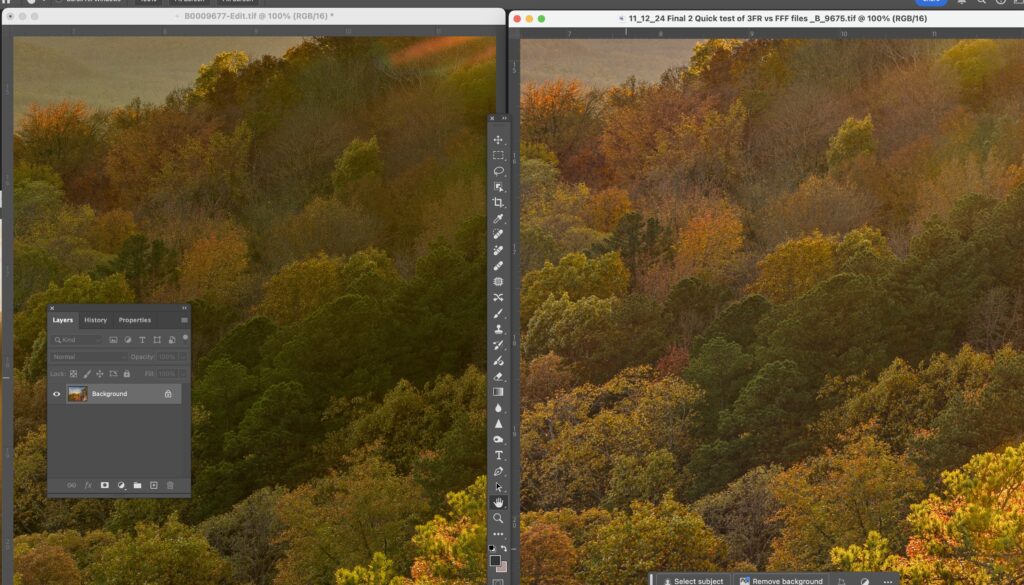
This image speaks for itself. The Lightroom image is on the left and no matter what I did and toolset/masking I used, I could not get the details to come out in the trees. You can clearly see that there are more visible details in the image that Phocus generated. I have removed the flare from the Phocus image using the “Generative Fill” option in Photoshop. The sky in the background above the mountain also seems to look better.
A quick comparison to show how the details in the distance parts of the this shot came out. Shadow details appear to be better in the foreground. Also note the areas in the background. Along the bluff line you can see better details in the trees. The colors and details in the background tree line really stand out better in the Phocus images. The Phocus example is on the right.
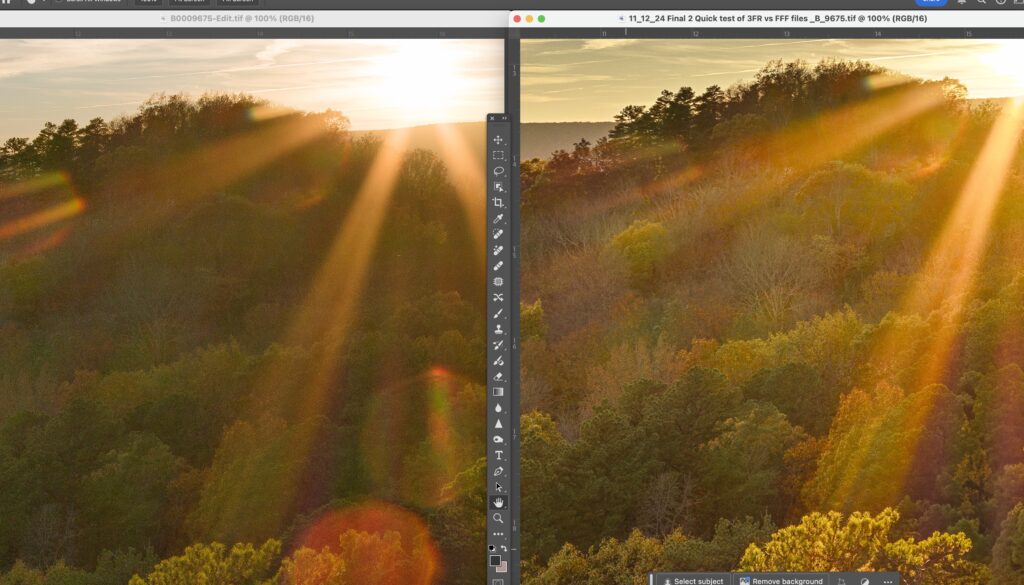
This example brings to bear some interesting differences between Phocus and Lightroom. The Phocus example is on the left and you can see again that somehow Phocus is pulling out more details in trees even though there is a huge amount of flare. The sky has a much warmer look in the Phocus image in these areas around the sun. In the Lightroom image you can see there a bit of a red tint that moves up into the white of the clouds. I also prefer the sun rays in the Phocus image.
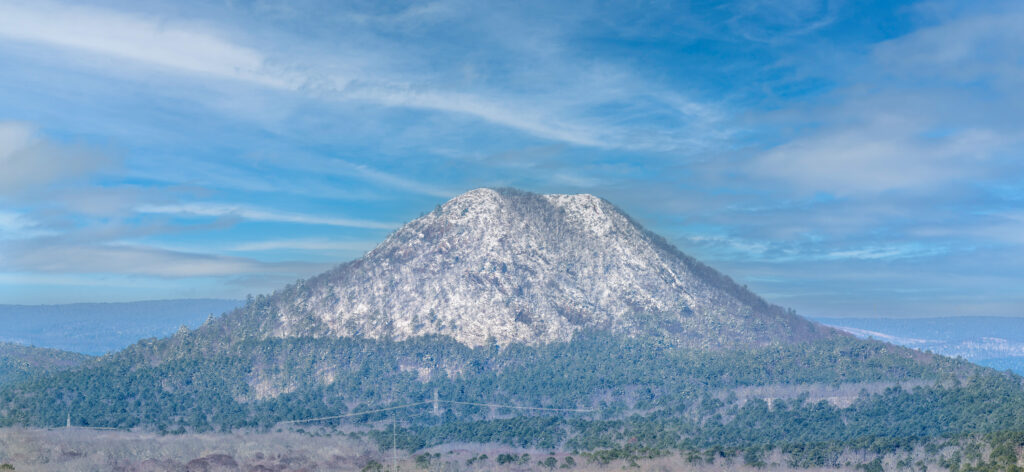
01_11_25 Valley View of Pinnacle Mountain after heavy snowfall
On the night of January 9th, 2025 Little Rock Arkansas had one of the heaviest snowfalls on recent record. At my house I recorded at least 14 inches. One of local favorite shots is the view of Pinnacle Mountain which can be seen very clearly at the end of my street. The day after the snow the sky was still grey and not clear and attempting to get a good shot of the mountain would have been a waste. However this morning the skies cleared and I was able to hike down to get a much better view. I had hoped to still catch all the snow in the pine trees near the base, however most of that was gone. However the mountain was still covered with snow which is rare event so I was rewarded with this view.
I shot this image in 2 frames with a Fuji GFX100II and the 500mm GF lens. All of the shooting on this morning was handheld with IBIS and OIS enabled and the results were spectacular. The details that this combination of lens and camera can capture are most impressive. I should add later some detailed crops but I am not sure that the effect can really be seen. This view is about 3 miles or more away from where I was standing and the individual tree limbs on the mountain and around the base are clearly visible. I shot with 3 frame exposure brackets and worked up only 2 frames from the total of 6. I was using Iso 80 with shutter speeds ranging from 1/650 to 1/250.
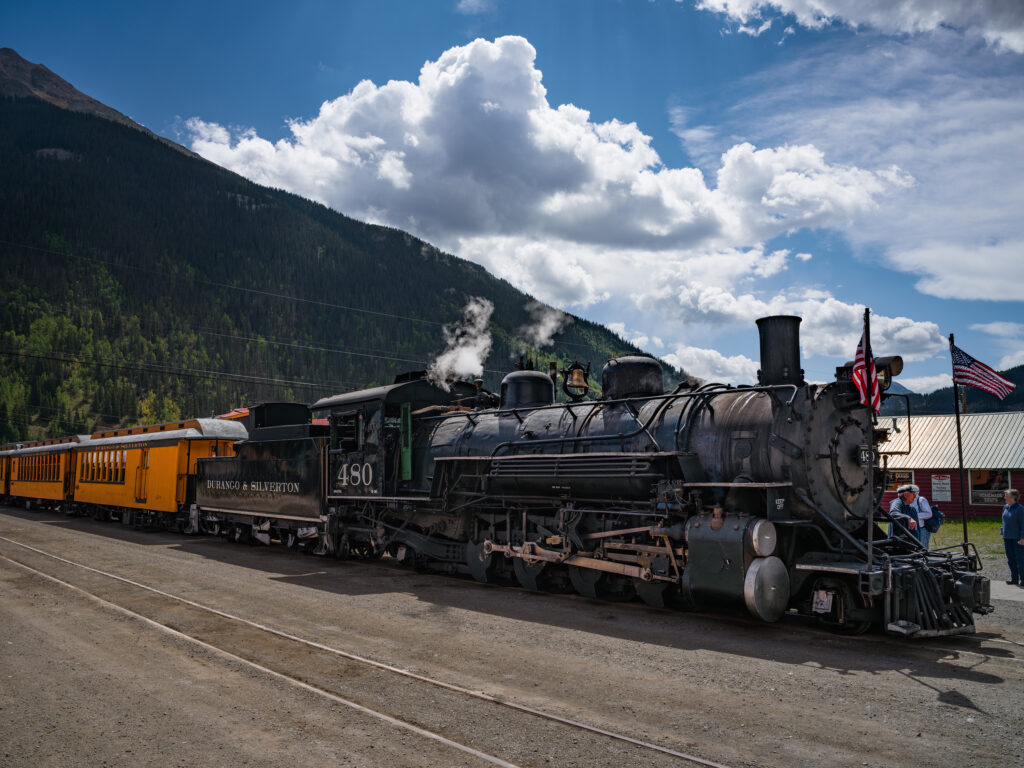
01/07/25 View of Silverton Colorado Narrow gauge
One of my favorite subjects is trains of all types, especially Steam engines. One of the most famous still running steam engines, is the Durango to Silverton Steam train. This railroad runs along the Animas river the entire way and allows for some amazing images. The only drawback is that you can expect to get covered in dirt and coal dust from all the smoke that comes back from the engine.
I was in Silverton back in September and had planned on traveling from Silverton to Engineer Pass, via Animas Forks. My last trip there was way back in 2006 and I expected the roads to be of the same quality. No, they were not and once you get to Eureka, where the old mill was, the road becomes a rutted mess, so bad that I figured it would take at least 3 more hours just to get to Animas Forks. So we turned back to Silverton and were able to go down to the station to wait on the steam train to arrive.
This was a static shot, after the train was no longer moving but the crowds were everywhere, so I planned on not trying to use a tripod for focus stacking. I am still going to remove the few folks in the image eventually. The best shot was going to be on the other side of the train where the sun was shinning but the crowds on that side prohibited any photography. So I worked on the shady side.
The image was taken with a Hasselblad X2D and 35-75 lens at approx 50mm. I used base ISO of 64 and was able to pull up the dark shadows around the engine. Depth of Field was fine at this distance so I have all of the engine in full focus.
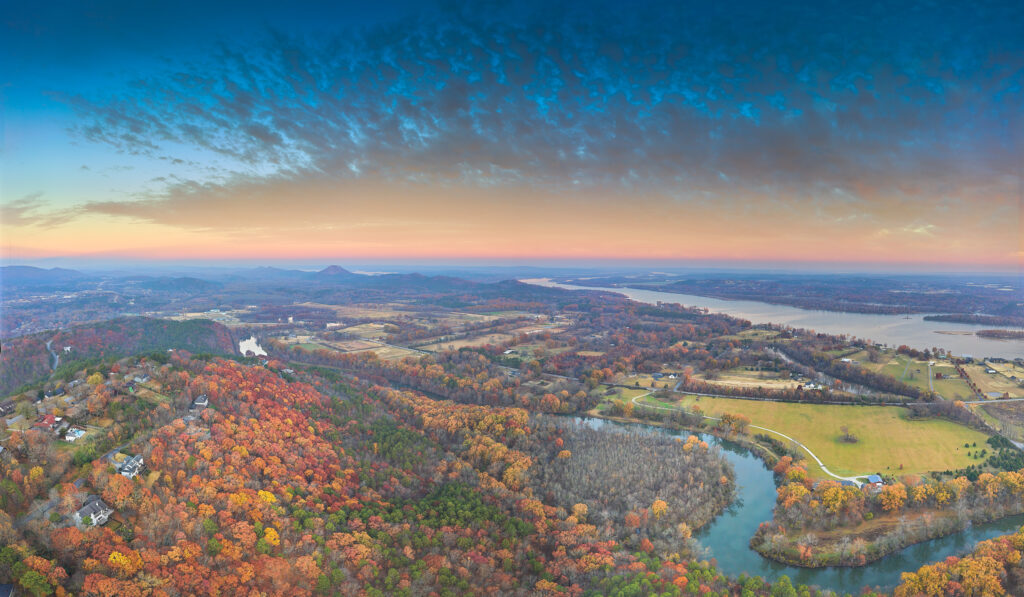
02_07_22 Fall Sunrise over Western Pulaski County featuring Pinnacle Valley
A composite image taken in 3 parts with a DJI Mavic 2 Pro Drone. The fall colors were just about peaked on the ridge in the foreground, and had already pushed past peak in the valley. I wanted to included the Maumelle River in this shot as I loved the look of it’s graceful curve at the bottom of the image. The Arkansas river flows in the background. The sky that morning was special with a wonderful peak/pink color and the rising sun popped the colors of the trees on the ridge. I found very few spots in the state in 2021 that had as much fall color as the Walton Heights Ridge.
Paul Caldwell
06/13/20 Sunset over Western Little Rock and the Big Dam Bridge
- At June 14, 2020
- By paul
- In Featured Arkansas Photography
 0
0
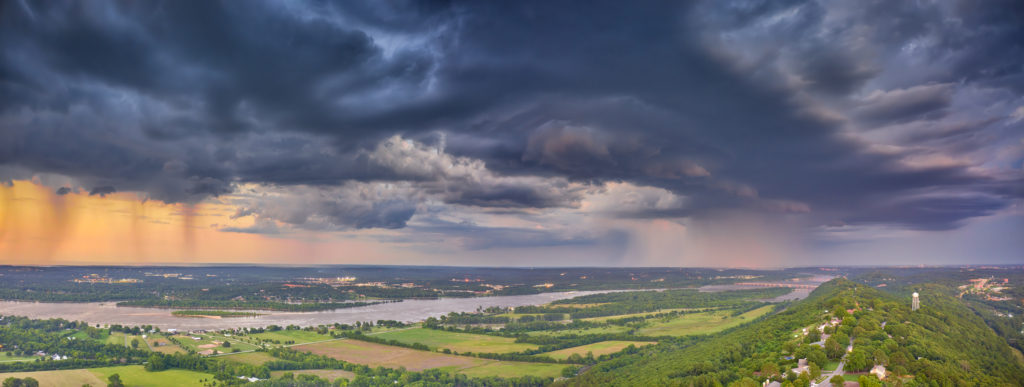
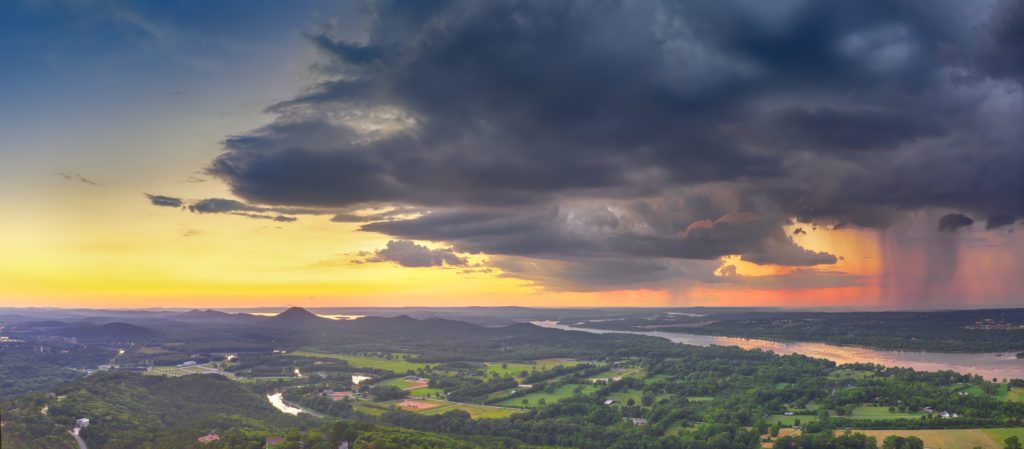
Taken with a DJI Mavic 2 Pro. For this shot I was forced to use multiple AEB bursts of 5 shots each, knowing that I would be throwing most of them out. However it’s the only way to get a a full reach of dynamic range from this drone as DJI really did a poor job on the raw capture process. But that’s another story in itself.
This was one of those wonderful thunderstorms that just rolled in quickly after the sun had dropped below the horizon. I started taking the shots right at around 8:00 pm and was able to shoot well towards 8:2o. This shot was one a rare shot as I was able to catch the full thunderstorm to the right of the shot and then the clear evening sky to the left. I used Capture One software to convert the raw files. I took 10 shots for the bottom portion to finally get a single file that was not too noisy. The sky was much easier to capture with just the normal 5 exposures. Once I had the images completed in Capture One, I opened them as tifs in Photoshop and layered the sky over the bottom of the image, doing this for the right and left half of the shot. Then I used Photoshop’s panoramic software to combine the final two images. Photoshop will do OK most of the time as long as you don’t have a pure blue sky or any other type of solid sky. The longest exposure was 1.6 seconds, which I feel is about the longest you can go with a drone in most conditions.
Paul Caldwell
06/13/20 A sunset with a stormy sky over Pinnacle Mountain
- At June 14, 2020
- By paul
- In Featured Arkansas Photography
 0
0
Taken with a DJI Mavic 2 Pro. For this shot I was forced to use multiple AEB bursts of 5 shots each, knowing that I would be throwing most of them out. However it’s the only way to get a a full reach of dynamic range from this drone as DJI really did a poor job on the raw capture process. But that’s another story in itself.
This was one of those wonderful thunderstorms that just rolled in quickly after the sun had dropped below the horizon. I started taking the shots right at around 8:00 pm and was able to shoot well towards 8:2o. This shot was one a rare shot as I was able to catch the full thunderstorm to the right of the shot and then the clear evening sky to the left. I used Capture One software to convert the raw files. I took 10 shots for the bottom portion to finally get a single file that was not too noisy. The sky was much easier to capture with just the normal 5 exposures. Once I had the images completed in Capture One, I opened them as tifs in Photoshop and layered the sky over the bottom of the image, doing this for the right and left half of the shot. Then I used Photoshop’s panoramic software to combine the final two images. Photoshop will do OK most of the time as long as you don’t have a pure blue sky or any other type of solid sky. The longest exposure was 1.6 seconds, which I feel is about the longest you can go with a drone in most conditions.
Paul Caldwell
03/21/19 Broadway Bridge over the Arkansas River in Little Rock–Featured Arkansas Photography
- At March 20, 2019
- By paul
- In Featured Arkansas Photography
 0
0
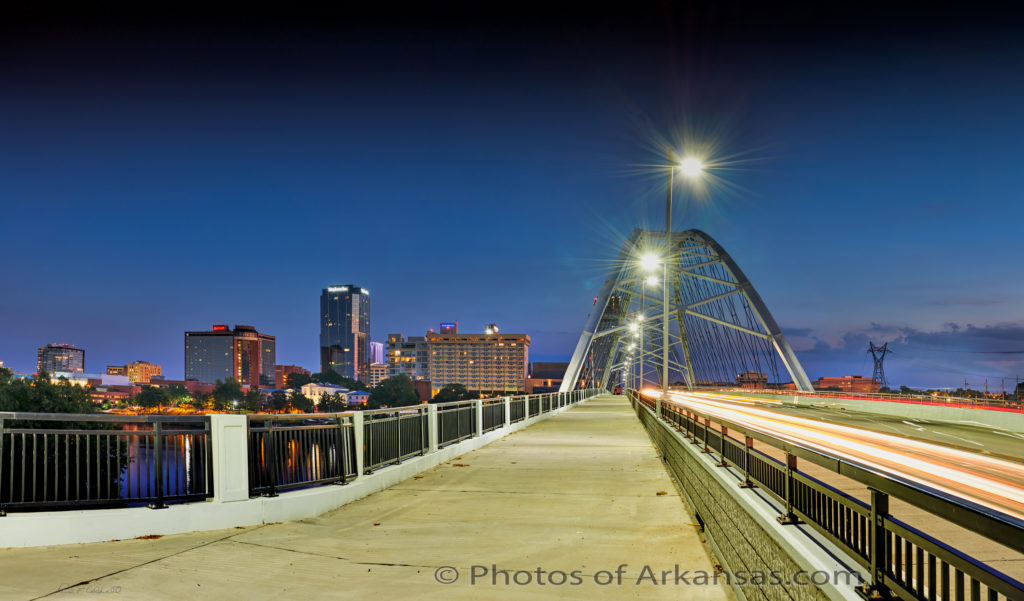
Taken with a Nikon D850 and 24-70 lens, 4 vertical photos, stitched into 1 landscape panorama.
The new Broadway Bridge in downtown Little Rock/North Little Rock has been a eye catching subject since its’ completion. I wanted to catch the bridge in the magic 30 minutes of light after sundown, when the sky is still showing a slight blue tint. The motion of the cars moving over the bridge turned into a painting of light due the very slow shutter speed I selected of 3 to 5 seconds. This photograph is a combination of 6 different images as I also had to bracket my shutter speed to capture the full dynamic range of the scene.
I used a tripod to keep my scene as level as possible and did not worry about a nodal point. To be honest, way too much is made of finding a nodal point with modern stitching software. You just don’t have to worry about it as much. I had no trouble getting the railing in the immediate foreground to line up at all. I used Phase One’s Capture One software to develop the images and then stitched them together in Lightroom. I also had to work a bit to get the building straightened out since my camera was pointed up slightly. I went ahead and picked a aperture of around F10 to help with the star burst from the street lights.
Written for www.photosofarkansas.com please do not reproduce this image or any of the written material without permission.
03/20/19 Auto Rotate for image playback on Phase One IQ4 still problematic
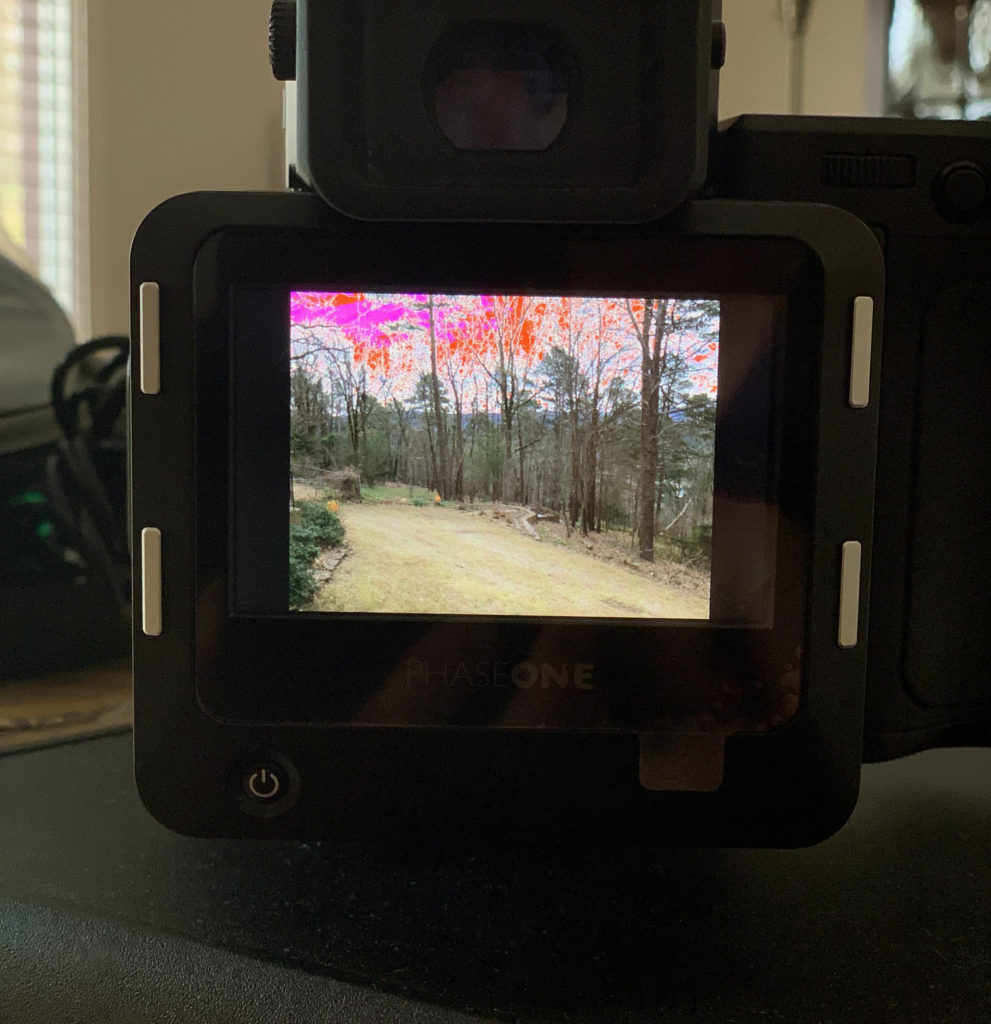
Yesterday 03/19/2019, Phase One released a new firmware for the IQ4, their top end Digital back. This is the 2nd official firmware on the back and the first firmware to offer something new (and it brought back a few older IQ3 features see this post).
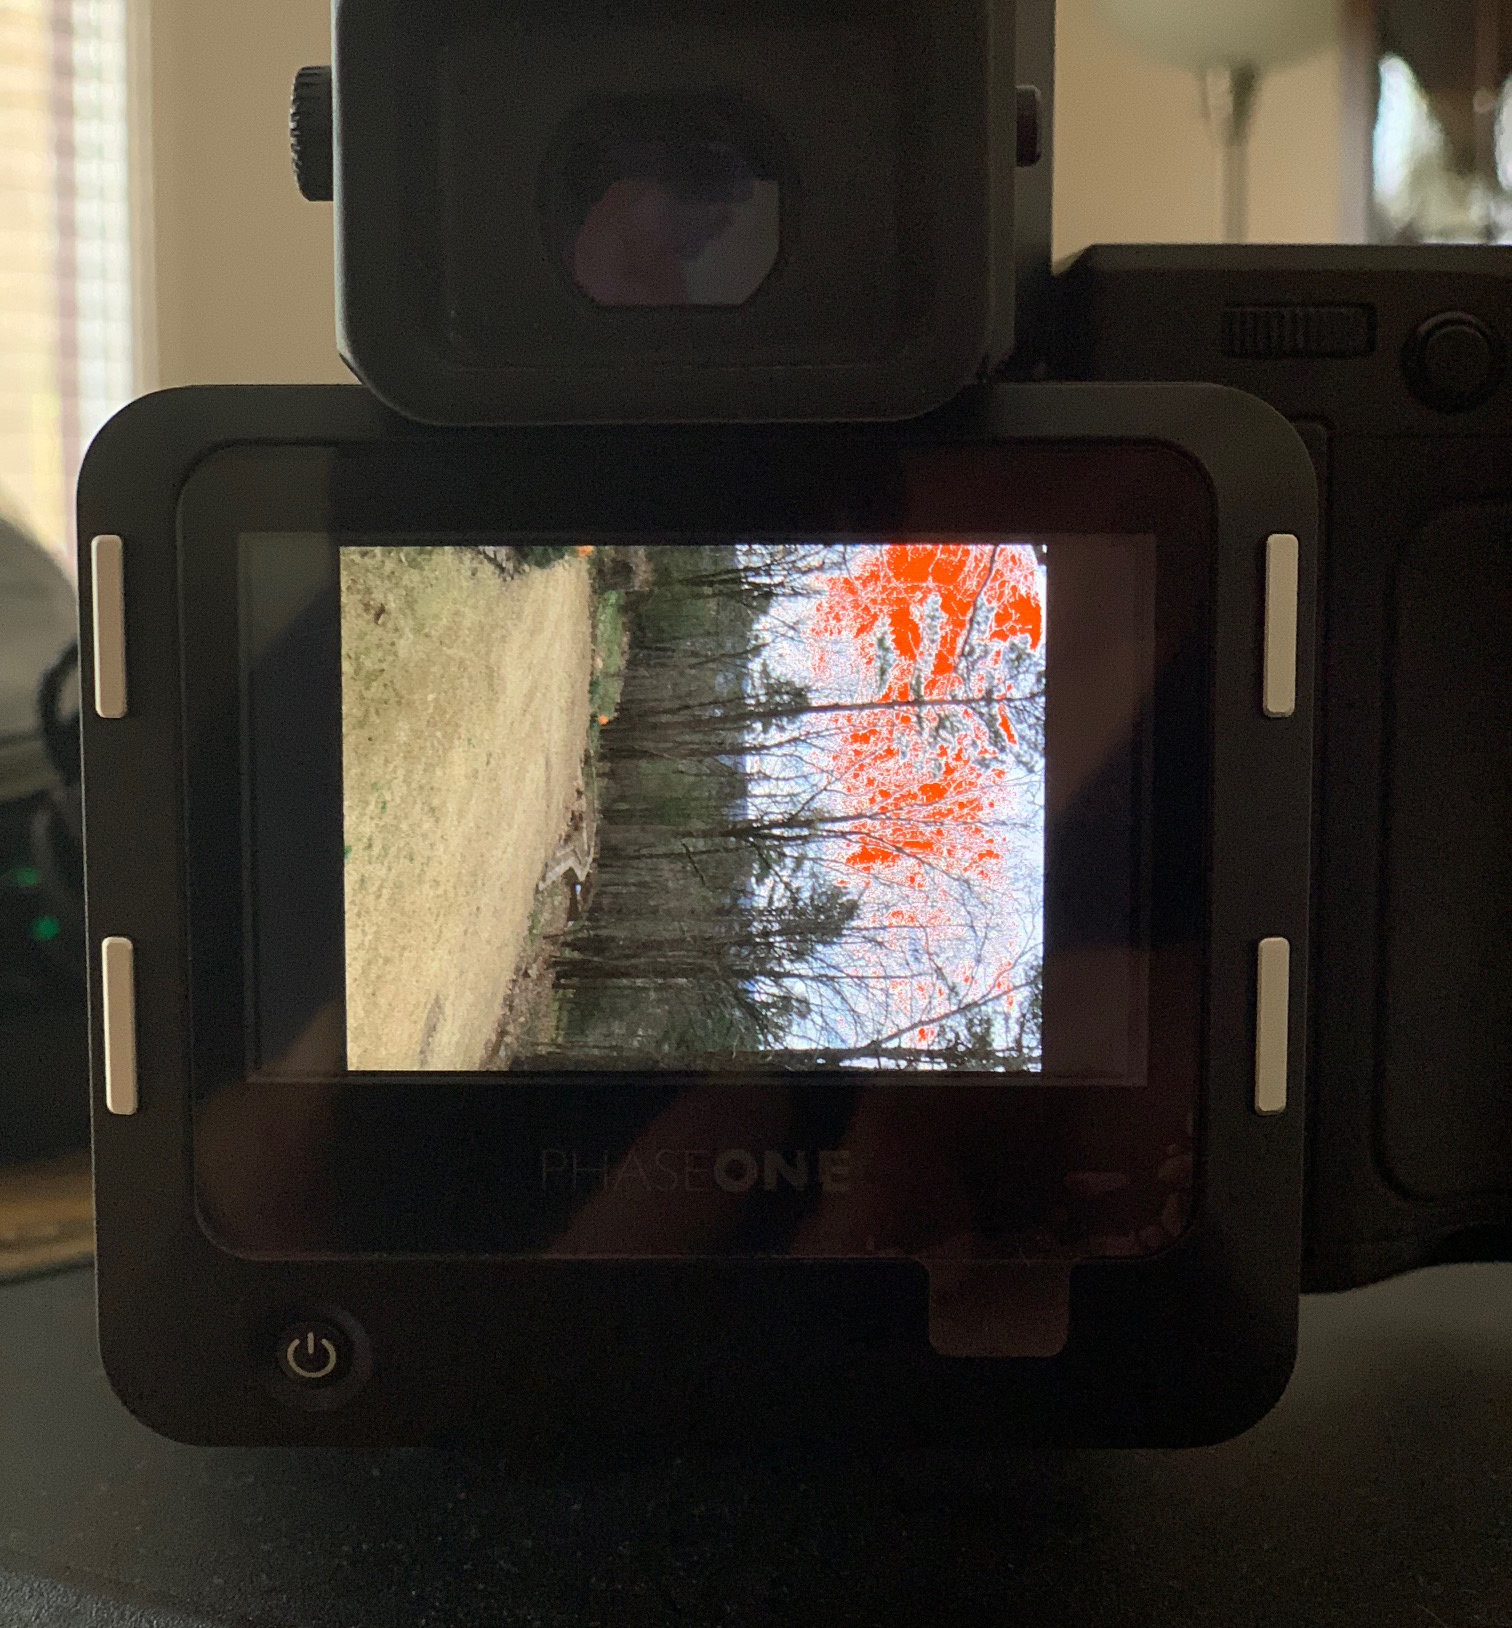
However there is still a small issue with IQ4 playback, autorotation. Auto rotation, is a feature that Phase One along with all other camera manufacturers usually include for playback of a portrait orientation image. When you take an image in portrait mode, (with the camera vertical), the image will playback in the same vertical orientation.
- Phase One IQ4 Landscape orientation image playback correct
- Phase One IQ4 Portrait orientation image no Auto Rotation on Playback
The image on the left shows a IQ4 image taken with a XF and 55mm LS Phase One Lens. The image is displayed correctly, as the the image was captured in landscape orientation and playback keeps it there. However the image on the right is showing a portrait orientation image and how it’s played back. The image should be vertical however the back is playing it back in landscape mode.
What is interesting is as long as the IQ4 stays in the portrait orientation, the image during playback is displayed correctly. But once you rotate the back to the horizontal (landscape) orientation, from that point on, all portrait orientation images will be displayed in the horizontal orientation. So when you shoot with the IQ4 in portrait mode, make sure you check your images before rotating the camera from that position. Attempting to check a vertical image displayed horizontally is very difficult.
For my work, this is problematic since I take 65% to 75% of my work in portrait mode since I want to blend the multiple portrait images into a panorama. For now you have to remember to preview your work while the camera is still in the portrait orientation.
Another interesting observation is that when you load the files into a Capture One 12 session, all the vertical images will start out in the horizontal orientation, but as Capture One creates the previews the images will rotate back to the correct vertical orientation.
Hopefully Phase One will resolve this soon but it looks like it will have to come with another firmware update.
03/18/19 IQ4-150 Firmware 1.03.26 – Released–It’s official now!!
It’s now official. You can update your Phase One IQ4 to the latest firmware which is 1.03.26.
The process itself will take approximately 8 to 10 minutes and the last four minutes, the back will power off the LCD and only gives a blue light blinking at the bottom. I found that a bit disconcerting, but overall the process did work as it’s supposed to.
With this update you gain a few new features for the IQ4 and get back a couple of IQ3 features that should have been there from the start, (unless Phase One replaced them with something better which the did not).
Old IQ3 features that have now been returned:
- Power share: which allows the XF and IQ digital back to share power. Important for field use as the IQ4 uses about 1/3 to 1/2 more battery in normal use. Power share allows the XF to send power to the IQ4 once the IQ4 battery reaches a certain level of discharge. This is a good thing since the XF takes very little power compared to the IQ4.
- Auto Gain for Live View: simple feature that has been in place with all IQ CMOS backs, since the days of the IQ250 back in 2012. Left off the IQ4 for some reason. With auto gain Live View you the back will pick an ISO level depending on the ambient lighting. It also added a bit more contrast to the Live View screen which I felt helped in critical focus. This feature was removed with the IQ4, and has not been available since December 2018. Instead Phase One offered Exposure simulation which showed allowed the Live View to display a representation of the currently selected ISO/Shutter Speed/Aperture. Great in good light outdoor, not so great in low light (sunrise or sunset). I have not tried the new Auto gain yet, but hopefully it will work as well as it did on the IQ2 and IQ3 backs. You also have the ability to use the Auto Gain Live view with your selected aperture, or wide open which is a great feature.
New IQ4 features that have been added:
- Live View zoom up to 400%. You now have the ability to zoom into your Live View screen as much as 400%. The details are still present and the ability to achieve very sharp critical focus on smaller distant details in a scene has improved.
- Self timer for ES (electronic shutter). Pretty straight forward, you now can trip a self timer while in the ES. Not that big a deal for me as I have a remote 12 pin that allows me to fire the ES without having to press the shutter button on the IQ4 LCD.
- While in Live View, 3x (triple) tap will take you all the way to 400% and or you can use a two finger pinch to zoom to any level from 0 to 400. Nice addition.
- The brightness slider for Auto Gain Live View is easily accessed view a single swipe from the left side of the LCD.
- AFr Zoom to Focus on the IQ4 with the XF Focus & Recompose feature
Overall, these are great improvements for the new IQ4, and hopefully they will assist photographers in the field.
However a few pretty important features still seem to be lacking surprisingly.
Auto Rotate: Simply stated if you take a vertical image the image will be displayed vertically in playback. Currently the IQ4 displays such an image horizontally. I still find this really disappointing as I show a lot of panoramas and use the vertical orientation to stitch with. I cannot think of any $99.00 point and shoot camera that can’t do this, and it surprises me that Phase One did not include this in December and now almost 4 months later still can’t implement it!. This is shooting preview 101, basic stuff and Phase One will require yet another firmware update to implement this.
Adhoc, where is it. Phase One seems to have a totally different direction now. I guess more pointed at studio work. Since day 1 of the previous IQ backs that had wifi, there was an adhoc option. Simply and clean created a static ip address that you could connect to in the field and thus use Capture Pilot from an iOS device. Phase One now only allows Capture Pilot use if you are connected to wifi over a router, again what the heck? Who thought this was a good idea? You have a great solution for field use of your software tool for iOS devices and then you just cut it off. Phase One has made limited low level statements that “adhoc” will return with a later firmware update. I still feel this won’t be possible as much system boards on PC’s or Mac, have all the networking capability hard wired in. Hopefully Phase had a way to implement adhoc without issuing an EC (engineer change) which would require all existing IQ4’s to be returned to the factory.
Heat and battery life, no mention as to if anything is being done to help on this. Currently a 3400 millamp Phase One battery will show totally drained when there is still over 20% of the battery left. The IQ4 also gets considerably hotter than the IQ3 and Phase One left out the feature that showed existing heat of the back that was quite popular for the IQ3. I wonder why?
written for www.photosofarkansas.com by Paul Caldwell please do not reproduce any of this content without permission.
03/14/19 Sunset skies over Pinnacle Mountain–Featured Arkansas Photography
- At March 14, 2019
- By paul
- In Featured Arkansas Photography
 0
0
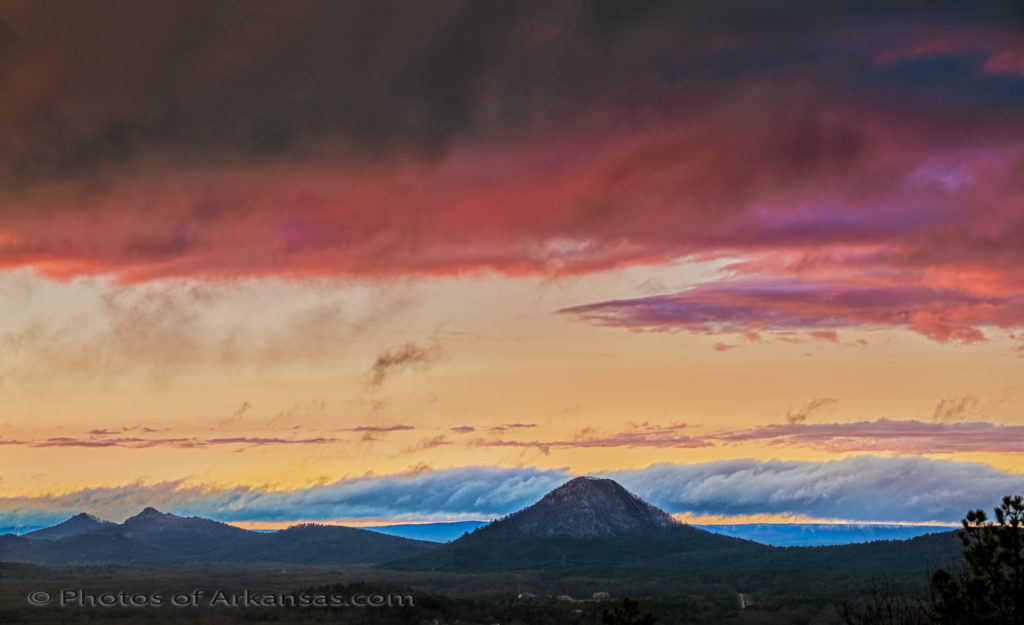
Taken with a Nikon D850 and 80-400 lens, ISO 200. 4 vertical shots combined into 1 final image.
Love the area around Pinnacle mountain in western Pulaski county. All day long the skies had been grey and dark, no color. But right at sundown, the clouds broke open and the sun started to shine. It was still raining a bit, but I headed out to try and capture at least 1 sunset shot. I was working with the D850 and 80-400 lens, (a lens I have mixed feelings about) and no tripod, so I pushed up the ISO to 200 and shot brackets. I really should have pushed up to around 400 or even 800, but I was still able to get my shot. There is a bit of noise in the foreground, but it’s not as bad as I thought it would be. The skies were just loaded with color and I loved the way the various layers of clouds were moving across the skies.
I used Capture One to convert the images from raw files and then used Photoshop CC 2018 to create the panorama. It’s not really a true panorama, but more large format image. To capture this, I took 4 vertical images all hand held then used the panorama tools in Photoshop to create the final image. Photoshop does a great job most of the time and was able to get this image converted fine.
Pinnacle is an amazing looking mountain in western Pulaski County, Arkansas.
Written for www.photosofarkansas.com by Paul Caldwell, please do not reprint or reproduce any of this content without permission.

