03/15/13 Featured Arkansas Photography–Night skies over Roark Bluff on the Buffalo River
- At March 15, 2013
- By paul
- In Featured Arkansas Photography
 0
0
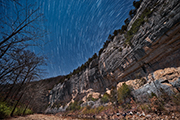

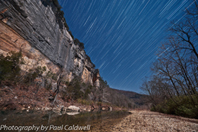
Night skies over Roark Bluff on the Buffalo River January 2013
Taken with a Nikon D800e, Nikon 14-24 Lens @ 14mm, F4.5, iso 400, total exposure time approximately 40 minutes. This shot was taken back in January, but it was a great night to be out shooting the stars. The temperature was around 29 degrees and there was virtually no wind. We started shooting at dark and by about 1 hour into the night we were getting excellent runs. This shot is a composite of 40 minutes taken in 2 1/2 minute exposures at iso 400. I will then stack the exposures to catch the motion and create the trails. The blue sky is due to the moon. If you work with the moon at night you will be pleasantly surprised by the results. It will give a nice blue hue to the sky and also provide all the illumination to the bluff that you see in this photograph. This is not a daylight/nighttime exposure as many people think. This is all done at night with the aid of the moon. As was looking up, it makes the perspective of the trees a bit more interesting, as if they are looking into the photo. I am going to start working at night with a Canon 24mm TS-E for perspective control where it will give me a good enough FOV, which on this shot I needed all of the 14mm I could get. You are looking to feature the sky, but you still want to get as much of the foreground as possible.
03/14/13 Review of the Breathing Color Stretch Relief Pliers
- At March 14, 2013
- By paul
- In Articles/Reviews, Printing & Framing
- 0
04/24/13 I have added some new information to this article in regards to working with the stretch relief pliers and 2″ stretcher bars you can read more about it here:
When working with inkjet canvas, by far one of the most time consuming aspects of the workflow is the process of stretching the canvas. Inkjet canvas is a much more delicate product and requires careful stretching or issues like corner rubbing or tearing/straining of the weave will ruin a finished canvas print. Rework which involves staple removal can ultimately damage an inkjet canvas enough that it has to be reprinted.
For stretching there are two basic methods that I am familiar with, hand stretching with a pair of canvas pliers (most often a pair of Fletcher style) or the use of a stretching machine. Machines take up a lot of space, are expensive and require a fairly large canvas volume to justify their cost. However they do a great job and once you have a workflow down can produce a very even and tight stretch. Pliers on the other hand are tedious and hard on the hands, as most require a constant pressure while stapling. They don’t have a large width so a lot of time is wasted in just working the canvas. Here is an example of such a pair of canvas pliers.
-
- View of Fletcher Pliers No 2
-
- View of Fletcher Pliers No 1
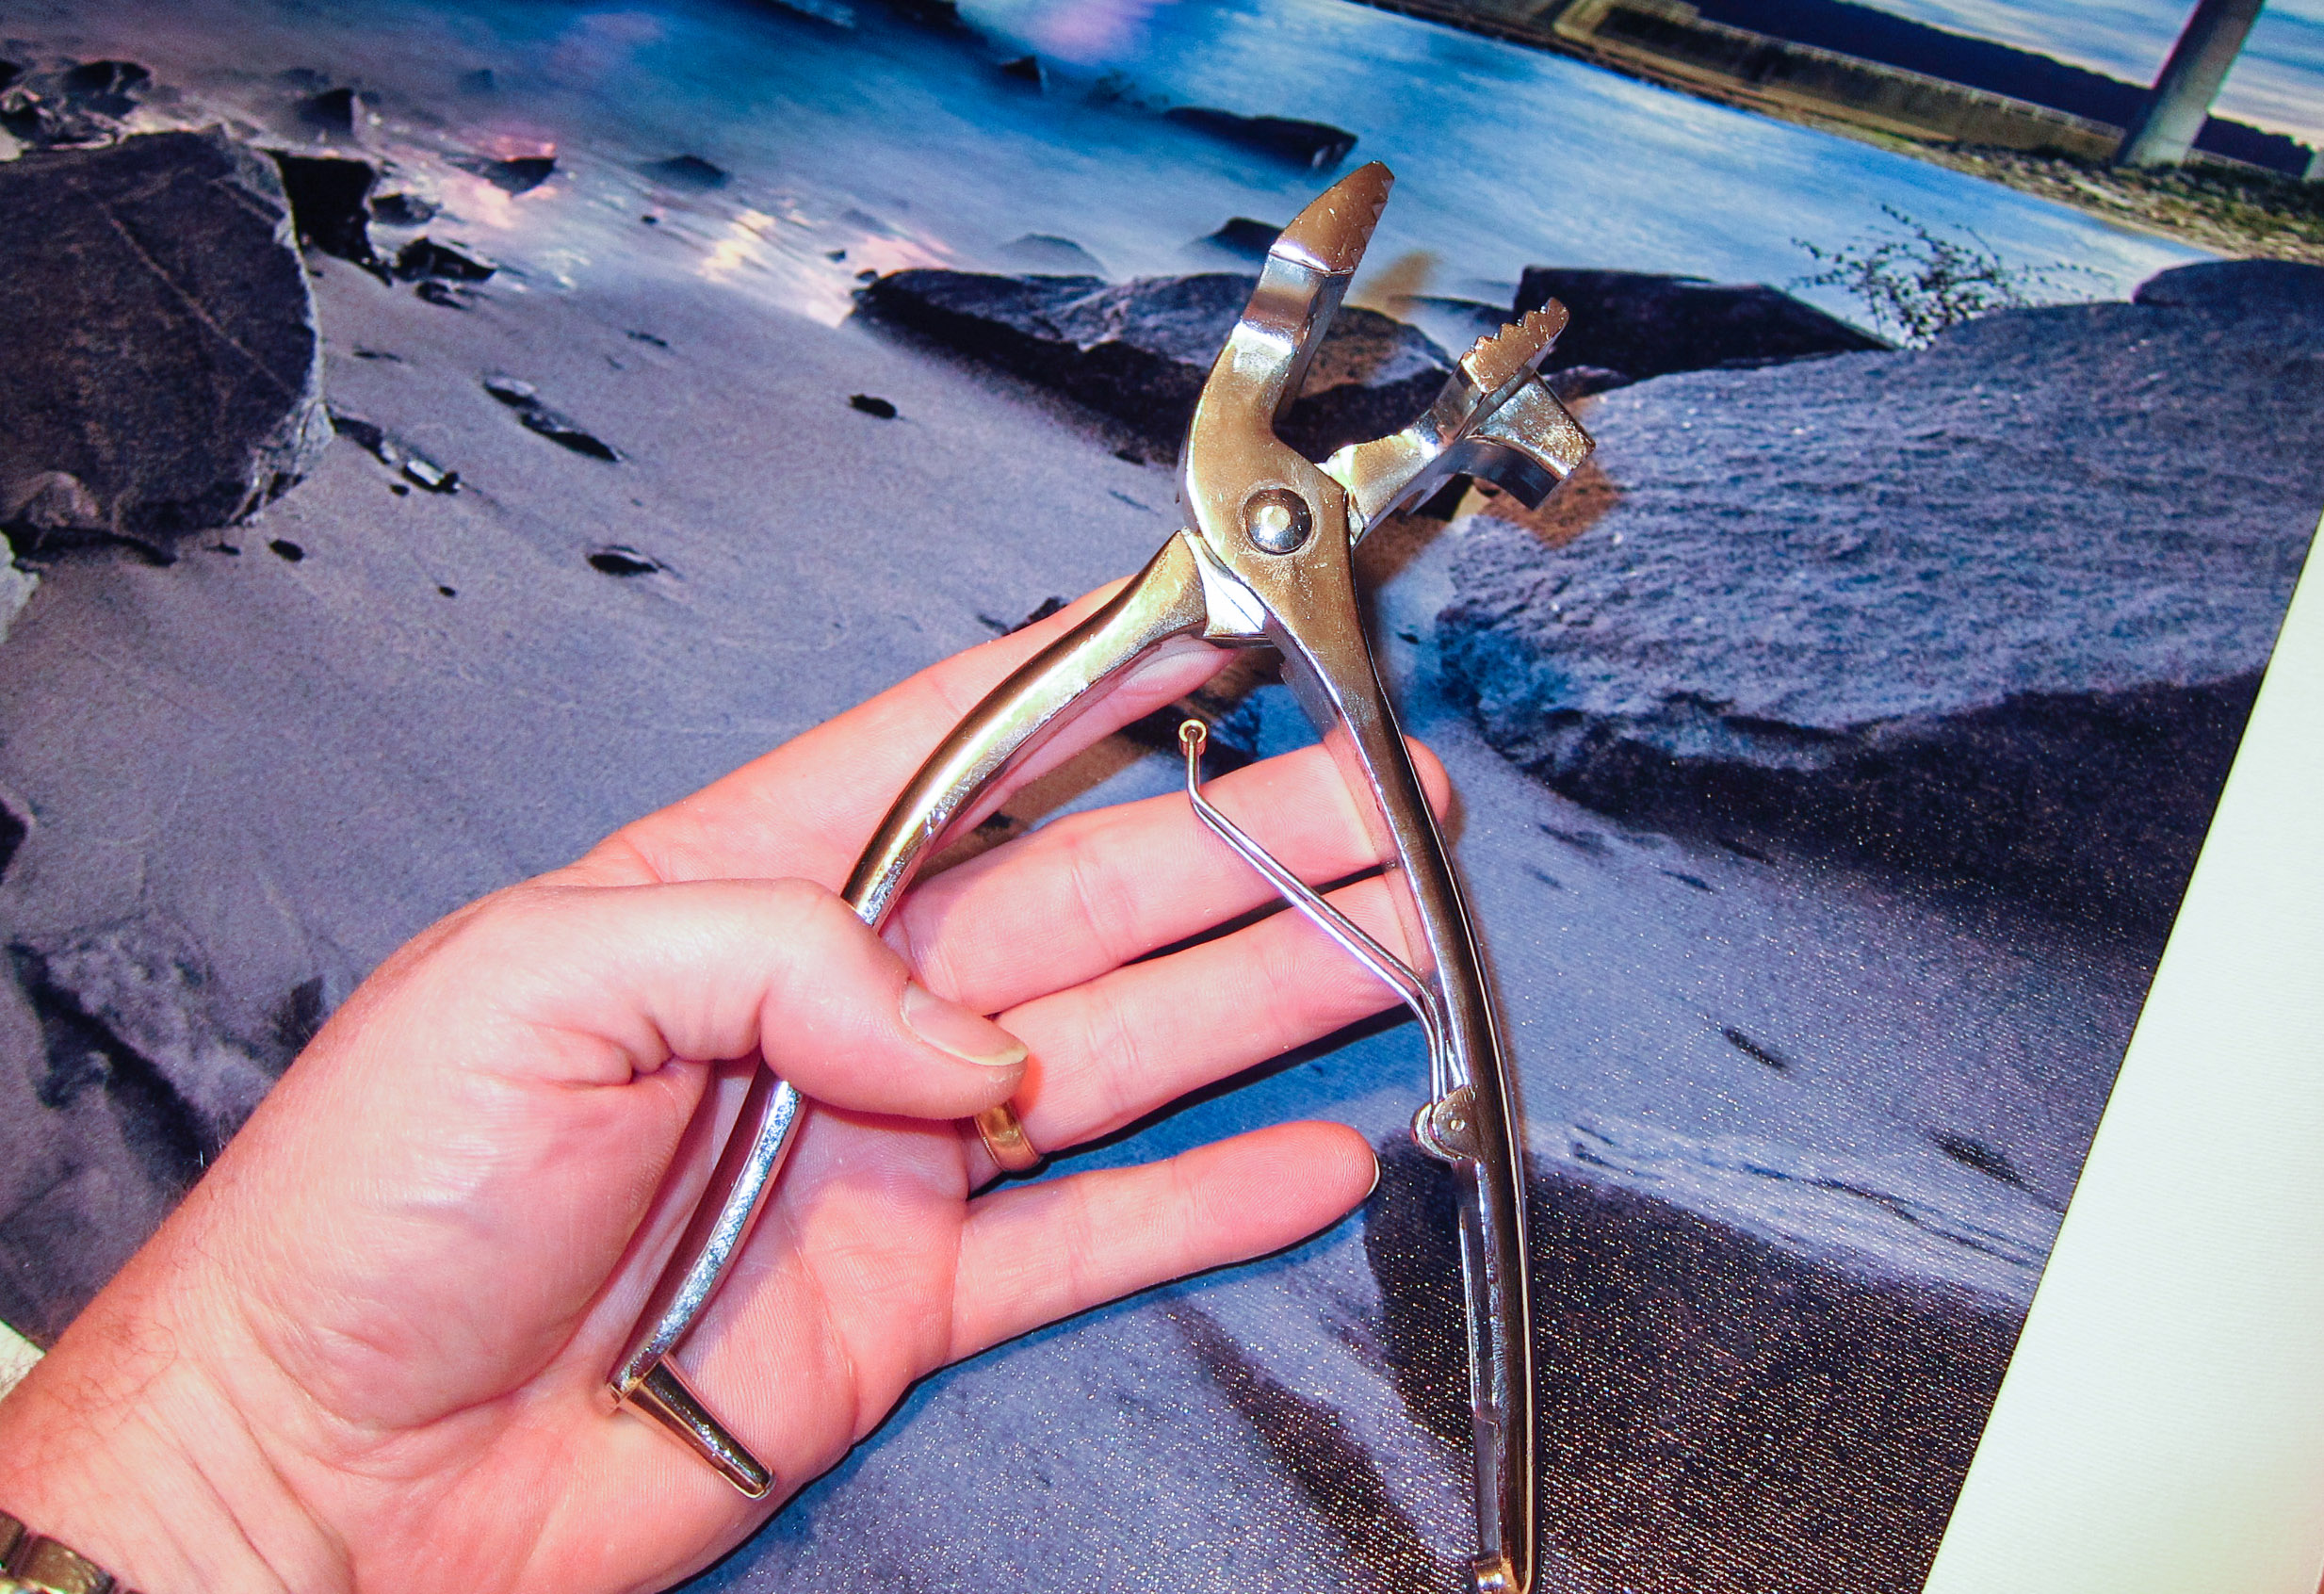
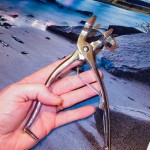
Canvas pliers like these don’t begin to share the expense of a stretching machine but only grab a small amount of canvas and are mostly designed to be used on the non-inkjet canvas. They also require a workflow where you are constantly working around the canvas in a circle in an attempt at keeping even tension while stretching. This style of plier is also really meant to be used with a wider stretcher bar. The 1 ½ inch style bars that are used for most inkjet canvas stretching will not allow this style of plier any purchase as they need to find a fulcrum point to gain leverage on the canvas. The only way in the past to gain this advantage on this type of stretcher bar was with the use of a stretching machine, however with the introduction of the Stretch Relief pliers by Breathing Color, the game has changed dramatically.
-
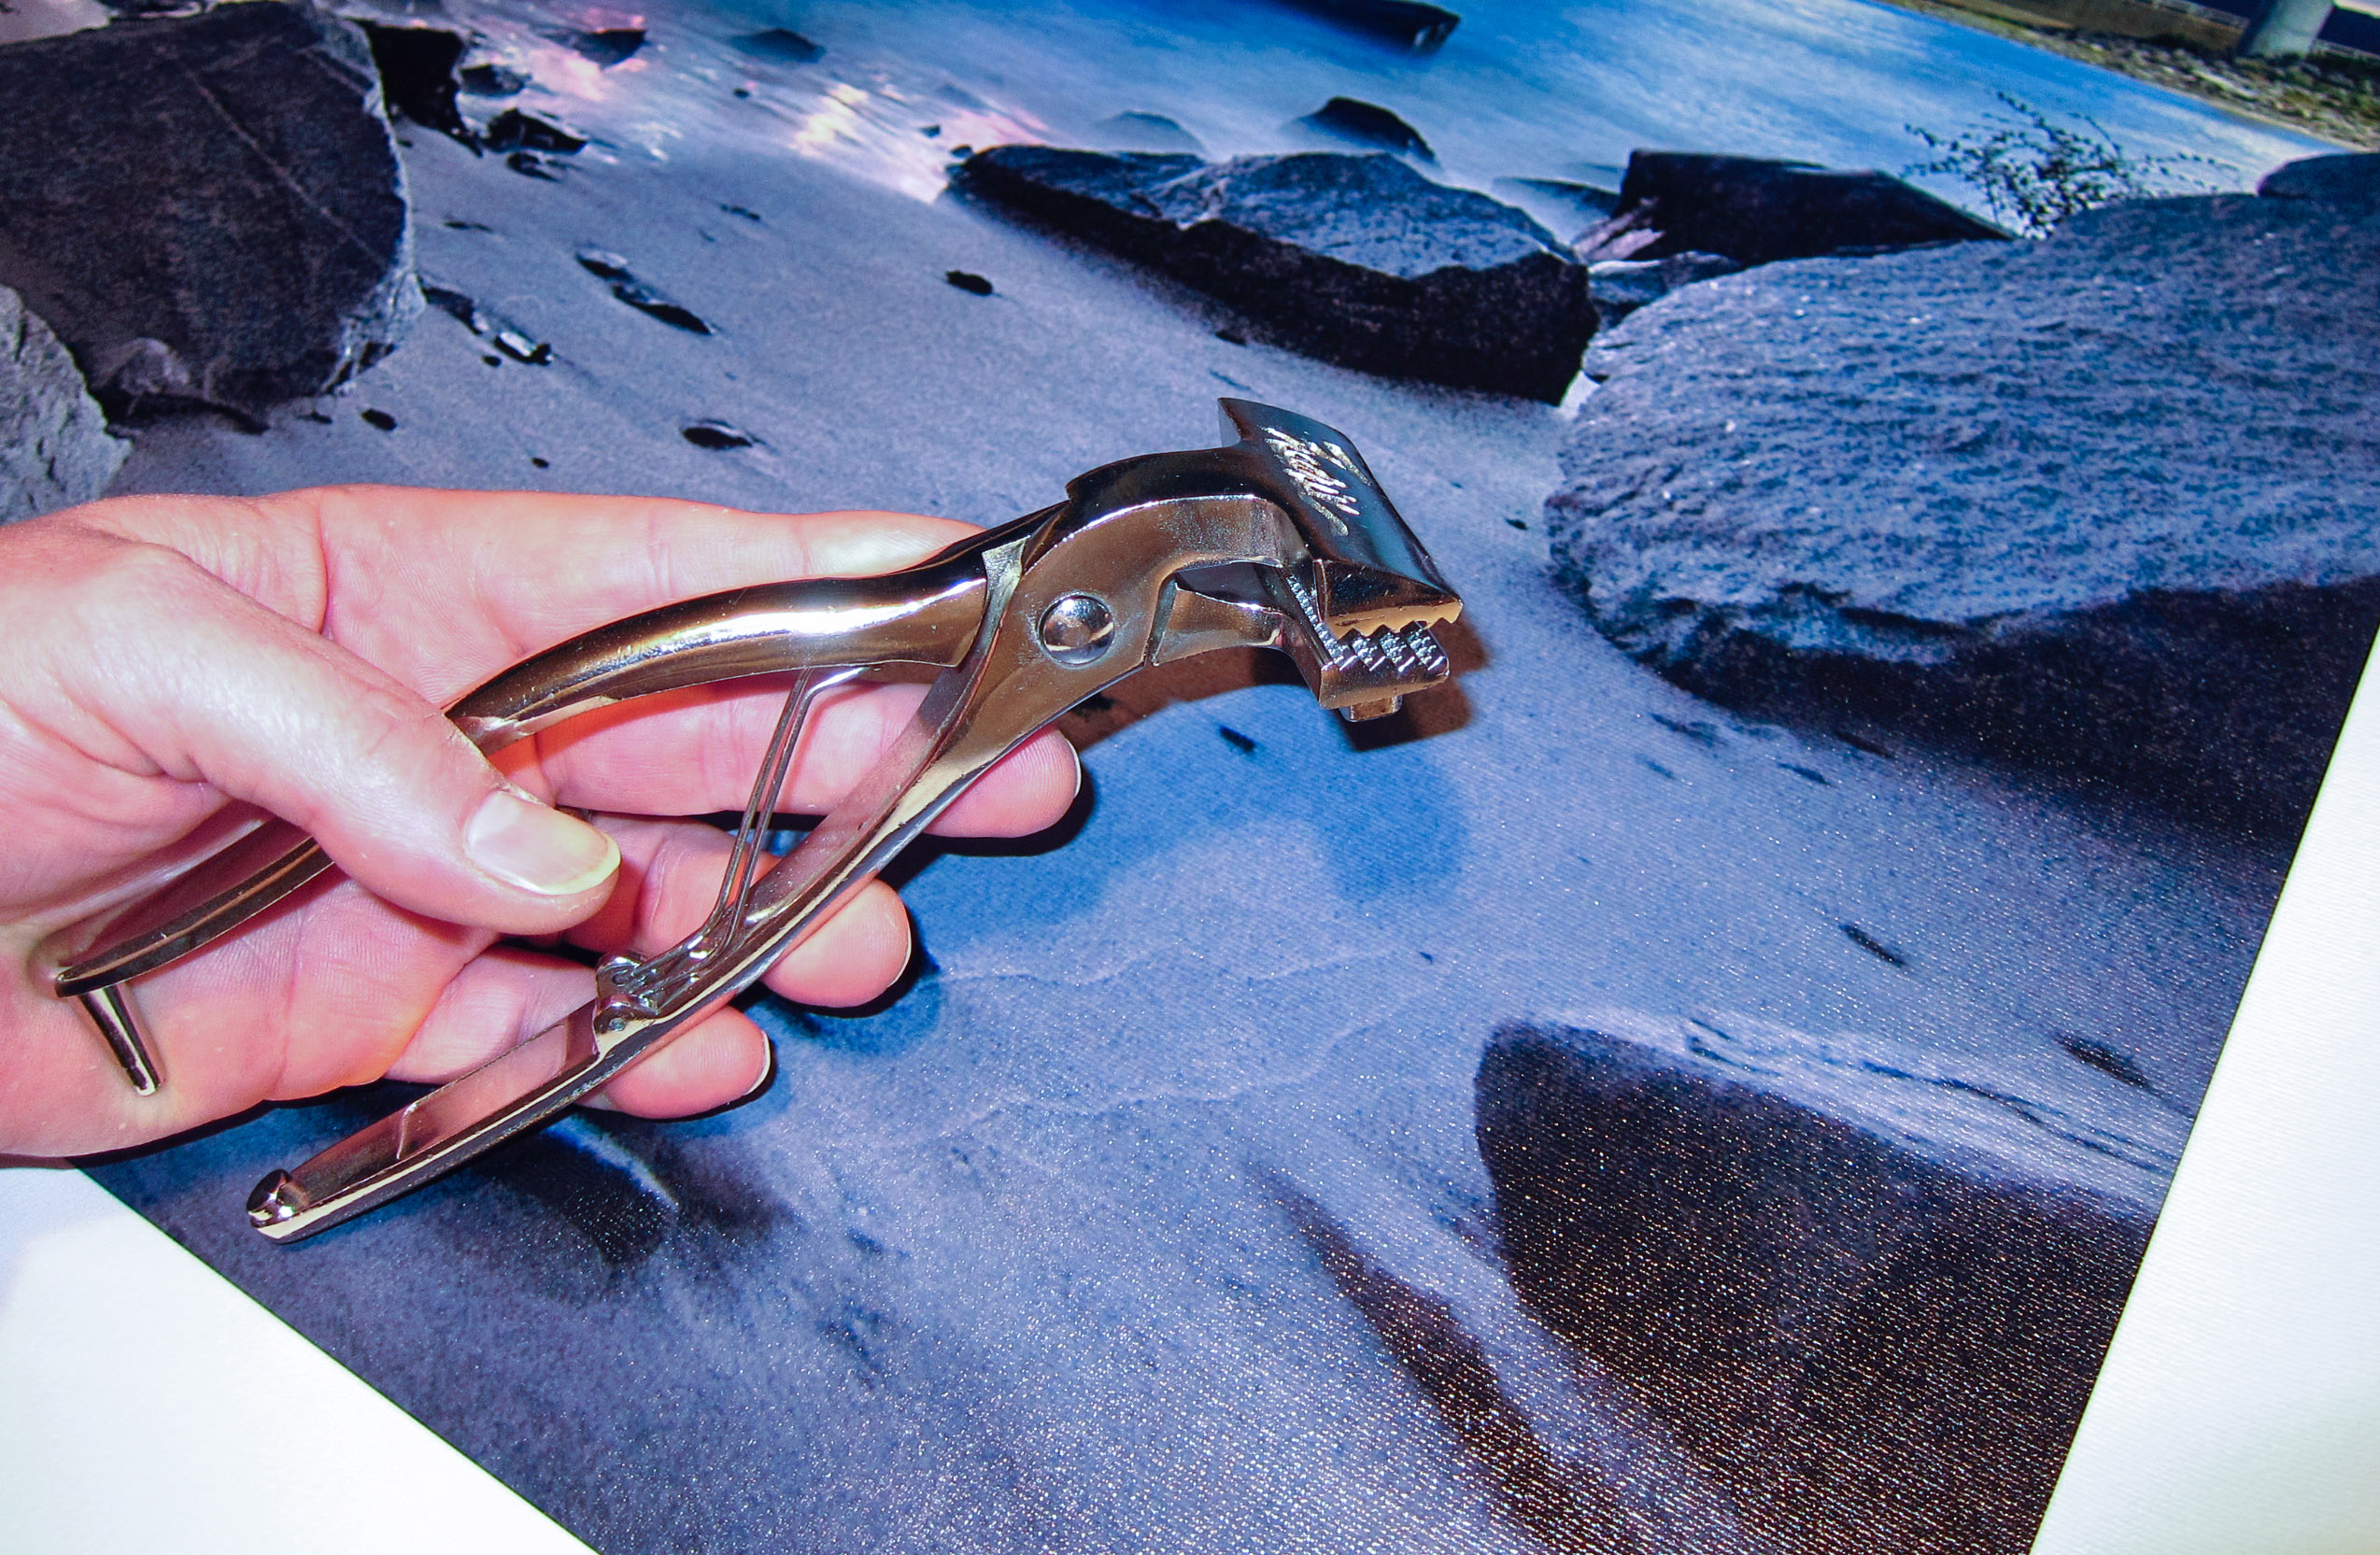
- Breathing Color Stretch Relief Pliers
-
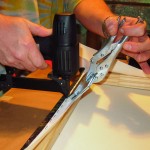
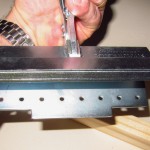
- Stretch Relief Pliers in action
-
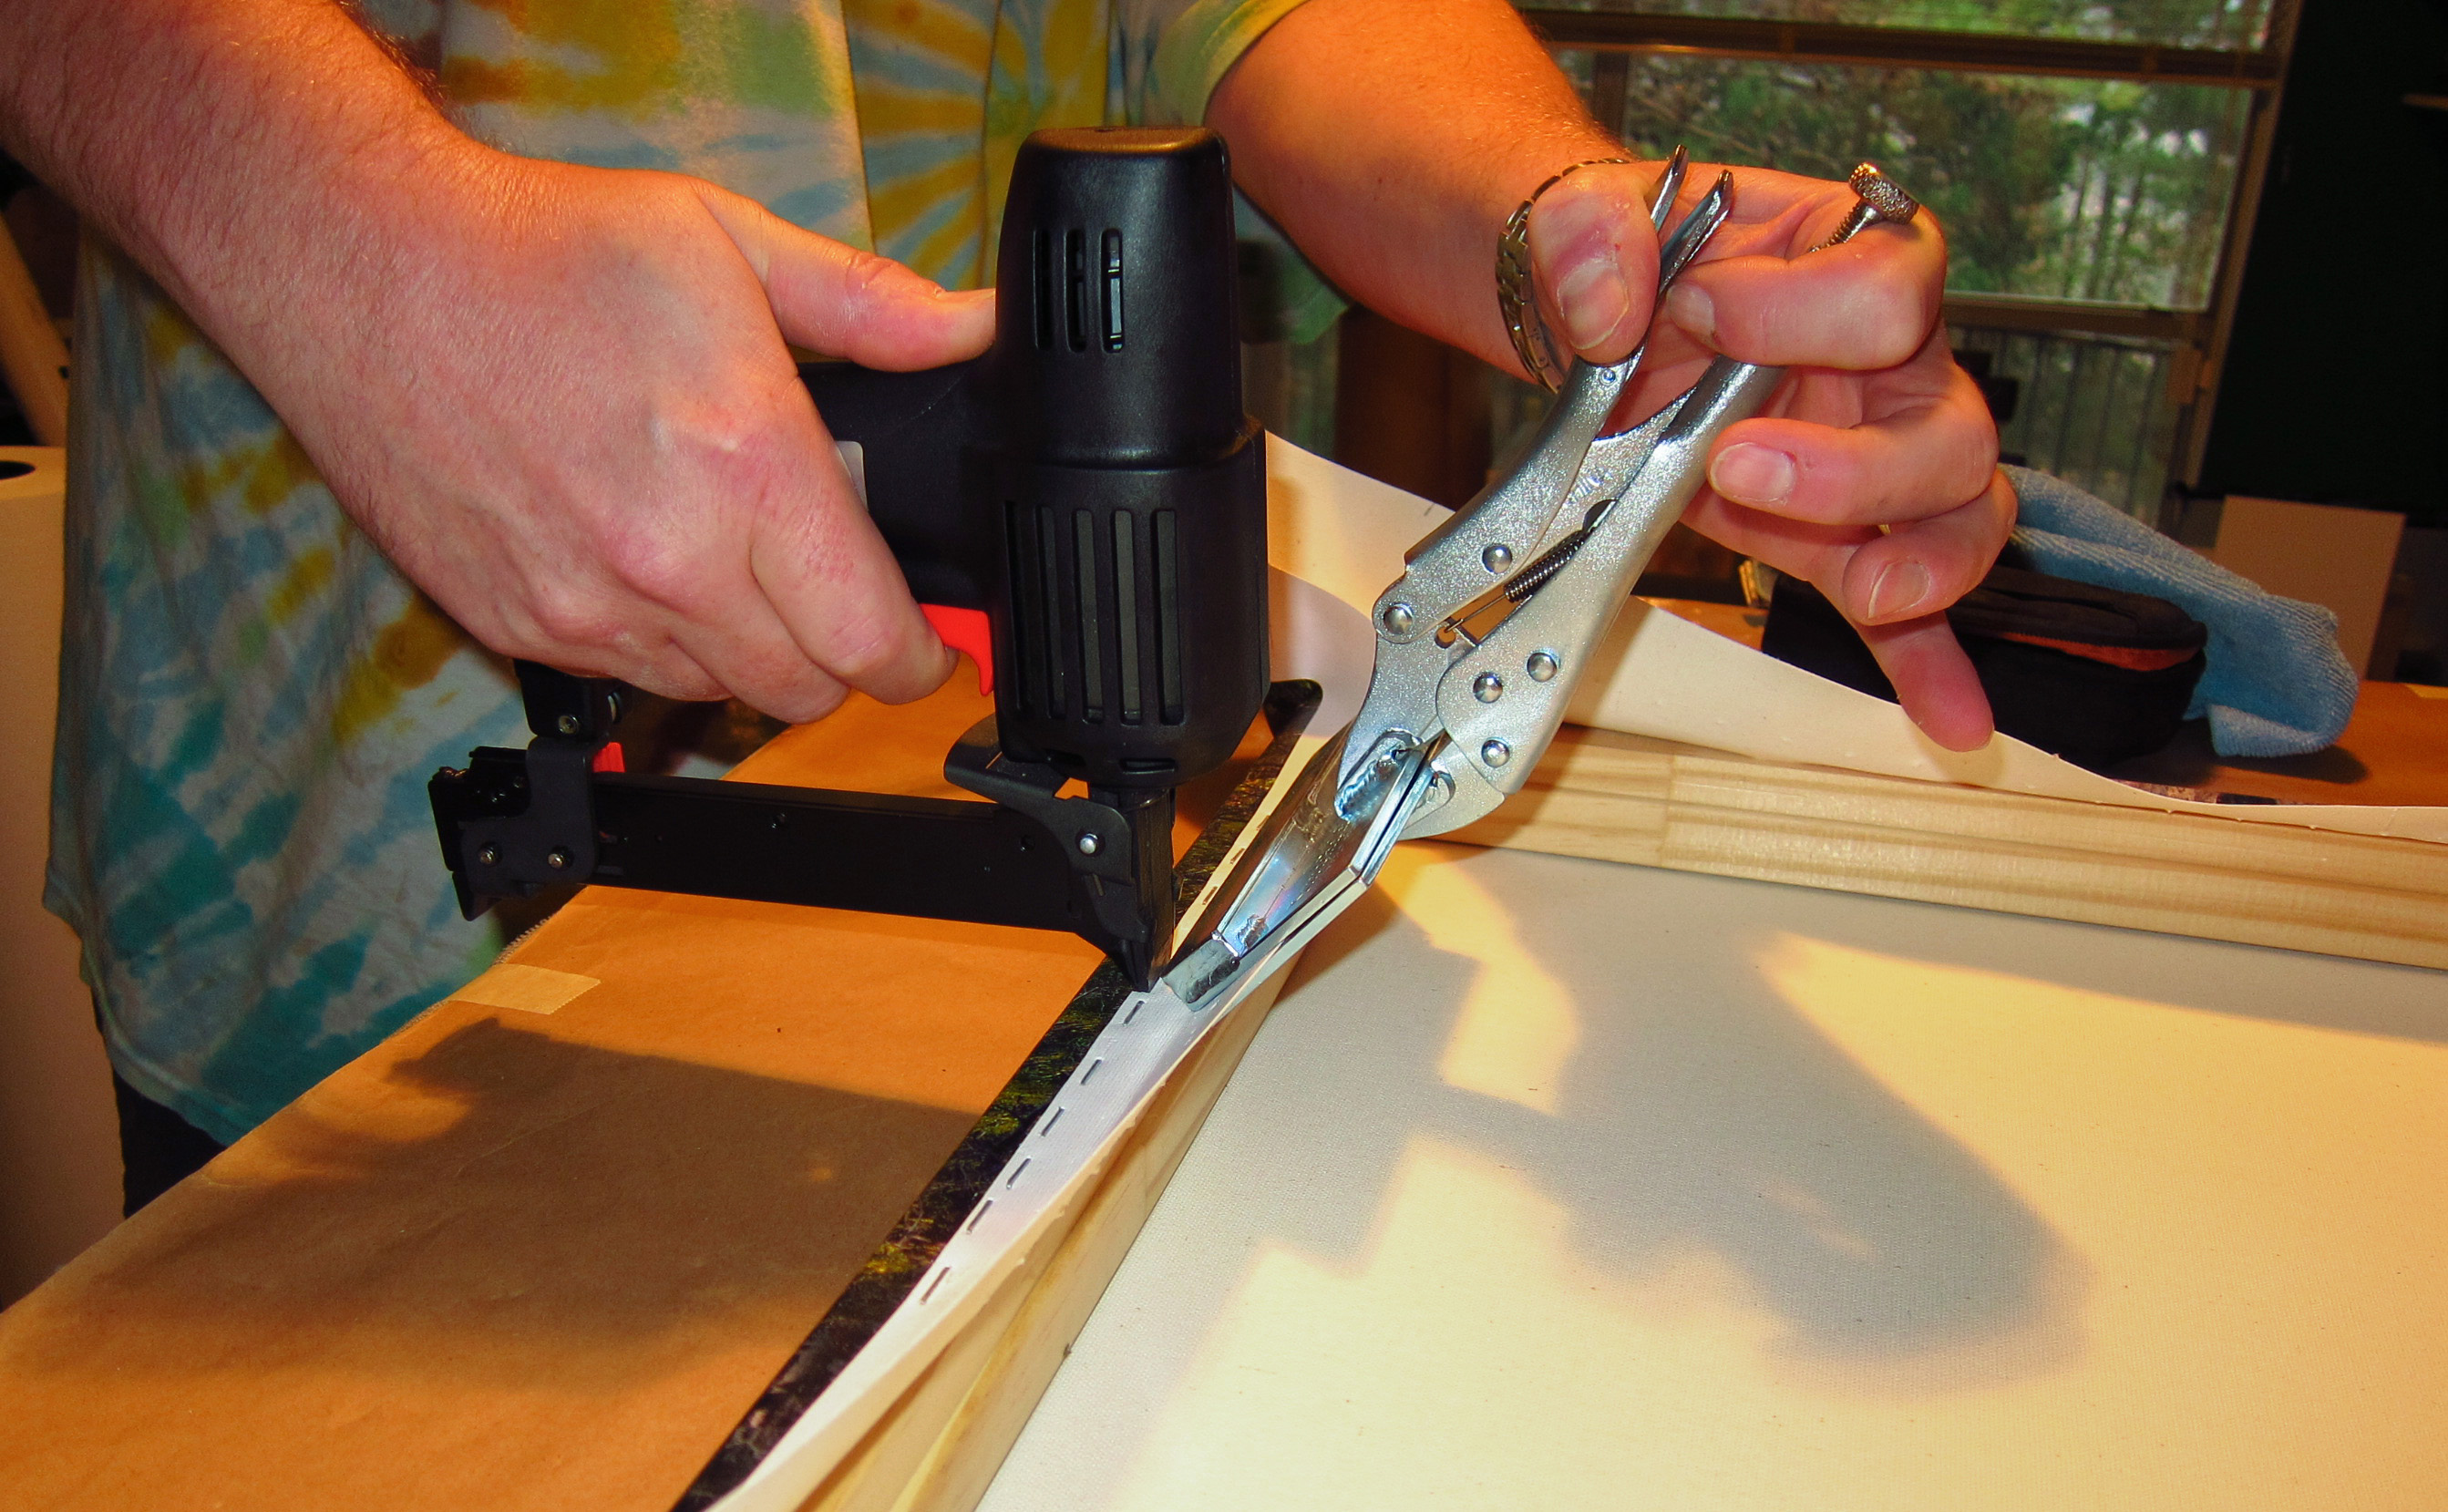
- Stretch Relief Plliers adjustable tension screw
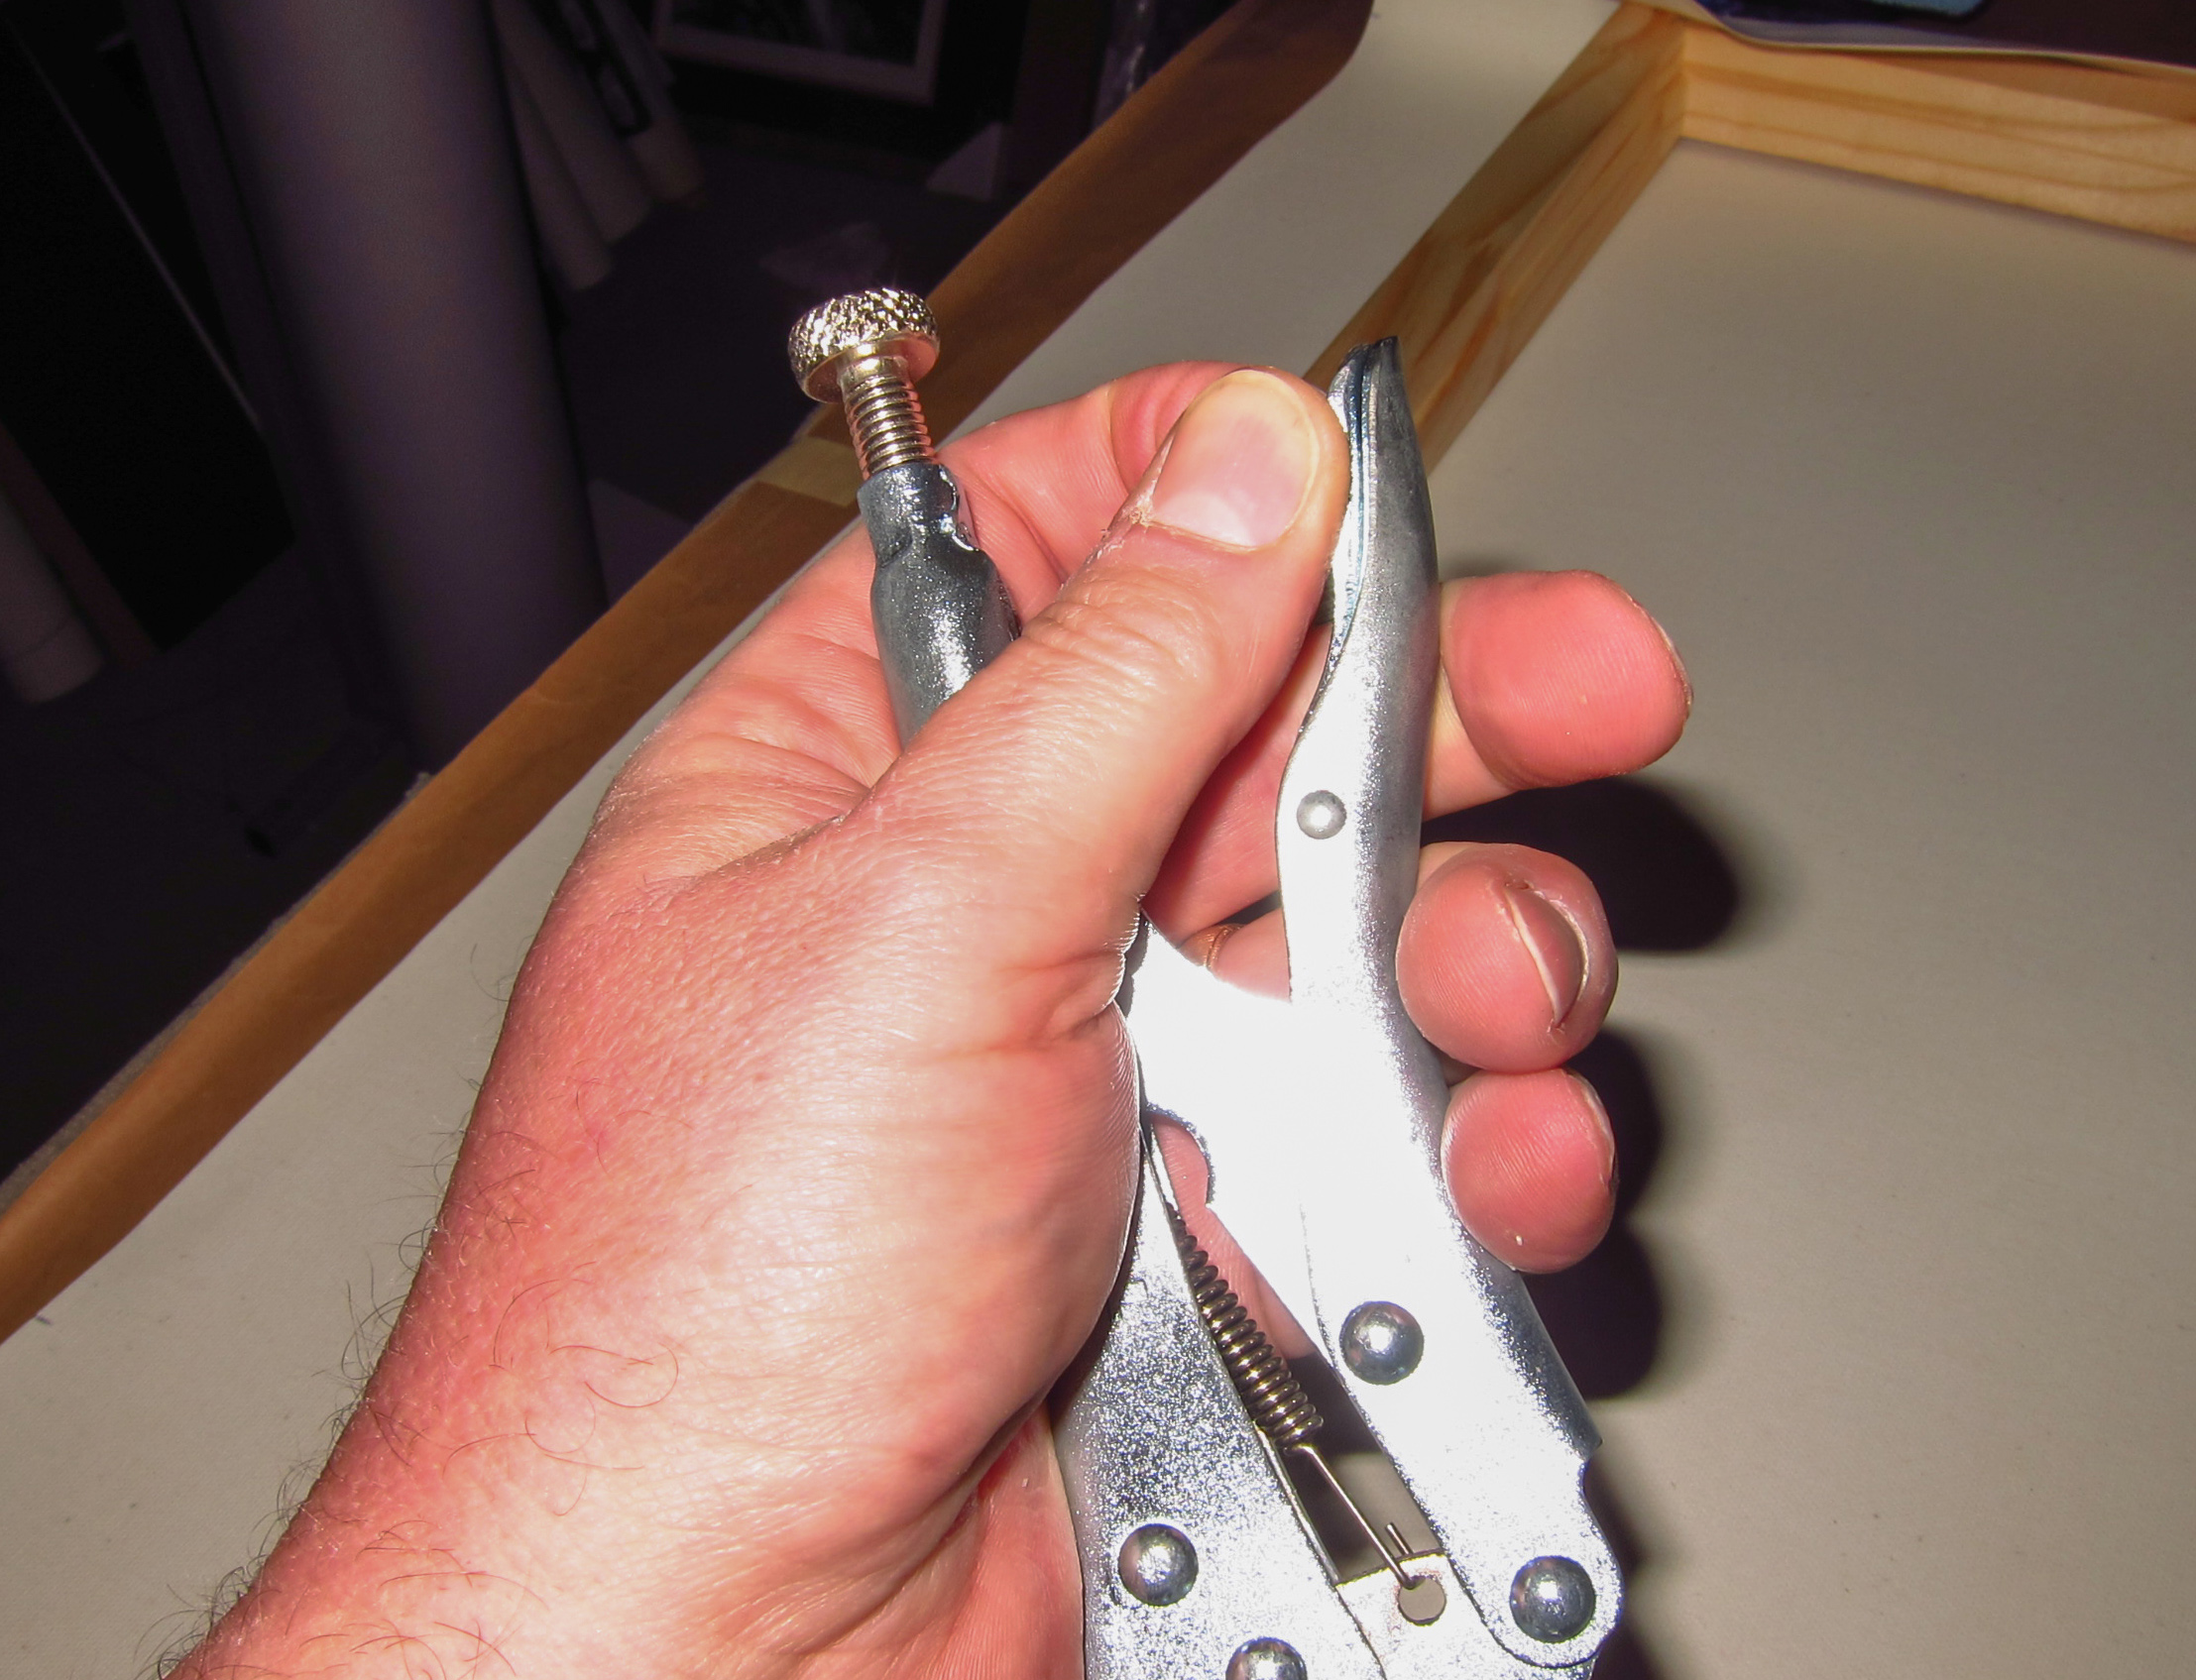
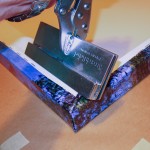
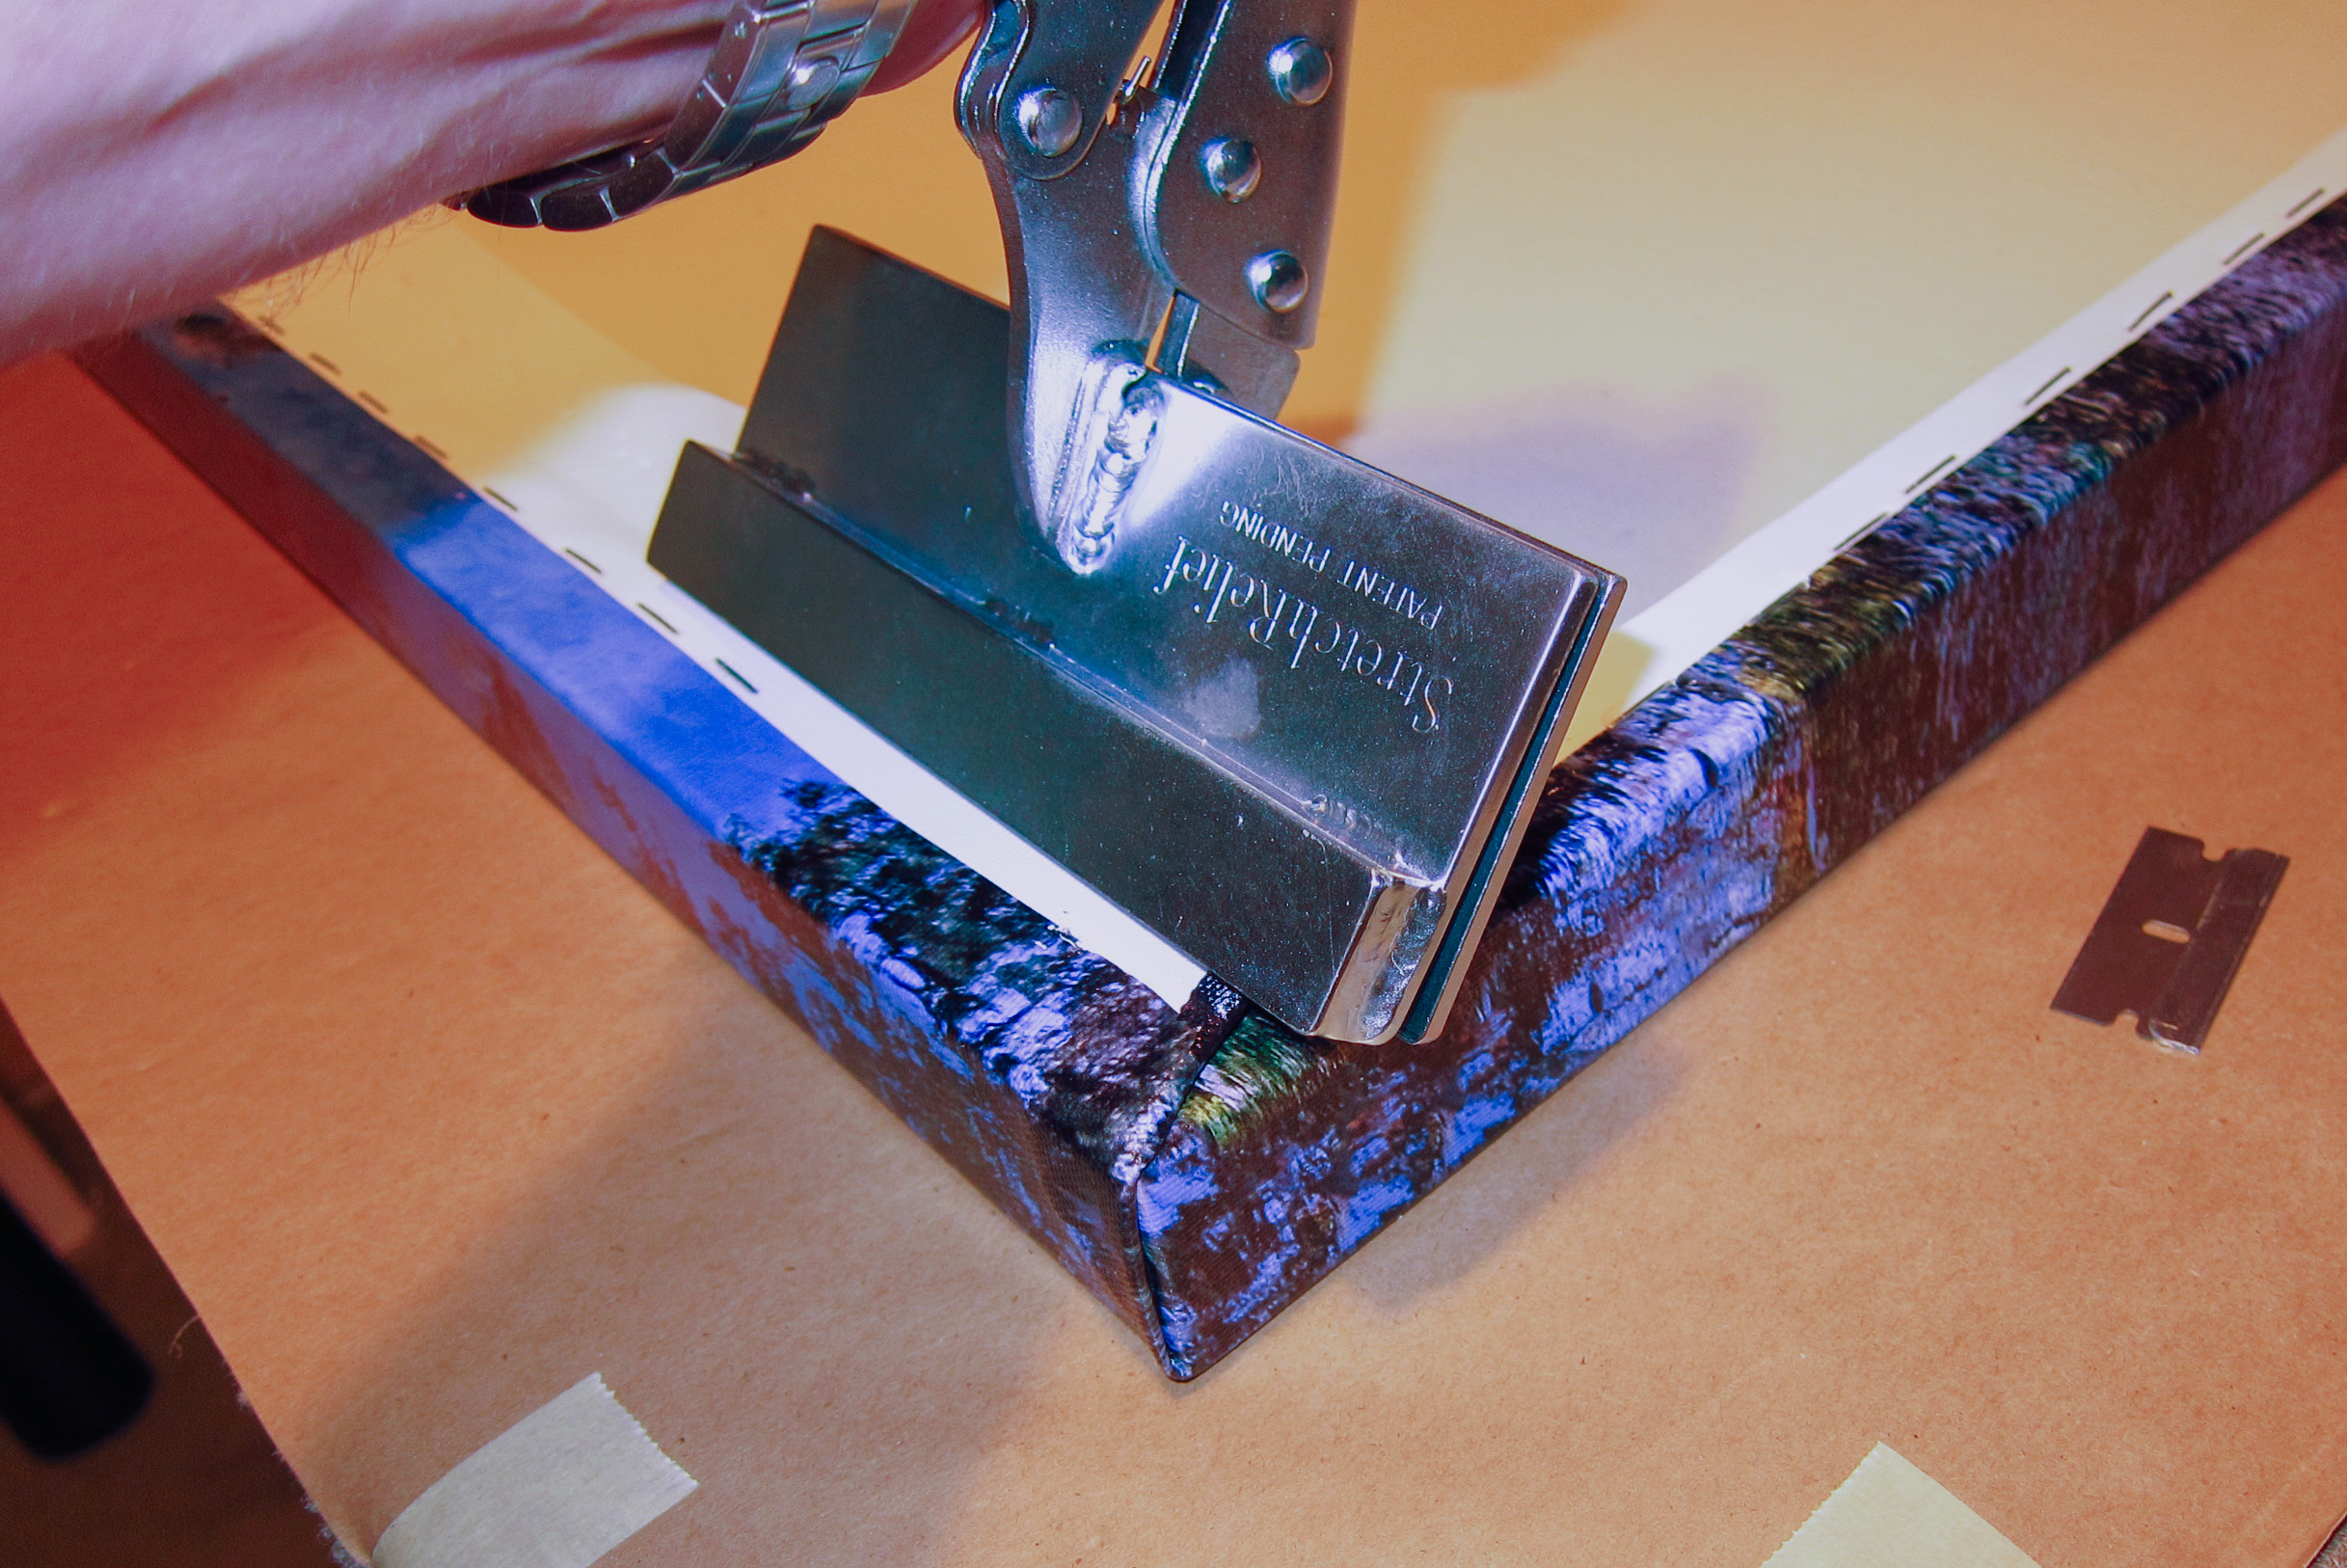
These pliers are a combination of a vise grip style of pliers which offers the ability to let the user lock the jaws of the pliers in place on the canvas, thus freeing up the need to constantly force the pliers closed. While making the stretch, the pliers offer adjustable tension with a screw at the back of the pliers. Stretch relief pliers jaws offer a 4.5 inch surface for the canvas. The flat part of the pliers have a set of teeth which will aid in holding the canvas during the stretch and not allow for any slack. The pliers have notches in the back to allow the user to work right over a center support bar and get in right to the edge of the corners. Now for the first time with a set of pliers you have the ability to get a grip right up to the corner with 100% control over the tension which aids tremendously in creating a good finished look to your canvas.
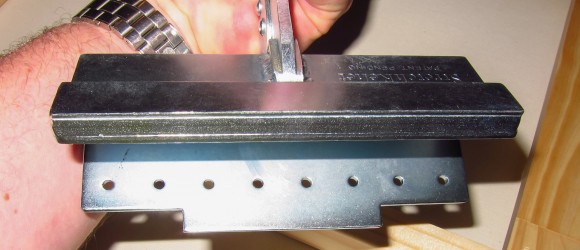
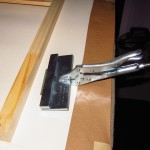
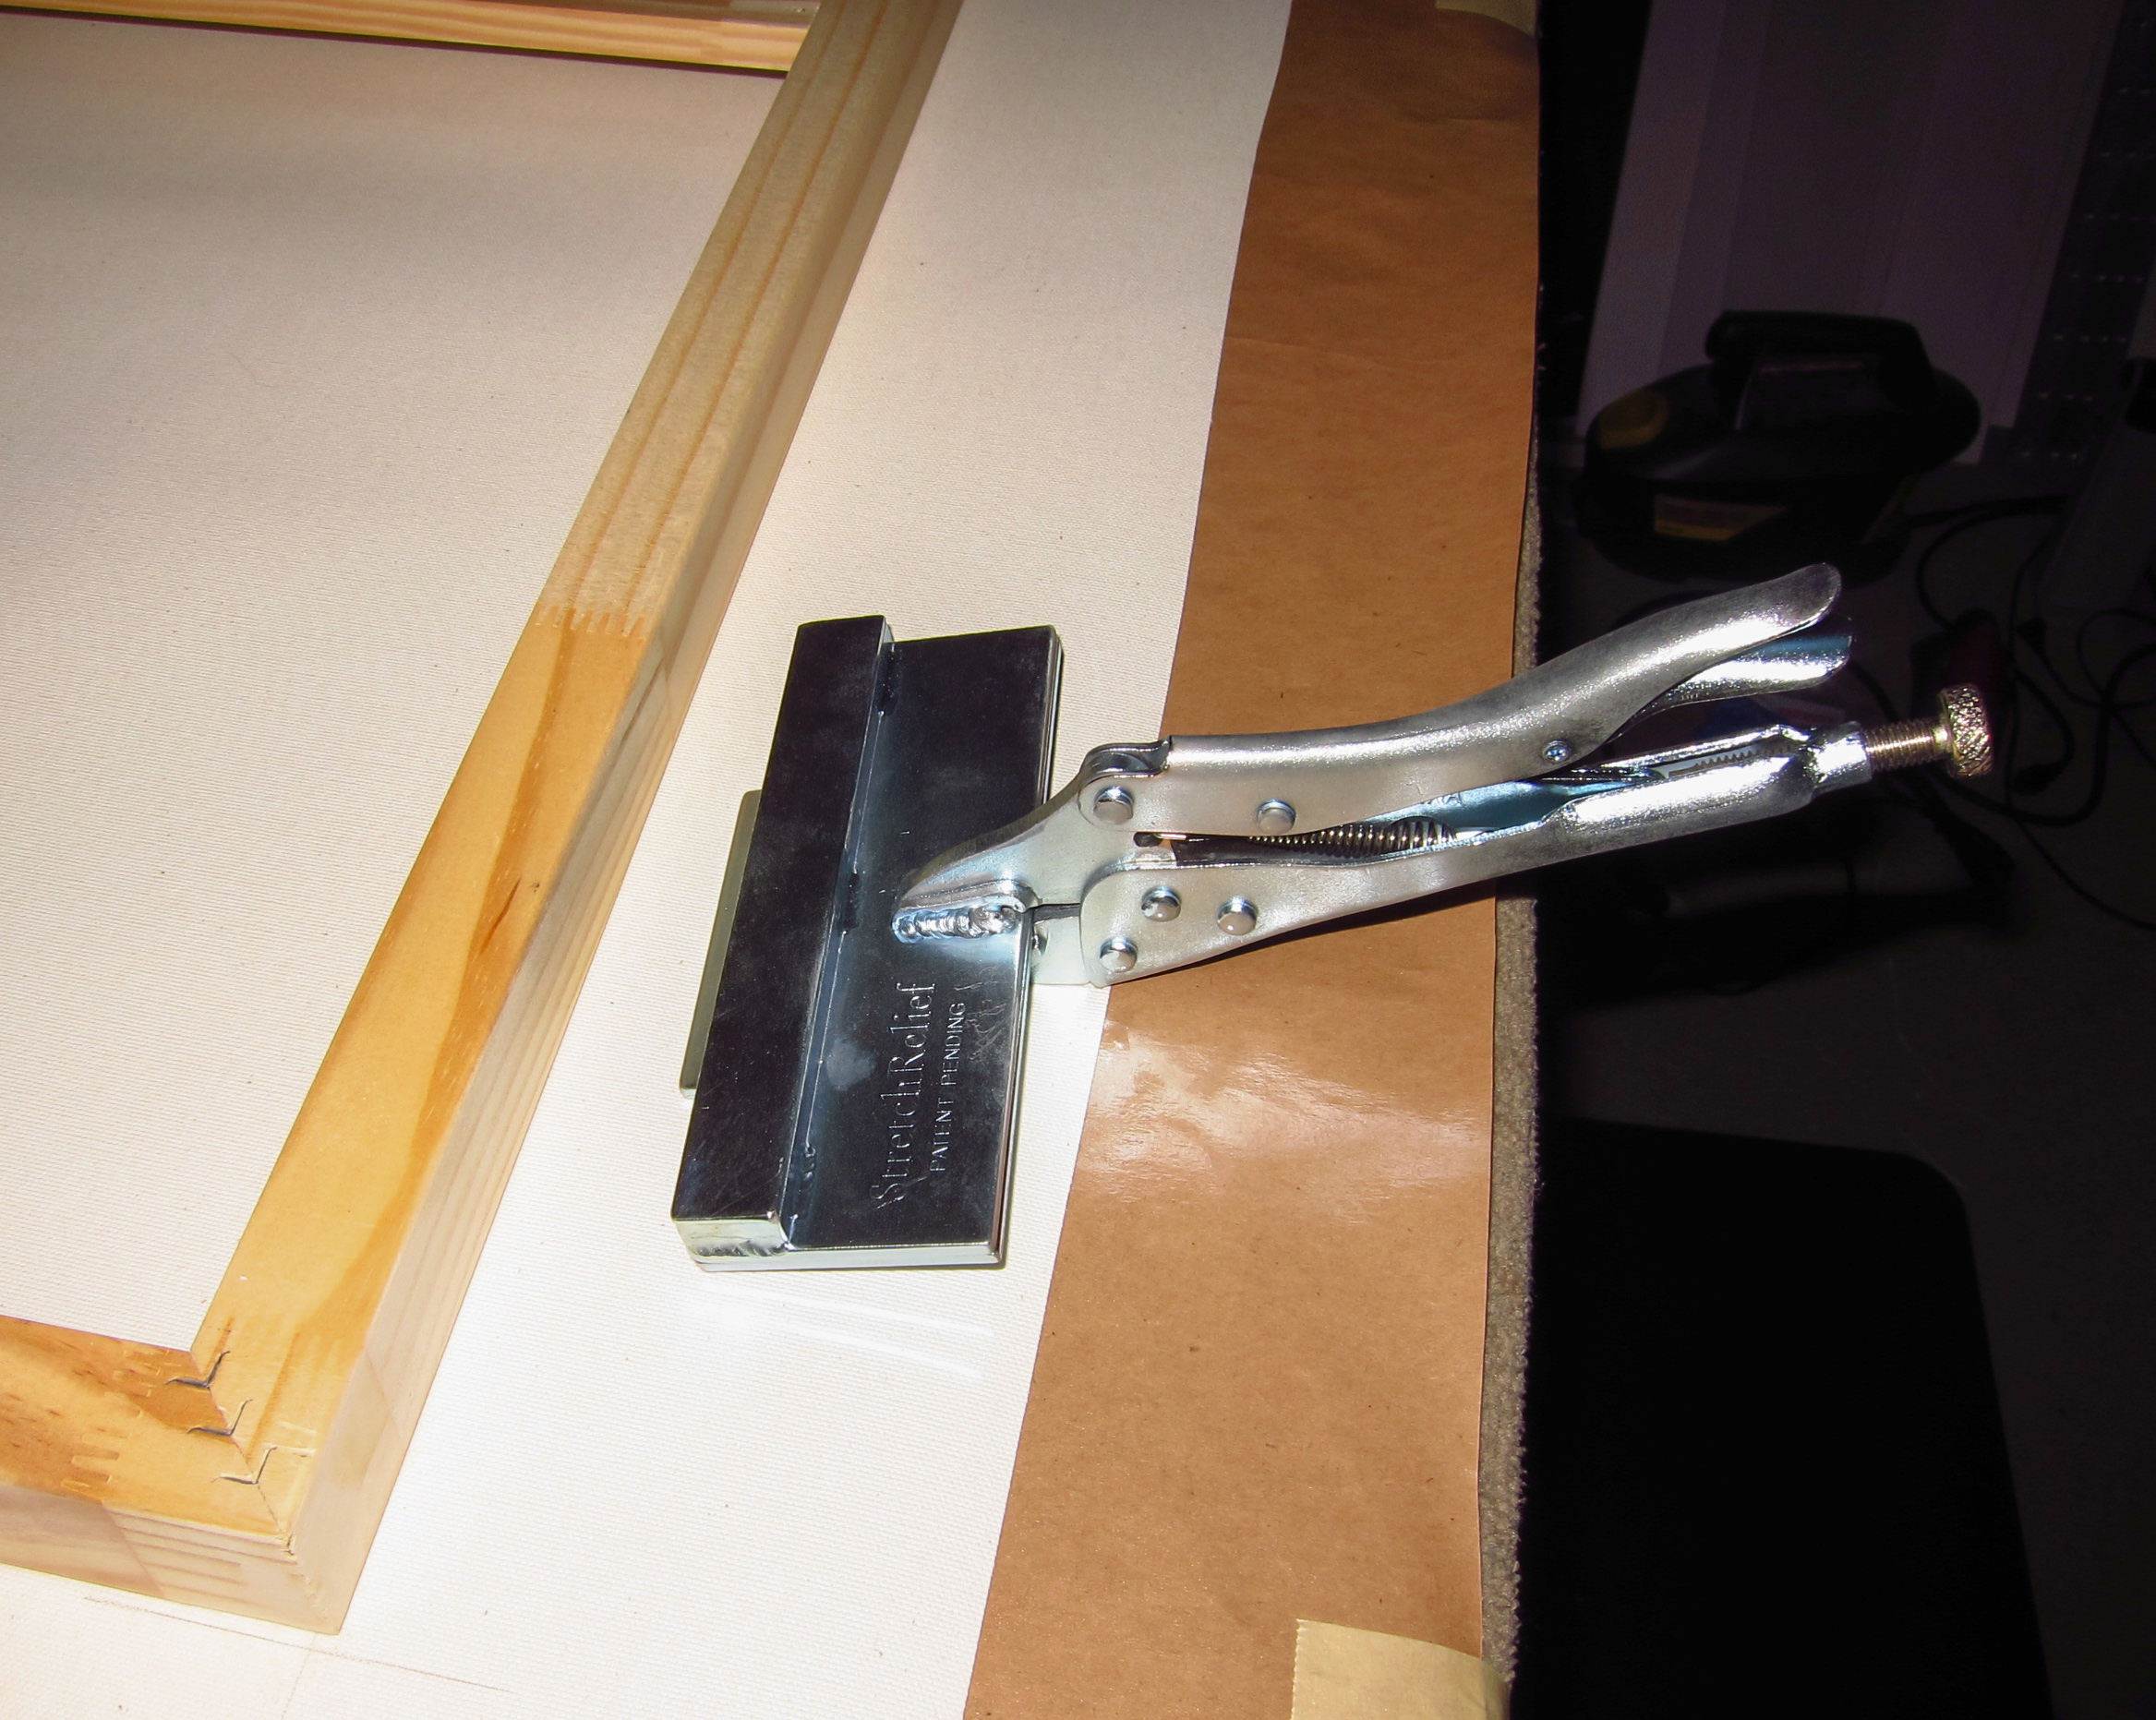
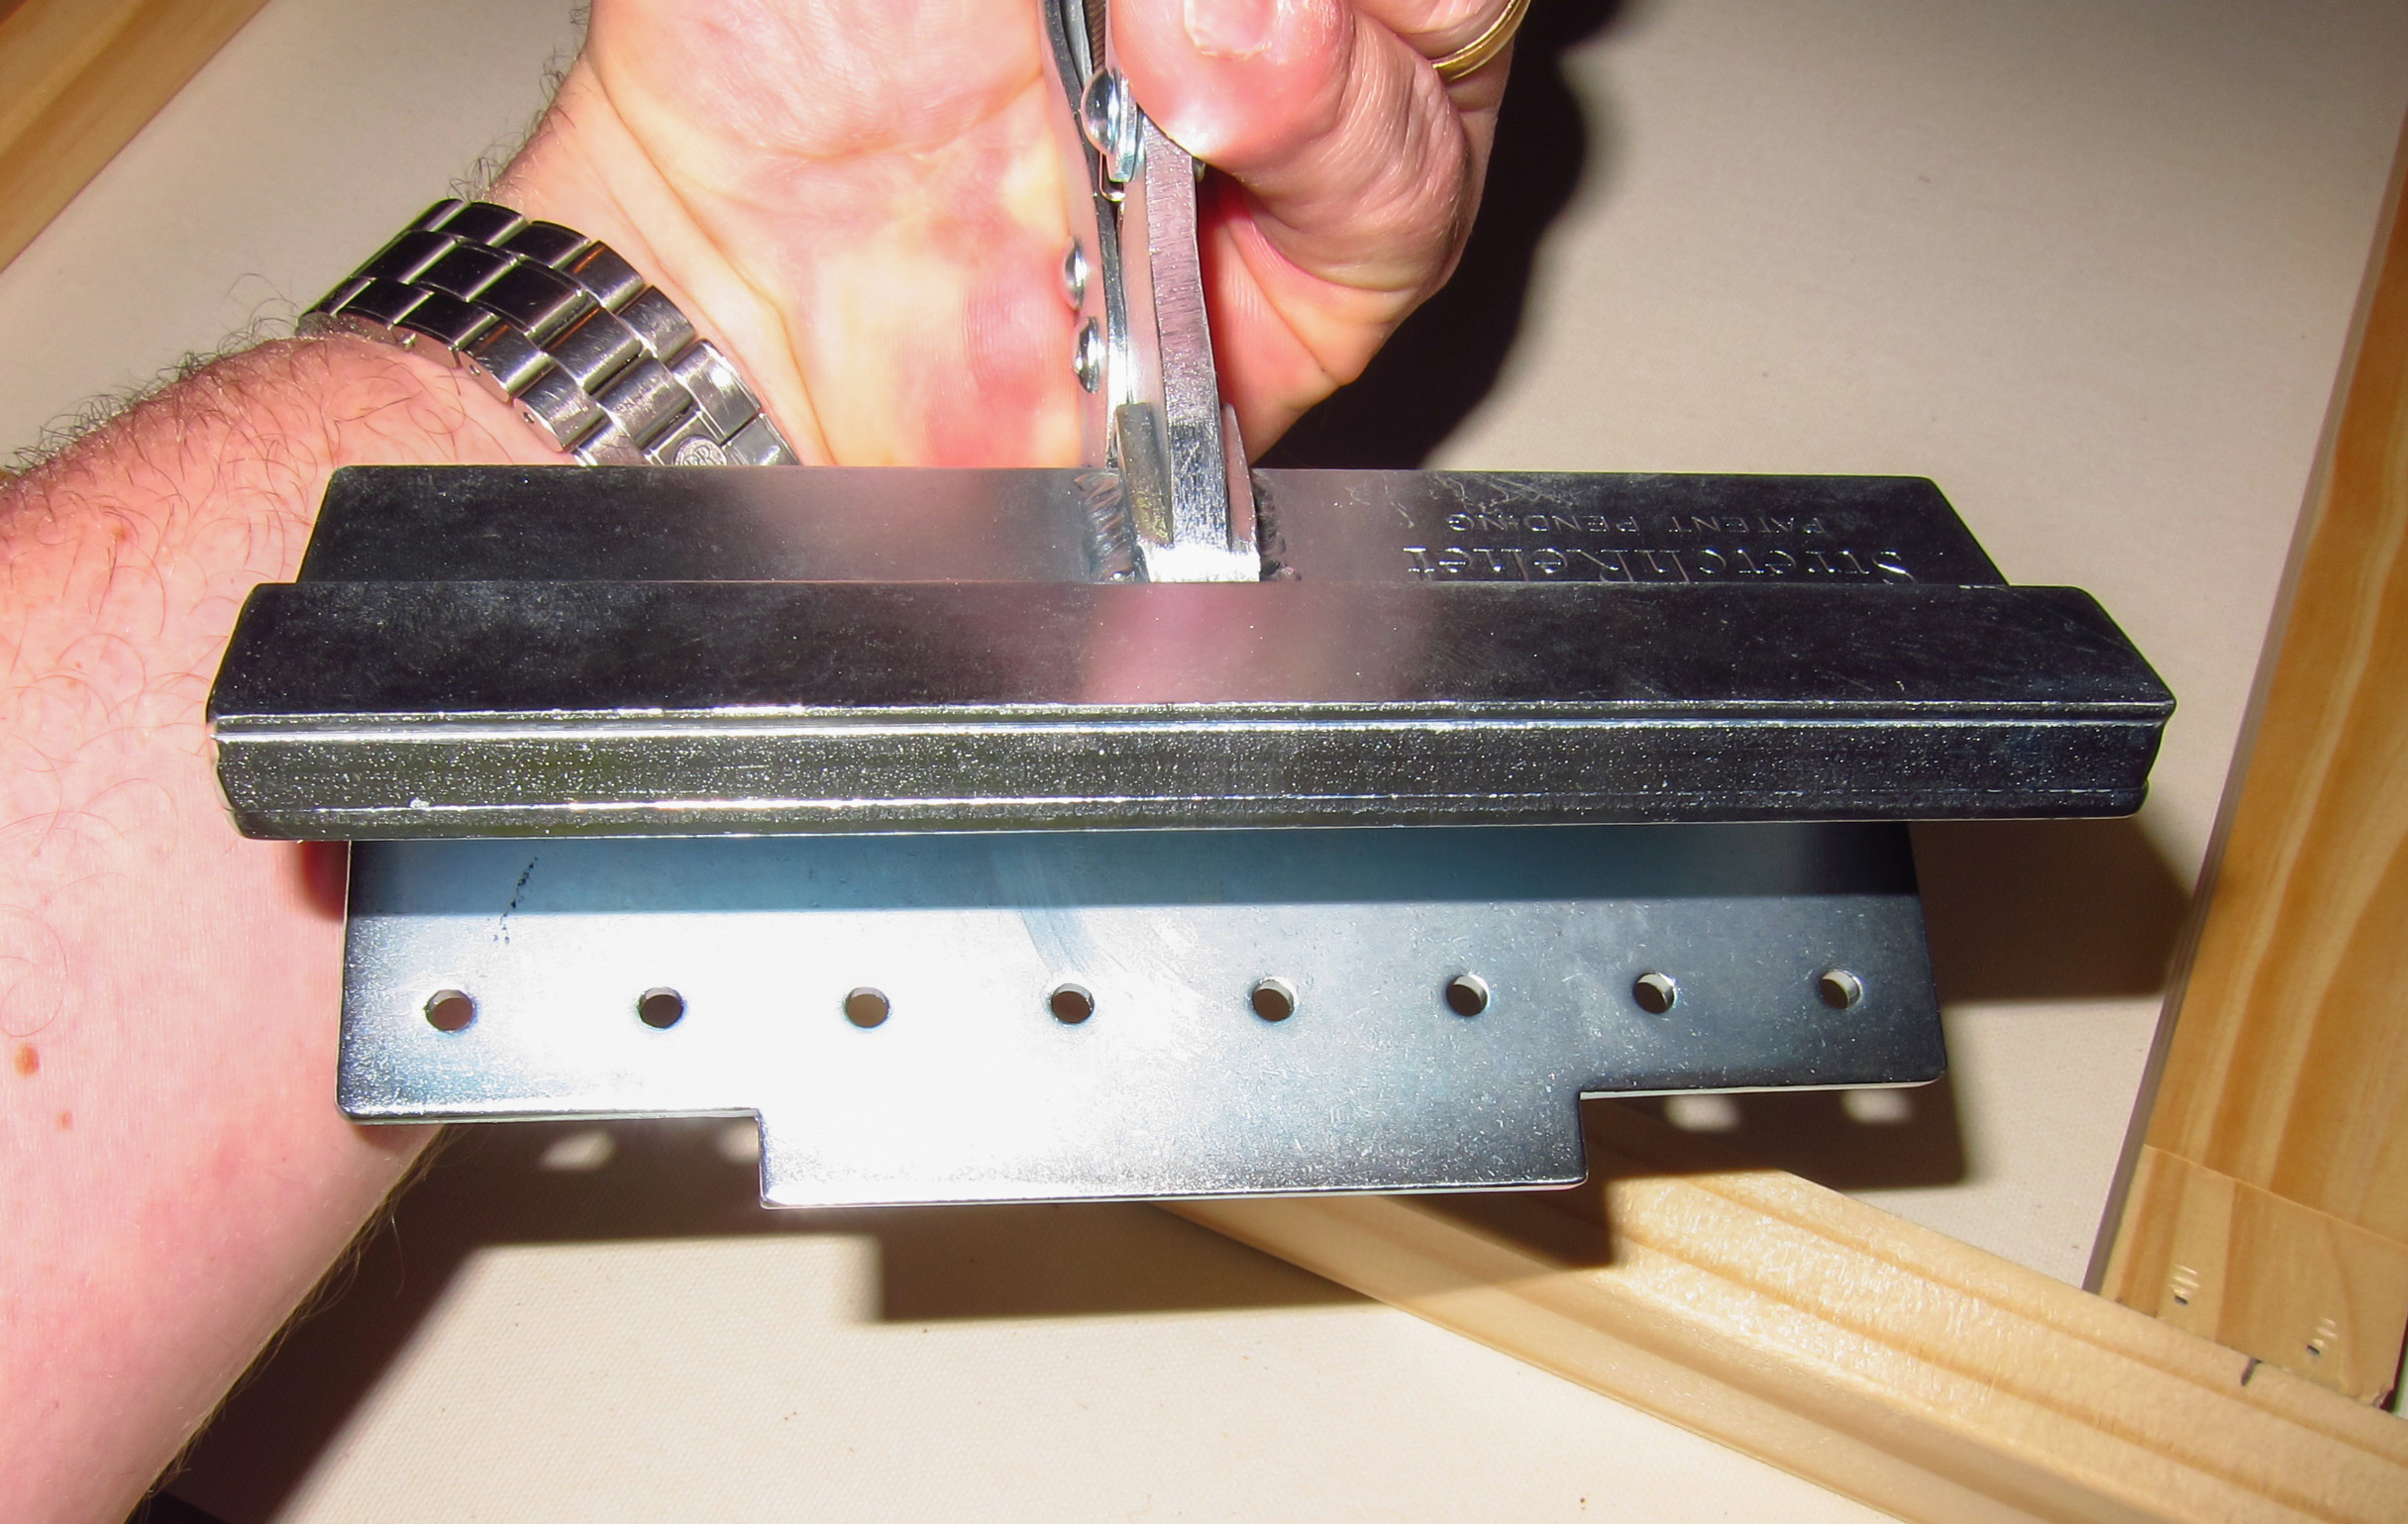
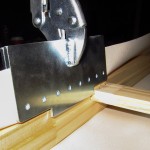
To me, the real key to the design is the notched back of the pliers which will grab at the back of a stretcher bar and create a perfect fulcrum point. The fulcrum allows you to draw back on the canvas with no need for any extra force but two fingers and hold that tension in place while you staple the canvas. You are applying tension to over 4.5 inches of canvas at one time which is over 2.5 times a normal set of pliers. I have found that the best set of stretcher bars for the stretch relief pliers are the 1 ½ inch style. Here is a picture of this style of stretcher bar with canvas wrapped over the bar with a pair of stretch relief pliers.
-
- Picture of Stretch Relief Pliers showing the back notches and holes for teeth
-
- Stretch Relief Pliers locked down on stretcher bar prepared for stapling
-
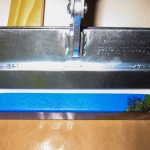
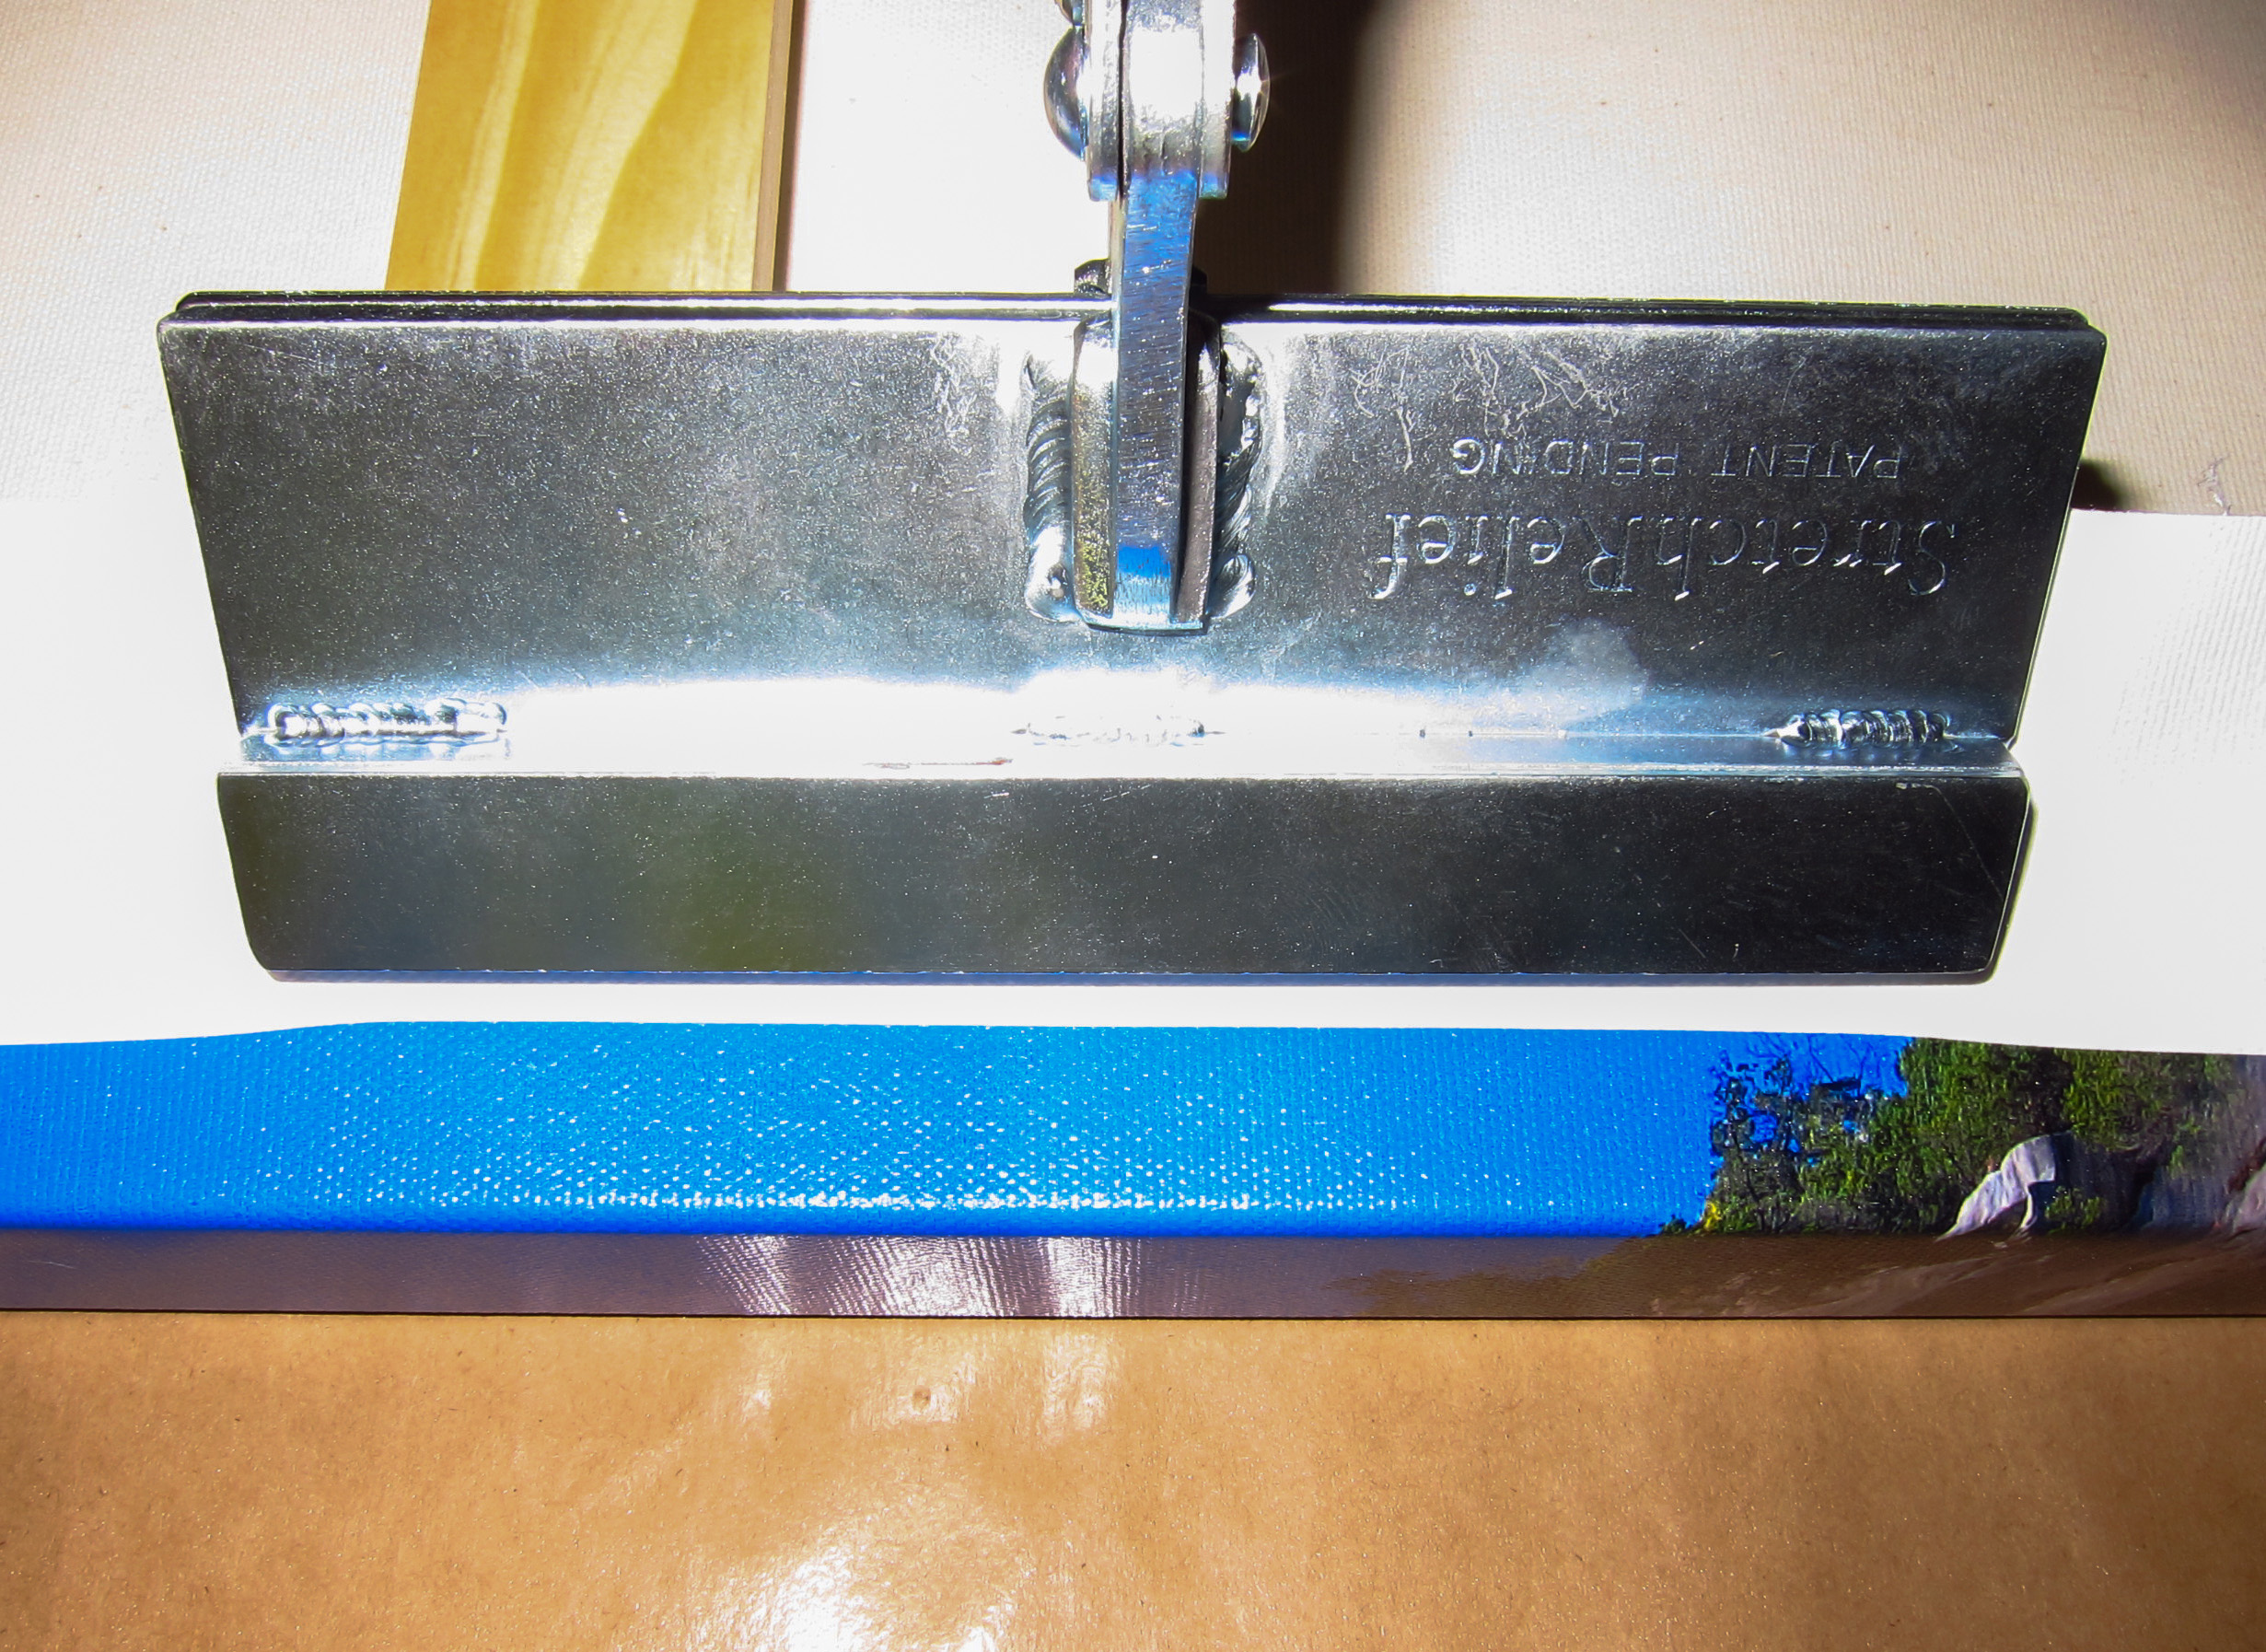
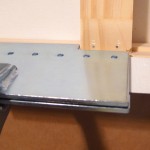
- Stretch relief pliers up against a center support showing how the notches work
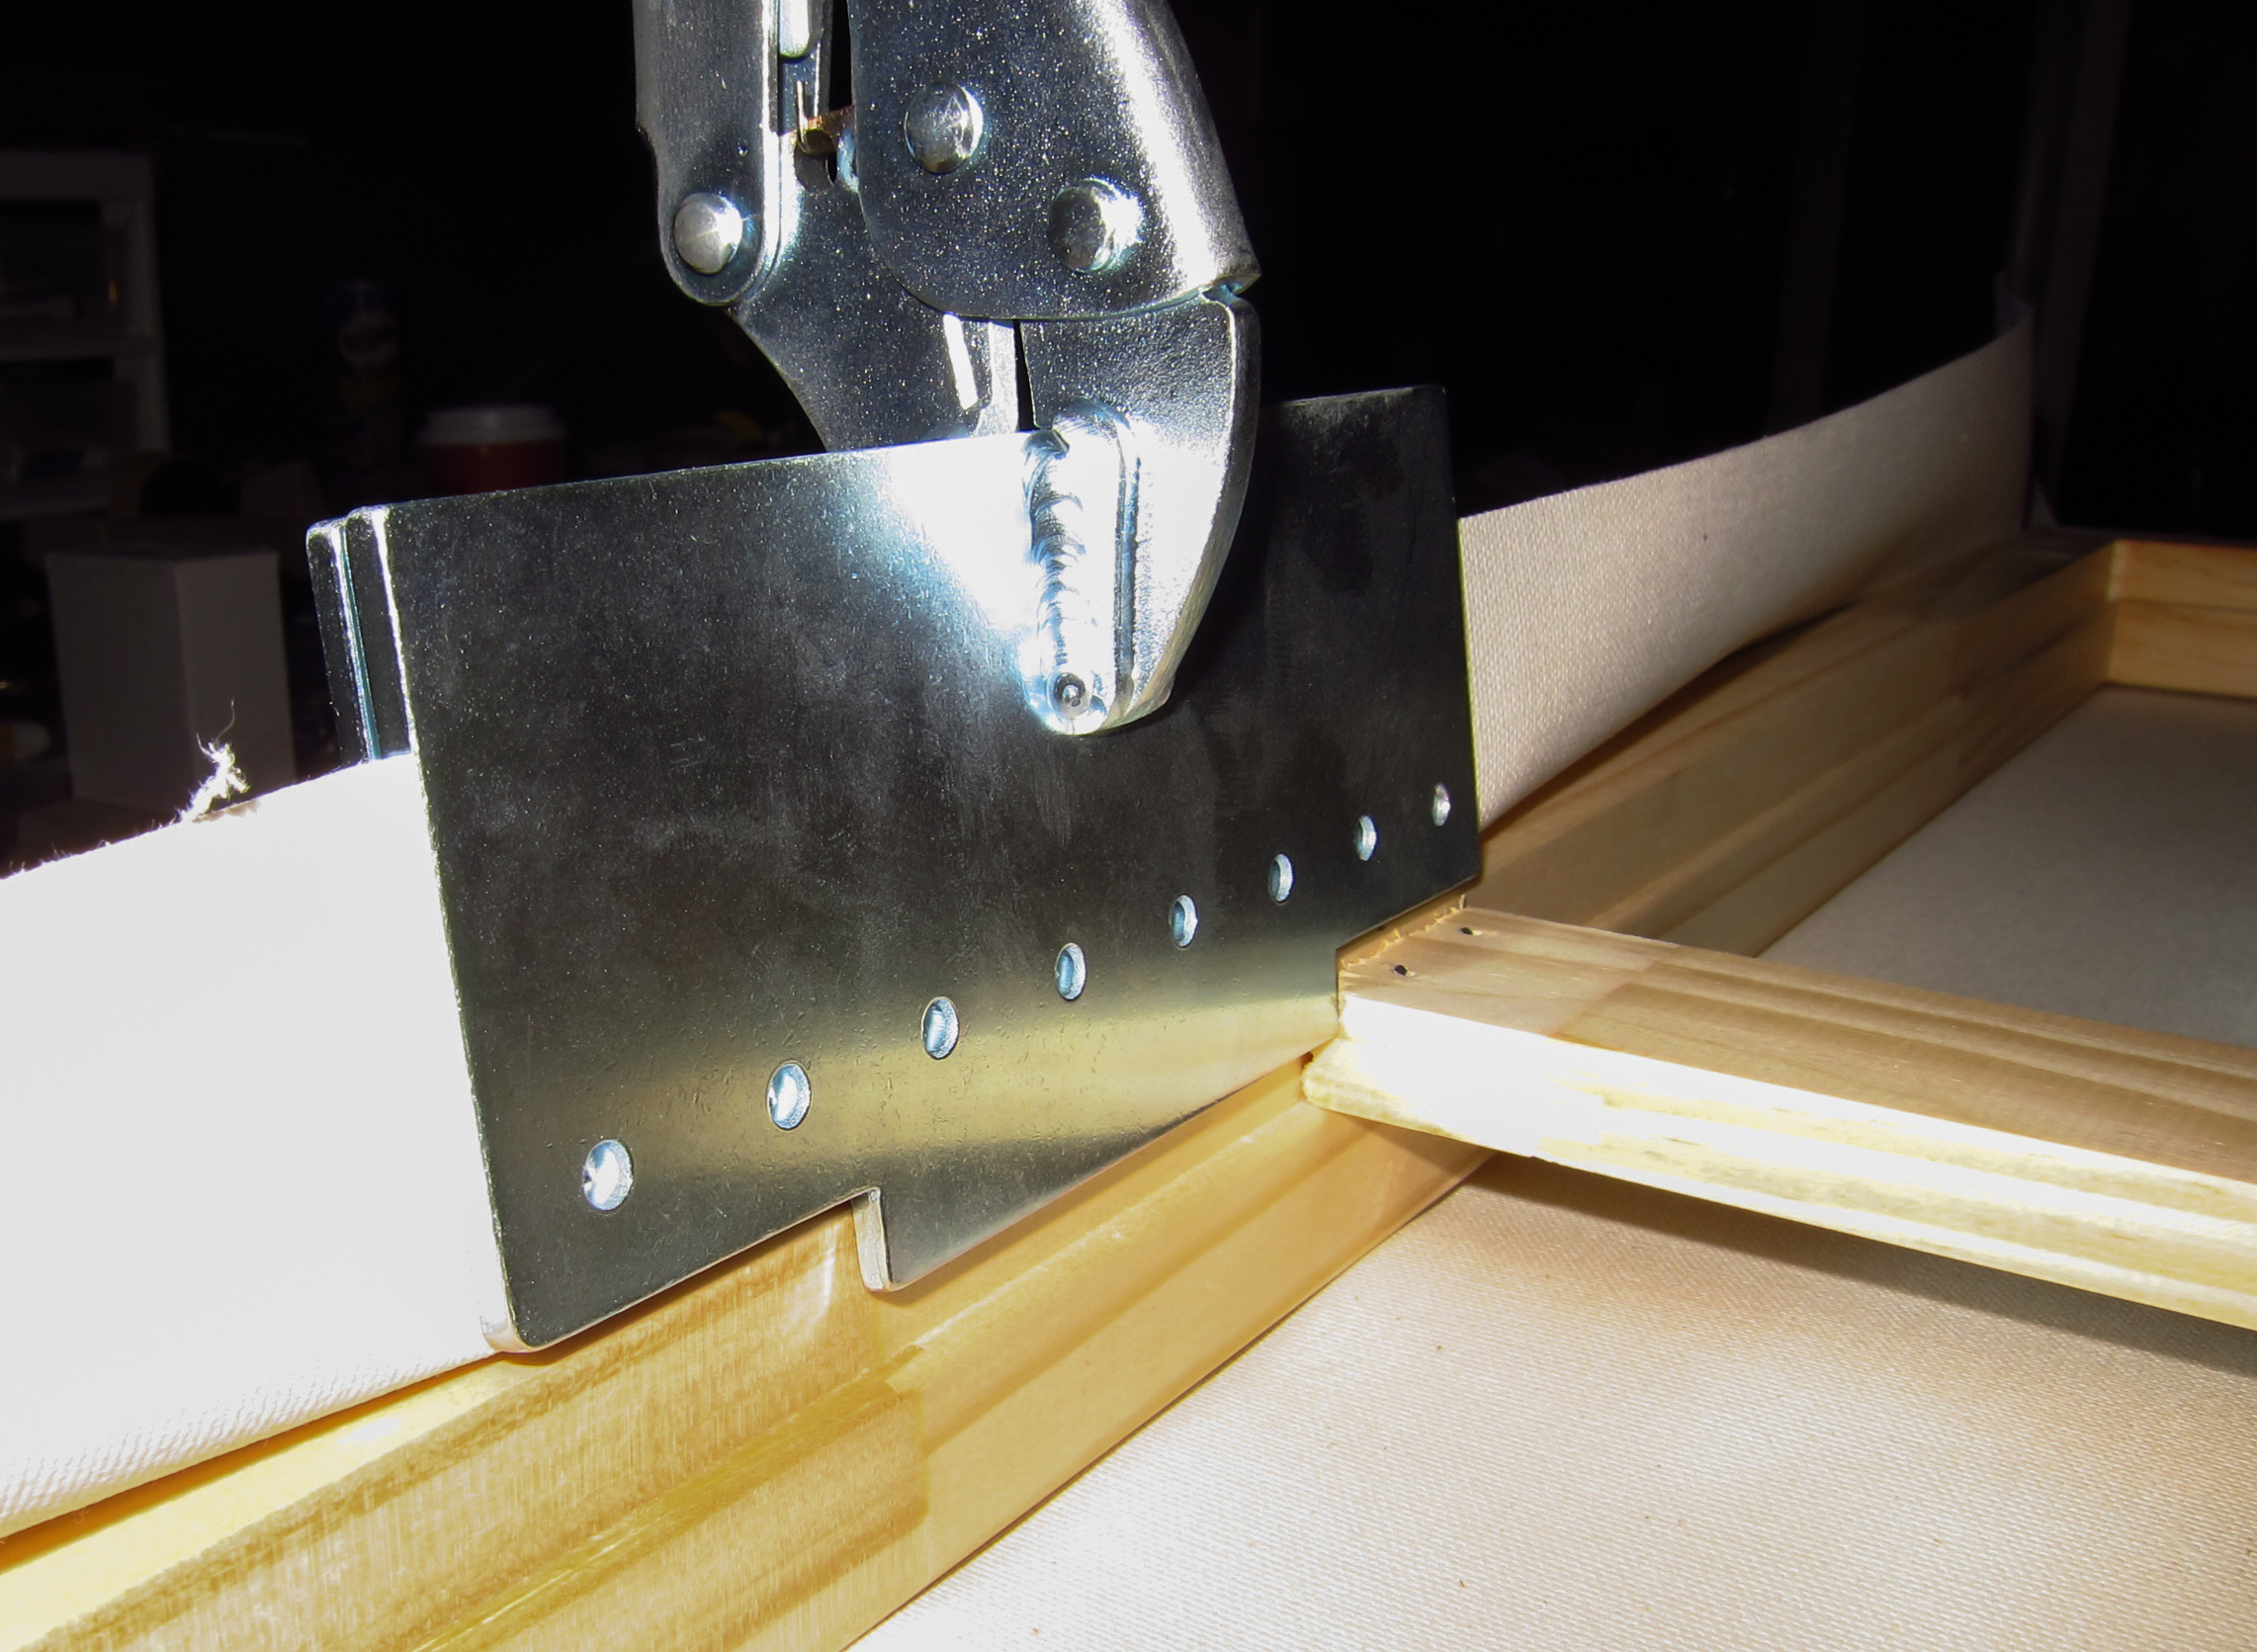
-
- Stretch relief pliers engaged close to center bar showing 100% coverage
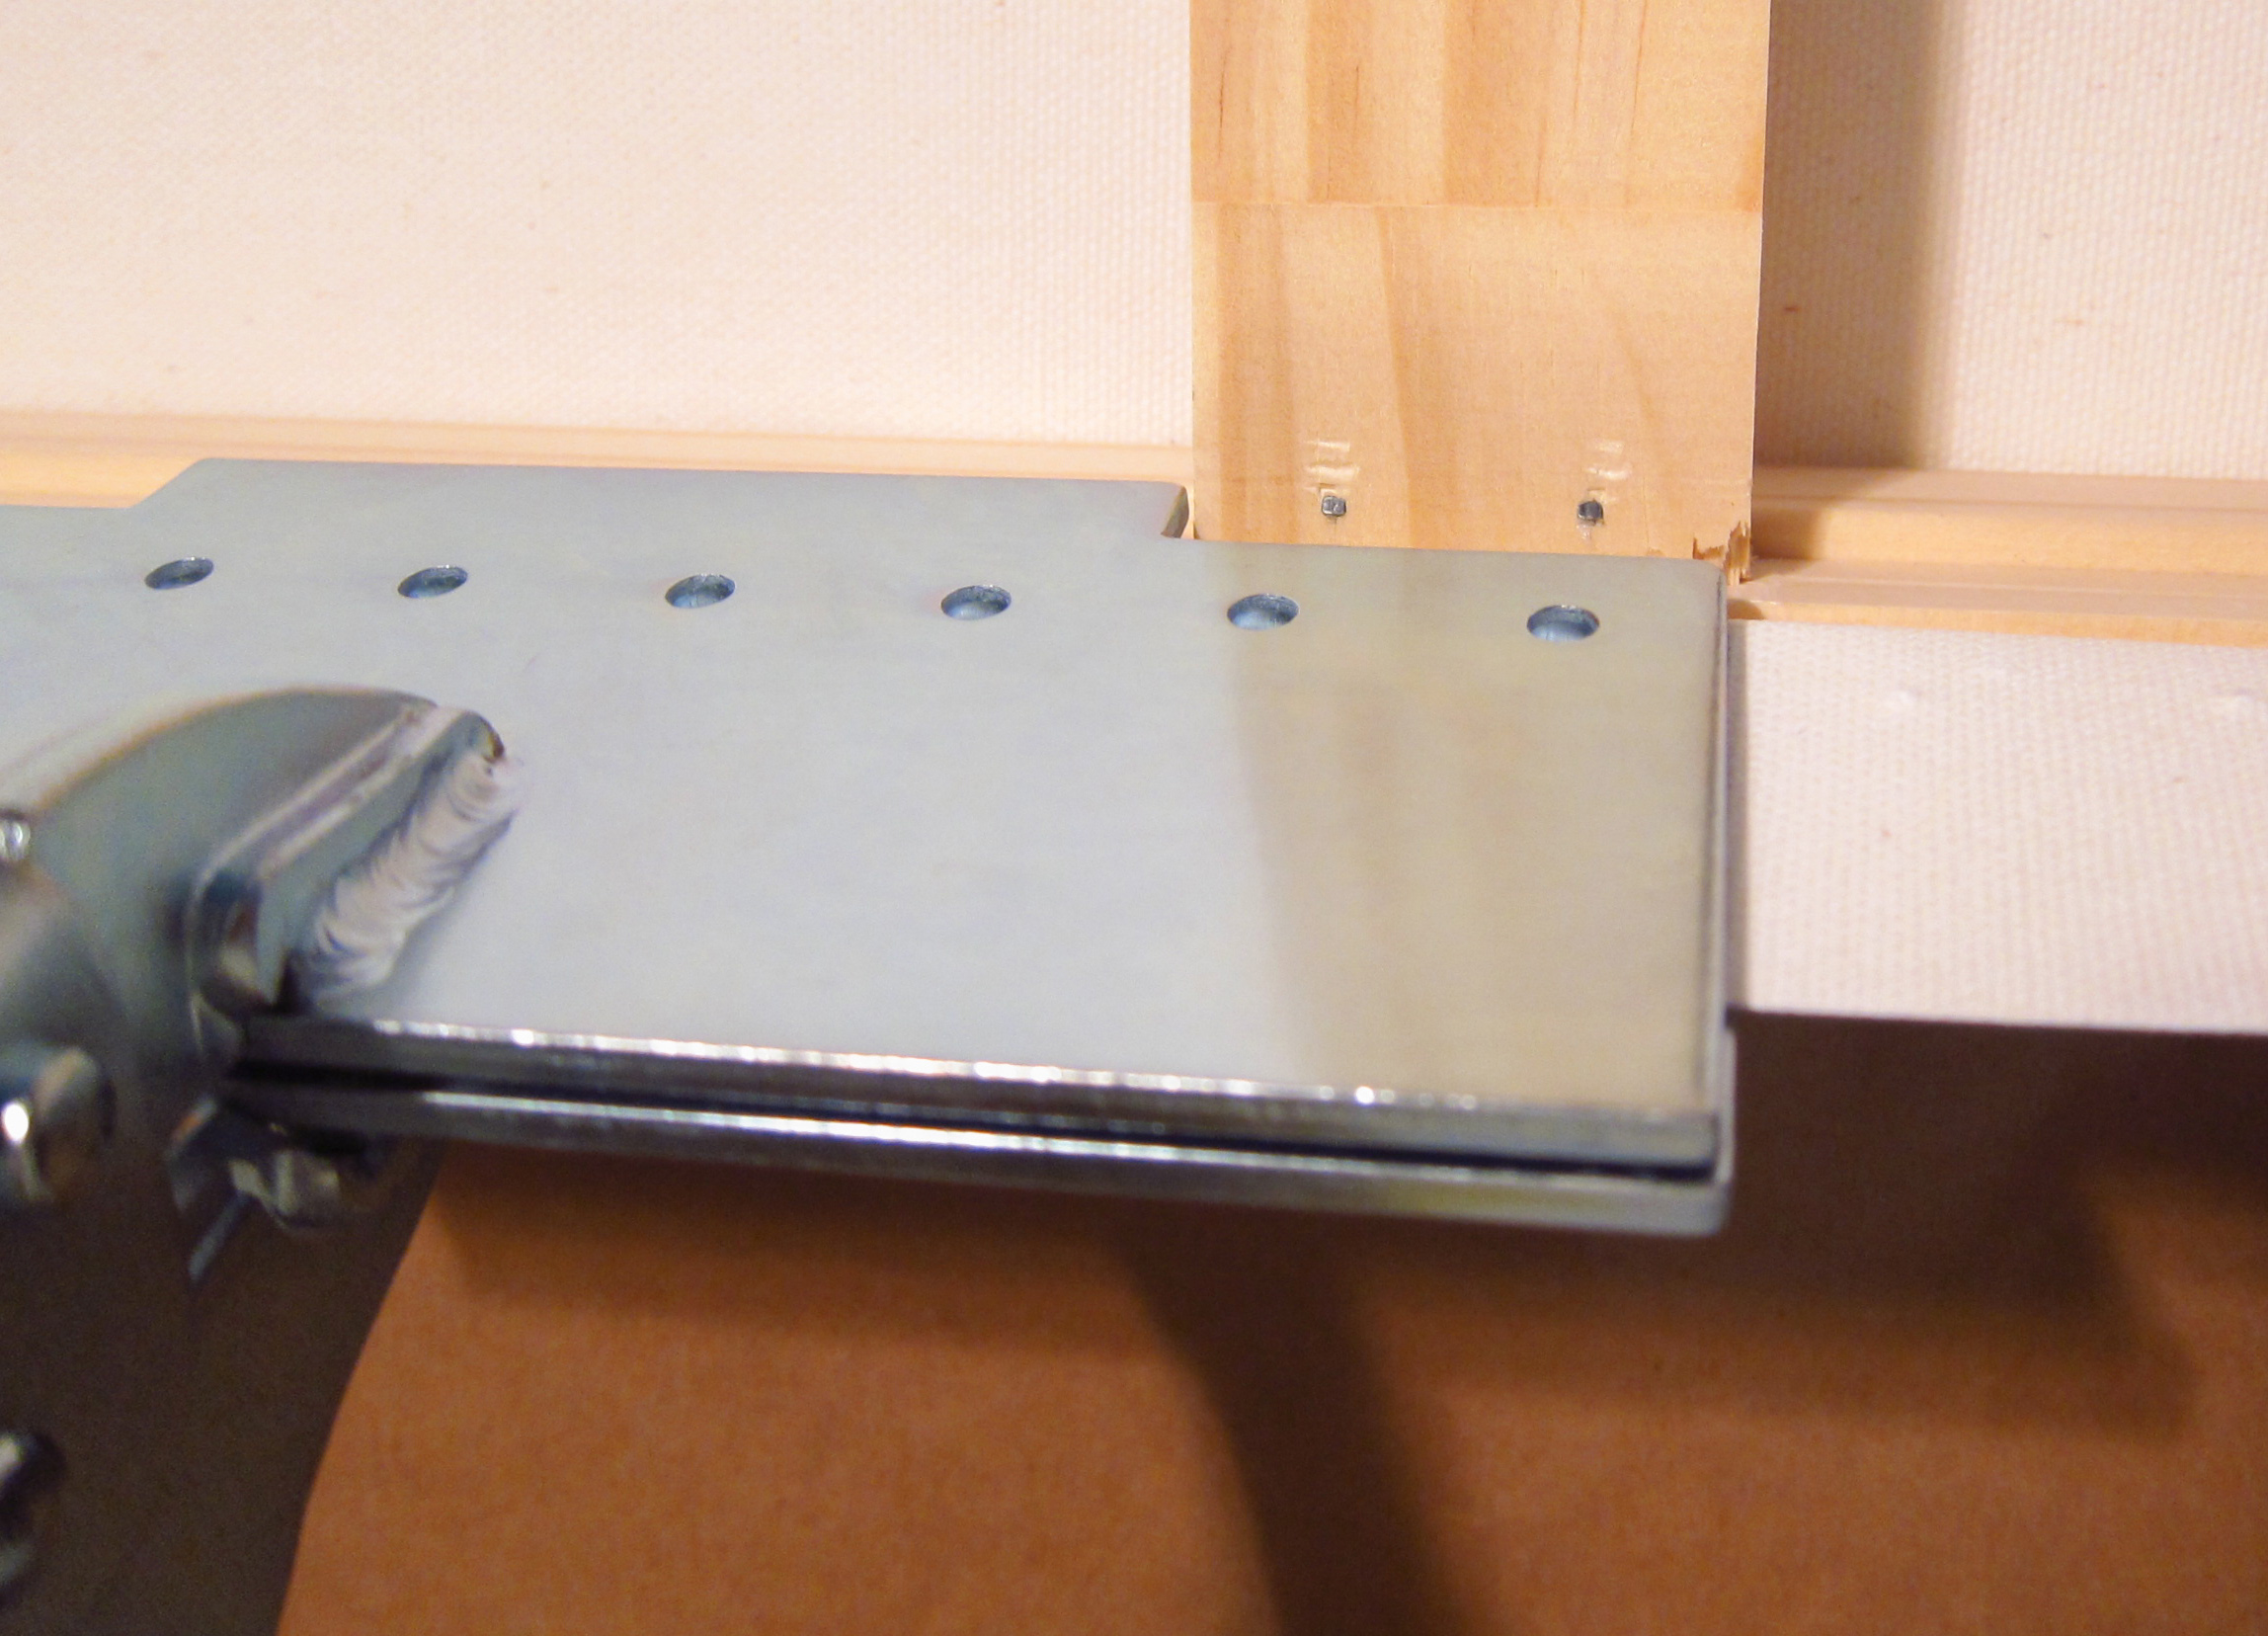
This style of bar is notched on the backside. The notches are meant for the placement of center and corner supports but the stretch relief pliers will utilize the notch and fit up against the back of the bar. In the middle picture shown above you can see the cut out notches on the back side of the pliers. The third picture shows the pliers up against a center support bar. The recommendation is to allow for 1 ¼ inch of free canvas but I have made great stretches with 1”. Much less than this and the teeth will not bite the canvas and this will allow for slippage.
I feel that the main strength of the stretch relief design is that they act similar to the way a stretching machine works. This is because they allow you to finish one side completely then flip the canvas over and finish the opposite side. Usually I will start with the long side first. The older style pliers are designed to work from the center of the canvas out, and you rotate the canvas each time after you staple. For example starting in the middle on the long side, flip to the opposite side staple there and then do the short side. Repeating the process till you have neared the corners.
I prefer to start my stretch on one long side with 4 temporary staples. I then move to the opposite side, and use the stretch relief pliers to gain purchase and tension. It’s important to standardize on one style of bar and allow a standard amount of extra canvas on all your prints. For example I use a Larson 6011 bar, 1 ½ inch, and on all my prints I add 2 inches of extra printed material. Thus I have the 1 ½ inch width of the stretcher bar covered and have ½ inch printed material to wrap around the back. This allows me to line up the print on the stretcher bar as I know that when I am centered on the bar, I will have ½ inch of white canvas and ½ of printed material.
Once I am lined up, I will lay in the first series of staples. I then move to the opposite side and pull my temp staples and again use the stretch relief pliers to pull the canvas tight and finish that set. Now you have approximately 4.5 inches of canvas down on each long side in the center. I quickly move to the short sides and apply one staple to the top of each corner. I feel this helps keep the canvas from getting waves in it during the stretch. Once this is done I complete one long side, then the other long side. This whole process takes about 2/3 less time as trying to do this with a normal set of pliers. You will tend to forget and run out of staples because you are moving along so fast. Remember on the long sides not to staple all the way to the edge as you still have to form a corner. Once the long side as done, simple flip, pick a short side and finish one then the other. I will then quickly examine the face of the canvas to make sure I don’t have any waves. At this point you are basically done with the stretching. The only process left is the cornering/finishing.
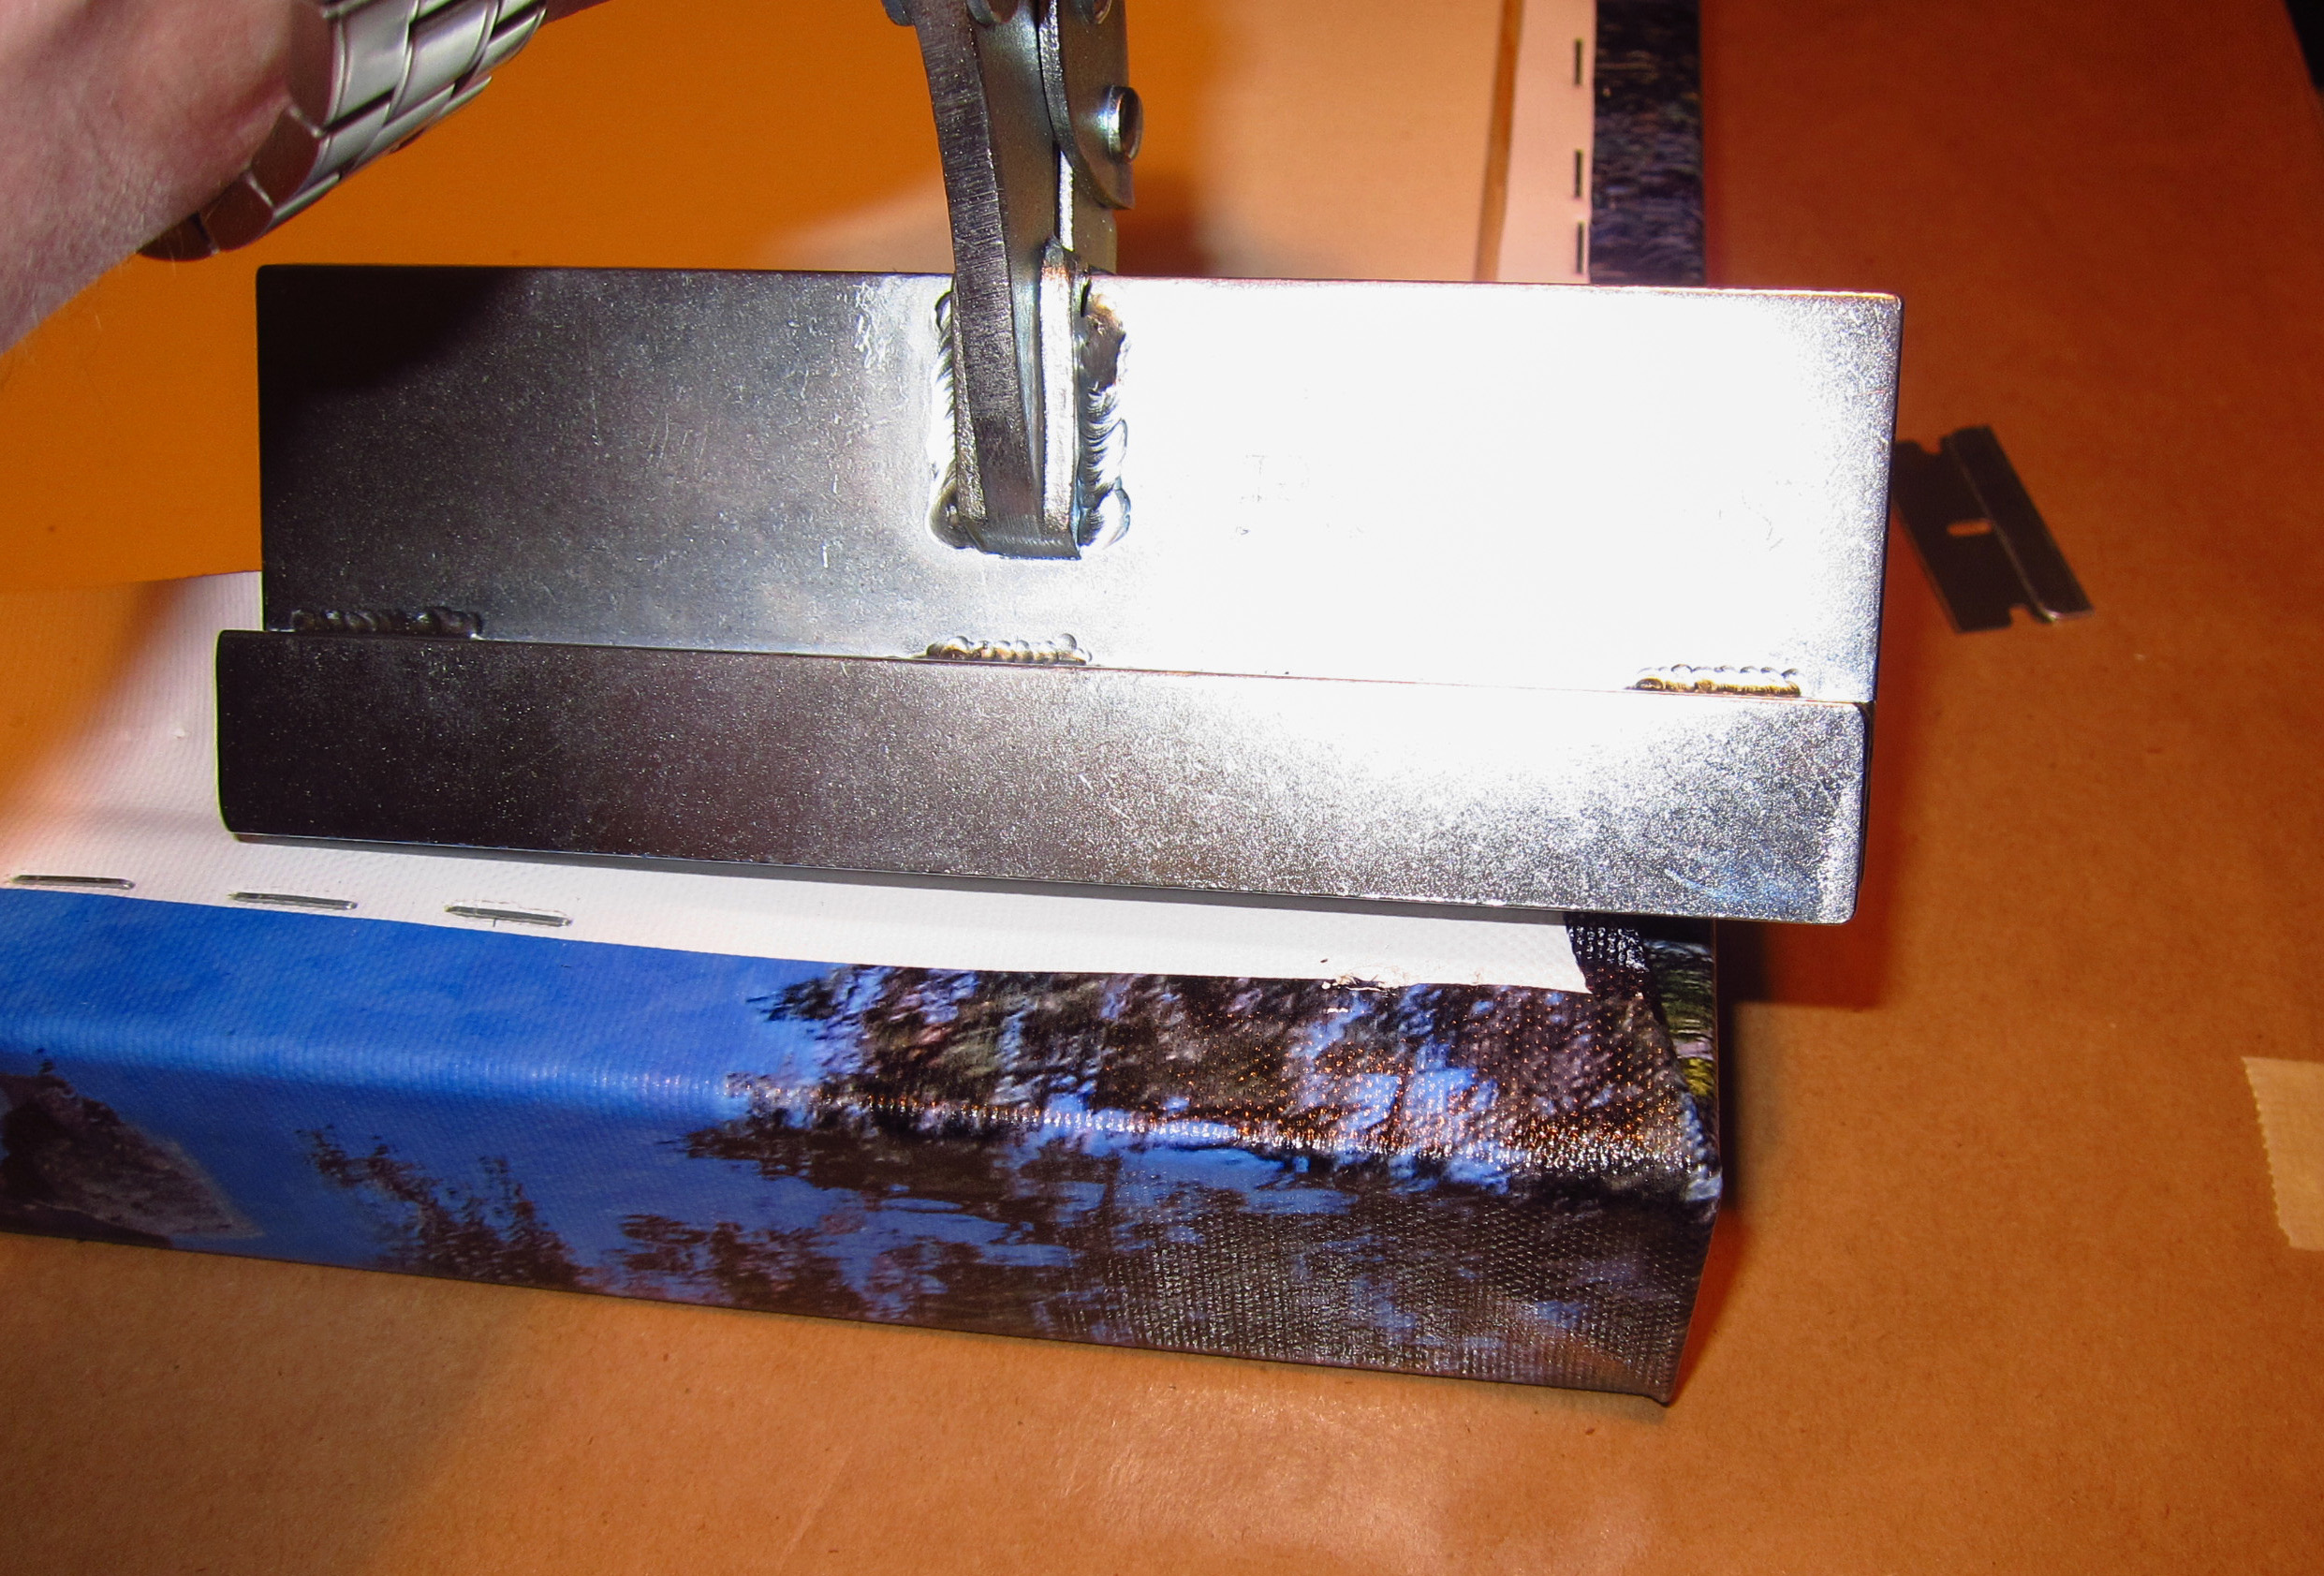
On a corner the notched edges of the Stretch Relief pliers allow you to get right up to the edge of the stretcher bar. Being able to get close like this with the added advantage of the fulcrum allows you to get an even and very tight tension on this key part of the canvas. How one finishes off the corners is up the individual, I prefer to cut out some of the extra material and then tuck the corner over. The Stretch relief pliers will still make a strong enough grip to include this extra material and still provide a tight stretch. This is so important since usually the cornering requires some doubling of the thickness of the canvas. When finished the stretch relief pliers will create an excellent stretch and create a drum tight product.
-
- 2nd View of Stretch Relief pliers showing how assist in creating an excellent corner
-
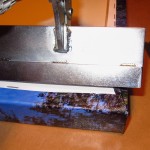
- View of Stretch Relief pliers engaged in finishing a Gallery Wrap Corner
In summary, the stretch relief solution give the user a similar type of control afforded by a stretching machine. This is possible due to the several design features:
- The greater surface of the pliers
- Teeth which bite and hold the canvas
- Piers which allow the user to free up the hand and don’t need as much constant tension
- The cut out notches on the back edges which allow the ability to get close to opposing edges
- The notch in the center of the back which creates a fulcrum and provides excellent tension
- A screw on the back of the pliers that allows the user to adjust the totally amount of tension
With these pliers you have an equaled amount of control and tension during the stretching process. You are able to do this with just the control of two fingers due to the fulcrum created by the pliers. The time savings and actual relief to your hands from not having to grip and hold the pliers/canvas in place will justify the extra cost of the stretch relief pliers. My only reservation is that the pliers only come with a 6 month warranty. Construction and welds all seems to be very well done and hopefully his warranty period can be extended to 1 year. I feel that by using these pliers you will get a much more professional product which is evenly stretched and better looking than a stretch from conventional 2” pliers. Over the years I tended to lead with paper/matted/framed prints on anything larger than 20” x 30”, but with the advent of the stretch relief pliers I am now much more at ease with larger canvas projects. I will get more work done, which is right the first time and needs no re-tensioning later on or rework.
You can learn more about the stretch relief pliers here: www.breathingcolor.com
03/13/13 Featured Arkansas Photography–January Night skies over Roark Bluff
- At March 11, 2013
- By paul
- In Featured Arkansas Photography
- 0

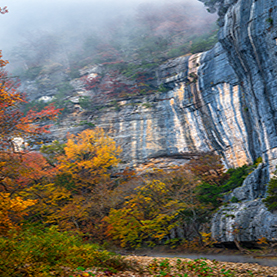
Night skies over Roark Bluff on the Buffalo River–click on image for a larger view
Taken with a Nikon D800e, Nikon 14-24 lens @14mm F 4.5, iso 400. Image taken in a series of 2 minute exposures and stacked to capture motion. This was my first trip with the Nikon D800e for night photographic capture. I had used the D800e throughout the 2nd half of 2012 but was never able to coordinate a good night for a shoot. I prefer to have a clear night with a 1/2 to 3/4 moon and on the 20th of January in 2013 all of this came together. There was also very nominal wind for the entire night. This particular shot was taken looking downstream so I can featuer Roark Bluff and still capture Bee Bluff, the next bluff down river. All of the on the bluff and riverside trees is from the moon and no light painting was needed. The moon is a wonder ally with night photography, giving you a great blue hue to the sky along with adding just enough illumination to see the foreground details i.e. bluff, trees, etc. I was very pleased with the results of the D800e at night. The 14-24 lens at F4.5 still was extremely sharp and the corners of the shot were very useable. I noticed no coma in the stars and very little chromatic aberration. I used Capture One 7 to convert the raw files and stacked them in Photoshop CS6 to capture the star motion. I then combined various versions of the foreground image until I got the best overall image.
03/10/13 Featured Arkansas Photography–Sunset from Flatside Pinnacle
- At March 10, 2013
- By paul
- In Featured Arkansas Photography
- 0
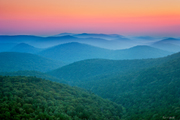

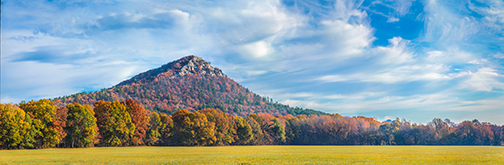
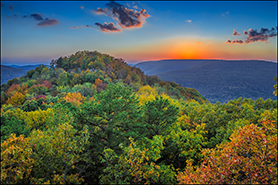
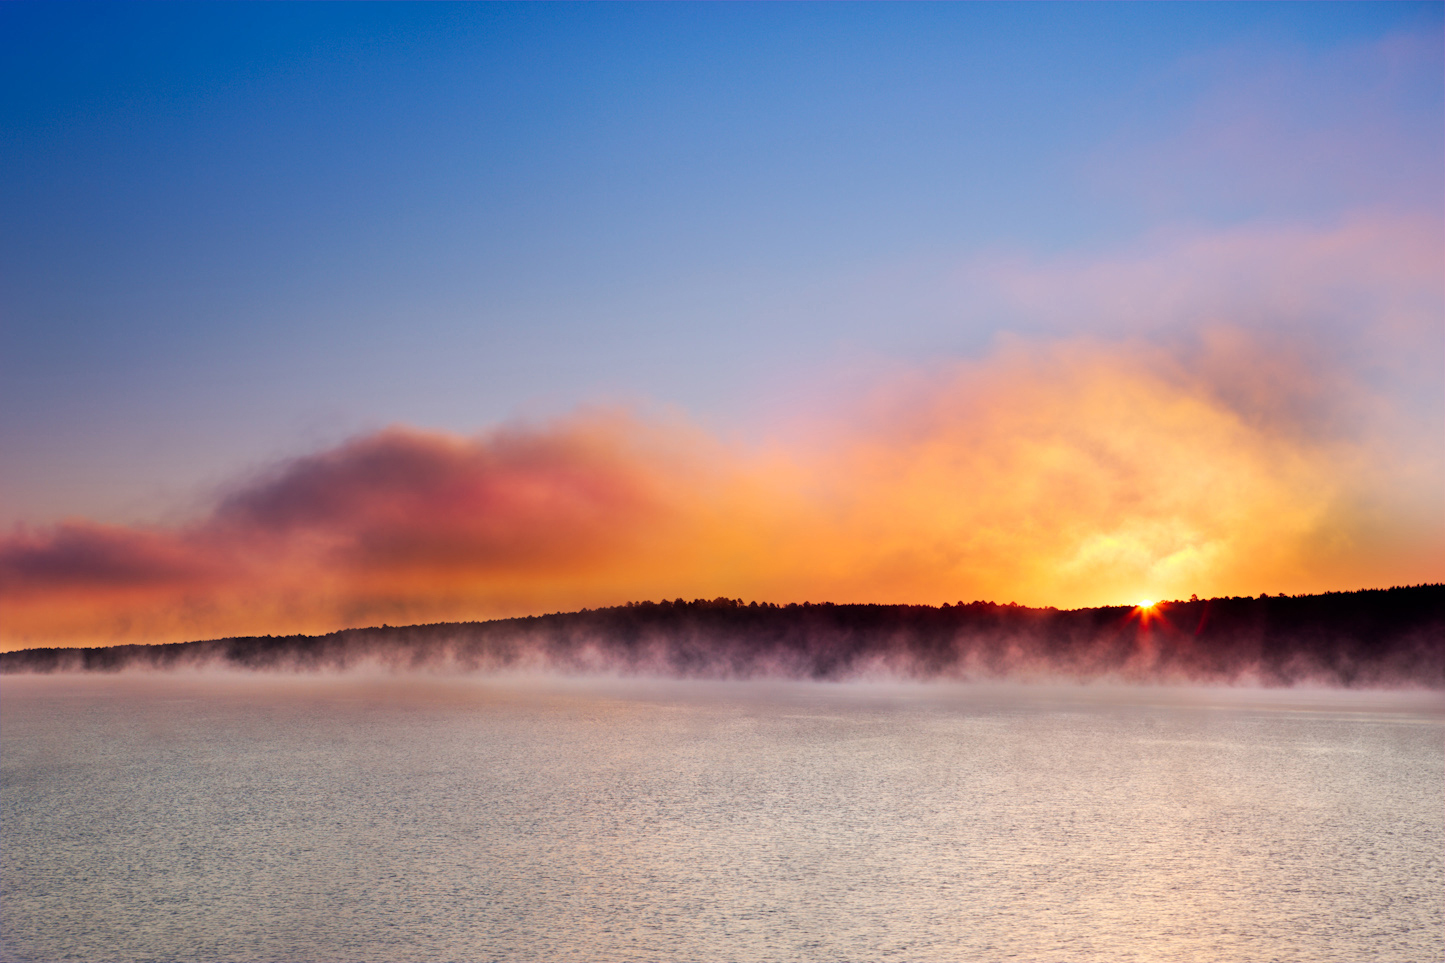
Sunset from Flatside Pinnacle in the Eastern Ouachita Mountains
Taken with a Canon 1ds mkII, Canon 70-300 lens, F11, iso 200, Composite shot taken as a manual exposure bracket. If you get a chance to visit this area you won’t be disappointed by what you find. Flatside is the 3rd in a series of pinnacles that I consider to be the gateway to the Ouachita mountains. In Pulaski County, you have Pinnacle Mountain, then just a bit east from Flatside, there is Northside Pinnacle. These are followed in turn by Flatside and then Forked Mountain. Forked mountain can easily be seen in the distance from the summit of Flatside. Forked Mt. is a considerably harder climb than Flatside but the view from it’s summit is worth the hike. I like to shoot to the west from the summit of Flatside after the sun has dropped below the horizon as you then can pick up the rolling hills out towards the west. I worked this shot up from 5 separate exposures in a classic exposure bracketed series, which was required back when I was shooting with the Canon 1ds series of cameras, now with Nikon’s newer cameras like the D800, I should be able to get the same shot with 2 or 3 frames max due to the extra dynamic range of the Nikon sensors. The trail runs up the back of Flatside mountain and right now there are several large trees down that make the hike take a bit longer. The trail is an easy 1/4 hike from where you park your car.
03/07/13 Featured Arkansas Photography–Midnight skies looking south from the summit of Mt. Magazine
- At March 07, 2013
- By paul
- In Featured Arkansas Photography
- 0
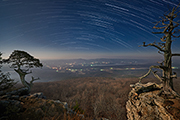

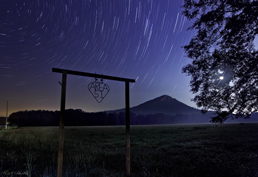
Midnight skies looking south from the summit of Mt. Magazine
Taken with a Nikon D800e, iso 250, Nikon 14-24 lens @ F4.5, final image is composite of 50 minutes of 2 minute stacked exposures. I had been to Mt. Magazine a about a week earlier but was still learning about the place. The small ceder tree to the left is a famous landmark on Mt. Magazine and has been recently adopted by the Mt. Magazine lodge as their emblem on all signage. It’s a easy shot, but tends to be over run with people most times during the year. On this night with temperatures ranging about 25 degrees, I didn’t have too much to worry about in regards to people, however I did need to watch out for ice. The bluff line drops down about 80 to 100 feet about 5 feet in front of where I had the camera. On this night the moon was more of a hindrance then a help as I was near full, just two days past full and very high in the sky. The day had been very hazy and some of the haze can be easily seen in the distance against the horizon line. The town in the distance is called Havana, not sure where the name came from and the lake in the foreground is call Blue lake. All my night work is now shot in stacks since I get so much more control over the final product. For some reason I still had some gaps that I didn’t expect so I am starting to feel that the Nikon D800e might be buffering out with a long series of raw files, but I need to test this in a control to make sure. The gaps can be easily fixed with Startracer software so I am no worried. However I still managed to somehow touch the tripod and move it so that last few stacks were out of line. This image represents a 50 minute time frame and I took the individual stacks as 2 minute images. This gave me the best balance of star light against the very bright moon. However I still added a dark short frame that I took towards the end of the series which helped a lot in closing down the moonglow to the left of the image. This shot is looking due south and the pattern of the trails was a pleasant surprise for me.
03/05/13 Sunset over Cameron Bluffs on Mt. Maganize, Arkansas
- At March 04, 2013
- By paul
- In Featured Arkansas Photography
- 0
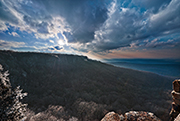

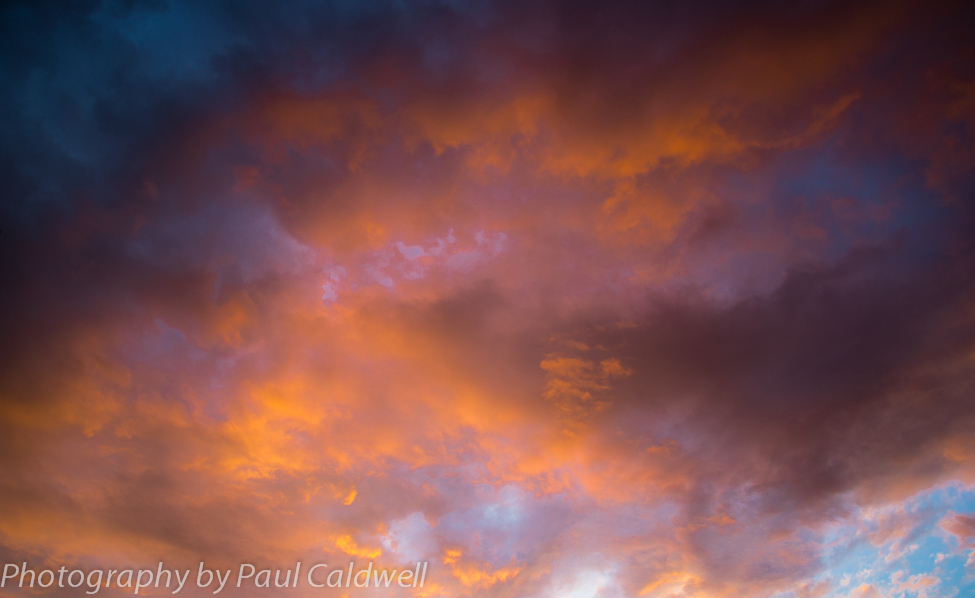
Sunset over Cameron Bluff on Mt Magazine in Arkansas
Taken with a Nikon D800e, iso 100, Nikon 14-24 Lens @14mm, F9, 1/1250 of a second, Single Exposure. I was lucky enough to catch this great sunset as the sun was just dropping over Cameron Bluff on Mt. Magazine last week. All day the weather had been overcast and hazy, but when I reached the summit of Mt. Magazine, things changed dramatically. The sky started to clear and the temperature dropped by as much as 20 degrees. The wind was blowing out of the north and I figured the wind chill was close to 24 degrees F. I had been working the opposite side of the Cameron Bluff overlook and just happened to turn around in time to catch a great sunset over the bluff. I did not have my tripod and with the wind that was blowing I knew I had to go to a very fast shutter speed to stop the trees in the foreground. I set the camera to iso 100 and then moved my shutter speed to 1/1250. The overall exposure was quite dark in the area around the bluff and the sun appeared to be overexposed, but as I worked the image up in Capture One 7 I was pleased to see that I had an amazing amount of detail still available to me in the hills below the bluff. My only issue was FLARE, which is a real problem with the Nikon 14-24 whenever you are shooting into the sun. I have a love/hate relationship with this lens as it’s so sharp but the issue with flare is terrible. I spent more time working on the flare issues than anything else. The 14-24 tends to create a rainbow looking flare and depending on the angle to the sun it can tend to dominate the lower portion of a shot away from the sun. As you are shooting into the sun and want the sun in the shot, there is no way I know of block out the flare at the time of exposure. The D800e was still able to give me a wonderful shot that I feel captured the moment perfectly!
02/23/13 Featured Arkansas Photography–Night skies over Area 51 in Western Pulaski County Arkansas

Stars and moonlight over Area 51–click on the image for a larger view
Taken with a Canon 5D MKII with a 16-35mm lens @ F4.5 for approximately 4o minutes. Area 51, in Little Rock, not out in the desert. Yes, Arkansas has it’s are 51! It’s a great spot to view Pinnacle mountain as there is big field in front of the mountain and the area 51 sign just adds to the effect of the shot. This is a harder spot to work than one might think as the constant stream of cars coming by. The headlights can really blow out a stacked exposure and to get this shot I had to work in the foreground from several different image since the lights were totally blowing out the image. I liked the way the sky came out, with a amber color towards the horizon and then a nice fade into a deep blue. I was barely able to catch the north star in the upper left corner. I was working against a very bright moon but I was able to finally get into a spot where I could use the large tree on the right to block most of the moonlight. I love this spot and go out to it many time during the year.
02/21/2013 Featured Arkansas Photography–Night skies over Twin Rivers Park
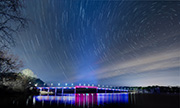

Night skies over the bridge at Twin Rivers Park
Taken with a Nikon D800e, 14-24 lens@ 17mm, F4.5, iso 400. Image is the result of a series of 35 second frames that were stacked together. Well, it’s been a while since I put up anything new, and I do have my reasons, but I am going to try and get a bit more current. This shot was taken over the new bridge at Twin Rivers Park, in Little Rock. This is a new subject for me but one I have wanted to explore for a while now. The bridge has a series of bright lights that run along it’s course so it added an additional challenge for any type of shooting. If you exposed the bridge for 35 seconds, it would be totally over exposed, but I need the 35 seconds for the stars. So the solution is to expose a series for the bridge after the stack is done, then combine the images together later. The bridge added one other problem in that it had a much brighter center that would go off like a search light every once and while. You can still the effect in the center of the image, but I felt it was balanced enough as I had it. The effect of the center light is a bit harsher in the smaller jpg file I have uploaded for the web. I was blessed to be shooting with Dr. Smith that night and only to have a few planes overhead.
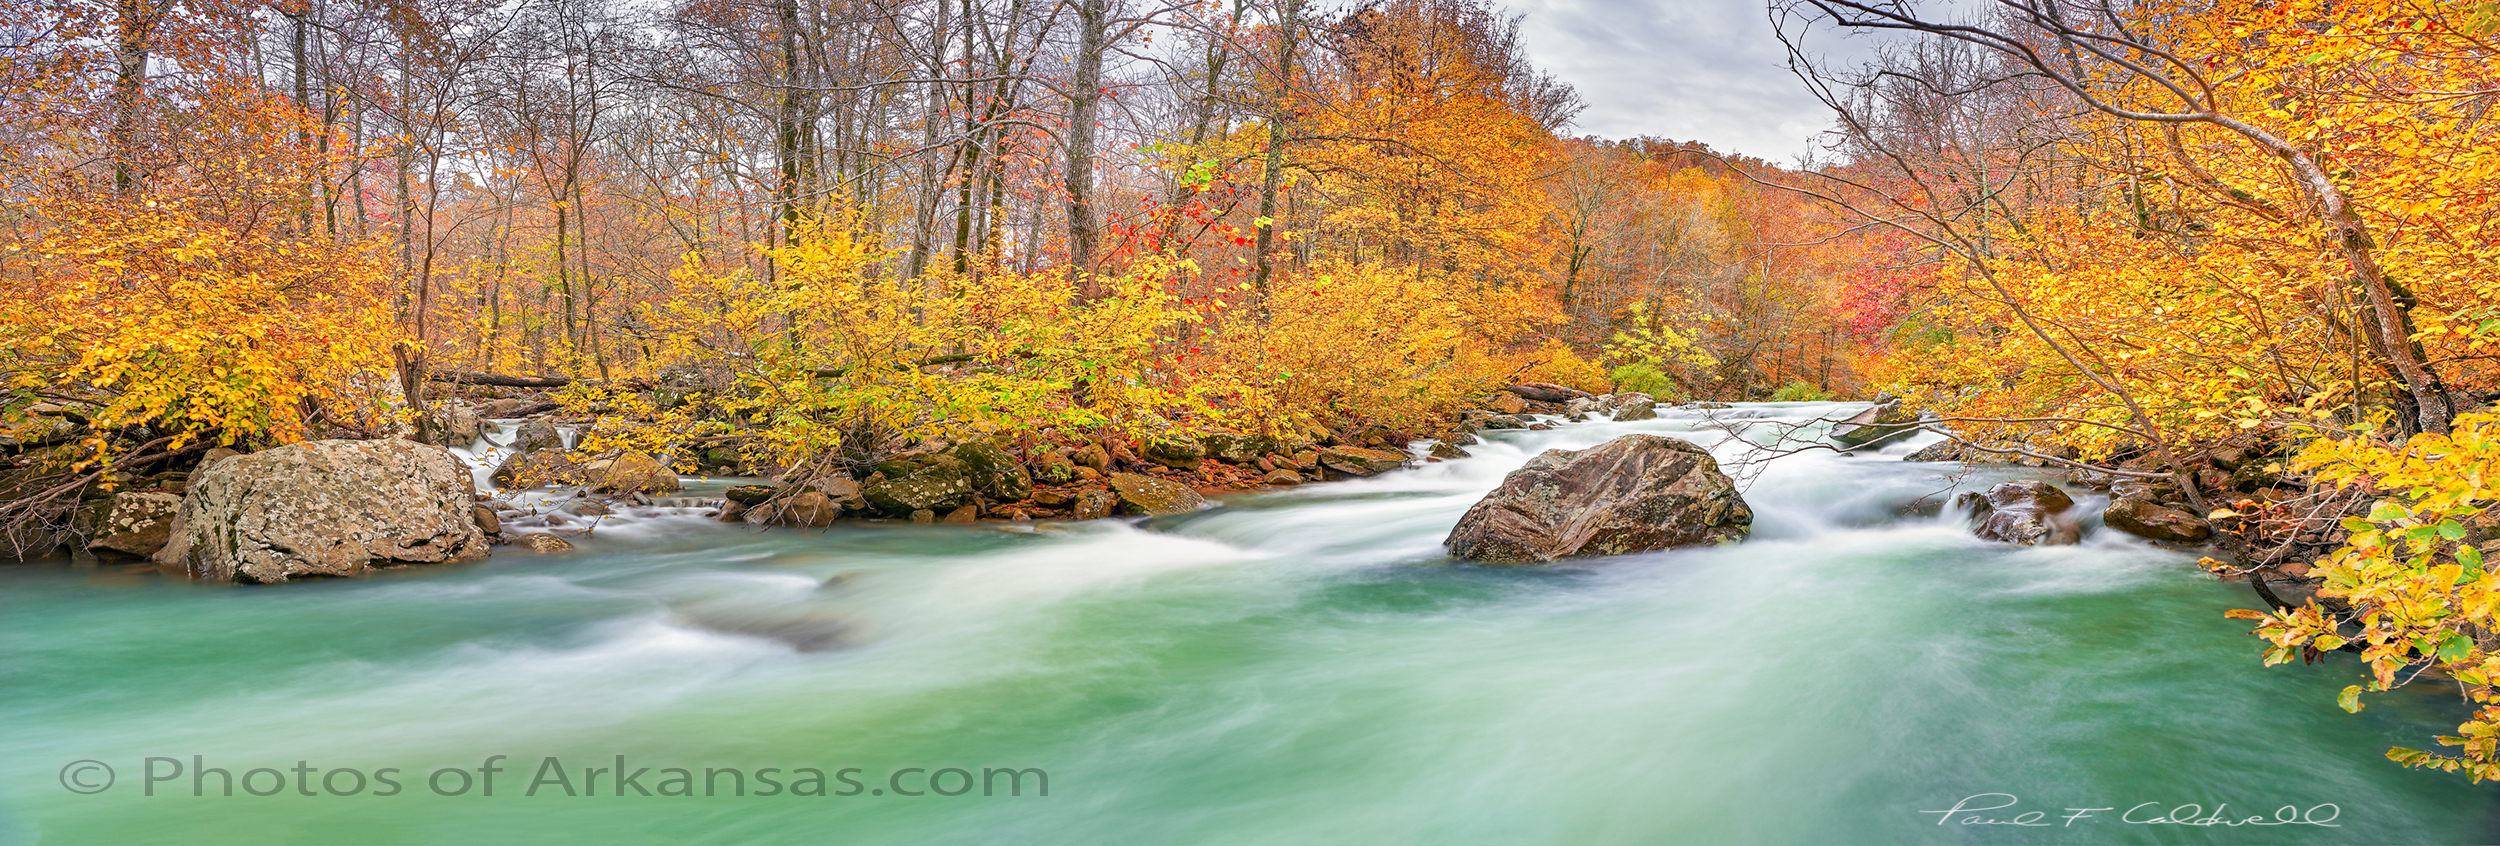
12/04/12 Featured Arkansas Photography–Fall Scene along Falling Water Creek
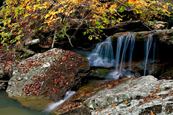

Fall Scene along Falling Water Creek in Newton County
Taken with a Canon 1DS MKII, Canon 24-70 Lens @ 24mm, F11, iso 100. If you have the time, one of the best short hikes in Arkansas is along Falling Water Creek. You can find plenty of small waterfalls along the way. The best place to start is from the Falling Water Falls waterfall on Forest Service road 1205. Hike downstream for about the next 2 miles and you will be very pleasantly surprise. If you run into any trouble, just hike up the hillside on the left side of the creek (facing downstream) and you will eventually come back to FR 1205. I would plan for this hike when Falling Water Creek is not running so high that a crossing would be unsafe. You can easily judge the height of the creek by viewing the water comin over Falling Water Falls. In this 2 mile stretch of the creek you should find several great waterfalls entering the creek.
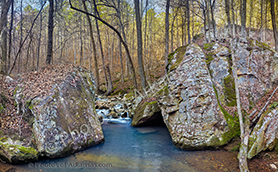
11/20/12 Featured Arkansas Photography–Prayer meeting at the narrows, Buffalo National River
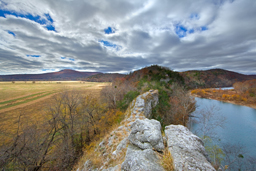

Prayer meeting at the narrows of the Buffalo River
Taken with a Canon 5D MKII, Canon 14mm lens @ F11 for 1/60 of a second, iso 200. I love to work the narrows on the Buffalo River. It’s a very unique spot in Arkansas. Here you have a long bluff that had at one time been eroded by two different streams. One, the Buffalo which can be seen in the picture and the 2nd, Richland Creek. Richland long ago moved it banks away from this bluff, but is still close by and empties into the Buffalo not far downstream from where this picture was taken. On this day I was waiting and hoping that all the cloud cover would break off and give me some blue sky. It was late fall in 2010 but I still had some great color along the banks of the Buffalo. While I was waiting, a group of Mennonite women came down the bluff from behind me. I was surprised by this, as I only thought that there was one way up, but they had a different location to gain access. They climbed down the steeper end of the bluff which is behind from where this shot was taken, then walked along the narrows and climbed the smaller bluff in the distance. There they held a prayer meeting. You can see them barely in the distance on the right side of the bluff in the distance near the river. IF YOU CAN’T SEE THEM CLICK ON THE IMAGE FOR A LARGER VIEW.
 From the Blog
- Errors with High Resolution Mode, Panasonic LUMIX S1RII July 4, 2025
- 05/08/25 Capture One, big announcement, at least for portrait photographers May 8, 2025
- 05/03/25 Trump’s Tariffs finally start to hit Photography Equipment. May 3, 2025
- Firmware 4.1.0 for X2D? April 21, 2025
- 04/18/25–Looks like Trump’s Tariffs are much ado about NOTHING in regard to photography equipment. April 18, 2025
- 04/09/25 Arkansas Sets new standard for Scientific Ignorance with new law for Ivermectin April 4, 2025