01/04/14 Some issues for IQ260 and IQ280 owners on the Wifi top cover
This only applies to photographers that purchased a IQ260 (possibly IQ280) early in the product life. I would say back to about July to October of 2013.
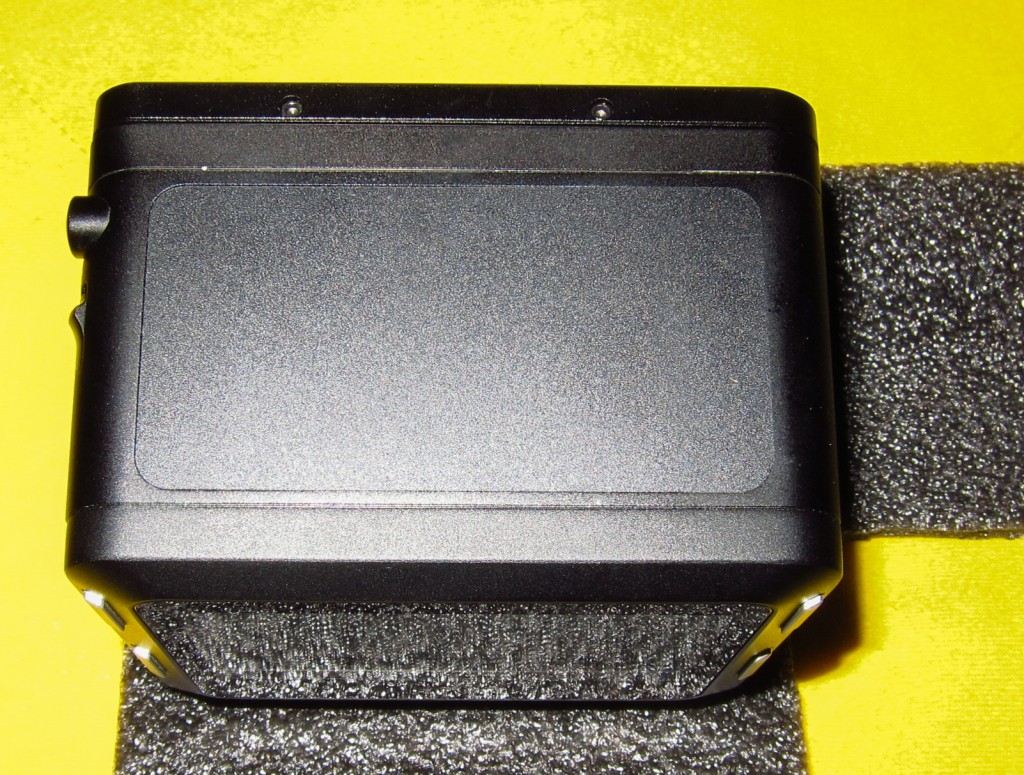
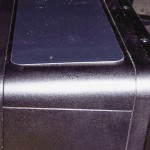
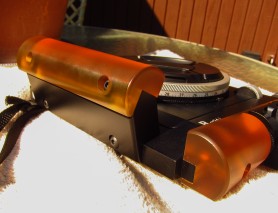
One of the features of the IQ2 backs is the built in Wifi capabilities. When you first get the back, you will notice that the top has a rather large plastic rectangular piece. You can clearly see this in the photo below:
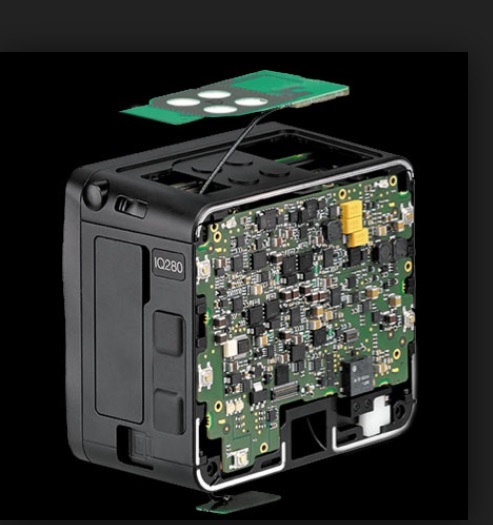
With the older IQ140, 160 and 180, this part of the back was solid and there was no plastic top. However with the placement of the WiFi Card on the top, Phase had to apparently cut the top open to allow for signal strength. As you can see from the next picture that there was probably no way to place this card on the bottom of the back and it’s appears to be too large to go down the side.
So instead of the hard shell across the top you now have a ridge plastic piece that fits into the rounded cut out. This piece should be flush to the top and not have any raised edges.
I had noticed a post on the Luminous Landscape forum where someone had tried out a used IQ260 and noticed that the top piece was raised and it was possible to feel a gap between the edge of the frame of the back and this cover. It’s interesting to note that since I purchased my back in March of 2013 and took delivery in mid August of 2013, I have had it out in the field at least 20 times now. I have used it on hot days and cold ones and only in passing had noticed this plastic top on the back. However until I read the the post, I had never really checked to see if my plate was fitting flush to the top.
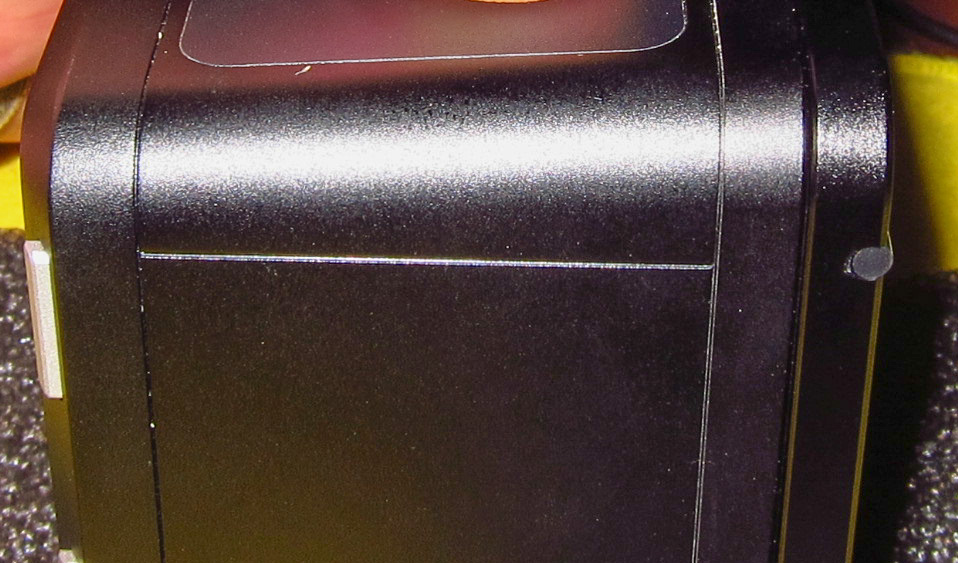
Curious I checked my back and noticed immediately that from the back where the LCD is, the entire right side of my top plate had indeed raised up a considerable amount. You can see the difference between the right and left sides in these two photos.
- Left side my my IQ260 showing edge of WiFi cover
- Right side of my IQ260 showing top of cover and gapping
I attempted to push the plate back down, but in a minute or two the plate had pushed back up to the same position. The top plate had raised up enough that I could easily catch it with my fingernail and feel it trying to pull up. The plate was loose and what concerned me more was the fact that it might now somehow have compromised the integrity of the seals for the back. I have more to show on this in a different post, as I had been getting some fogging on the inside of my LCD for sometime now.
With a simple push you can get the top plate to go back down, but as mentioned before it’s not going to stay there. I don’t know exactly how long my back had been doing this and this surprises me as I am usually pretty quick to see such things. If I had been using a Phase One DF+ body with the back, I could easily have missed this since the viewfinder of the DF+ comes right over the top of the back, but with the Arca rm3di that I use the back sits out at a 90 degree angle to the camera and nothing covers this piece.
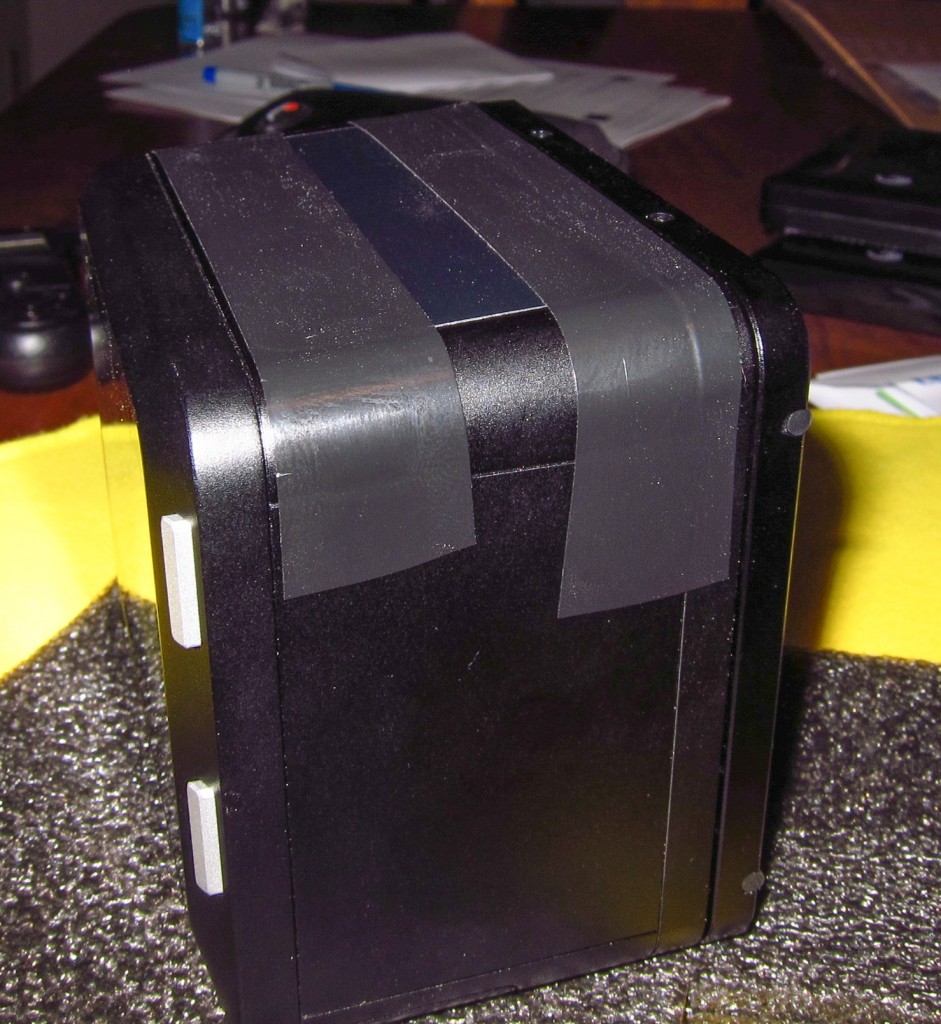
As you can see in this shot, with simple pressure you can get the plate to go back to the original position but of course you can’t keep pressure on it and I was a bit worried that pressure might not be the best idea since you might be pushing down on the wifi card also. From the pictures of the card on the Phase One website it appears that the wifi controller card is directly below the plate. The other issue is that the plate is surrounded by the hard metal of the back so if anything does push on this part of the back, the plate will give in long before the back frame does. NET: Don’t drop this back on it’s top. I have a few ideas for mine since I am always in the field and protection is important.
I have one other concern that I have not heard back from my dealer or Phase One yet. What is the amount of weather sealing that this plate is given? I am a outdoor photographer, not indoor and my older P45+ or IQ160 was pretty much bombproof. I had 2 close calls with my P45+ and neither time did have any damage. If anything the 160 was even stronger than the P45+, the only areas that really need protection being the LCD and the sensor. Working outdoors, it’s always possible for a errant drop of moisture to hit the top of the back. In fact it’s more possible than not. Have you ever worked in the woods directly after a rain? Drops are constantly coming down and they are going to hit the flat top of this back really quickly. The older IQ160 does not have an issue here since there is no opening, just the metal frame. Now you have a huge opening almost all the way around the top of the back and the opening has a small gap (even when the plate is where it should be). Water will always seek and find the weakest part of a seal and it will also get down into the gap no matter what you do. I can only hope that there is very tight (well mine was not very tight) weather seal on this plate. This would be one way to fix it, but it’s rather ugly and I am hoping to hear back from Phase One that the correctly mounted plate can handle a few drops of water.
This whole issue caused me to email my Digital Transitions (DT )Rep, who quickly put me in contact with one of the dedicated technical support staff with DT. Scott, one of the techs at DT, took my information and opened a case with Phase One. About the same time I found another forum post where Phase One had responded to another user informing them that the first round of backs released to the field (mine was one of them) had a different method of attaching the WiFi plate and if you saw gaping, the back needed to go back to Phase One to have the plate replaced with the newer style or method of gluing it down in place.
NOTE: If you are considering purchase of a Phase One back, I strongly recommend you work with a dealer like DT. They can sell used or new and have a direct line to Phase One. As a end user, it is very hard to reach Phase One in Denmark. They have no phone support. They do have a location in Mellville NY, but it’s more of a marketing support arm and I don’t believe that any repairs like the ones I needed will be done in the U.S. If you purchase a back over the web and it has a Value add warranty, then that warranty will be supported by dealer, however you will need to develop a relationship with that dealer. If you purchase a used back with no warranty, then you just spent a lot of money and you may end up with no recourse at all. Save a bit up front and pay a lot in the rear. The dealer can get through to Phase One much faster and they can also contact Phase One in Denmark. The only way I know to reach Phase One in a situation like this is open a trouble ticket with Phase One via the main Phase One website. You will get a response but it will take a while and you will not get any phone calls. I prefer a phone call in situation like this.
I purchased a Value Add warranty with my upgraded IQ260 so Phase One has sent me a loaner back, in this case a IQ280. I did check the top plate on the replacement back and it’s definitely more secure than my back was. I will update this post when my back returns and when I hear back about the weather seals on the plate when it’s mounted correctly.
Hopefully this is just a slight hiccup with my IQ260. So far I have only had this issue and fogging inside the screen and I am wondering if the fact that the seal for this plate being loose had allowed some moisture inside? I had DT also add this issue to my case.
01/03/14 Featured Arkansas Photography–Circle in the Clouds on Mt. Magazine
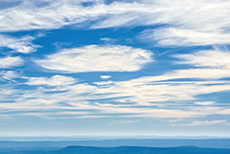
- A Circle in the Clouds on Mt Magazine
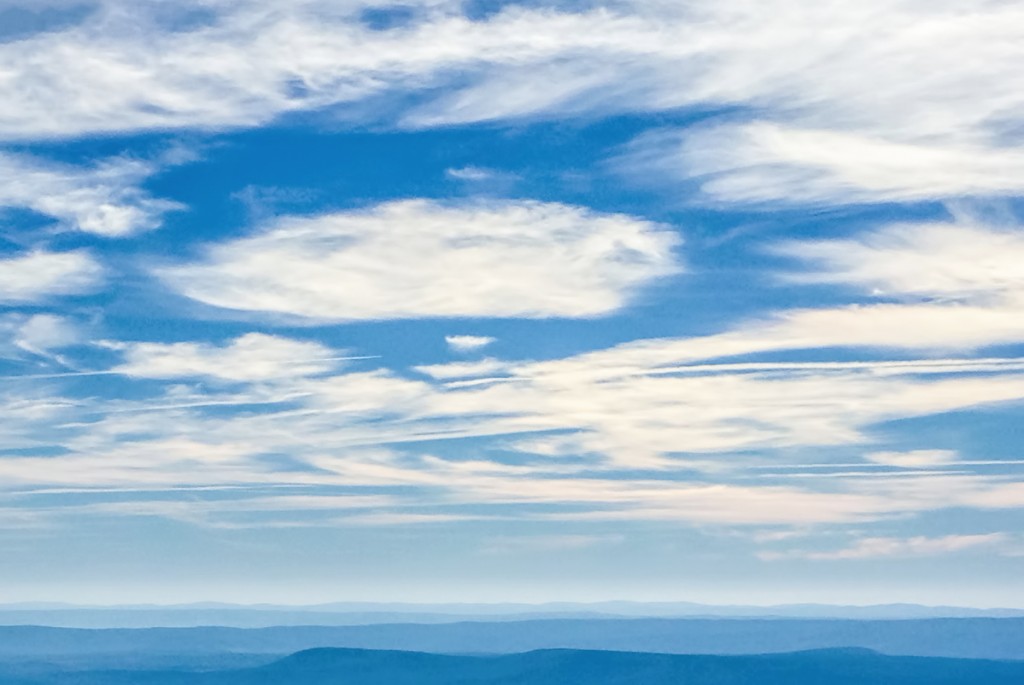
Taken with an iPhone 5, all settings automatic. Every once and a while I will take out my iPhone 5 and shoot a shot of something that has caught my eye, something that is changing too fast for me to get out the “real” cameras. On this day, I was headed back over to the south side (Havana Arkansas) of Mt. Magazine when I saw this really amazing cloud formation. I knew that by the time I setup my other gear this scene would be gone, as clouds are constantly changing. I shot a couple of shots before I finally got the iPhone to realize I was trying to expose for the sky and not the foreground. I am not a big fan of the iPhone camera, just way too much noise and not enough details, but the world seems to think that this type of technology is the future of photography, which is a bit sad. Ok I guess if you want to post it on Facebook or Pintrest or whatever the most current instant photo gratification website is at the moment. For it was the fact that is one cloud was just sitting in a perfect circle and all the other clouds were moving away from it, almost like the way a water drop creates a ripple. The sky was also full of jets that day and I just left the contrails alone. The original image had so much noise in it (which surprised me since I had so much light) that I worked it up in both Lightroom and Photoshop and then added a bit of Clarity from Topaz. I re-discovered Mt. Magazine in 2013 and plan to make many more trips there as it’s such a unique spot in Arkansas.
12/07/13 Featured Arkansas Photography–Fall scene from Mt. Nebo Arkansas
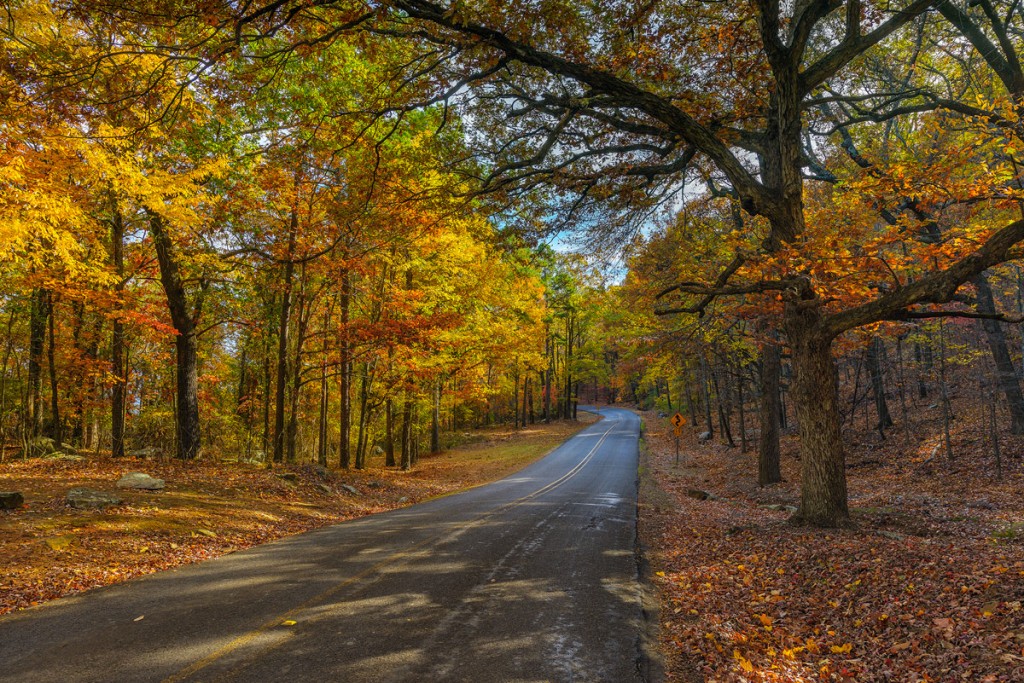
Taken with a Nikon D800, 14-24 lens, F 5.6, iso 200 single exposure. In my travels throughout Arkansas, I had only been to Mt. Nebo on one occasion and on that day it was raining. Mt. Nebo is a large mass formation that starts a chain of mountains that terminates in Mt. Magazine. Mt. Magazine is the tallest spot in Arkansas at over 2700 feet tall, Mt. Nebo is around 1200 feet tall, which is surprising when you see it since it appears to be much taller. Thanks to Chris Kennedy, a photographer based in Russellville, I was able to get a much better tour of Mt Nebo this fall. Mt Nebo has some excellent photographic locations and is great place to travel for a sunrise as it overlooks the entire Arkansas River Valley from Russellville to Petit Jean Mountain.
This shot was taken in the mid afternoon as is some of the best fall color I was able to capture this year. I had spotted this area on our first trip but the light was not correct. When I made a 2nd trip to Mt. Nebo, I was able to line up this shot perfectly. The light was blending in from the right hand side of the frame and the illumination of the left side of the road was near perfect.
This photograph is another example of the amazing dynamic range of the Nikon D800. I had left my truck about 1/2 up the road and just started walking along the road. I did not have a tripod and there was a bit of wind blowing. I also had a situation where the lighting was an extreme range, bright on the left side and very dark on the right. I also have to be aware of the center of the shot since I did not want to blow out the sky in the center which had the most light. I picked iso 200, and exposed for the center of the frame. I was using a CL-PL to help pull out more of the colors of the fall trees and it added about -1.5 stops of exposure.
When working up the shot in post, I used Lightroom and was able to control the exposure in the center of the frame and pull up the extreme shadows on the right hand side. In the past, with previous digital cameras, I would have had to make at least 2 separate exposures and thus would have needed a tripod.
This shot was taken along Hwy 155 which is the only road to the summit of Mt Nebo near the old bench road.
11/20/13 Featured Arkansas Photography–Arkansas nighttime photography
Nighttime photography has become one of my greatest passions in the last 4 years. I have expanded into all types of varieties but still tend to mainly work with traditional landscape settings. Within the state of Arkansas there are so many different subjects that I have interest in working with. These range from scenes along the Buffalo River to views of the Little Rock skyline. Within all of these shots I tend to tie in working with the moon for illumination since it provides such a amazing amount of light when used in the correct proportions. I have listed some examples of what can be accomplished in a this gallery.
[complete_gallery id=”1210″ class=”aligncenter” ]
Here is some information behind each image in the gallery.
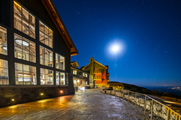
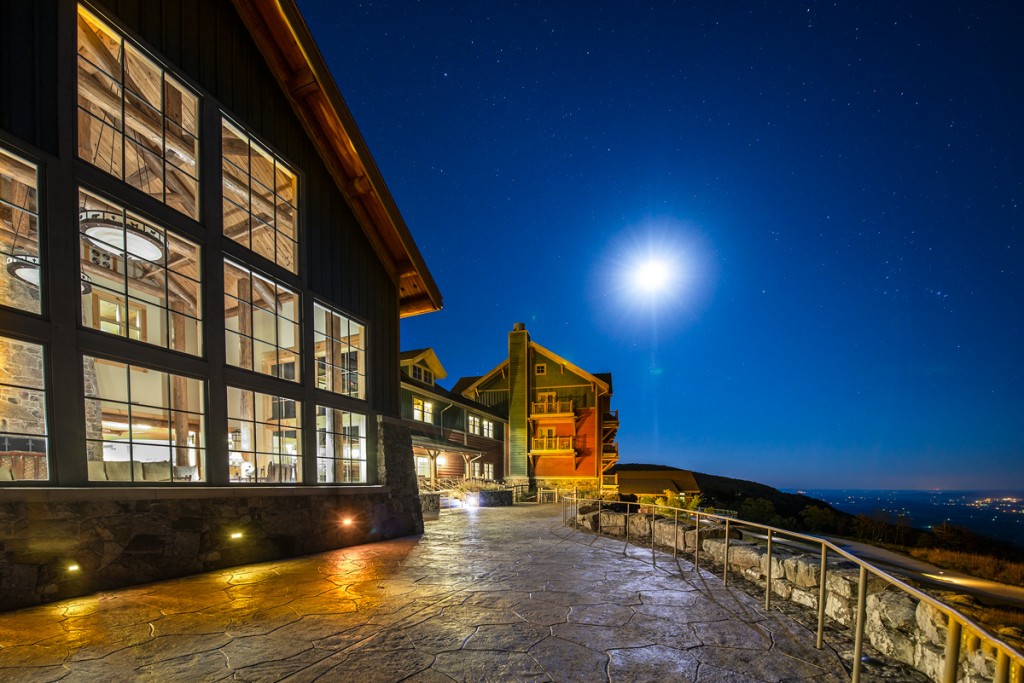
- Nighttime view from the Lodge on Mt. Magazine. This is a single exposure taken with a Nikon D800e for approximately 15 seconds with a 14-24 zoom lens at iso 200. In this shot was was trying to capture the full effect of the rising moon but not allow the moonlight to totally blow out the surround stars. In the right hand portion of the night sky you can make out Orion. The moonlight provides a wonderful blue hue to the night sky and eliminates all the of yellow color which is generated by local light pollution. I had to take a few extra shots of the lodge since the interior lights were blown out by the original 15 second shot.
- Big Dipper over Roark Bluff on the Buffalo River. Using a Canon 5D MKII and a 15mm fisheye lens, I was able to capture this shot in a single exposure. The big dipper is directly over the middle of the bluff and is pointed almost straight up. Over the course of one night the Big dipper will rotate around the north star and eventually will rotate below the bluff. All of the light on the bluff was provided by the moon which was about 3/4’s full.
- Ghost walkers at Sam’s Throne. Taken with a Canon 1D MKIV and 15mm fish-eye lens. On this shot I used the fish-eye lens to accentuate the effect of the pine trees on both sides of the road, in effect framing the shot. Some campers had built a large bonfire nearby and it provided an excellent source of local lighting. During the exposure of the shot, I had some people walk by with head lamps on which just added to the overall effect of the shot. This was a single exposure for about 30 minutes and I was lucky to have the fire burn overexposure on the shot. The moon was still barely out when this shot was taken and gave the excellent dark blue color to the sky.
- Midnight at Sam’s Throne and moonset. Taken with a Canon 5D MMKII, 15mm fish-eye lens at iso 2000 for approximately 20 seconds. This shot is one of my all time favorites. The night was very calm and thus all the trees were not blurred by the wind. I was able to place the moon in the small pine tree to the right of center of the shot which kept it from overexposing the shot. The moon provided an excellent amount of light to both the rocks in the foreground and the bluff line in the distance, not to mention on Sam’s Throne itself. This was taken as a single exposure. There was considerable noise in the sky, but by using Lightroom to develop the shot I was able to get a very clean final image.
- Lightening Strike over Pinnacle Mountain. Taken with a Canon 5D MKII and 24-70 lens. For this shot I was forced to move to the shelter of my car since the air was filled with static electricity. I placed the camera outside the car on my tripod and then triggered the shot with a remote release. I took several shots that night close to 20, but only got this one which captured the blot of lightening directly over the top of Pinnacle mountain. This is an example of just how much luck is involved in capturing just the right shot.
- Star trails over Roark Bluff on the Buffalo River. Traditional nighttime shot allowing the earth rotation to create star trails. I kept the shutter open for a full 45 minutes and then had to wait another 45 minutes for the camera to write a dark frame. The resulting image was one of the best night shots I ever captured up on the Buffalo River. This night was dead calm and the sky was totally clear of clouds with the temperature around 42 degrees. Just perfect conditions for nighttime photography.
11/08/13 Featured Arkansas Photography–A view from the Lodge on Mt Magazine
Taken with a Nikon D800, Nikkor 14-24 lens, F 5.0, iso 400 for a 16 second exposure. One of the most favorite spots that my wife and I love to visit is the Lodge on Mt. Magazine. Since it reopened several years ago, it has become one of the most impressive spots in Arkansas. The Lodge is on the very top of the mountain and runs is situated in a north to south layout. You have a magnificent view to the south from the lodge and on a clear day you can easily see for 50 miles. In this shot I am looking due east. The moon was just past full and provided excellent illumination of the lodge and the night sky. You can also see Orion off to the right. The lodge has 60 rooms and there are also 13 cabins for rental. The cabins are 5 star and are well worth the rental. You can make reservations in advance for up to 1 year. Mt Magazine is the highest spot in Arkansas and in the Ozark Mountains and is the southern terminus for the Ozarks. The mountains you see when you look to the south are the Ouachita mountains.
11/01/13 Featured Arkansas Photography–A sign that nature will always win
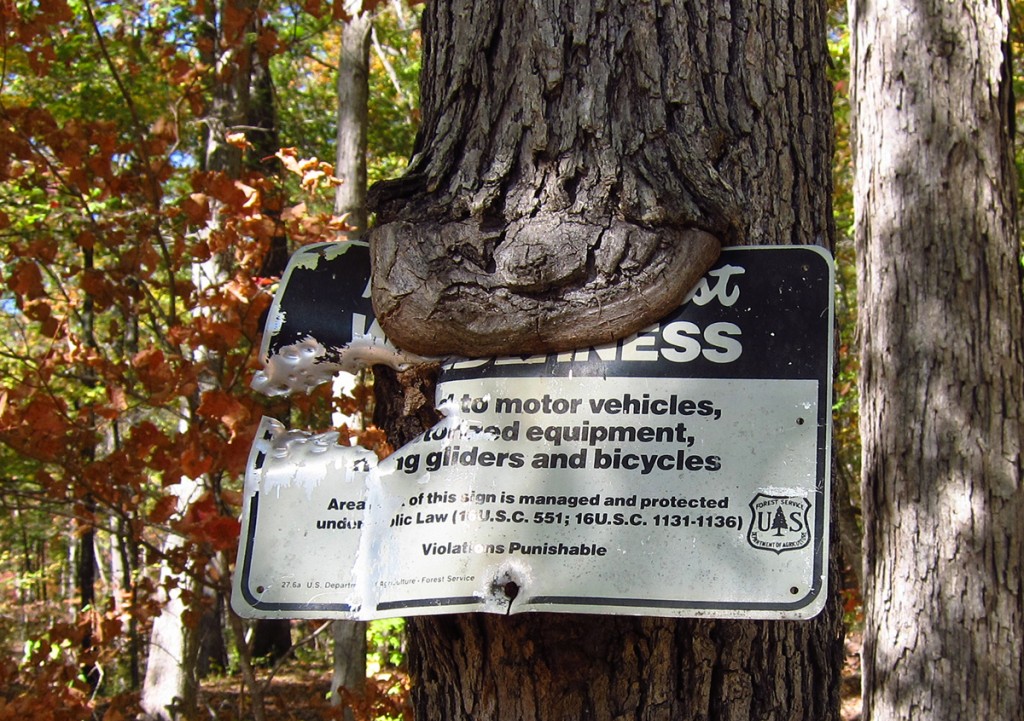
Taken with a Canon S95, iso 200. After a long hike along Richland, I came across this sign near my truck. I stopped for a minute to take a few photographs of it since it showed in just image what’s going to happen eventually to anything man made, i.e. nature will always win. Here you have a wilderness boundary marking sign that has been almost eaten by a tree. This I am sure took many years and was helped along by the Stupid Redneck or many Rednecks that decided it would be a neat idea to shoot a “helpless” sign. Note the entire left side is gone from what looks like a shotgun blast. This always amazes me as this sign is near a trail head and you never know who might be coming up the trail. However even taking the man made destruction, I found that fact the tree was starting to eat the sign and in about another 15 years, more than likely the sign will be gone, the tree should still be there. Sadly Arkansas did not receive anywhere enough rain to bring up Richland during the this fall so I tried for some other spots. Richland is definitely a magic spot and one of favorite spots to photograph in the U.S. not to mention Arkansas.
10/24/13 Featured Arkansas Photography–Sunset from Cameron Bluff on Mt. Magazine (a camera perspective)
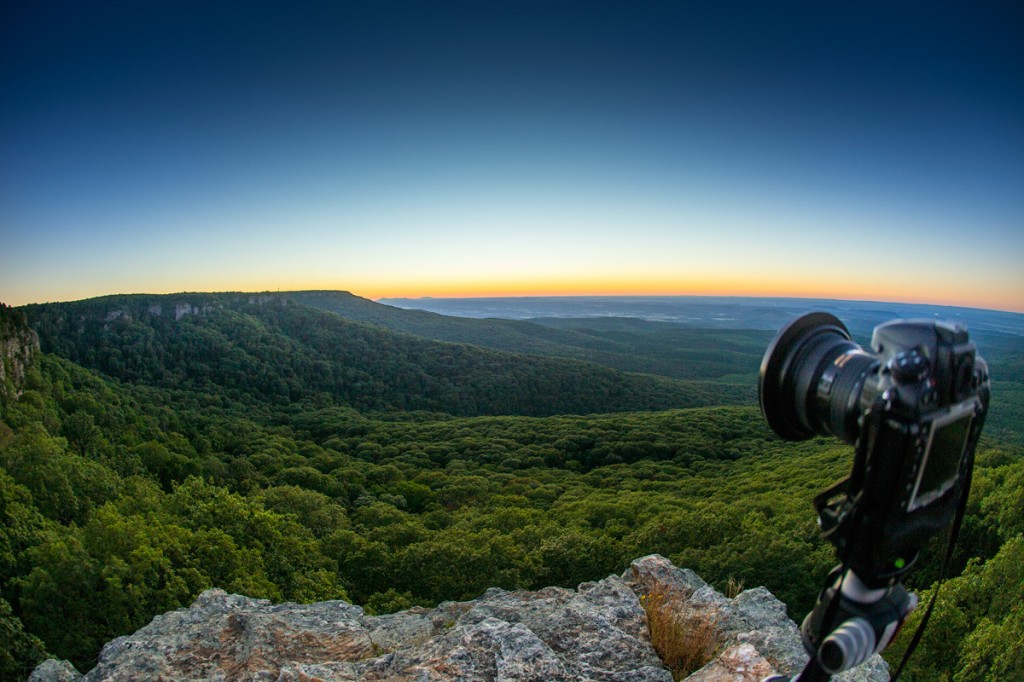
Taken with a Canon 6D, 15mm Fisheye, F5.6, iso 250, handheld, iso 250. I love to work various spots on Mt. Magazine for both sunrise and sunset scenes. Mt. Magazine is unique in that it’s the southern most part of the Ozark Mountains and also the tallest spot in Arkansas at over 2700 feet tall. There are literally hundreds of spots to find great vantage points for sunsets/sunrises and I am constantly looking for new ones. On this evening, there wasn’t too much to look for, just a bright orb of the sun, so I decided to try something different and add in one of my cameras which is a Nikon D800. The fisheye effect of the 15mm lens added to the effect. You can definitely see that there is a lot of time before the peak fall color hits this spot.
10/18/13 Featured Arkansas Photography–Sunrise through the rocks on Petit Jean Mountain
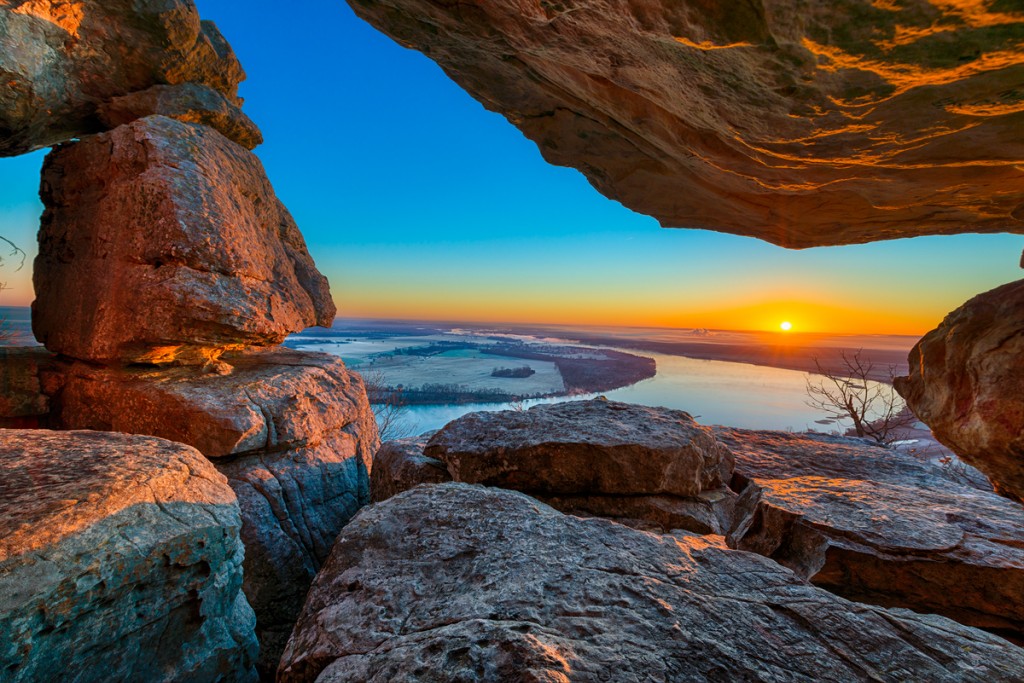
Taken with a Nikon D800, Nikon 14-24 lens @ 14mm, F 8, iso 100, exposure bracketed in 4 series. Petit Jean State Park (which was able to stay open throughout all of the stupid government shutdown) has some wonderful places for sunrise/sunset photography. The mountain has one long section that runs along the length of the Arkansas River and the eastern most end has a great view of the river as it turns due west towards the city of Morrellton. During certain times of the year, you can catch the sun where it will briefly (for about 5 minutes) totally illuminate the rocks below the summit. I have worked this spot hundreds of times over the year, but didn’t realize that this scene was possible until last December. You can also see on the large rock to the left what appears to be the profile of a face. On this day there was just a small amount of fog in the valley off in the distance and when the sun popped up over the horizon, the glow was amazing. I took this photograph with a Nikon D800 with 4 exposure brackets but due to the amazing dynamic range of the D800 at iso 100, I only ended up need 2.
10/06/13 Featured Arkansas Photography–Sunset from Cameron Bluff on Mt. Magazine
Taken with a Nikon D800e, Nikkor 14-24 lens at 14mm F11, iso 100, for approximately 1/250th of a second. Mt. Magazine at 2,700 feet is the tallest spot in Arkansas, and what is so interesting is that it’s south of the Arkansas River, and much closer to the Ouachita Mountains than the rest of the Ozarks. I like to work around on Magazine as there are several great spots to get sunsets and sunrises. I am hoping to get back to this spot soon with the fall colors soon approaching, and since the Buffalo National River is still closed due to the ignorance in Washington, Magazine may be a haven since it’s a state park not Federal. I still find it sad that the ignorance of a few hundred congressmen and senators has closed all the National Parks and similar areas down. Back to the photo, it was a single shot from a Nikon D800e and I exposed for highlights, then pulled up the shadows later on in post. The Nikon D800 family of cameras have an amazing range of dynamic range in the iso 100 to 400 settings.
09/27/13 Featured Arkansas Photography–Springtime at Haw Creek Falls in the Arkansas Ozarks
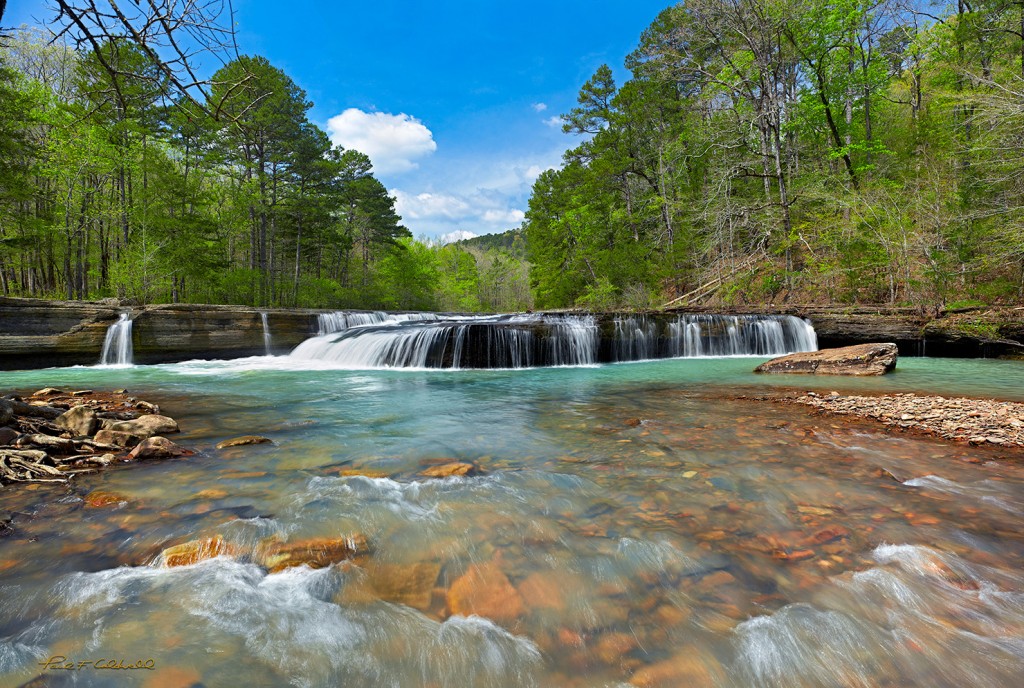
Taken with a Phase One IQ160, Rodenstock 28mm Lens, F11, iso50, for approx 1 second. If you like to spend time in the Arkansas Ozarks, but don’t want to be too far away from Little Rock, then consider Haw Creek Falls. With the new policies from the National Park, and Arkansas State Parks, you never know when the adjoining campground will be open, however if the gate is closed, feel free to walk around it and head to the falls. You can also access the falls from the Hwy 123 side of the creek. Haw Creek is one of the classic ledge drops that are famous throughout the Arkansas Ozark mountains. Here the creek drops over a ledge that is about 6 to 7 feet tall and has a interesting break in the middle where the watercourse changes directions. I like to photograph Haw Creek many times during the year and on this day I caught it about as good as it gets with just enough water in the creek and a just darn near perfect sky and no WIND! It takes about 1.5 to 2 hours to get to Haw Creek and it’s well worth the drive. This photograph will be shown in Cantrell Gallery for the next few months please stop by and take a look if you get a chance.


