02/21/14 Featured Arkansas Landscape Photography–Moonset and sunrise over Downtown Little Rock


Sunrise and moon-set over Downtown Little Rock
Taken with a Nikon D800 Nikon 14-24 Lens at 20mm, F 7.1, 1/20th of sec exposure, ISO 200. Photograph developed from a single file. The view of Downtown Little Rock is a great place to catch a sunrise especially if you can find the Arkansas River still to allow for the best reflections. I made this trip with Todd Smith, another noted photographer in Little Rock. Todd and I were also very lucky to have a setting waning moon directly over the city. This when combined with the sunrise rise lighting the clouds in the background made for a wonder shot. Once again the Nikon D800 did not disappoint me in that I was able to work up this from a single raw file, something that would not have been possible in my days with Canon. In the distant background you can also see a flock of birds that were flying down river. What I liked the most about this shot is how the sun was just starting to rise and was only hitting the Regions and Stephens buildings. In the foreground is the Junction bridge and the Main street bridge is directly behind it. Since late December, Little Rock has been lighting all the bridges at night with a bright red light. Some of this light is responsible for the color on the water in the foreground.
02/12/2014 The First Testing of the IQ250 on a tech camera–Most impressive results in fact it’s game changer
As posted on this site and many others, Phase One, about 2 weeks ago, announced the IQ250, the worlds first CMOS digital Medium format back. The announcement also stunned quite a few folks out there when it was discovered that Sony was the chip being used, not a Dalsa. Dalsa has been the main chip company that Phase One has used since the announcement of the P65+ about 4 years ago. I saw the announcement and also noticed the mention of Sony and I had a suspision that the results when posted from the various dealers out there, would be pretty revealing. I have used the Sony 36MP chip in the Nikon D800 since May of 2014 and believe me I saw the light early. Enough that I sold pretty much all my Canon Digital gear save for 1 6D which I use for night photography.
Digital Transitions, my Phase One dealer based out of NY, just released a huge test where they shot the IQ250 with a very good selection of current Tech camera lenses. This was an indoor shoot in the Morgan Library in NYC so the subject matter was a bit different for me, but the results from the tests are very impressive. I just finished downloading and comparing the IQ250 and IQ260 shots taken with the Rodenstock 32mm. To be honest, after shooting the D800 for so long and seeing what it can do with 1 frame at base iso 100 in regards to total range, I was pretty sure what I would find. However I did try my hardest to make the 260 images come close with all the tricks in Capture One that I have learned over the years, and the net is, you can’t!
You can download and read more about the testing that Digital Transitions did here: DT Tech Camera tests IQ250 and other MF backs.
In my landscape work, I tend to focus on shifting 3 images to create a short panorama. So for me, the rise and fall results were not that important, but if you interested DT (Digital Transitions) did post these as well. I took the 3 shifted images from the IQ250 and IQ260 on the 32mm Rodenstock. I don’t own this lens, but have the 28mm Rod and 40mm Rod. The shifting characteristics of the 32mm and 40mm Rodenstocks are pretty close. After completing work on the images in Capture One, I went ahead and combined the IQ260 stitches into one image, them went back to the IQ250 images to compare certain parts of the files to see how the 2 cameras reacted. In the four images I have in the article, I will explain the areas that stand out the most to me.
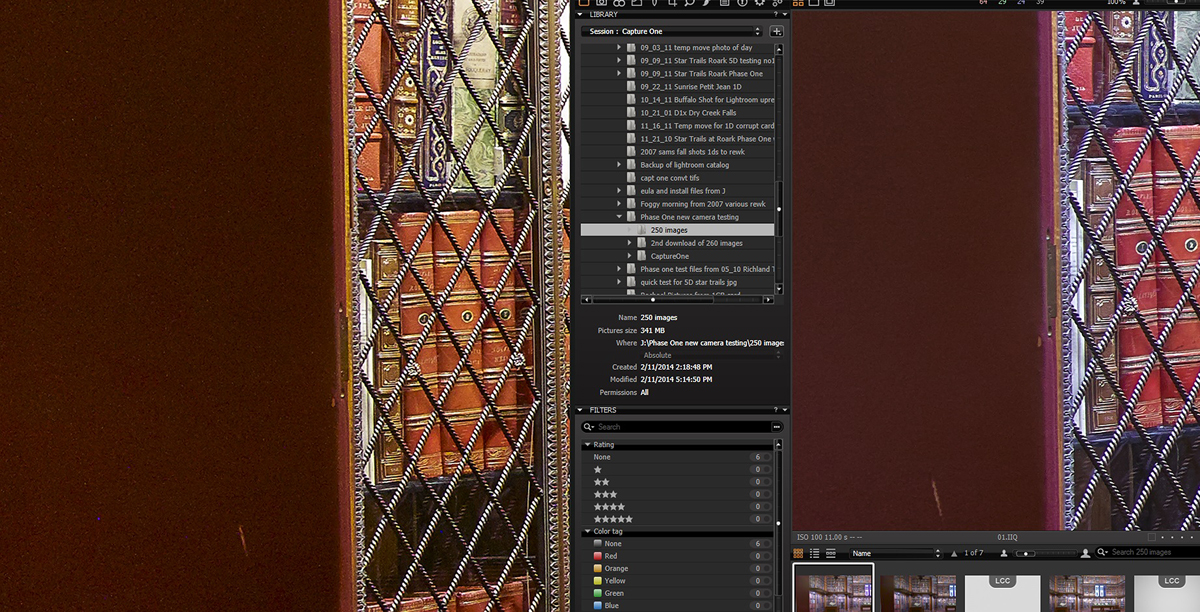
Left corner comparison of IQ250 and IQ260 Morgan Library
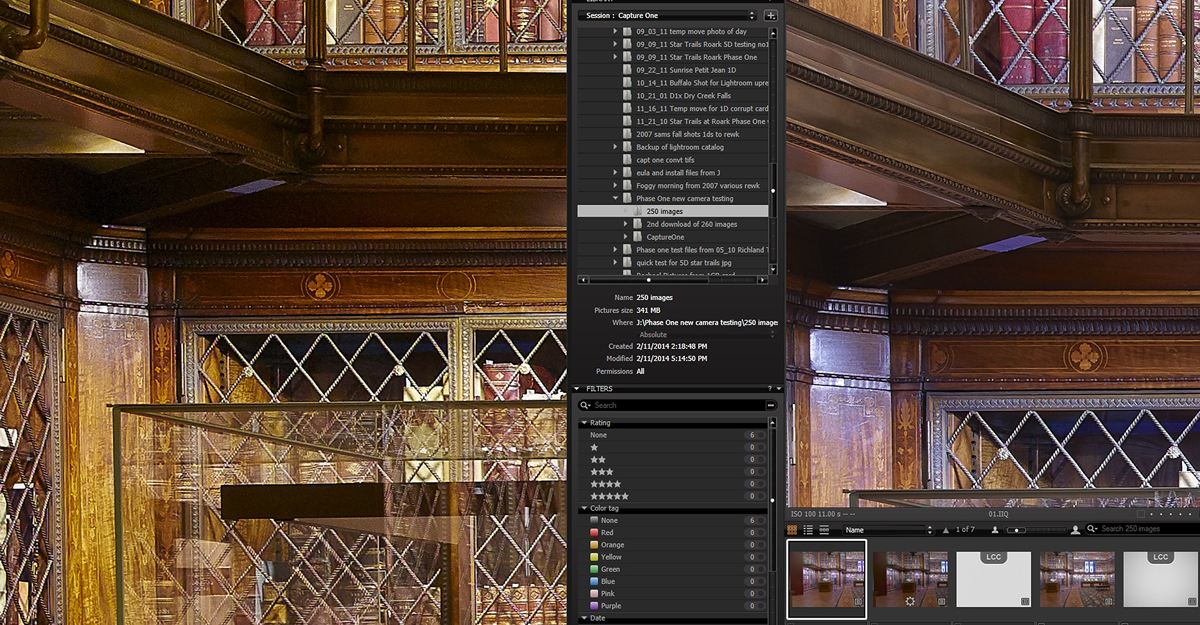
NOTE web conversions really don’t do these files justice, if you are interested in my results, please visit the DT website and pull these files down to get the full effect. Capture One is free for all digital back users you can pull the latest version which is 7.2 from the Phase One Website.
IQ 250 is on the right in this comparison. In this image you see a part of a large panel that runs vertically in the left most portion of each test. At first when I looked at the panel with the IQ260 shots, I thought it was made from wood, however when I looked at the IQ250 shot, I realized that this panel was in fact covered by fabric and the IQ250 actually showed the detail of the fabric. If you look to the right edge you can see that this panel is part of hinged setup and is covered which red (appears to be red) fabric. The iq260 shot is too noisy to really tell very much. The only thing that really translates between the two are the two scratches that show up. The IQ260 was shot at a base iso 50 for 6 seconds and you will see that even at that ideal setting the darker parts of the image are pretty much pure noise and not worth recovering. It should be be noted here that the shifts were made without a Center filter on the Rodenstock 32mm. The center filter would have helped to balance out the IQ260 shift exposure an possibly bring out less noise giving a better final result, but it would have also benefited the IQ250 also, so it would have been even cleaner!!
Also noticed the amount of aliasing form the Metal X bars over the front of the book cases. You can clearly see red, blue, banding on these parts of the IQ260 file. The IQ250 is clean from aliasing and I have to assume it’s an advantage of the smaller pixel pitch of 5.3 microns over the large 6.0 micron pitch of the IQ260.
You can notice that the books definitely are different colors, and I could only guess at the correct WB in this room. The IQ250 seemed to want to go more to a red favored tint and I had warmed up the IQ260 image in Capture One. WB is selective and is something that can easily be adjusted once the correct value is known.
Comparison No 2 of IQ250 and IQ260 in moderate light
What is most striking here is the depth of the details the IQ250 pulled out of the balcony railing supports. IQ250 is on the right. Zooming in you can make out the details on the base of the railing support much more clearly on the IQ250 shot, also notice the wood grain and patina on the edge of the balcony. (I am not sure if this wood or metal, I am assuming metal since the finish matches the railing and railing supports). There is a red hue to the IQ250 shot and that was also in the IQ260 shot, but I took it out with a local adjustment in Capture One.
Other areas of interest are the 2 rows of beaded material on the outer face of the balcony. You can see the individual details of each bead much clearly with the IQ250 shot. But most telling is the detail underneath the balcony. Zooming into 100% you can see all the grain of the material on the bottom and the details are still very clear.
On this shot what caught my eye over and over was just how much of the notching around the based of the railing support standout as well as the head of the two bolts holding the plate in place.
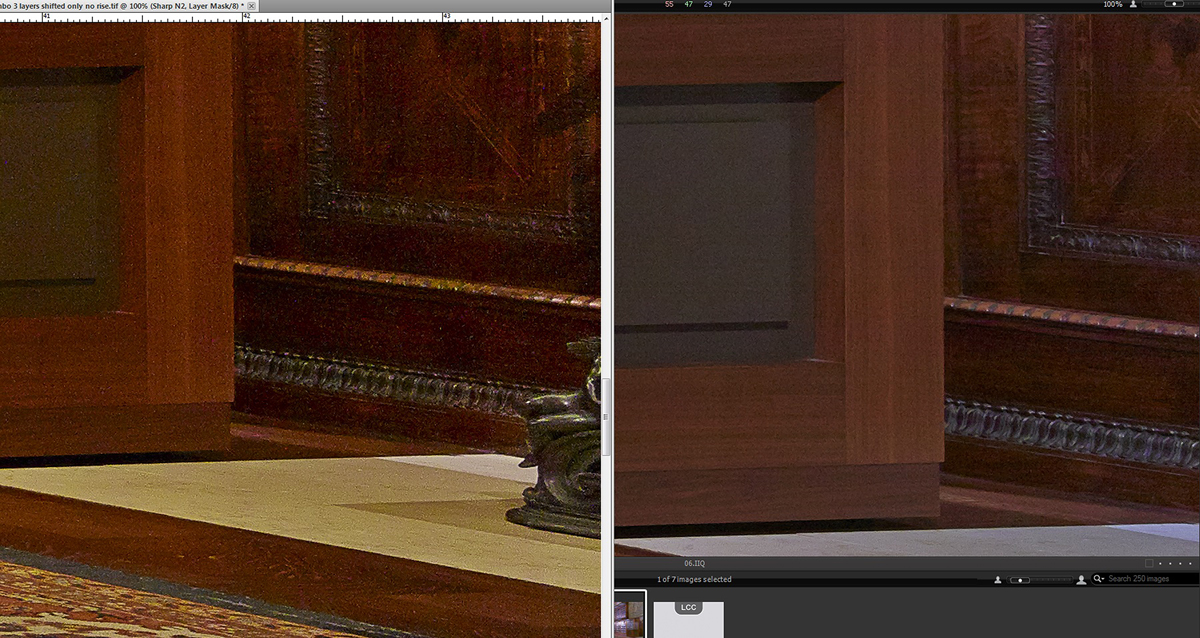
Comparison No 3 IQ250 and IQ260 back center of center image
In this comparison the IQ250 is on the right. This is a crop taken from the back center of the center frame of the three stitches. This image should have the best exposure opportunity from both cameras as not shifting was done. Quickly, notice the curved portion of the balcony, again the material’s patina is just so much more clear on the IQ250, where as with the IQ260 it’s pretty featureless. But what really stands out is the the very back underneath the balcony. They are watching you!!. Yes there is a small camera mounted next to the white box on the right. This camera did not catch my eye on the IQ260 shot, but when looking at the IQ250 image I saw it immediately. Notice here again the amount of details under the bottom of the balcony, again you can clearly make out the lighter material of the light shades and black piece on the middle balcony support. You can also make out the grain in the material of this same piece of material. The base of the railings also look much much better to me. Yes the IQ250 is still showing a red tint, but again that is because I saw no need to take it out since I was looking for DR range improvement. WB/color casts on this image are very hard to know without a true grey card shot to assist in WB.
Comparison No 4 IQ250 and IQ260 lower right corner
In this comparison the IQ250 image is on the right. This is a crop from the lower right corner. You can see two things quite clearly here, the base of a glass box stand and the back wood wall. Here again the shifted IQ260 has suffered quite a bit, not as bad as on the full left shift, but still the details just fall apart. The two things that are most telling are the insert of darker material on the box and wood grain of the outer section of the box. Working up the IQ250 image you can make out grain in the wood with no problem but on the IQ260 shot you are losing the wood grain by the time you add enough noise reduction to get the image workable.
Here you can also see a lot of stuck pixels in the IQ260 image. In looking at all of the test shots from the IQ260 stuck pixels show up in any of the more underexposed parts of the files. This was very surprising to me as I would have expected the mandatory dark frame to handle this. The dark frame is taken immediately after the regular exposure. In my experience with CCD cameras and long exposure, I owned for about 3 years a Phase One P45+. This camera was also rated to 1 hour exposures and I did use it for quite a few. I can state that I never saw this many uncorrected stuck pixels in a 45 minute exposure as I am seeing in a 6 second exposure with the IQ260. As the owner of a IQ260 I find this alarming. You can remove some more of the stuck pixels by using the “single pixel noise” reduction slider to 100% in Capture One, but normally this is not needed unless a dark frame was not taken immediately after the long exposure. With a Nikon D800 which I regular use for up to 5 minute exposures for stacking in my night photography actions, you will see some stuck pixels, but no where as many as seen in the IQ260 shot. With the Nikon I am not using long exposure noise reduction in camera since it would not allow me to operate the camera for a corresponding amount of time, in this case 5 minutes. However using Capture One in post processing I can always get a clean file by using the single pixel noise reduction slider. In the case of the IQ260, a dark frame was taken as you have no options with Phase One, so the vast majority of the stuck pixels should have been removed.
The back wall however is even more telling Here you can see the details in the engraving of the back wall much better on the IQ250 shot and the base board is full of rich details. The crop I took also shows the floor clearly has more details in both the tile around the fireplace and the actual wood floor. The IQ250 file is so clean it almost looks like I needed to add a bit of grain, as the bottom of the stand is very smooth, but that may be how it is in real life also.
Conclusions from these side by side tests:
- The CCD chip of the IQ260 was pressed harder than it could deliver on this test series of exposures and the results show both excessive noise (especially on shifts) and any area of the image not being stuck by artificial illumination.
- The 6 second exposure of the IQ260 contains a lot of stuck pixels, mainly blue, that were not removed by the dark frame exposure that would have followed the exposure on the back. The IQ250 is clean of all stuck pixels with the Capture One defaults of noise reduction loaded. I had to increase the “single pixel noise reduction” slider to 100% on the IQ260 image and it still did not get all of the stuck pixels out.
- Clearly the IQ250 image has much more room in the shadows. This is shown over and over by looking at pieces and parts of this test. The IQ260 in the darkest parts of the image (mainly the left shift) became too noisy to really use in a print larger than say 13 x 19. The IQ250 has a much cleaner transition between the light and dark parts of the image allowing things like patina and wood grain to stand out much more clearly
- The IQ260 suffered from very harsh aliasing, mainly on the metal X bars that cover the books. I was able to remove the worst of it with a local adjustment layer in Capture One on the IQ260, but on the IQ250 there is really none to start with.
- Yes the 1:3 crop factor size is important. Just from looking at the sides of the completed stitches you can see that the IQ260 pulled in about 3 more feet of image on both sides. This image is also pretty badly distorted by the time the IQ260 makes the extreme shift (as would be expect on a ultra wide shift). As the owner of a full frame digital back, I am a huge fan of the full frame size chips as I tend to work in close in Arkansas landscape shooting and the crop factor will make a composition/framing consideration.
As the owner of a IQ260, I was impressed by these results. I already knew the Live View worked and it even works well in low light as test by Alpa and now DT. I had hoped with my investment in a IQ260 that Phase One could somehow work magjc on the the CCD one more time since the IQ260 had a totally new chip. However based on these tests at iso 50 and some I have seen at iso 140 (the being of the long exposure noise for the IQ260, I am not seeing any improvements between the IQ160 and IQ260. I was hoping that the IQ260 would allow for a useable image at iso 400 in the long exposure mode so I would not have to drop down to sensor plus, but so far I have not see that result in my work. The shadows when pushed on a IQ260 pretty much appear to have about the same amount of range as my IQ160 had.
Seeing these results from the IQ250 and knowing just how good the Sony 36MP chip is in the D800, I have to make a decision to stay with the IQ260 or attempt a downgrade to IQ250. I don’t see Sony coming out with another full frame medium format chip anytime this year or early next year. They seem to be working on a 54MP chip for the 35mm camera world as they have announced it and are planning to bring it to the market in 2015. This leaves Dalsa who is Phase One’s main chip supplier, and boy I hope they are looking at these results. If any company is going to bring a full sized CMOS chip to market in 2014 or early 2015, I figure it will Dalsa. But they are also unproven in this space, only have CCDs. Sony has been working on the Exmor processor and their high dynamic range CMOS chips since around 2012 now have a fab process setup so that they can replicate this technology across many fronts.
02/01/14 Featured Arkansas Photography–Sunset from Flatside Pinnacle


Wintertime sunset from Flatside Pinnacle the beginning of the Ouachita mountains.
Taken with a Phase One IQ160 Digital Back and Rodenstock 28mm lens @ F11 iso 50 for approximately 1/30 of a second. If you have a few hours one winter afternoon, take a drive out to Flatside Pinnacle and work up a sunset. This area is not too far from the city, and takes about 40 minutes to get there. From Flatside you have a view to the west that is one of the best in Arkansas. Here you can see the beginning of the rolling Ouachita mountains and in the distance Forked Mountain. Flatside is not a hard hike so you can bring some extra equipment if you like. It’s also a great place to position yourself to watch a storm roll in from the west in the summertime. Looking to the right just outside the scope of this photograph, you can see the other tallest peaks in Arkansas all lined up, Mt Nebo, Spring Mountain, and of course the tallest Mt. Magazine. Great place to spend to off time.
01/29/14 Why I didn’t purchase a Sony A7r
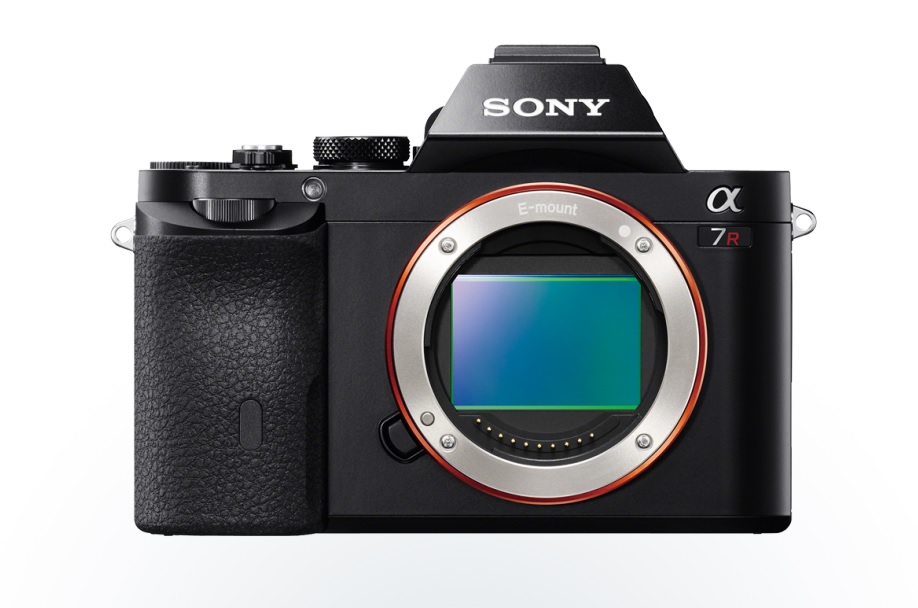
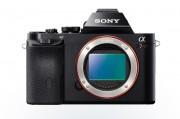
Sony A7r viewed from the front showing full sized sensor
When Sony Announced the A7r I was very impressed. In the past Sony has produced some very impressive camera solutions and I was almost moved enough by the A99 DSLR to purchase one. However my local dealer, Bedford Photo in Little Rock Arkansas, pointed me toward the fact that Sony was working on a full frame Nex style camera. A camera that was going to revolutionize the market. It was enough to make me wait a bit.
It’s now been about 4 months since the initial roll out of the A7 family of cameras. Sony ended up producing the A7r without a low pass filter at 36MP and the A7 with a low pass filter at 24MP. Both cameras are mirrorless and were put into a very compact mostly all metal body. I was in line at Bedford’s when they had their Sony day in late December 2013 and was able to work with an A7r. My reaction was different as I did not purchase one. Instead I backed off to evaluate the entire A7r solution and after giving it some consideration, I found for me it did not make much sense. Here are the main reasons:
- Sony FE lens support current and future
- Concerns of current Sony Alpha (A) lens support for the A7r
- Nikon lens support issues on the A7r
- No on Chip image stabilization on the A7r
- Concerns with non-Sony lens adapters
- Sony history of 1 and done firmware updates
- Weight of body with larger lenses
- Lack of intelligent remote or intervalometer
Let me give a bit more detail behind each of these.
Sony FE lens support current and future:
With the new Nex A7r, Sony also announced a new line of Full Frame lenses, the FE lineup. Currently there are 4 lenses announced with more to come.
- Sony FE 28-70mm F3.5-F5.6
- Sony FE 35mm F2.8 (Zeiss optics)
- Sony FE 24-70 F2.8 (Zeiss optics)
- Sony FE 55 F1.8 (Zeiss optics)
This is a start but only one of these four lenses has OSS (image stabilization). With a 36MP sensor in such a slim body, there are going to be situations where vibration may cause some overall sharpness issues. I used the Sony Nex-7 for over 2 years with many of the older E lenses before moving to the Fuji X cameras. The E mount lenses are mainly plastic bodies and on the Nex-7 they were not the best solution. Fine for video work, but detailed sharp landscape images, I was not impressed. It seems that Sony is moving up in overall quality with their newer FE glass, but however these lenses will only work in full mode on a Sony A7 family camera body. They won’t work on a Alpha body even though they are full frame. I also don’t see much movement in the ultra wide solution for this camera. In the field for my work, I most often lead off with a 14mm lens and so far I have not seen anything from Sony showing a platform with a 14mm in the native FE mount.
Concerns of current Sony Alpha (A) lens support for the A7r
With my Sony Nex-7 I used the Sony LA-EA2 adapter which allowed me to have the ability to mount standard Sony Alpha lenses. This adapter had the translucent mirror technology that Sony uses in the A99. Of course Sony puts OSS on the sensor on their DSLR bodies which is a great idea. So all of the Alpha lenses I used would not have any OSS (image stabilization). The AF with the Sony LA-EA2 adapter was good, a bit slow but most times accurate. The adapter added a lot of mass to the Nex-7 but with the Alpha 16-80mm lenses it was a good solution. When I demoed the A7r I used this same adapter and the Sony Alpha 16-80mm lens. I found that with AF on, almost all of the shots were just a bit out of focus, but when I switched to manual focus and peaking I was able to produce some very sharp images. AF is important in my work and many times I would prefer to lead with AF instead of a manual focusing option. My medium format solution is a Arca rm3di which is always manual focus so I when I work with cameras like the Sony A7r, I want a rock solid AF solution.
Sony also announced a new Alpha lens adapter when they brought the A7r to market, the LAE4. I was not able to try this adapter to see if it produced more consistent results with AF.
Nikon lens support issues on the A7r
I should have listed this closer to the top. With Nikon lenses, there is no current adapter that allows for AF or VR. This is a huge deal for me since most Nikon lenses really aren’t designed with precision manual focus in mind. This is especially true with the new G lenses. It’s possible the the manual focus rings are just not that well calibrated and just a tiny amount of movement can make a major change. Since Sony did not put any stabilization on the A7 cameras sensor, you will need to rely on the stabilization in the lens. Several of Sony’s new FE lenses will have OSS (Sony lens stabilization), however all the Nikon lenses I have with VR, the VR and AF will not work. This is only true with Nikon lenses, as Metabones makes an adapter for Canon that allows the use of both IS and AF on the Canon lenses. If I was still heavily invested in Canon lenses, the Sony A7r would make perfect sense especially since Canon has yet to announce any new full frame DSLR with any more than 21MP.
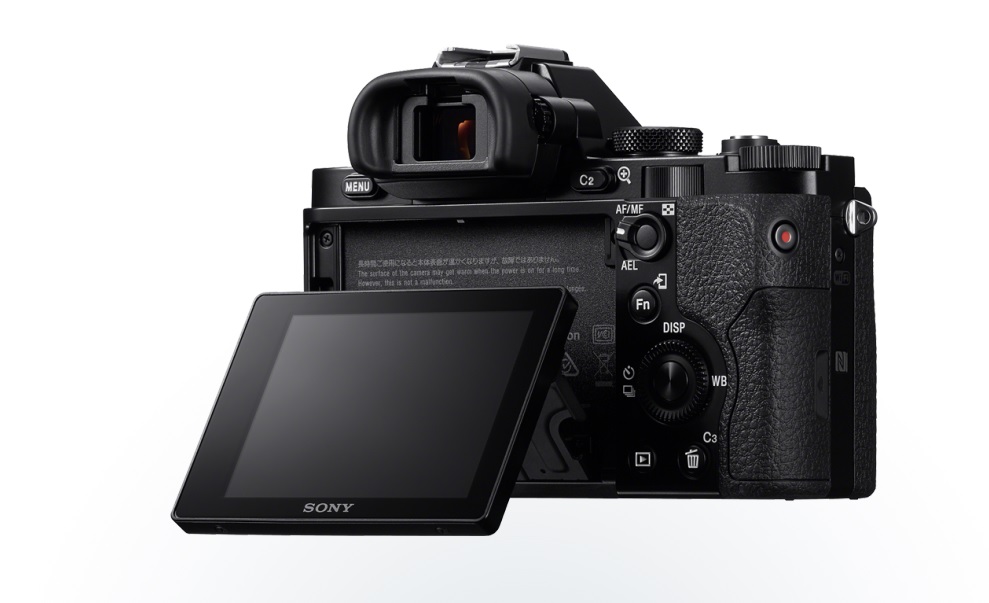
A view of the Sony A7r showing the tiltable LCD screen
No on Chip image stabilization on the A7r
Many users of the A7r are reports issues with vibration from the focal plane shutter on the A7r. It appears that the A7 has a different shutter design that does not cause this problem. However depending on the lens and selected shutter speed, the A7r can impart a slight blurring that may or may be able to be recovered in post. This oversight should have been expected with such a high megapixel count sensor in such a lightweight body. Some photographers are bothered by this worse than others, depending on the equipment they are using and shutter speed ranges selected. It’s a bit of a disappointment since Sony has such a good implementation of the sensor based image stabilization on their pro DSLR bodies, like the A99. I don’t see this being fixed via a firmware update.
Concerns with non-Sony lens adapters
Currently there any many different brands of adapters on the market to allow the use of non-Sony lenses on the A7 family of cameras. These range from exotic Lecia lenses to more common Canon and Nikon. The problem with many of these adapters is that they don’t seem to maintain the correct tolerances so that within a brand two of the same adapters may not reach the same degree of focus accuracy. Also it seems that some of the adapters can create either reflection issues or contrast issues when shift lenses are used. These issues may be worked out over time, but currently it poses just another problem that may or may not be correctable in post processing. For example the Metabones adapter for Canon lenses has shown definite problems contrast shifts when any of the Canon TS-E lenses are used, especially the excellent 17mm and 24mm TS-E2 lenses. Some people are fixing this by gluing a non reflective material inside the adapters, which is not an easy task due to the interior layout of the Metabones adapter.
Sony history of 1 and done firmware updates
Sony has a history of not releasing any major firmware updates to a camera once it ships, similar to how Nikon operates. This implies to me a pretty closed system and is unlike Fuji, Canon or Phase One. An example of this is the Sony Nex-7 which was shipped in early 2012. This camera had a huge issue for most shooter, myself included, where the video button was just too easy to engage while shooting stills. It took Sony at least 9 months to release a firmware to allow the user to change the button from always on. Sony seems not to release firmware updates that have any effect on image quality. The Nex-7 was a great camera in the ISO range of 100 to 400, however after than the amount of noise that developed became destructive to the image and by ISO 1600, the files were so noisy to make them only equivalent to 16MP images. I had hoped that Sony would add some firmware enhancements that would allow for some improvements on the higher ISO ranges for the Nex-7, but it never happened. Canon and Fuji both have had several major firmware enhancements to several of their camera lines that allowed for major improvements in image quality. I like to see a company continue to develop a camera’s capabilities after the initial announcement, and this is not a practice of Sony.
Weight of body with larger lenses
The body of the Sony A7r is so light that most modern 35mm lenses seem to unbalance it. If you are only using a older prime lens this might not pose much of a problem, but try placing the Nikon 14-24 on the A7r!. The weight of the lens totally outweighs the camera’s small mass and it makes it pretty much impossible to just shoot by holding the camera. So both hands are occupied in holding the lens/camera and you really don’t have a free hand to switch a setting once you are lined up for a shot. If you are using the camera/lens combination on a tripod, then most definitively the lens will need a tripod mount (which none of the current FE lenses do) or the lens adapter (like a Metabones or Novoflex) will also need a tripod foot. The lens mount flange on the Sony A7r cannot handle the sheer mass of many of the lenses you might want to use and long term you will either bend the flange or pull it out of alignment. Either way the fix will be out of warranty and depending on how the mount flange is installed may or may not require an entirely new A7r body.
Lack of intelligent intervalometer for A7r
As with all Sony DSLR’s and Nex cameras, there is no intervalometer for this camera. Sony once again is depending on a app called Timelaspe that will run on the iOS or Android OS. This tool limits you to the power left on your phone and since it requires the phone to be on for an extended period of time, it will drain the phone’s battery. The timelaspe app is designed to give the user the ability to create the actual video on the camera so for the night photographic use I would need it’s not a tool I could use. I much would prefer to use a cabled intervalometer that will let me set the time of the necessary exposure and the interval needed, removing all of this from the camera. I have also not found any built in timelaspe tool that will let you take a shot longer than 30 seconds since they all are dependent on the camera’s built in set shutter speed of 30 seconds. This is the longest shutter speed that most cameras will allow. Sony once again has used their proprietary port for a wired remote so that none of the third party intervalometers will work. This limits tremendously the use of the camera in night photographic applications and even limits it in the more traditional timelaspe applications. Personally I don’t want to be tied to my iPhone for any type of intervalometer use. The amount of heat that may build up in the Sony A7r may preclude it from night photographic operations anyway.
The Sony A7r is a great concept and for many photographers, it’s a great way to reach the 36MP threshold, especially a Canon shooter. In my situation, I already have the Nikon D800 and find it’s mass/weight are a benefit in keeping everything in sharp focus. I love the idea of a EVF that allows 100% magnification at the viewfinder level like Sony has along with the excellent focus peaking that Sony has had for several generations of DSLRs and Nex series cameras. However the inability to use my current lineup of Nikon lenses (with AF and VR) is a huge issue for me. This is a first round release for Sony and no doubt they will follow up with a more refined product either later this year or early 2015. I can also hope that Nikon improved their Nikon1 lineup of mirror-less camera to include either the Sony 24MP or 36MP sensors as then I should be able to use all of my excellent Nikkor lenses to their best capabilities.
01/24/14 Featured Arkansas Photography–Wintertime on Richland Creek featuring Shaw’s Folly Rapid


Wintertime on Richland Creek featuring a view of Shaws Folly Rapid
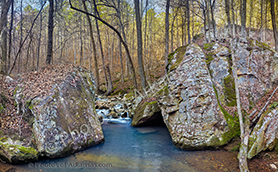
Taken in 2007 with a Canon 1ds MKII, Zork Adapter with Mamiya 35mm lens, F11, ISO 100, for 1.5 seconds. Richland creek is one of the most scenic spots in Arkansas, offering hiking, kayaking, and camping opportunities. The creek is one of the major tributaries of the Buffalo National River and has good flow most of the year. By far the best parts of the creek to hike are the upper reaches. Here you have have approximately 6 miles of creek and about 5 miles are just studded with great photographic opportunities. If you work the creek in the wintertime be aware that the water temperature will be around 41 to 45 degrees F. Dress warmly and look for safe places to cross. Richland has a strong flow throughout and it will fool you quickly on a crossing. During the winter you can often find great ice formations either in the creek or along the bank and many of the waterfalls that come along the creek will be frozen. It’s an easy place to look for a unique photographic study, just find one of the spots like the one in the photograph and setup. Richland is loaded with spots where house sized rocks have fallen off the surrounding bluffs or have been moved downstream during epic flooding. Enjoy!
01/23/14 Drobo does care–A revisit to my original complaints with support for my Drobo 5D
-

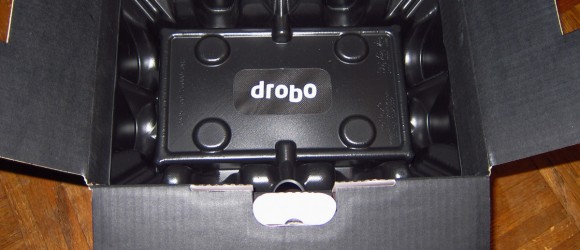
- Drobo offers an excellent packaging solution to their products
-
- The Unit arrives in a totally protected package
Recently, I wrote a article about the issues I had with Drobo Corp. in regards to the trouble that occurred when I attempted to upgrade the firmware on my Drobo 5D.
Not long after I wrote that article I was contacted directly by Drobo by a phone call. They had read my article and were concerned that my support experience had resulted the way it had. The phone conversation was with the Vice President of Drobo’s Service and End User Support. During the call I went back over my previous case and the problems I incurred trying to get my original 5D to run the latest firmware and still connect via USB3. One of the points I made was that I had been surprised to come away with such a negative impression since previously all of my support issues with Drobo products had been very positive.
What I took away from this call was that Drobo does care about the end user. As a company, Drobo is focused on supplying a high level of quality for their hardware/software and support of these products. The V.P. of service agreed that my previous experience with Drobo’s support process was not the impression that the company wanted to impart.
The fact that Drobo’s V.P. of Service reached out to me was most impressive. I did not expect this and because of it, I realized that my most recent impression of the Drobo Company and their support process was incorrect and with his guidance should give this process a 2nd chance. From our conversation I we put a plan in place that we both agreed should get me to a final resolution that was better than the first. Based on our conversations, here is what Drobo agreed to do for my problem:
- Ship a new 5D off the line to replace my 2nd refurbished unit
- Assign a new support case and give me the support from a dedicated 3rd level engineer who would follow the case until resolution
- Provide phone numbers so that I could talk with the tech when I felt it was required
- Pre-test the new 5D before it shipped to make sure it operated to specs.
The end result was that I received a replacement unit and a set of (2) 2 TB drives that Drobo had pre-tested. The new unit arrived with the latest version of the 5D firmware, 3.0.9 and it installed clean on my production win7 64 machine. I was able to move my (5) drives over to the new 5D and the array came up clean. All the data was immediately accessible with no errors that I could determine. The throughput of the USB3 connection was as I expected with no slow downs and there were no USB3 mass storage device driver errors in device manager (indicated by yellow exclamation points). During the boot up process of the new 5D, I did see the “USB device not recognized” screen but this is only temporary with the box going away after about 5 seconds. The new unit boots up and is assigned a drive letter by the win OS like it should. It is very possible that my Asus P8P67 main board and it’s corresponding NEC/Renesas USB3 drivers have a slight issue with the Drobo boot process, however the key factor is that the 5D comes up clean and operates correctly.
I came away from this experience with a totally different opinion of Drobo and their products. Drobo is a company that does care about the end user. It’s also clear that they are concerned about situations like mine, enough so that they were willing to reach out to me directly. It’s clear to me now that one of their company goals is to produce an environment that allows the end user have the best experience with their products.
I also came away with a few thoughts about my operation that may have helped in this situation:
- When my problem first happened during the upgrade of the 5D’s firmware I had not registered my 5D with Drobo. They are very clear about needing to have this done and it was a oversight on my side for not getting it done when I first received the product. By registering your device, you are letting Drobo know that this serial number is now in use so they can can track it.
- I did a firmware upgrade without having my 5D fully backed up. Normally I will have a backup of a Drobo in use. It may not be 100% current but will be within 90%. In this case my backup was only about 25% of the 5D before I attempted the firmware update. Having a full backup is very important, as it can reduce the stress of trying to get your unit back on-line or operating with the most.
- I should have pushed harder to ask to speak to a representative. I made several attempts of this in my online case, however I never reached out to Drobo from outside the confines of my on-line case.
Overall I feel the 5D is still an excellent value when compared to other raid solutions (for a win7 platform). I was trying to figure out where to go next as I really did not want to dedicate a new PC just for a raid array. The Drobo 5D still offers a great overall solution for a raid device for a end user like myself.
Drobo is aware of the fact that some customers may have run into situations like my previous one and they are working to add support solutions that will give the best possible answers. They have re-done the support website and it’s now much easier to navigate to your open cases. Most cases will have an initial response within 12 hours or less. I also feel it’s safe to say that the Drobo Company is very concerned about their support for the 5D as it’s one of their best selling products. The company is making some internal changes with the support process to make sure that a 5D support case does not get sidelined as mine did back in September.
01/12/14 Featured Arkansas Photography–Wintertime reflections of Pinnacle Mountain


Wintertime Reflections of Pinnacle Mountain
Taken with a Nikon D800, Nikon 14-24 lens @ 18mm iso 100 with no filters. One spot I never get tired of visiting is Pinnacle Mountain. There is always a shot to be taken, either on the climb up or in driving around the mountain. To many a 500 foot tall peak is not a mountain, but Arkansas it does seem to quality since the tallest spot in the state is only 2700 feet, the summit of Mt. Magazine. Arkansas will usually get one or two snows that will dust the higher spots. Pinnacle can be climbed from pretty much any side but most prefer to come up from the west side (the opposite from this picture), the east side which this image shows is a bit more challenging and is more of a rock hop to the summit. I like to try to catch a reflection shot of Pinnacle when I feel the conditions are right. On this morning I had just a bit of breeze but I was still able to get a close to mirror reflection. The pond is a small catchment on the back side of the mountain.
01/08/14 Make a trip to Sam’s Throne and enjoy the new Campground
- At January 09, 2014
- By paul
- In Scenic Spots in Arkansas
 0
0


THE ENTRANCE TO SAM’S THRONE CAMPGROUND IN ARKANSAS
This actually happened in Mid 2013, but I never got around to writing about it. They finally finished the improvements and created a formal campground status for Sam’s Throne. This spot is a climbers paradise and for me a photographic wonder. I work this area year round and love to work the bluffs of Sam’s after dark. If you have not ever been here, it’s worth the trip up Hwy 7 to the Hwy 123 Junction. Take Hwy 123 for about 10 miles north and then start looking for this sign. You won’t find a bunch of RV steps here, and it’s a very informal campground, but it now has facilities and that’s a big improvement. Sam’s Throne is one of the most famous climbing spots in Arkansas and is featured by a over 1 mile long bluff line made from primarily sandstone. You can also look off the bluff to to the rock prominence that is the actual throne. The road down to the bluffs has been dramatically improved since the early day’s when it was just a logging road. Sam’s throne campground is pretty much on top of the bluff and you can get a great nighttime sky from there. Once you get down to the bluff line looking northward you get a great shot of Red Rock and the valley of Big Creek. Looking south towards the throne gives you a great view of the rolling hills moving off into the distance.
I have photographed Sam’s in pretty much all types of weather and as I mentioned above love to work it at night. It’s not a bad compromise as you won’t be too far out from your car. This area does get some rough folks driving by at times during the week, and I would not consider leaving a car alone at the trail head after dark unless there are some folks camping near by. During the summer months and peak climbing season you can expect to have people there. At the Bluff line you can walk along the top of the bluff in either direction and find great subject matter for your photography.
This shot is one taken during the night after the moon had set at the campground. There was a group that had started a huge bonfire and the way it was lighting up the trees really caught my eye. This shot was taken as single long exposure for about 30 minutes and during the time I had the shutter open a group of people walked by with head lamps on, and I really liked the effect they created.
Sam’s is a great spot to take the family and spend the entire day, be aware that there are sharp drop offs everywhere so if you are taking young children be careful.

Star trails over Sam’s Throne in Arkansas
01/08/14 Problems with Drobo 5D after upgrading past Firmware 3.0.7

This information was originally posted to my blog back in October of 2013. However I am still receiving emails from other users who have run into this same problem with both Win7 64 bit and now Win8 64 bit and USB 3 connectivity. I would strongly recommend you do not upgrade your Drobo 5D unless there is some other pertinent reason for the need. I don’t feel that Drobo has a good grip on this issue based on my month long open call with them. Once again, it should be noted, Drobo no longer offers free tech support for any of the Drobo consumer lines, after the first 90 days of purchase. After that you will be required to purchase a 1 year contract from them for around $179.00. U.S. This gives you the right open a ticket and email back and forth, but not “talk” to a human. Based my my 25 years of experience in the tech field, I feel this angle is wrong. In my case, one simple phone call with a tech or “engineer” as they are called would have easily solved this issue. Remember my 1st replacement unit was defective with the power switch. Something that anyone who has used these products for any period of time would know. Instead my tech or “engineer” implied that I was “stupid” and did not understand the basics of how the 5D operated. Interestingly enough after a huge amount of my time wasted on emails, the same tech or “engineer” was astonished to see that “yes it does appear that your current replacement Drobo 5D chassis has a power supply issue”. What was even more interesting was that when the 2nd unit arrived, it worked just like the 1st unit I had purchased (which failed after the firmware upgrade past 3.0.7). Personally, I do have a problem when I company takes the position that (A) Your time is not important to us, and (B) We know more about the unit’s basic function than you even though you have operated it daily for almost 8 months.
Drobo used to have excellent support, dedicated tech’s who followed up with your issue. This was all provided with the base 1 year warranty. Now it’s 90 day’s and after that pay up. Also remember that the price of the Drobo 5D is around 800.00 U.S. well actually that is a bit misleading, as you do need support so the price is really $979.00.
Drobo had a great idea, not sure if the original company founders were bought out (more than likely the case) or if something else happened. But my future raid solutions will all be based on a raid card (LSI for example) and a simple PC board/tower case. This will actually cost out cheaper than the current price point of the Drobo 5D with necessary support.
FOR NOW I WOULD NOT UPGRADE TO THE LATEST FIRMWARE ON THE DROBO 5D IF YOURS IS WORKING OK WITH A WIN7 64 BIT MACHINE AND USB3. Once you upgrade, there is no longer a way to downgrade. Drobo used to offer this option with their older superior support on the old 4 bay models, but now they are only looking forward. For a single owned shop like myself that puts a large dependency on a raid 5 or raid 1 setup for primary backup this product is no longer a valid consideration.
Update on 10/12/13
What I thought was a fix, turned out to be a dead end as the replacement Drobo would not work correctly on my production PC. It would boot up, and briefly showed all the correct lights, but as soon as windows gave the new hardware tone, the Drobo rebooted and started this process over and over, never coming on line. I was able to bring up a new disk pac with the replacement drobo, (2) 200GB drives. This worked correctly, but for some reason, my (5) 2 TB drives would not work. I also received a windows error about “A USB device attached to this computer cannot be recognized”. This error comes up with either Drobo, mine or the replacement.
I went back to my original Drobo 5D with my hard drives and booted it up. It came up fine, still getting the USB device error, but still it comes up and is recognized by windows and assigned a drive letter.
As of Friday, Drobo is sending me yet another replacement 5D now stating that the original replacement was defective!!. Something I believe I tried to tell them after I first tried to use it. As of today, I still have not SPOKEN to anyone at Drobo, from a tech to supervisor and it’s quite apparent now based on the information I have inputted to the case, that Drobo is not interested in talking to me. I am sorry to see that this is the way that Drobo has gone and I have for sure purchased my last piece of equipment from them. I love their website showing all the “happy” users, well, that is pure fiction.
Update on 10/05/13
After working through two more days, and getting a better feel for the tech support with Drobo, I finally was able to fix this issue. The problem stemmed from the fact that both of my PC’s (with Asus boards) were running very back level USB3 drivers. On one PC drivers dated back to 2010 and the other 2011. I am planning to write up a bit more about this, but I did want to state, that DROBO DID RESOLVE THIS MATTER AND MY 5D IS NOW RUNNING ON BOTH MY PRODUCTION AND TEST PC’S WITH NO PROBLEMS. I am willing to take some of the blame for this entire debacle, however Drobo could have made this so much easier with just one phone call explaining the issues with the USB3 drivers. I will also note that Drobo was helpful in providing an updated driver for both of my Asus mainboards, something that Asus was not able to do since they quit updating the P8P67 mainboard over 1 year ago. Net, to this story, things have changed at Drobo. In the old days, you could talk to a person, and that person gave you an extension and you could call them back until the problem was resolved. Now you are going to work on-line, (the way of the world) and no doubt there will be some misinterpretations of instructions. However I have to state that my initial extreme disappointment with the Drobo support group has now been lessened and in the future I will know how to proceed with them.
Update 10/02/13
Amazingly since I started this problem after trying to upgrade my Drobo 5D firmware, I still have not been able to talk to a “supervisor” within the Drobo tech support organization. Yesterday I received a “replacement” unit, which was dirty, smelled burnt and was scratched on the faceplate. This was the unit that was supposed to work correctly with USB 3, however when I brought it up on my PC, it had the same issue: The Drobo comes up, is seen by Win 7, Win 7 makes the tone for adding a new device, immediately after that the Drobo drops back to standby and on a detailed inspection the USB mass storage driver has failed. ON THIS REPLACEMENT UNIT I WAS NOT ABLE TO GET THE UNIT TO EVER COME BACK UP EVEN BY RELOADING THE USB MASS STORAGE DRIVER.
Based on my 20 years experience in the PC market, where I worked for IBM for close to 30 years, I am amazed by this response, especially from a company like Drobo that just a years ago had excellent customer service. If you can’t get through to a supervisor especially after having an open call for over 60 hours and the unit is still not working, then THERE ARE SOME PROBLEMS IN YOUR COMPANY. Sadly this seems to be the trend in business today and I hate to see Drobo go this route. They have obviously spent a ton of money on marketing, just look at their current website. However I WOULD STRONGLY warn anyone or any company not to make a large investment for data protection with Drobo products. Their lack of ability to communicate, reach out to a customer who has a Drobo that was working perfectly before attempting a Drobo firmware update, and lack of management follow up is pretty telling.
As long as you bring up the 5D in a USB 2 environment it still works fine, however this totally defeats the over $800.00 dollar cost of the chassis in that you are dropping back to a USB2 transfer speed and you can get a 1st Gen Chassis for that. Sure they are no longer sold by Drobo, but there are plenty of them around. However now that I think about it, that might not be a good idea either since the support for an existing product is pretty much terrible, I can’t imagine what it would be like for older 4 bay.
I understand I running a Asus mainboard, but the USB3 drivers with most board companies are pretty much the same as long as the board is a Intel board.
From here it’s back to chassis and LSI cards, with drives for me.
This is my earlier post when the problem first started.
IF YOU ARE RUNNING A DROBO 5D, ATTACHED TO A WINDOWS 7 PROFESSIONAL 64 BIT MACHINE VIA USB3, I STRONGLY RECOMMEND YOU DO YOU NOT UPDATE THE FIRMWARE OF THE DROBO 5D TO 3.0.8 UNTIL YOU CHECK ON THE DATE OF YOUR INSTALLED USB3 DRIVERS, ESPECIALLY IF YOU ARE RUNNING A NEC OR RENESEAS USB3 CHIPSET.
I have been using Drobo products for storage/backup now for almost 4 years. For most of those years I used the original 4 bay 1st Gen Drobo that connected via USB 2. This device has been stable for most of this time, and had worked as a external raid 5 enclose would be expected i.e. notifying me when a drive was close to failing or failed and allowing me to replace said drive with no data loss. My only issue with the 1st generation Drobo was the fact that is slow for reads/writes mainly due to the fact that it’s only connection was USB2.
When the Drobo 5D, 5 bay product was announced I did not immediately move to purchase one. I felt (and now still do) that the price point of close to $850.00 was too high for my budget. However early in 2013, I was totally out of space on my 1st generation Drobo so I purchased the Drobo 5D. I installed the 5D on my main windows 7 64 bit machine, utilizing the USB 3 interface. I used all 5 drive bays and filled them with 2TB drives. Since I made the installation of the 5D, I had had no problems, until this past Friday night, when I made the FATAL mistake of allowing the Drobo dashboard to download and install the latest firmware for the 5D. Normally my thought process on firmware updates are “don’t update to them unless you see a specific need fixed”, however on this night I went ahead and allowed the Drobo dashboard to upgrade both the firmware on the Drobo 5D and Drobo Dashboard.
From here, things went downhill fast. The firmware update on the hardware failed. This pinged my memory back to when I tried this on my Drobo 4 bay, and I remembered that I had had the same issue with it. On the installation failure the Drobo 5D rebooted and then attempted to come back up. It went through the entire reboot, and then just as I received the tone of a new device being added to Windows, the Drobo 5D went into standby. I attempted one more hard restart and the same thing happened. From here I called Drobo customer support, and again I was in for a rude awakening. One thing I forgot, was my old 4 bay never worked correctly on firmware updates from the Drobo dashboard software, instead I had to always do a manual firmware update.
In the past I all of my tech support calls with Drobo support have been positive. They have been prompt, informed about the product, and have been able to provide a fix, either software or hardware. On this call in I was told that I had not “registered” my Drobo 5D, even though I had placed a tech support call with Drobo when I received the unit and I could see both the call record and serial number of the 5D in “my support” portion of the Drobo website. The tech I spoke to was polite, but would not proceed until I registered the product. I went ahead with the registration and then found out that Drobo no longer provides “free” tech support after the 1st 90 days of ownership. After this, you have to purchase a 1 year support contract for $162.00. This surprised me, but at this point, I didn’t care, as I needed to get to the data on this Drobo 5D. Most was backed up offline, but not in a local backup. NOTE TO DROBO, for the price of over $800.00 for a empty raid enclosure, I believe you should be able to continue to provide tech support for no charge for at least the 1st year of warranty. However Drobo has taken the sad path of most companies, if you need help, prepare to pay. This needs to be spelled out a bit better up front.
After paying the 1 year contract, not much else improved, except that I figured out on my own that my 5D was still OK, and somehow the firmware update had created an error on the Windows 7 mass storage USB device driver. After taking to Drobo tech support, it became quite clear that the firmware update had not taken and I had to download the firmware and do a manual update. This did not fix the problem and the 5D still came up and went into standby. A NOTE TO DROBO, you need to post a bit more information on this upgrade as when I spoke to a 3rd tech later on Saturday, I was informed that this is a known problem after you upgrade the firmware on the 5D to 3.0.8. This is terrible customer service, period. If you are using a raid enclosure, you are using it mainly to protect your data and provide a level of security, NET, if I had not followed the prompts on the screen, my Drobo 5D would be working fine. The 3rd tech I spoke to on Saturday also told me that there currently was not a fix for this issue and blamed it on the Windows 7 mass storage driver. Really? Did Windows suddenly change this driver? I checked as far as I could and the date on my system for the USB Mass storage driver showed no change, in fact it’s the same date as when the OS was loaded.
Here is where things are currently:
- If you are running Windows 7 64 bit and have a Drobo 5D, using USB 3 connections, then if you update to the latest firmware of 3.0.8 for the Drobo 5D, you have a very good chance of getting this same issue. I am running an Asus XXXXXX board, with a Intel i7 processor. This is no way I know to get this driver/firmware screwup fixed. Net each time from now on, when you attach the Drobo 5D, it will come up normally, then go into standby. I tried a full system restore back to the date before I did this firmware update, the system restore was successful, however the problem was still there. Based on this it’s a fair conclusion that a full image restore of the OS (Win7 64 bit) would not fix this problem as the issue is with the Drobo firmware 3.0.8 and the stock Windows 7 64 bit Mass storage driver for USB. The only way I can think to fix the issue is to back off the firmware to a previous version than 3.0.8 on the Drobo 5D.
- You can fix the problem and continue to use the Drobo 5D by either unplugging the USB 3 cable from the PC or back of the Drobo 5D, while leaving the power on the Drobo 5D. Windows 7 will then see it correctly and add the drive letter for the Drobo. You can also go to control panel==device manager and locate the USB mass storage device driver that has failed. It will have the dreaded yellow ! next to it. Select this component and go through the process to reload the driver using the 2nd option. This will get the drive back online, and the Drobo will come out of standby and Windows will assign a letter to it and you can operate as normal.
- You can also plug the Drbo 5D in to a USB 2 port and it will work fine. This was one answer I received from Drobo tech support. This makes no sense as you have now brought your 5D back to the speed of the older 4 bay models.
Overall I still have a ticket open with Drobo tech support and if I get some form of resolution, I will post the results here. Currently I can only get my 5D to operate at the correct level, by unplugging the USB 3 cable, or reloading the Windows 7 mass storage driver.
06/15/13 Phase One Back failures using Silver vs Black batteries
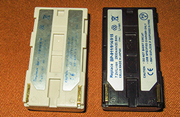

Silver vs Black Phase One 7.2 volt Lithium Ion Batteries
As many Phase One users may know the main battery used in most modern Phase One Digital backs, is based on a Canon Video camera battery. In fact in the older Phase One cameras which had the battery external to the back, like the P45+, P65+ etc. you could use Canon’s AC adapter/battery setup on Phase One cameras which gave you a much longer life in the field. This all ended however when Phase One decided to place the batteries inside the case as in the newer IQ series of backs.
One issue I have had with all Phase One batteries, is that they don’t’ tend to last very long in the field. The older batteries were 2600 millamp hours and in most cases with a IQ160 I would get about 2 hours or less in the field. When Phase One announced the IQ backs, they also increased the millamp rating on their batteries to 2900. In a nutshell millamps tells you how long a battery will last at charge i.e. 2600 will last a shorter period of time than 2900. However as I also moved to a tech camera setup with my IQ 160, I found that my battery use increased considerably. Since the IQ backs don’t really have a very good live view I tend to do a considerable amount of checking after a series of shots. In the past 6 months, I have found that some of this review is no longer necessary as I have gotten much more confident with my tech camera and focus. The ultimate solution is still a better live view but as long as Phase uses CCD technology, I have been told this will not happen.
So what do you do when you know you will be in the field all day or maybe two or three days? You carry a bunch of batteries. About the time I was introduced to the Phase One IQ series of digital backs, I also discovered that there was a much cheaper battery alternative. Capture Integration, based out of Atlanta sells a silver battery which looks and feels just like the black Phase One branded cells. They are all 2600 millamp but at 1/2 the price. My thoughts were to just purchase more of the silver cells and then carry them on trips. They don’t weight that much and charged up with the same Phase One charger. In fact I designed a battery sleeve that I could carry over my shoulder, based on a hunters belt. The Phase One batteries will fit into the same size as a 12 gauge shotgun shell!
At first, I really noticed no differences and pretty much stopped using my older Phase One LI batteries. Lithium cells in theory should not have a “battery life” issue but I noticed that my batteries that dated back to 2008 and 2009 where definitely getting shorter run times. There is no way to “re-condition” a lithium cell like you can with Ni-Mh cells. However in early 2013 I started to notice some strange issues with the Silver batteries, on my IQ160.
- The first silver battery I installed, did not power the back up. I double checked that it had locked and it did. This battery had come straight from the Phase charger, and showed 100%, one of the silver batteries. I went back and pulled the 2nd silver battery from the charger, which also showed 100%
- The 2nd fully charged silver battery did power up the back. All seemed fine so I continued to shoot. However after each shot, I noticed that the battery indicator would drop from full, to 1/2, to the lowest indicator while the back was writing the file. As soon as the file was finished writing the battery indicator would return to 100%.
- When I attempted to zoom to 100%, the zoom went to over 200% and locked. I could not go back down to normal view with a double tap. I had to power off and power back on. This series of errors happen several times, then I noticed on the right side, where the histogram should be there was nothing even though I could double tap the histogram to view it at 100% and then it showed up. Also both focus mask and the highlight warning would not engage when tapped.

Silver vs Black Phase One 7.2 volt batteries no 2
Out of curiosity I went back to the silver cells and worked with them in the IQ160. I had two of them that had been in my pack which had been sitting in the sun. The batteries were at 100% full charge, and when I placed one of them in the IQ160, I noticed that it was not fully engaging the brackets that hold the battery in place. When a new battery is placed in the IQ160 back (or older P series backs) the back always powers up. What happened when I placed the silver battery inside was that the back powered up, briefly then the screen went blank and the back powered off. I double checked that the battery was still locked into place and it was. However even locked in place you could still move the battery around and as I did this the back powered back on again. It seems that over time the outer casing material of the silver batteries, may expand, and contract and as it contracts it slightly deforms the shape of the battery enough that the slot where the battery fits on the IQ160 does not hold the battery firmly. I have also had several silver batteries that did not want to come out of the back after they were used. I first noticed this about 6 months ago, on silver batteries I had been using for about 8 months. This behavior implies that as the silver battery is used it gets hot (normal for a LI battery during discharge) but the silver case is also expanding and contracting causing deformations. Over time these deformations can cause the silver batteries to either:
- Stick inside the IQ back, and become very hard to remove
- Not fit snug enough in the case and allow movement which will either not give the correct voltage to the back and cause errors.
With the older P series backs where the battery is external to the back, this issue is moot since the battery is held in place by a hard metal sleeve and it can’t slide around.
I have not noticed any cracks in the silver batteries, but as a safety measure, I have stopped using them. I would not have any issues using them on a older P series back however like P45+. It’s also my understand that Capture Integration (Phase Dealer in Atlanta) no longer recommends using these silver batteries on a IQ back. However I never received a warning or notice from them about the possible issues of continued usage.
These are the results of one person’s usage of a IQ160 and the silver batteries that are sold to replace the standard black Phase One cells. If you have using these silver batteries and are experiencing any of these issues, before you send your IQ off to Phase One, try working only with the black Phase One batteries and see if your problems persist.
 From the Blog
- Errors with High Resolution Mode, Panasonic LUMIX S1RII July 4, 2025
- 05/08/25 Capture One, big announcement, at least for portrait photographers May 8, 2025
- 05/03/25 Trump’s Tariffs finally start to hit Photography Equipment. May 3, 2025
- Firmware 4.1.0 for X2D? April 21, 2025
- 04/18/25–Looks like Trump’s Tariffs are much ado about NOTHING in regard to photography equipment. April 18, 2025
- 04/09/25 Arkansas Sets new standard for Scientific Ignorance with new law for Ivermectin April 4, 2025