02/15/25 A side by Side Comparison of Hasselblad X2D Multishot (4) and Single

About 4 months ago, Hasselblad announced a limited multi shot capability for the X2D. It should be noted here, many people felt that the 3.8.4 version of Phocus “enabled multishot”. This is not true as previous versions of Phocus supported multi shot on the older Hasselblad digital backs. There was a firmware update to the X2D that allowed it to communicate with the multi shot option in Phocus. They did not really make a formal announcement, instead they allowed some of the testers to post some videos on Youtube. Some of the information was also incorrect in that they pre-announced that both a (4) shot and (6) shot mode would be available. The 4 shot mode kept the resolution at 100MP, but increased the details and created less noise than a single shot. The 6 shot mode was shown on the videos and created a 400MP output. NOTE, the 400MP has never been released as it requires a new version of Phocus. However the 4 shot is available but I have not really found too much written about it, so if you would like to see some side by side comparisons, read on. The images shown above were taken at ISO 1600, and F6.3 with the X2D and XCD 35-75 lens. The camera was mounted on a tripod and tethered to a M1 MacBook Pro running Phocus 3.8.4
Full screen examples for testing
Before you read through the samples, I am going to summarize my findings:
- The 4 shot Multi shot process does give considerably better resolution. This is especially true where finer details are involved.
- The 4 shot Multi Shot process seems to give better noise responses to certain parts of an image, however it would be nice to be able to use Hasselblad HNNR on the files. This is not possible since the only output is a .fff.
- Phocus Desktop seems to quickly process the 4 shot images on a M1 MacBookPro and the tethering connection is excellent.
- You are forced to use Phocus Desktop to complete the work on the images, since you cannot output to a 3FR only .fff or tif.
- Lightroom and or ACR cannot open the 4 shot multi shot .fff in fact no other software I have found can.
- There is no way to get Phocus Mobile 2 software to tether and thus 4 shot multi shot is not available on a mobile platform, thus you are tied to a laptop or a desktop both of which are heavy, bulky and have fixed keyboards.
- The workflow of 4 shot multi shot is tedious. Tether, capture, work on image all in Phocus, export as a tif to your laptop, then do more work on the image with Photoshop or similar software. The .fff images are left in your Phocus Capture folder and must be removed later to save space and you are generating a full sized tiff when you export the image. Duplication of images.
- I attempted to use the PC version of Phocus 3.7.5 which has multi shot support, on a 5 year old Surface Pro. The results were less than stellar as the capture time for the 4 shots was much longer than on the M1 MacBook Pro. This may have been due to the age of the Surface Pro, but using a newer windows laptop is no better than a MacBook as both have fixed keyboards and more bulk.
- This process cannot handle subject movement, be it from wind, cars or moving people. However I have found that with slight wind in landscape work, it’s still worth trying the 4 shot multi shot as it still outputs a 100MP image. You can often times combine from a single image of the same subject the areas that did alias due to movement.
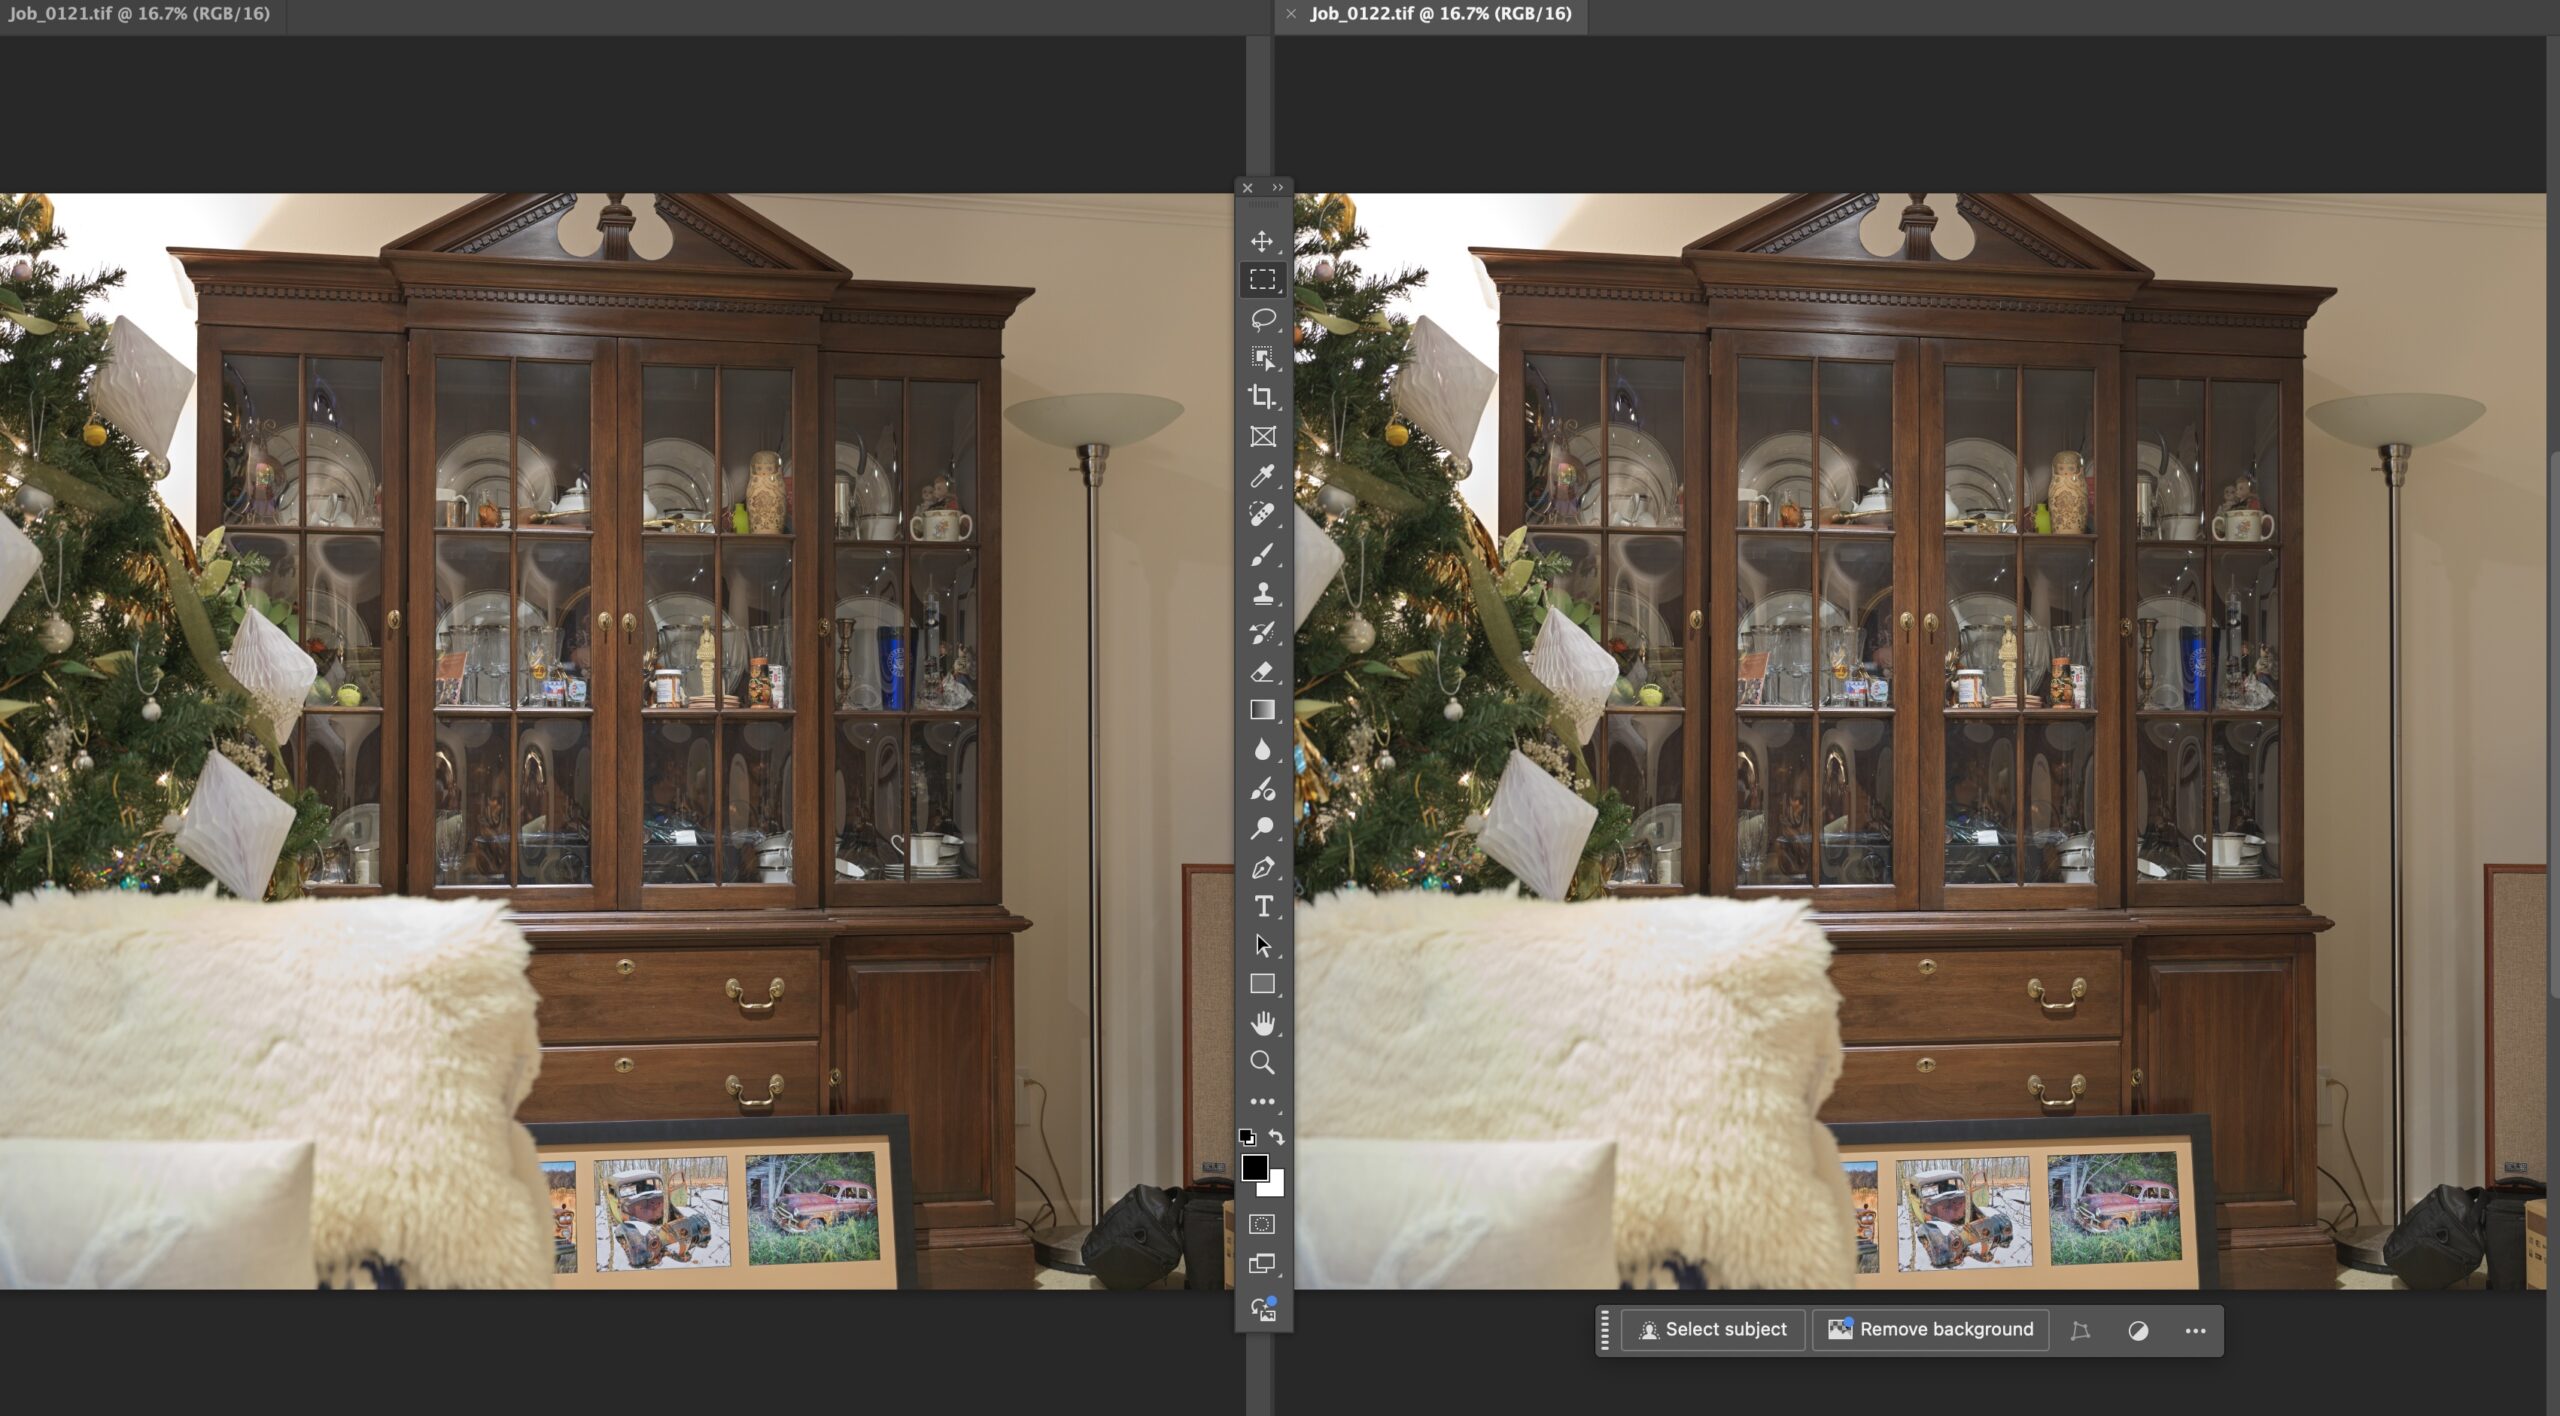
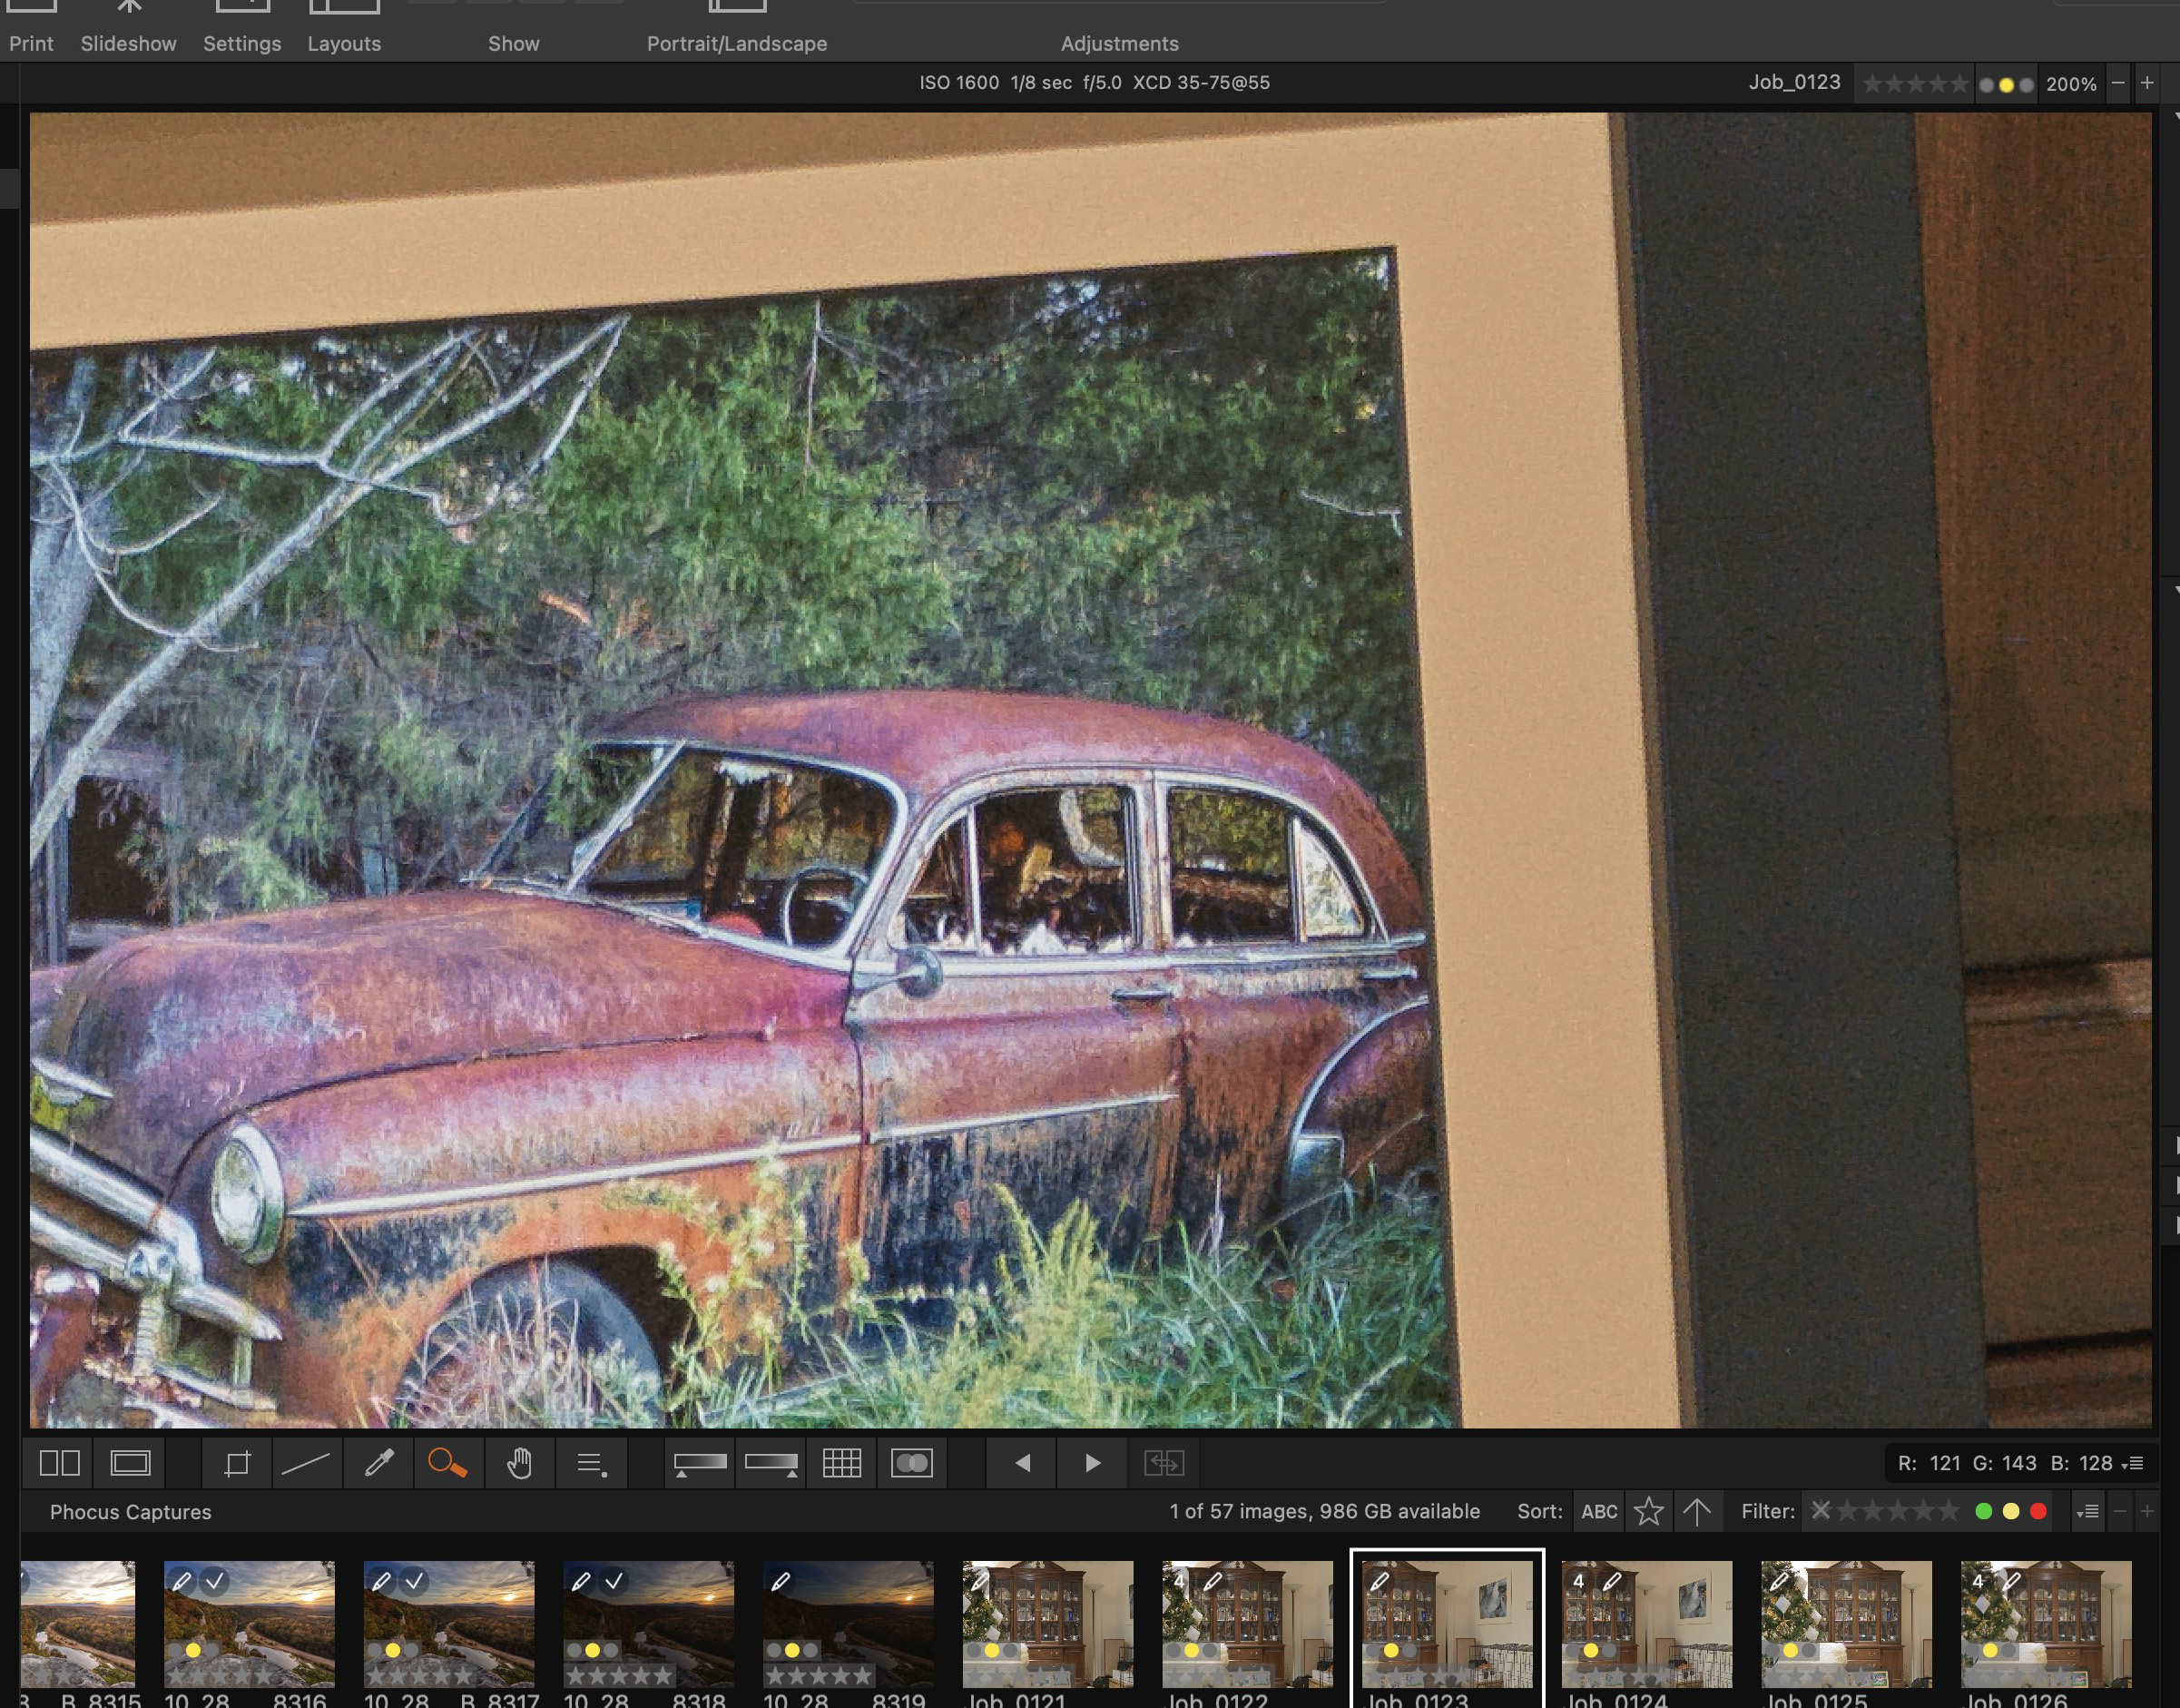
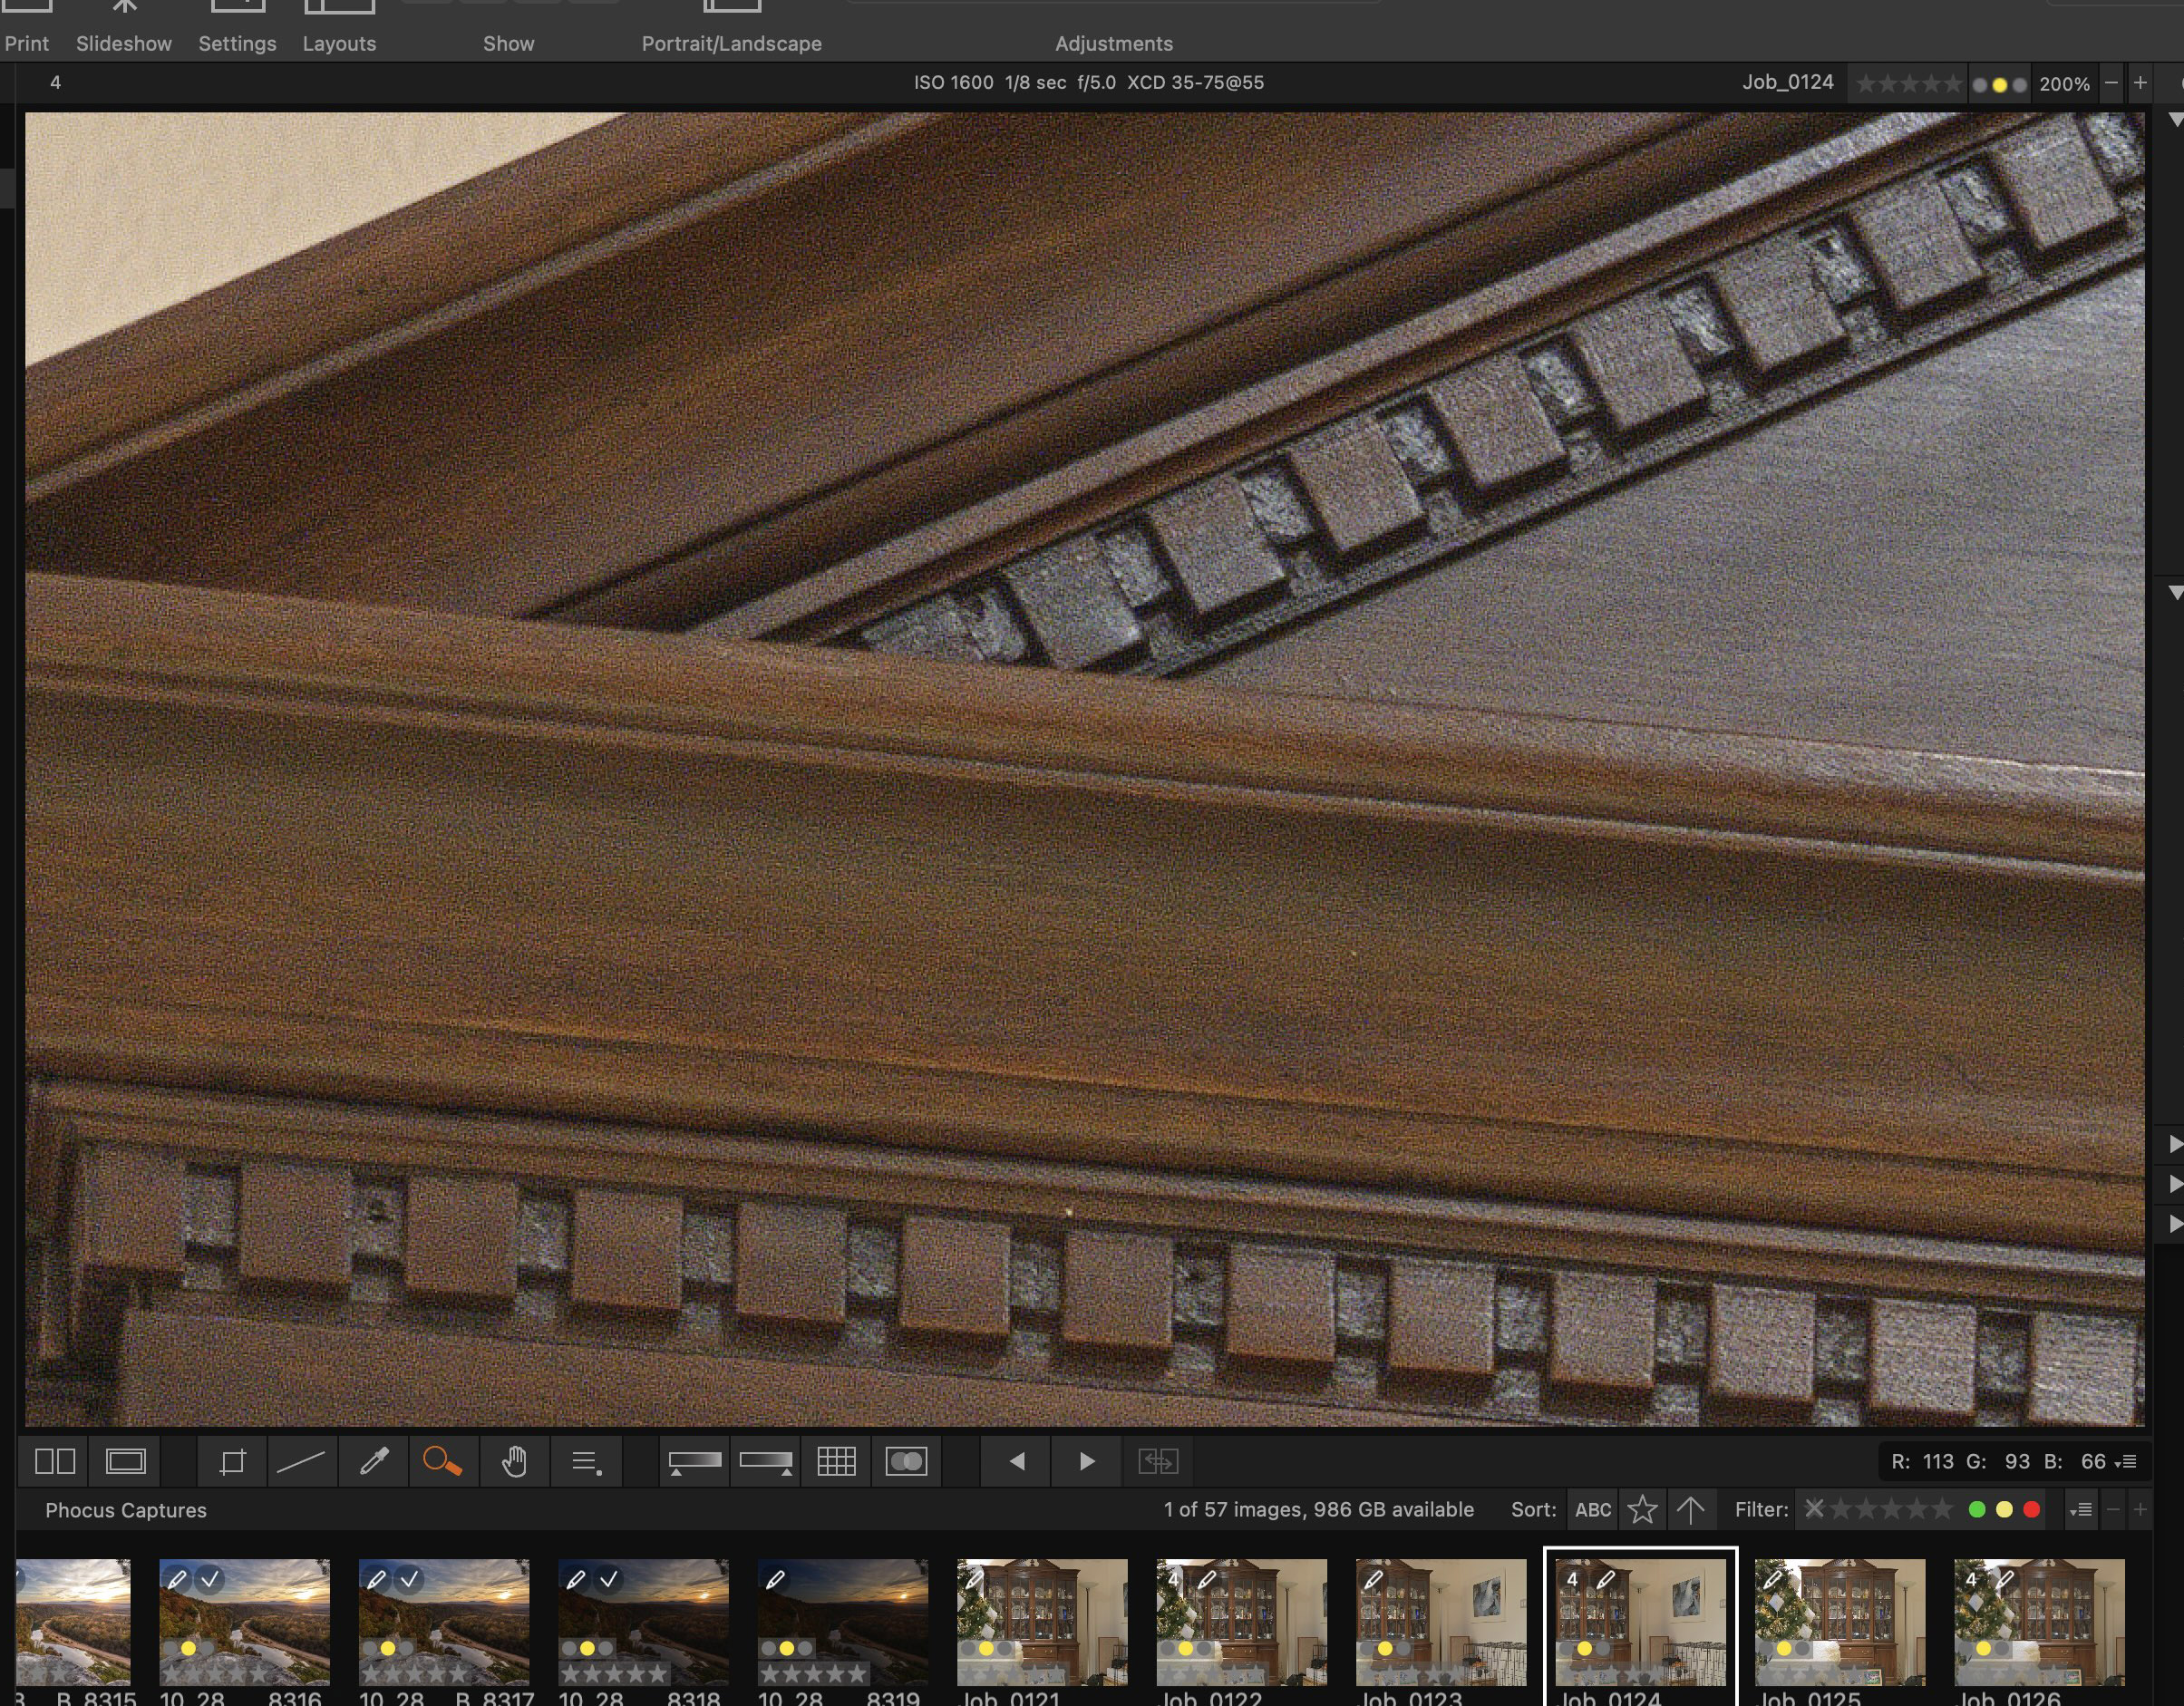
There are 8 different side by side comparisons, each taken from a unique area of the images. Since Phocus will not allow you to save a multi shot image as a 3FR, instead a .fff, I used Phocus to export both examples as a tiff. For this example I only used the default amount of sharpening in Phocus. No additional sharpening has been added. For all of these comparisons I viewed the images at 200%.
-
- X2D single shot
-

- X2D Multishot comparisons No1 old car
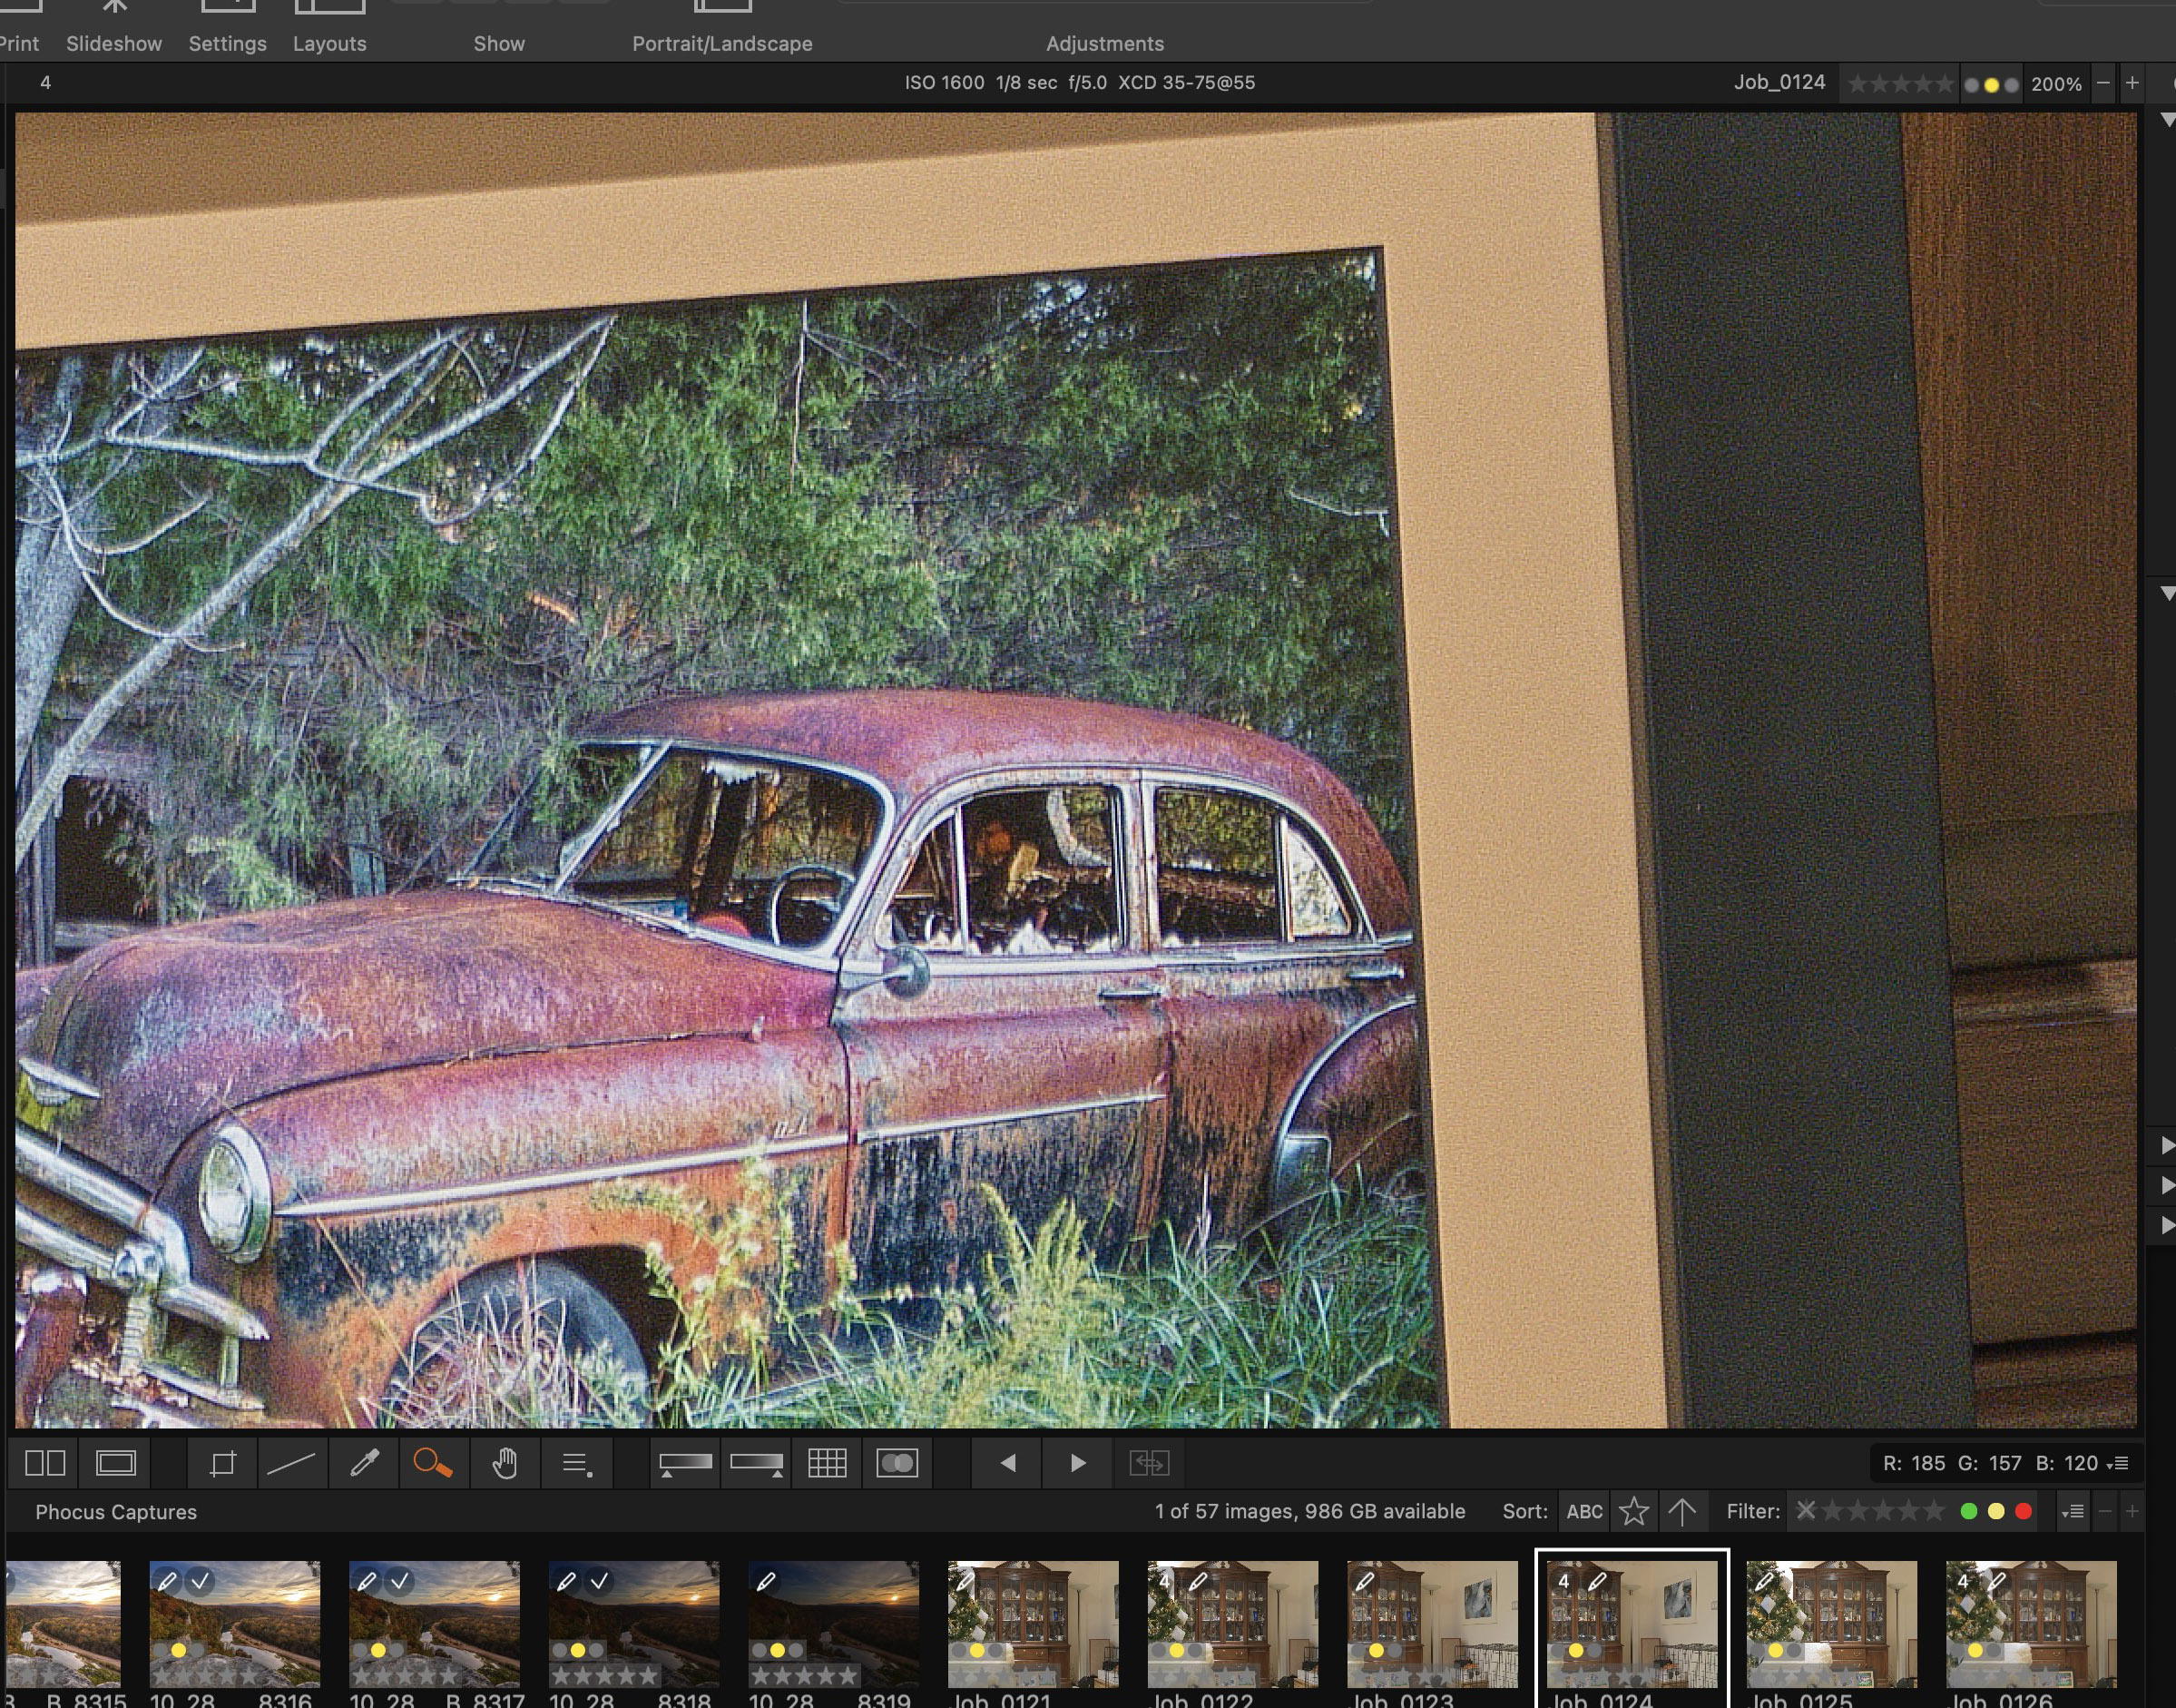
Click on either image in the gallery to open the two images into a Lightbox gallery. This will allow you to view the images in full size. The single shot version is on the left. These examples were taken from the lower right of the shot where I have a framed print of an old car. What you need to look at are the details on the car and the lesser amount of noise in the black frame. It’s very clear that you have more details in the car and in the brown of the cabinet behind the frame. The frame itself has a bit more noise as the multi shot attempted to pull more detail from a smooth black finish. This would be easy to fix with any noise reduction program.
-

- X2D Single Shot
-

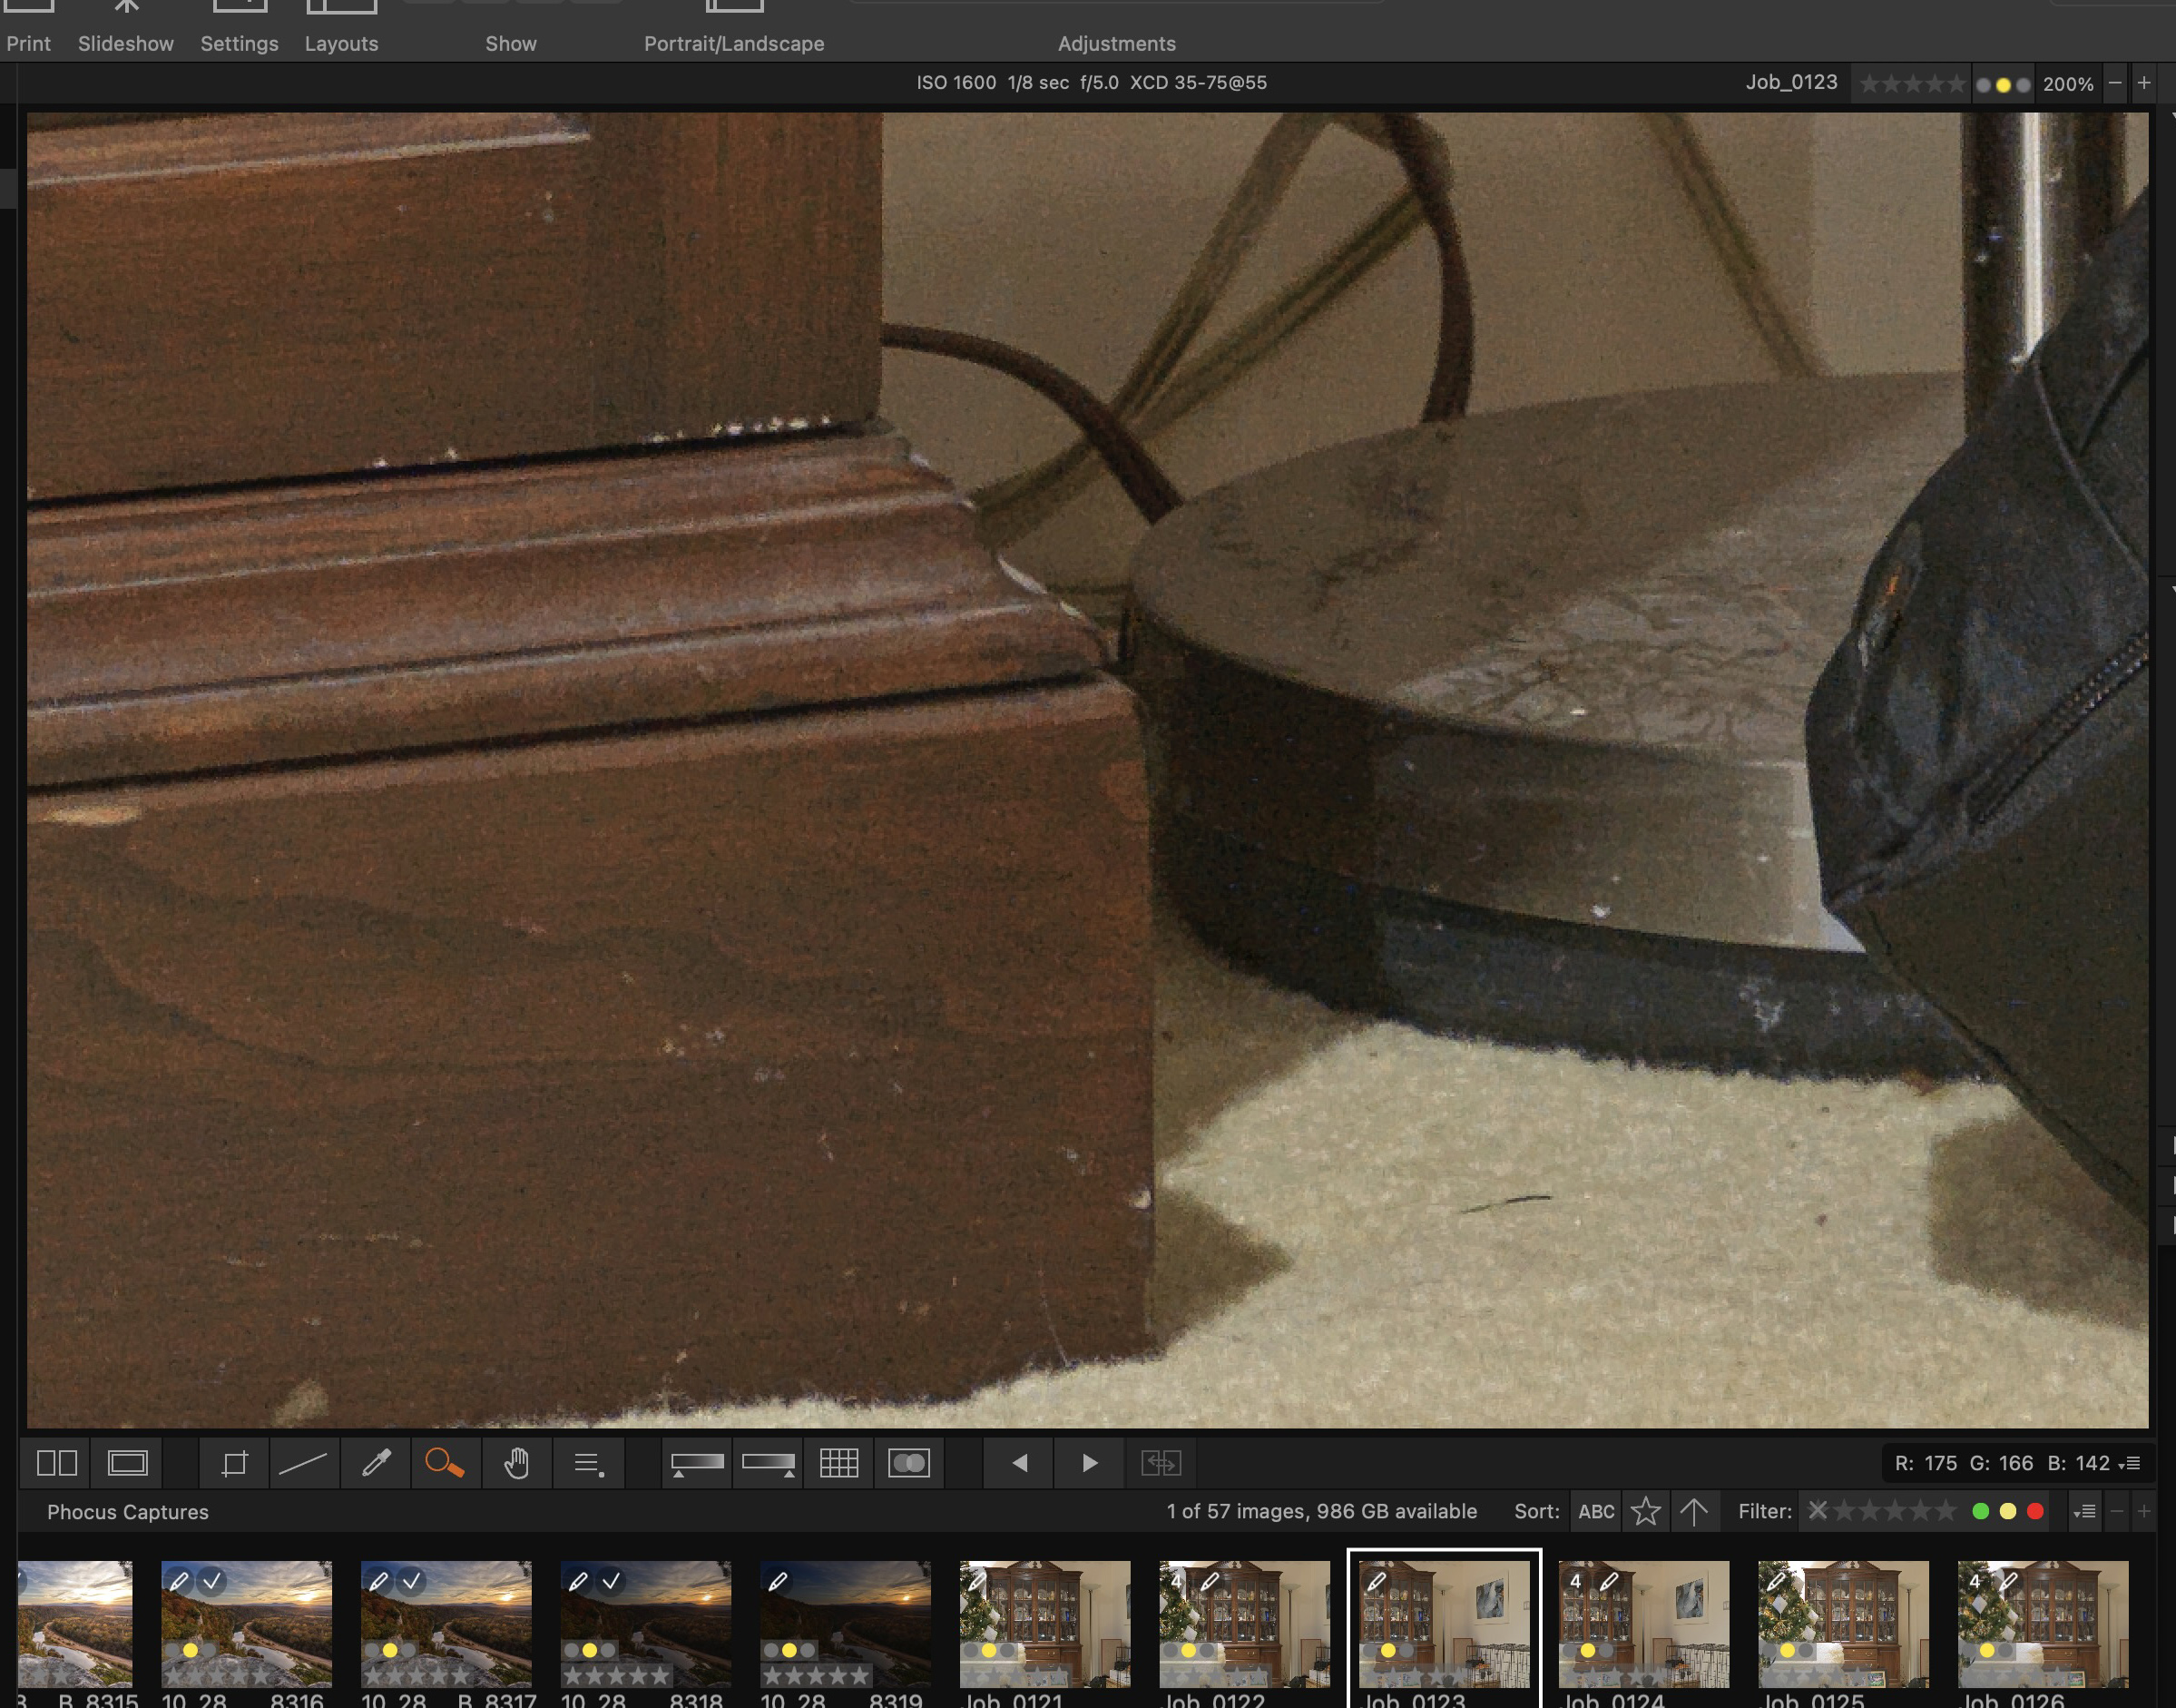
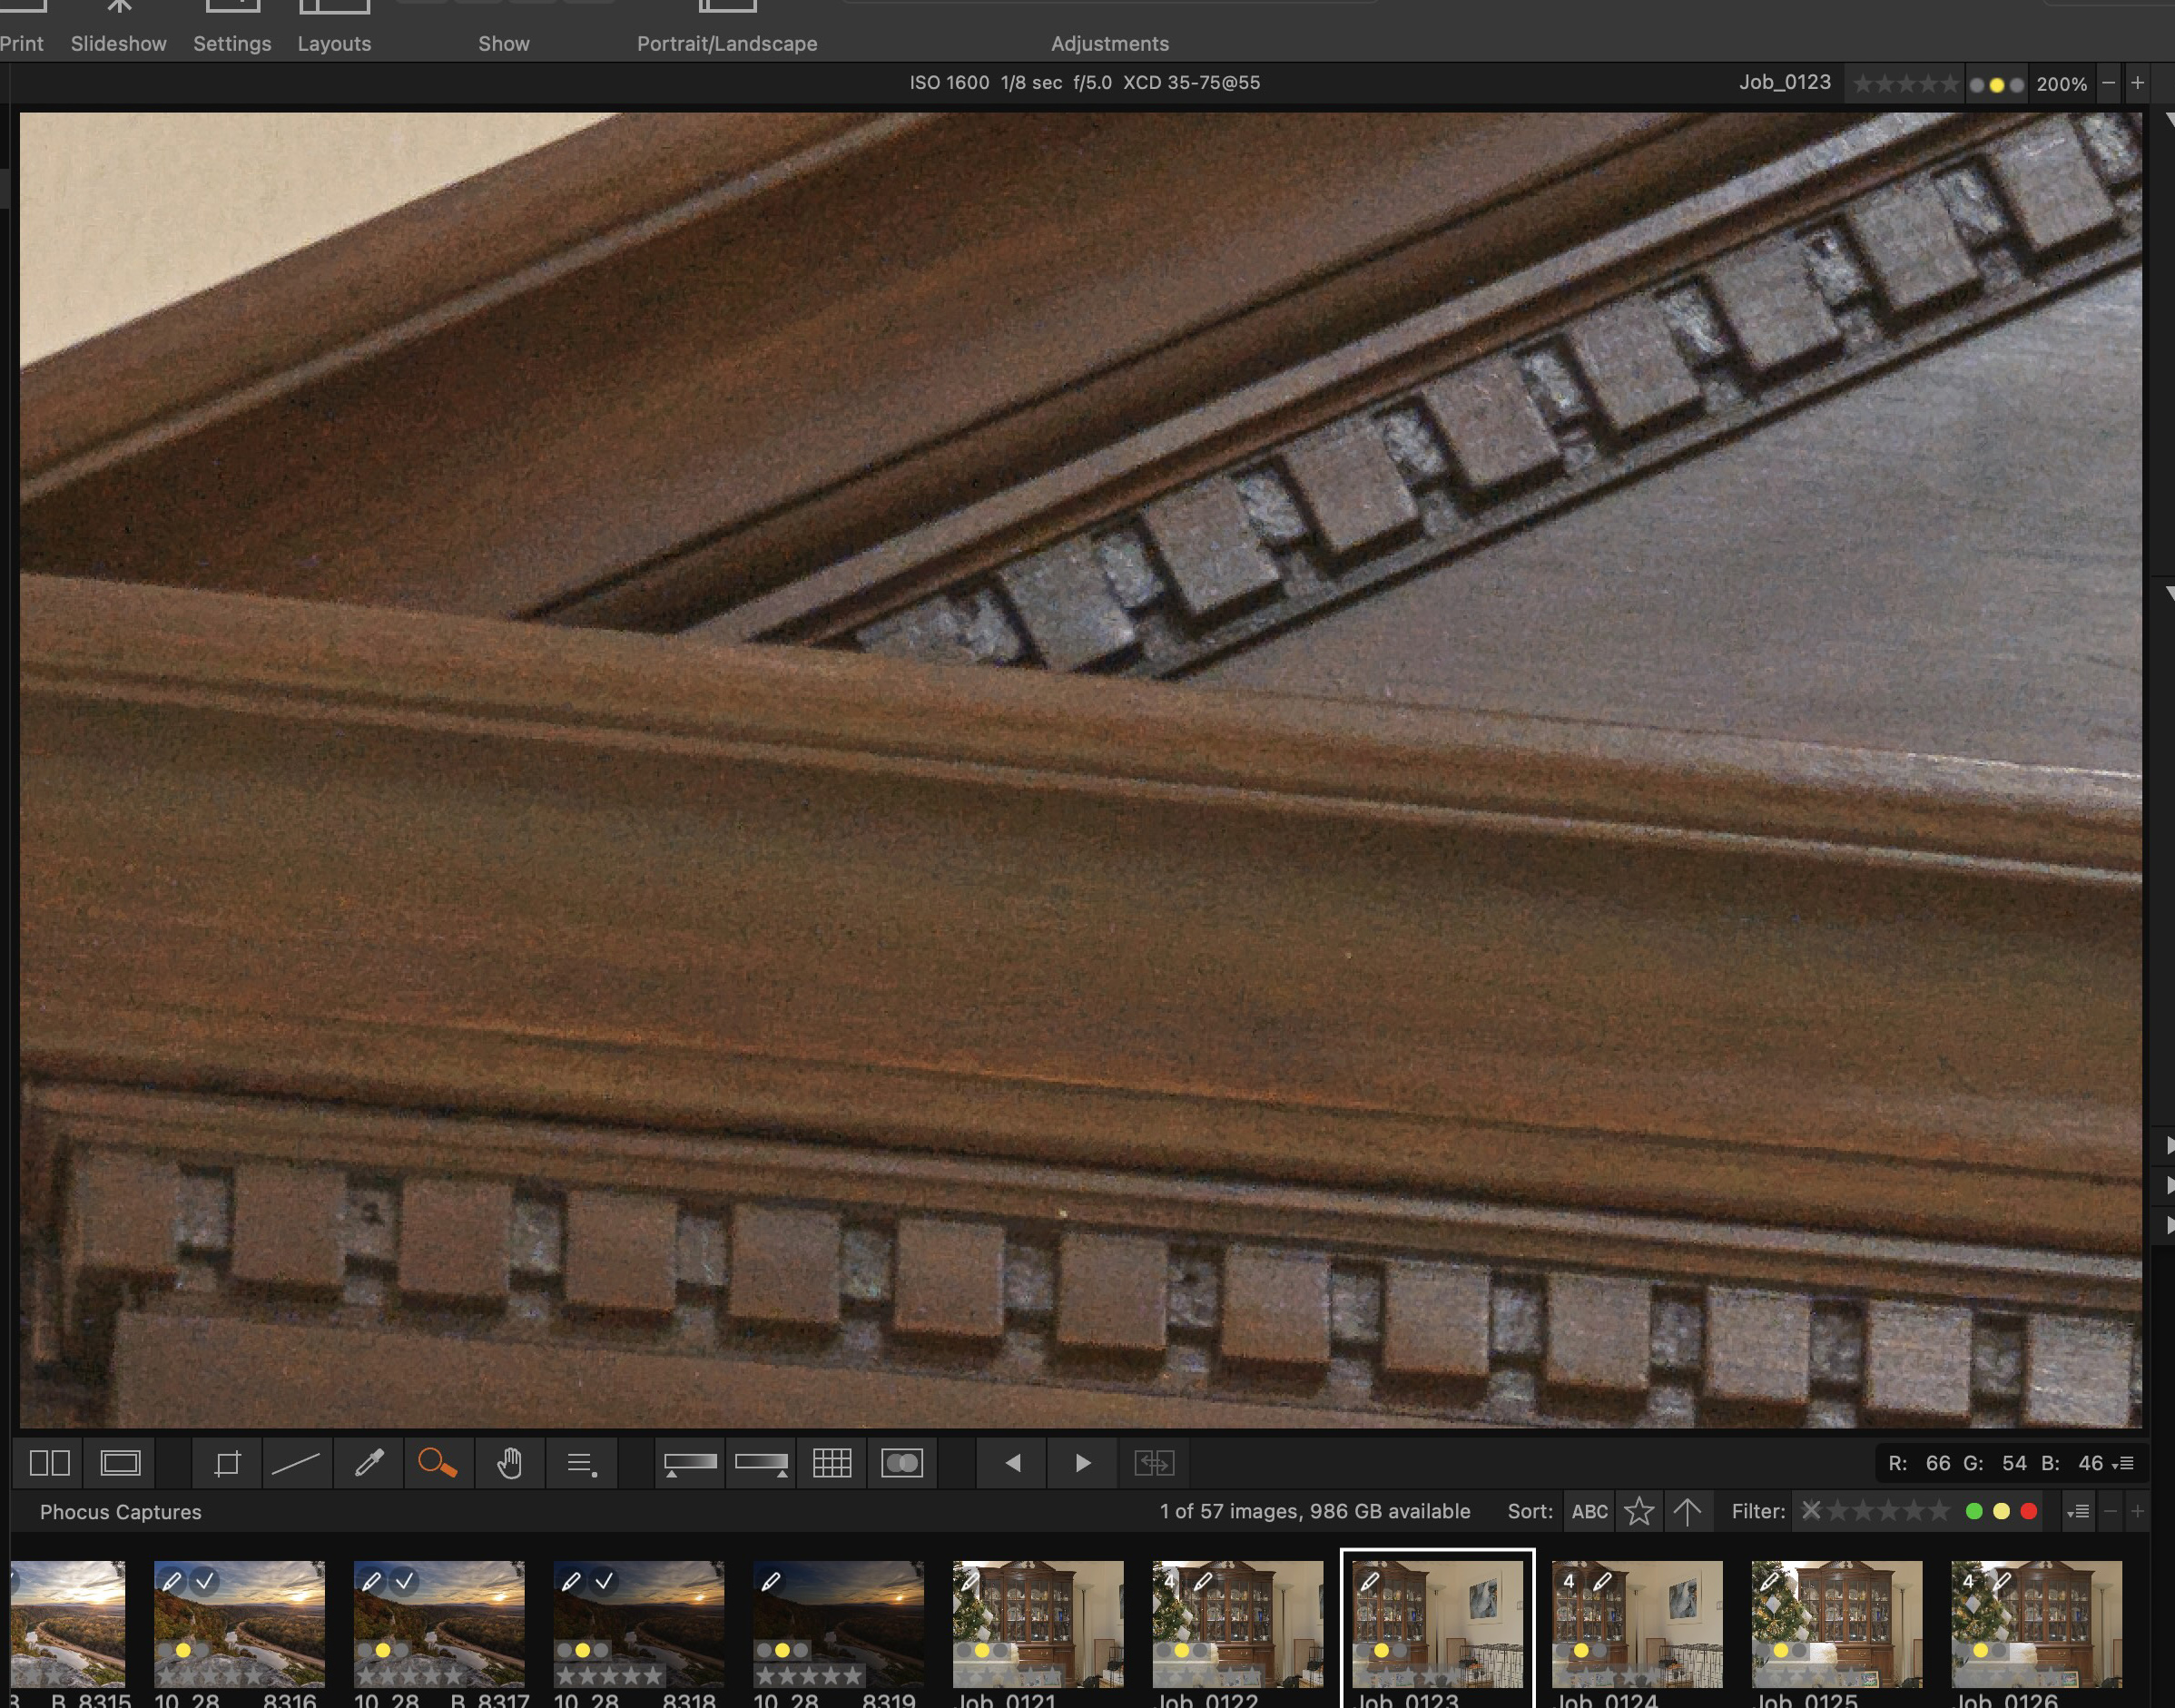
- X2D 4 Shot Multishot

This is an excellent example of what the 4 shot multi shot can deliver. The details in the wood are much improved. Also look at the black of the camera case on the right. The multi shot example is very clean of all noise. I do see a bit more noise in the background on the 4 shot image, again something that can be cleaned up later on, but I was surprised to see it. The details that came out of the black fabric of the camera bag were very impressive on the multi shot image.
-
- X2D Single shot

-

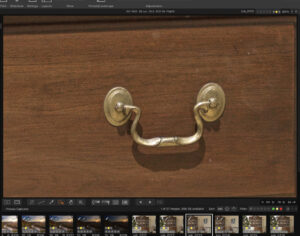
- X2D 4 shot multi shot
Simple side by side to show the amount of extra details that came from the multi shot both on the metal of the handle and wood grain. The gold metal handles and mounts take on an almost 3D look on the multi shot image. What stands out the most to me is how much better the wood grain is shown on the 4 shot multi shot images.
-

- Single shot
-

- 4 shot multi shot
These crops were taken from the upper left corner of the shot. You can clearly see that the wood grain is much better defined in the Multi shot image. The noise levels on the wood appear to be better on the Multi shot image also. The noise on the multi shot image looks more like grain and is more acceptable. Noise removal in subject matter like wood is tricky as you do not want to make the surface appear totally smooth. Wood always has grain and patterns.
-

- X2D Single Shot

-
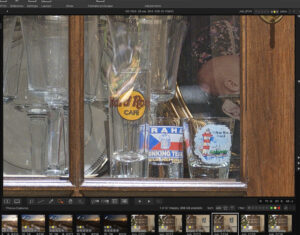
- X2D Multi Shot
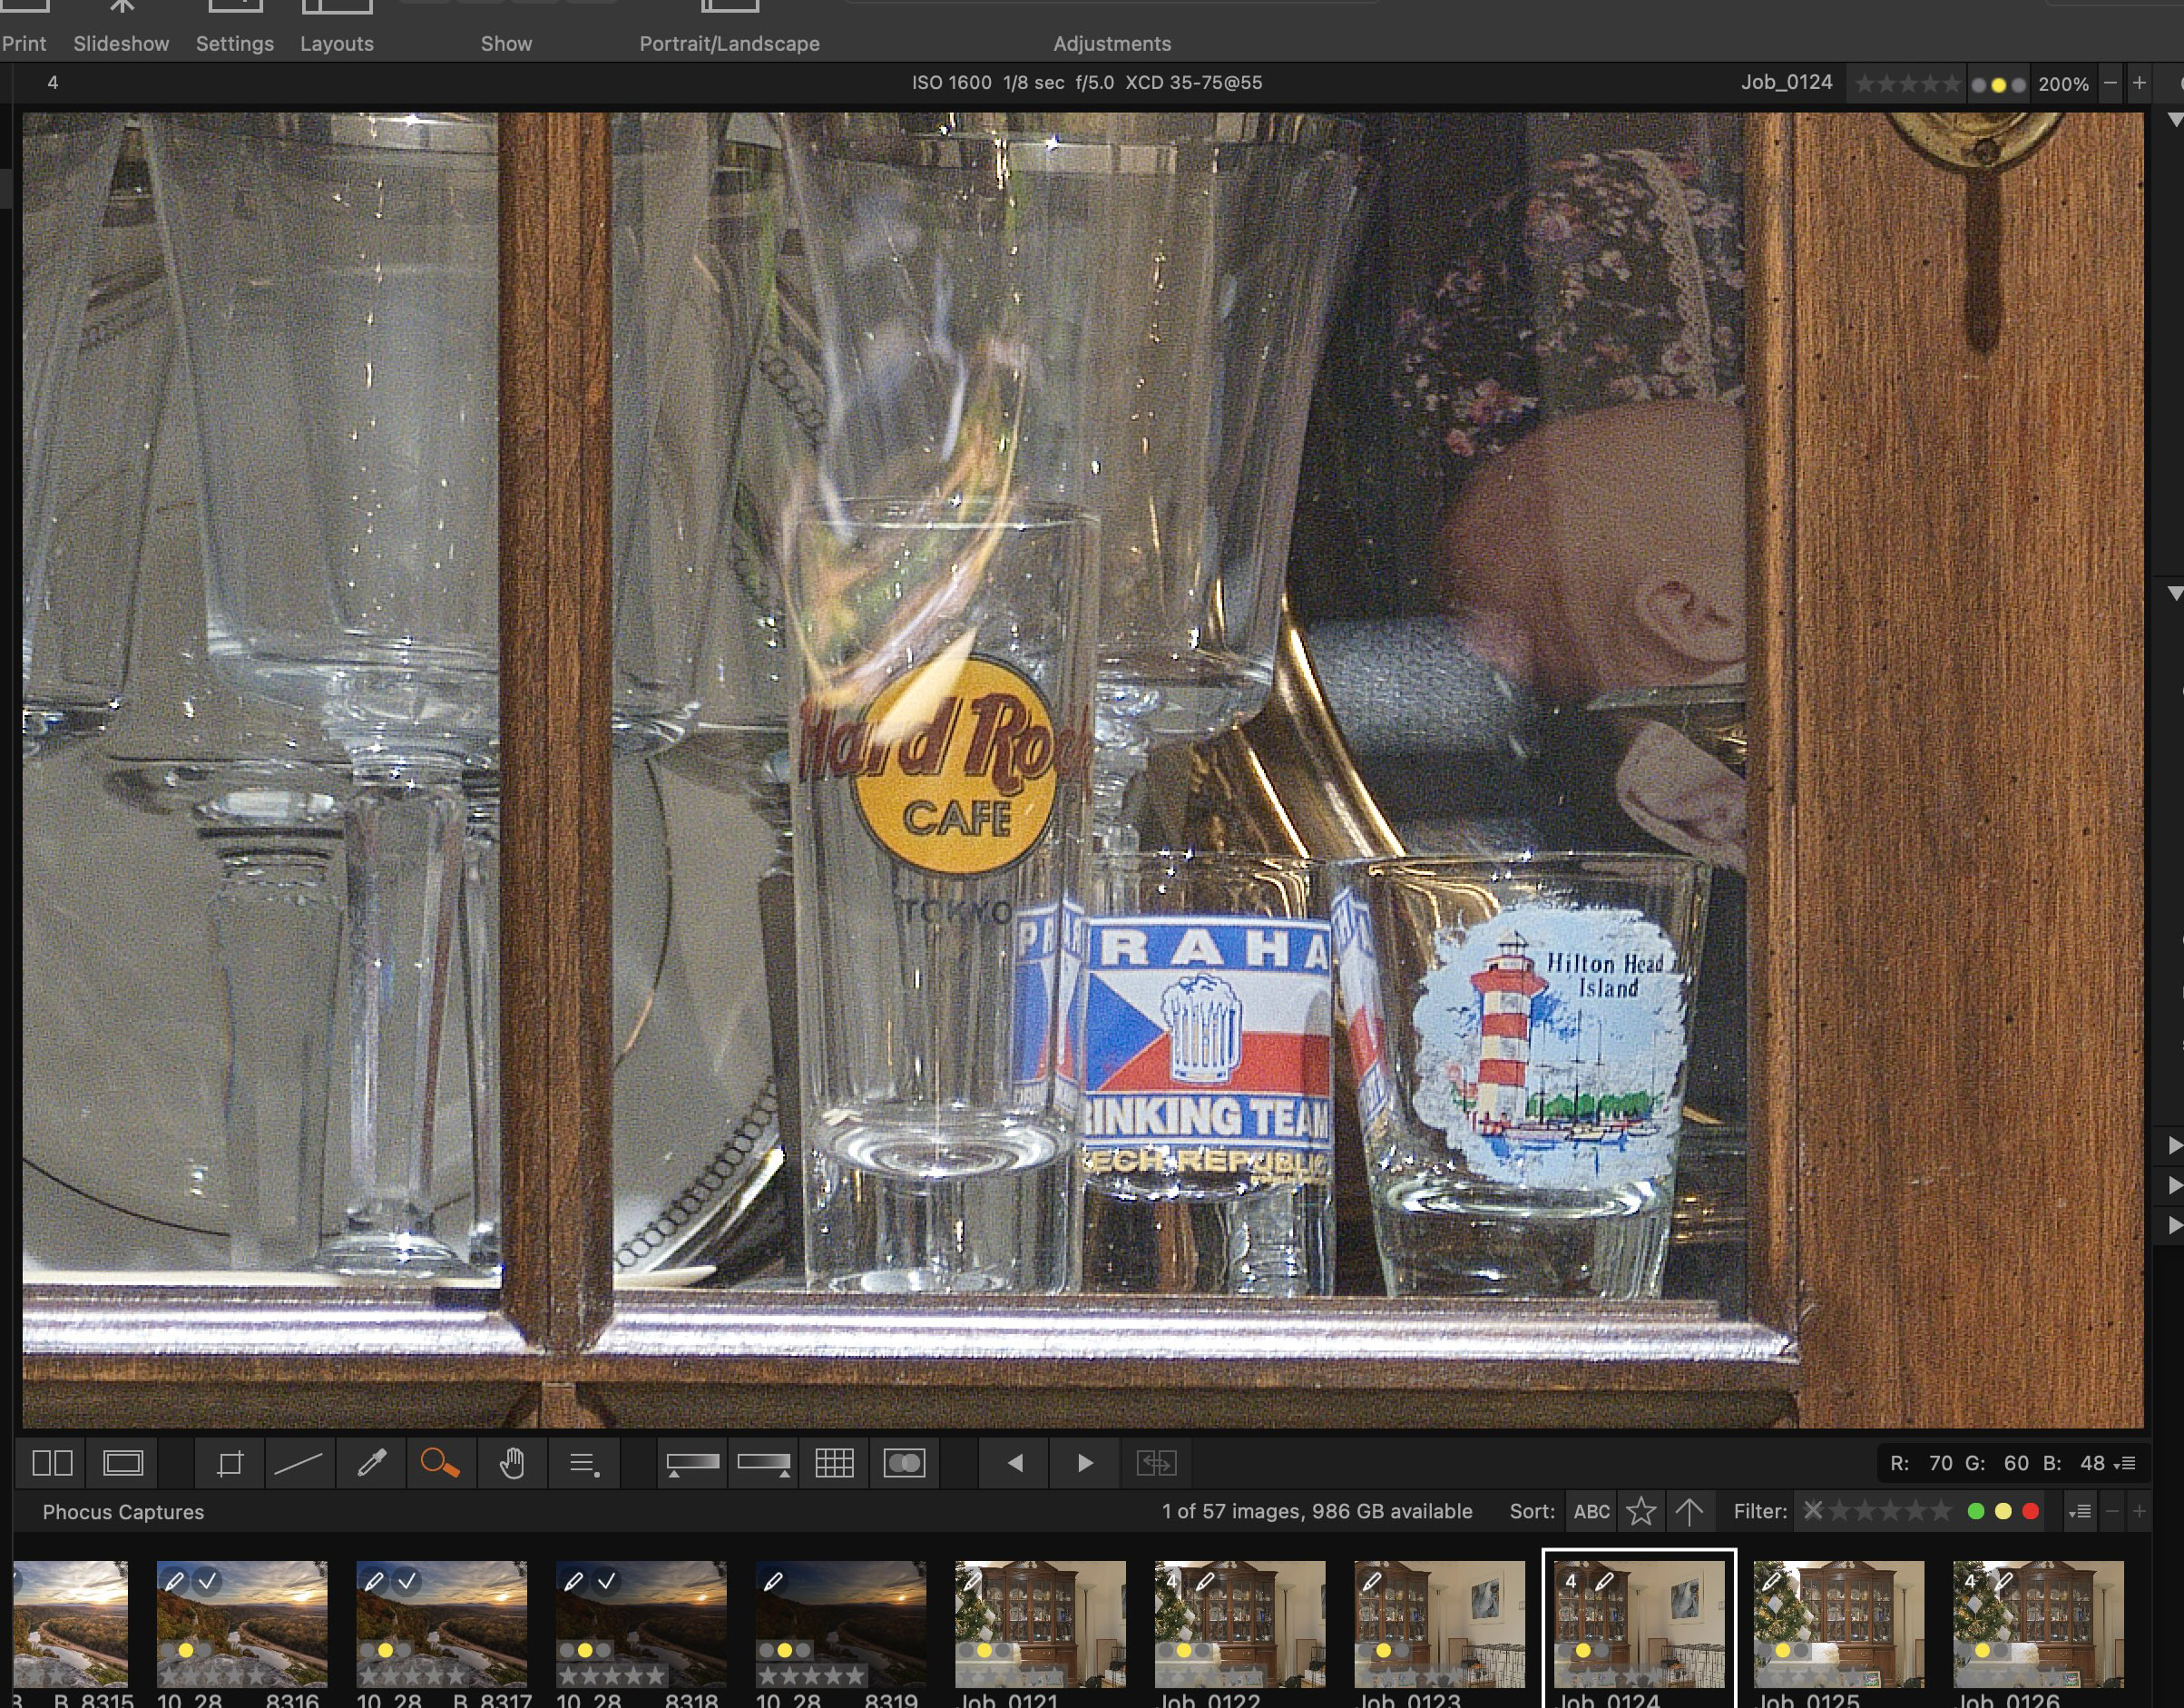
This part of the shot was taken through the glass of the cabinet. It’s interesting to look at all of the individual items and see how much better the definition is on each. On the glasses, look at the print as the edges of the individual letters is much better defined. Compare the large glasses in the back ground, the reflection sparkle has a sharper edge and appears brighter. You can also again see the difference in how the wood grain of the cabinet looks.
-
- X2D Single Shot

-

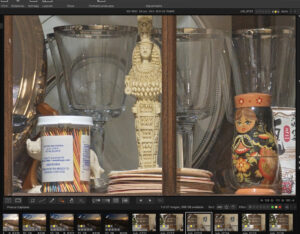
- X2D Multi Shot

This is another set of crops from the cabinet with the subject matter behind glass. Parts of the image to consider are the fine print on the toothpick bottle, the small statue in the background and the face on the wooden Russian tchotchke. Clarity and definition on all of these are superior on the multi shot image.
-

- Screenshot
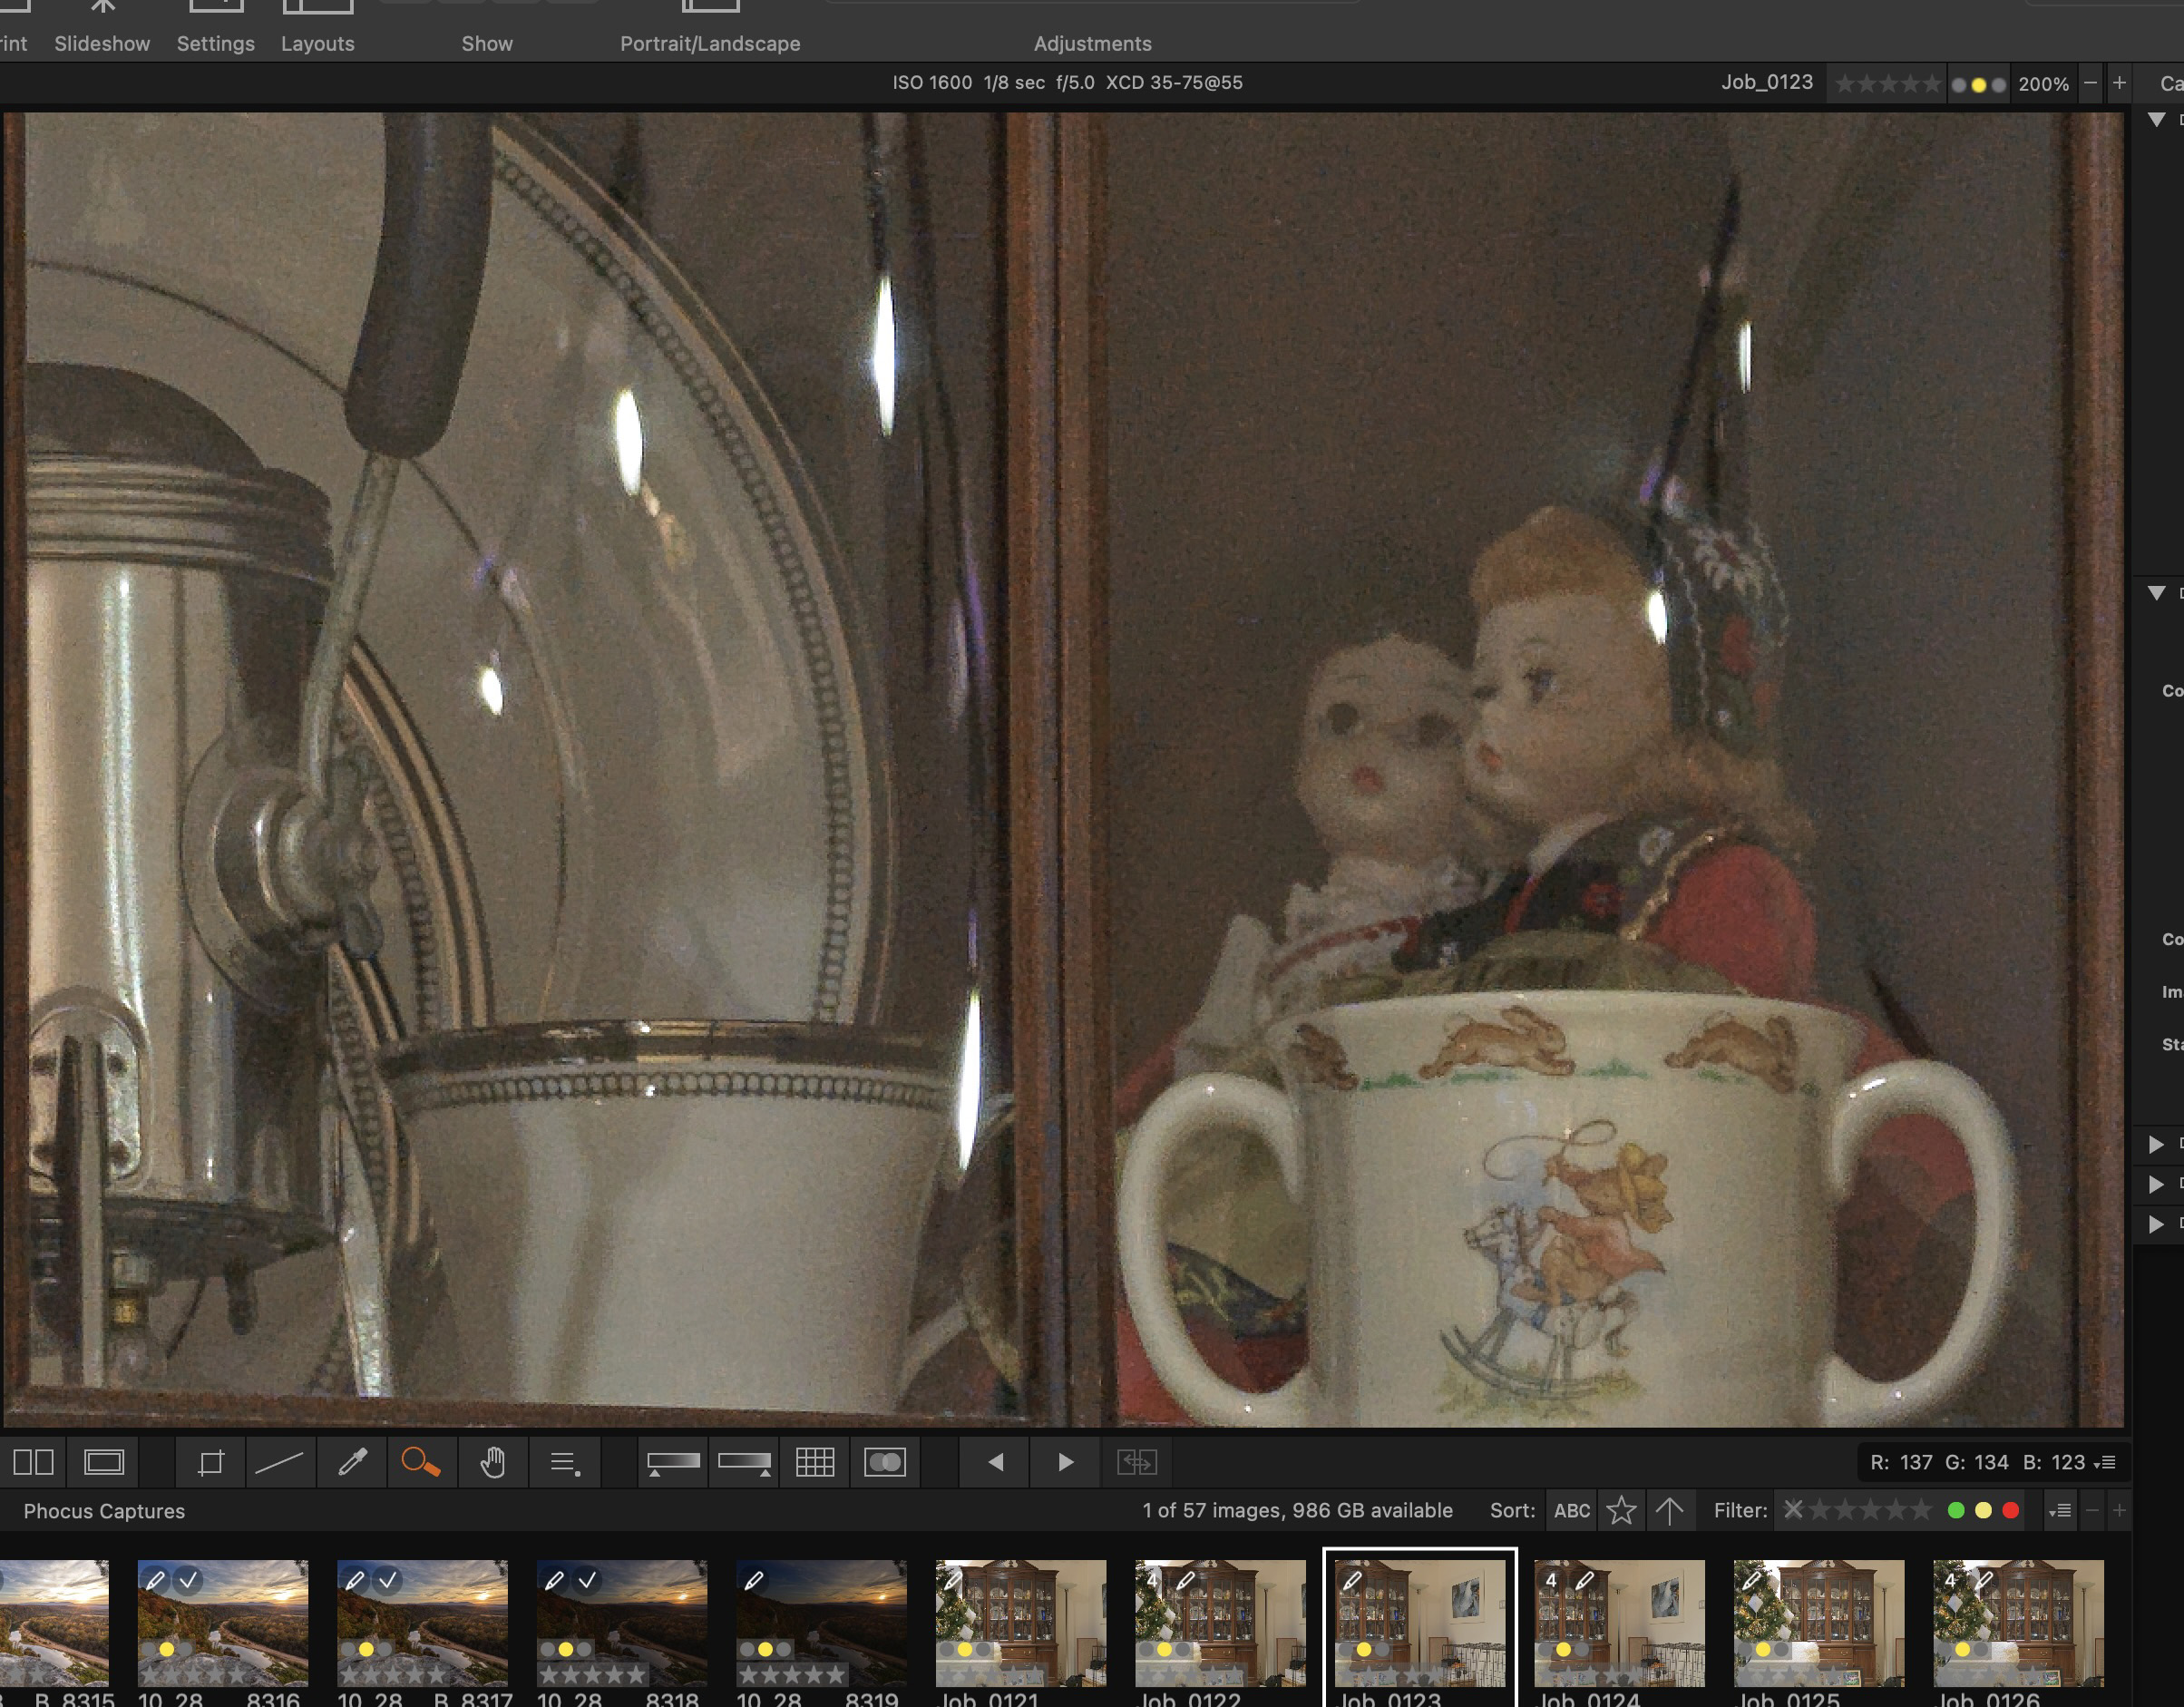
-
- Screenshot

I wanted to include these crops as they were from a darker part of the image. Remember these crops were taken at a 200% view. The lighting was the same. I feel that on the multi shot image besides the overall sharper look to the file, the image also seems to have a bit more life. It’s not as flat as the non multi shot image. Other things to look at are the fine details on the coffee cup around the lip, the faces of the dolls in the background. These images were taken at ISO 1600, on the X2D and I have not found the X2D to have the best higher ISO performance. There is clearly noise visible in both of the crops, but on the multi shot image the noise again takes on a more granular appearance, and it’s more acceptable to my eyes. Also look at the silver metal container on the left, especially the nut holding the handle on. Lastly, look at the face of the larger of the two dolls as a scratch on the face becomes much more visible on the multi shot image.
-

- X2D single Shot
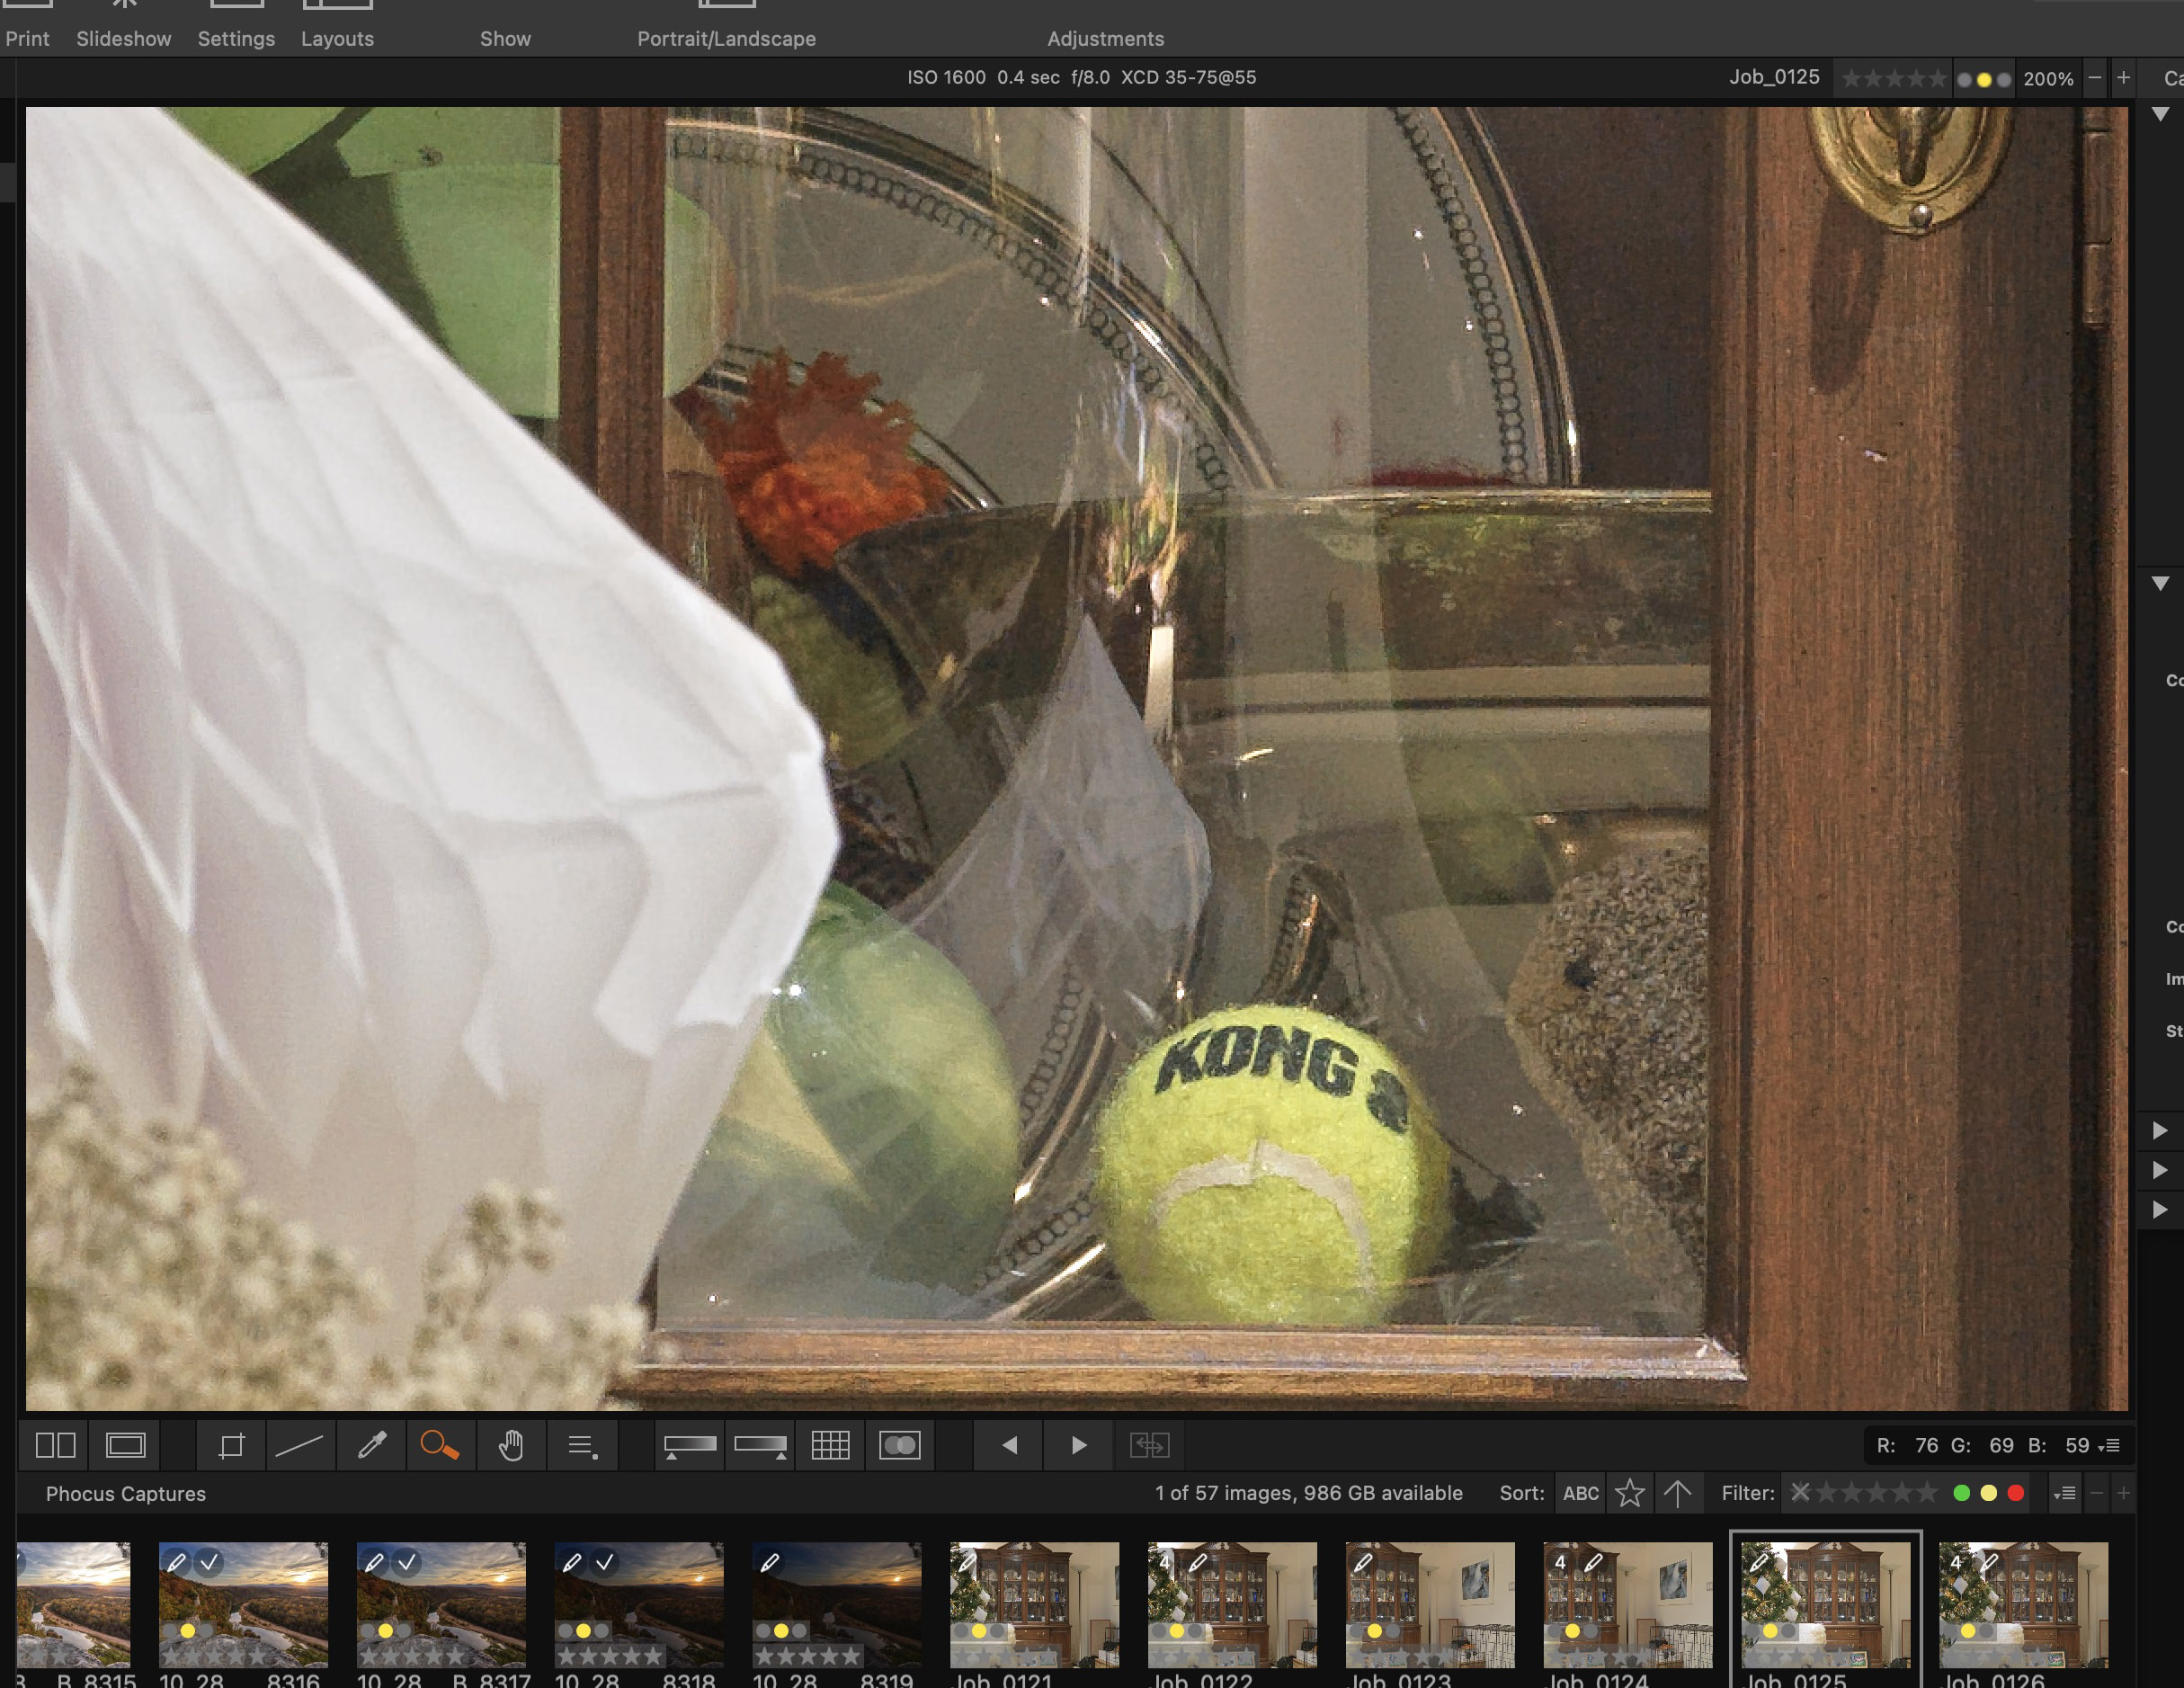
-
- X2D Multi Shot

The tennis ball says it all. Look at the color, and detail on it in the multi shot image. You can clearly see the individual fibers on the surface much better. Also the print on the ball has better definition. Other parts of the images to consider are the concrete bunny and the orange flower in the background. All have much better definition on the multi shot file.
Conclusions:
- The results from the X2D multi shot capture can be superior to a single shot taken of the same subject. The look and feel of the file is better, with superior definition.
- Noise levels can be similar at times, however the visible noise in the multi shot image takes on a more granular look, i.e. more natural in appearance.
- Finer details are much more visible in the multi shot image
- Sharpening the non multi shot file may bring some of the finer detail back, however I prefer to have them to start with and not need to rely on additional sharpening
- You must be tethered to Phocus desktop software, Phocus Mobile 2 does not currently support multi shot. This is a huge oversight by Hasselblad. Being forced to use a PC/or Laptop implies that they are only considering the use of multi shot in a studio. If conditions support it (no wind or moving subjects), there is no reason not to use multi shot in the field.
- I have yet to determine if multi shot cuts down on hot pixels, something I have seen quite a bit of with use of the X2D at higher ISO ranges.
- There is no way to save the output of a multi shot image as a 3FR, only .fff. Thus you cannot use the new noise reduction feature HNNR on multi shot images. Again a huge oversight by Hasselblad as based on my testing the multi shot images I captured would have benefited from HNNR at times.
- The multi shot workflow is tedious at best. You must be tethered and the image at first is imported to Phocus desktop at capture. It is now in your “Phocus Captures” folder on your computer. To use the image you must export it to your computer. In my case it’s exported to my documents folder as a Tiff. The problem with this is just that. It’s now a tiff, not a .fff and thus many if not all of the features of a raw file are gone. It’s just not compressed.
- IF YOU WISH TO WORK ON THE MULTI SHOT IMAGE AS A RAW FILE, you must work on it while it’s still a .fff in Phocus desktop. Phocus desktop is way out of date in comparison to any other raw conversion software such as Lightroom or Capture One.
- Lightroom CANNOT open a .fff from a multi shot capture. A .fff is really still a raw file, just a compressed version. Being forced to only work on the files as tiff is a huge disappointment.
Written by Paul Caldwell for Photos of Arkansas, 02/15/25
One comment
Leave a comment
 From the Blog
- Errors with High Resolution Mode, Panasonic LUMIX S1RII July 4, 2025
- 05/08/25 Capture One, big announcement, at least for portrait photographers May 8, 2025
- 05/03/25 Trump’s Tariffs finally start to hit Photography Equipment. May 3, 2025
- Firmware 4.1.0 for X2D? April 21, 2025
- 04/18/25–Looks like Trump’s Tariffs are much ado about NOTHING in regard to photography equipment. April 18, 2025
- 04/09/25 Arkansas Sets new standard for Scientific Ignorance with new law for Ivermectin April 4, 2025


Gp
Detailed analysis as always!