08/01/17 Working up a Western Panorama from a telephoto lens–Fuji 100-400
- At August 03, 2017
- By paul
- In Articles/Reviews, Fuji Gear
 2
2
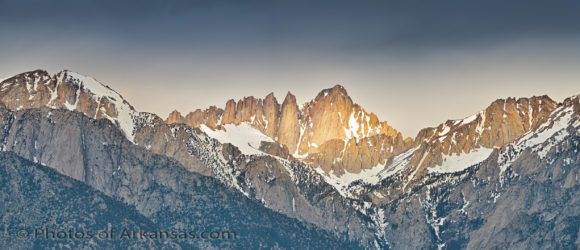
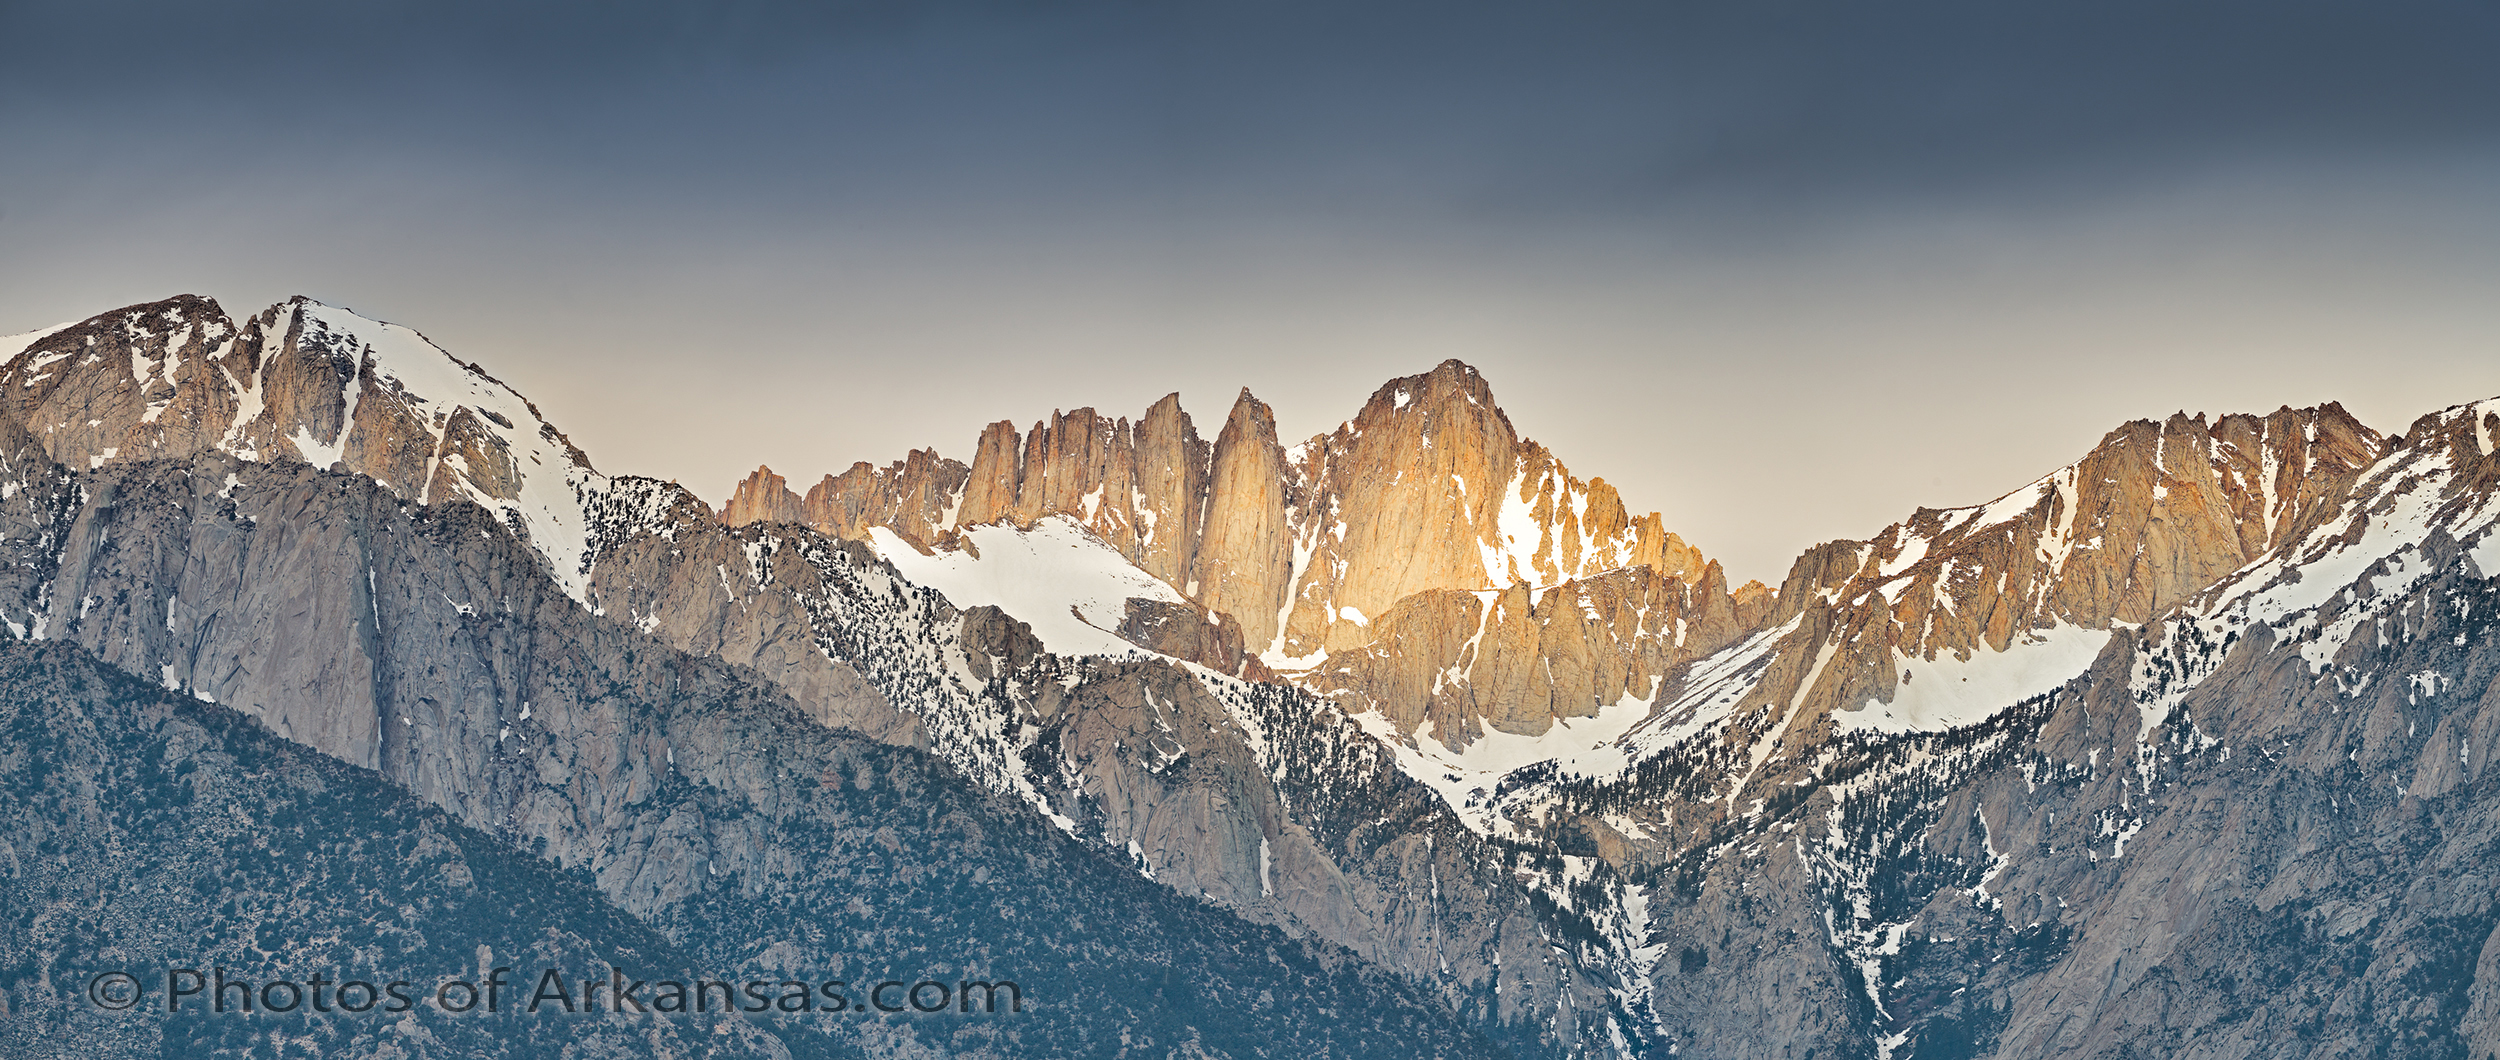
There are many times I like to take a moderate to medium length telephoto lens and stitch up a 3 to 5 part panorama. The telephoto lens works great on subject matter that I want to reach a bit, like in this example below of a mid morning shot of Mt. Whitney.
For this shot, I used a Fuji X-T2 and the Fuji 100-400 zoom lens. I wanted to be able to hand hold this panorama and not mess with a tripod and leveling base as this just adds more time. On this day, the light was hard to work with as there was partial cloud cover. The light was spotty and I knew that to get this shot, I would have to move fast. The Fuji 100-400 pared with the X-T2 allows me to work totally hand held since the lens offers image stabilization and the stabilization is excellent. Since I was using the telephoto, I wanted to maximize the amount of coverage, so I took the scene in 5 vertical shots. I did not bracket the exposure, but the X-T2 does make that process easy when needed. I stayed at the base ISO of 200 and in fact did under expose the foreground just a bit.
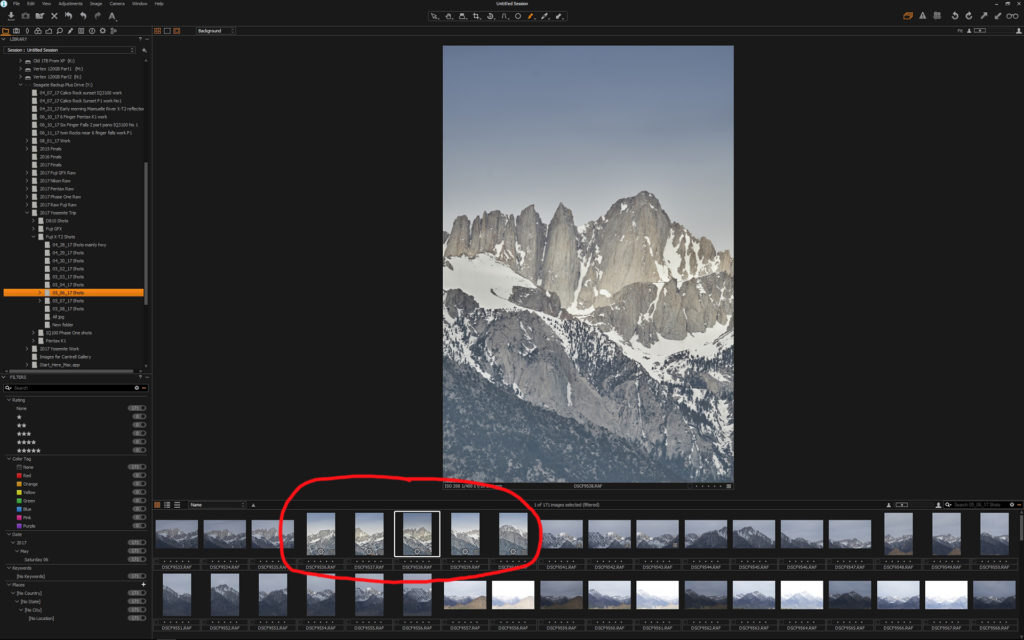
To start the process, I used Capture One to work up the raw files. With the latest version of Capture One, the raw conversion for Fuji x-trans raw is about the best I have seen. This is version 10.1.2 of Capture One. I use Capture One is session mode, which mean, I only import the images I want to work on and Capture One puts a sub folder with the raw files where all of the image info is kept. This is unlike Lightroom’s catalog approach.
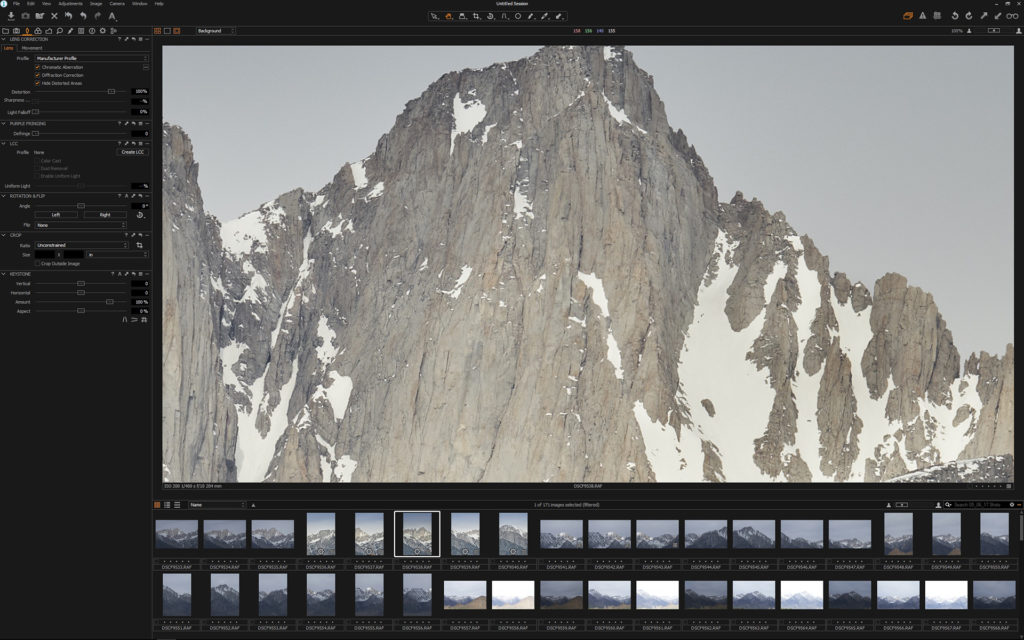
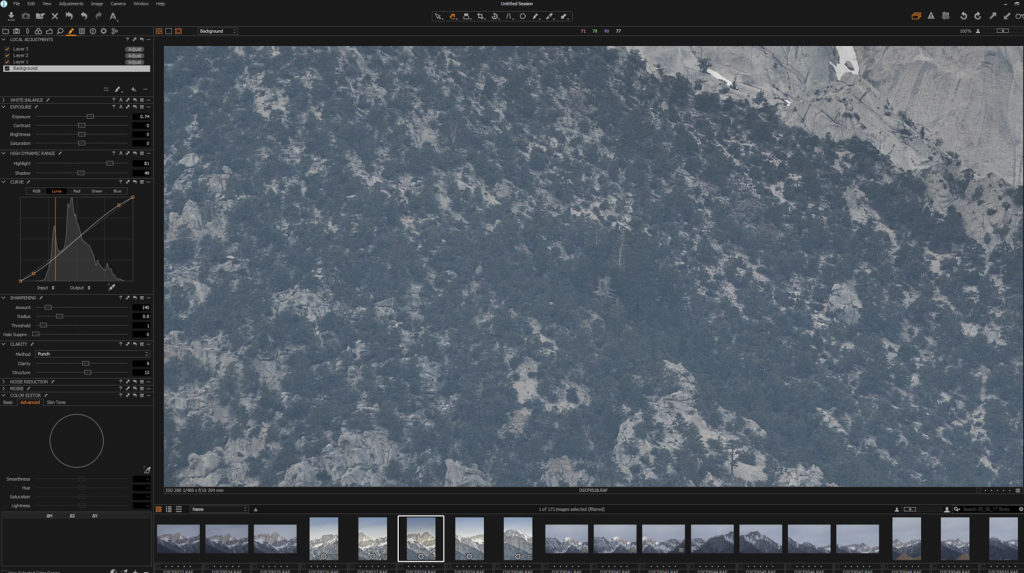
Yes it’s easier to just import these 5 raw files into LR, then do a pano merge. However Adobe’s “one and done” approach to raw conversion has been applied to the Fuji x-trans conversion. Adobe has done very little over the past 2 years to improve the rendering and many times I still will see what I call the plastic look to finer details. This is tragic as the X-T2 can actually pull quite a bit of detail from most images. I also feel that Lightroom/ACR conversion just don’t have the same clean noise free look that Capture One can obtain. Lightroom tends to over emphasize the edges of subject matter and it can’t pull the same fine clean details out of shadows that the latest version of Capture One can. In these two screen shots shown below you can see how well the rock on the face of Mt. Whitney has been rendered, but also look at the trees growing on the lower slopes as these are not only well rendered, but very clean and noise free.
You will need to pay close attention to the 5 separate files and make sure that you have attempted to keep the white balance the same between all 5, and also your exposure. This can hurt you later on in the panorama stitching as if one image or part of an image is darker than the rest, the resulting final image will show a demarcation line at the edge and ruin the stitch. This is most common in a pure blue sky. In fact if I am only working with pure blue for sky, I will not attempt this in Capture One as you can almost never get a clean sky with out the darkening towards the edge. This type of panorama will just work better if you stitch from raw files in Lightroom.
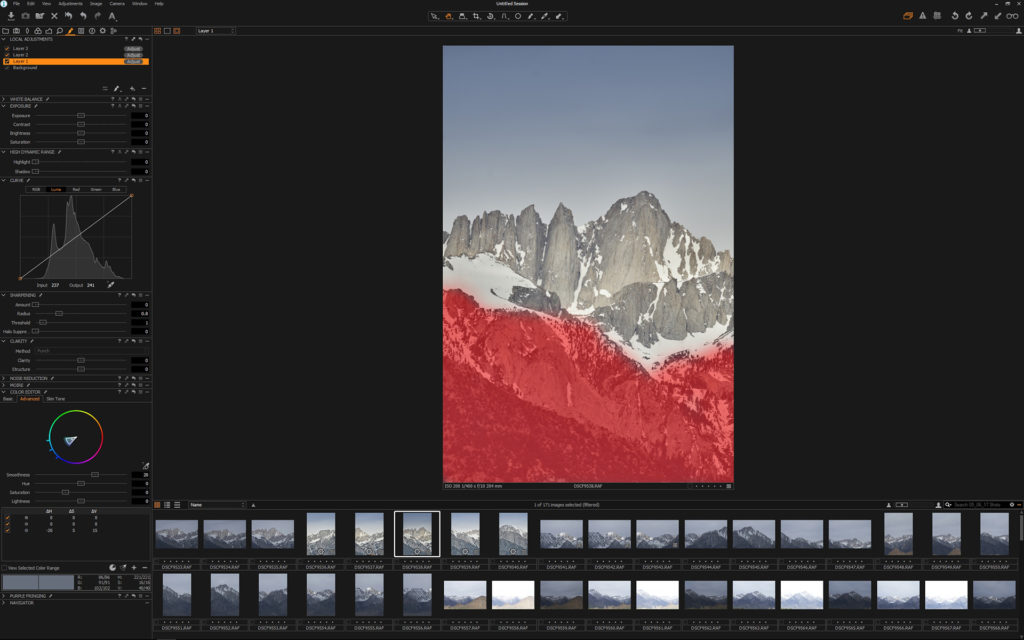
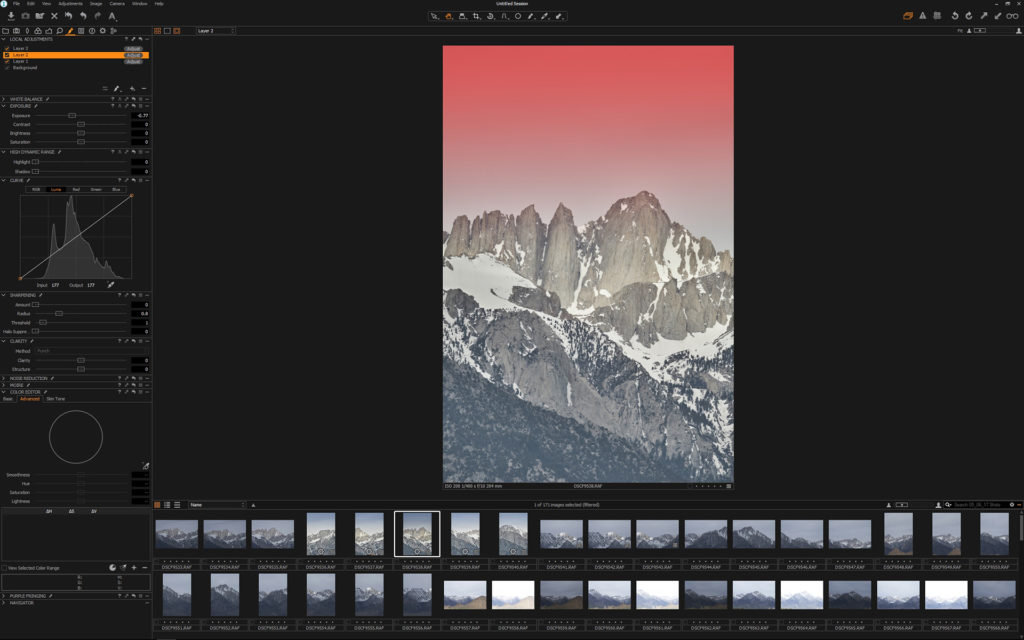
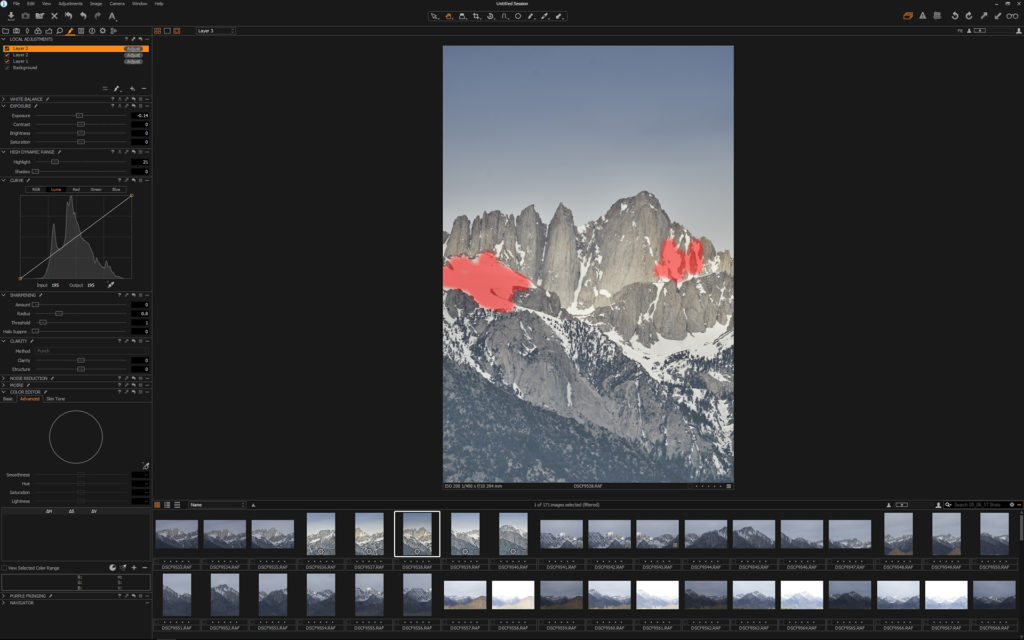
For these 5 images I did do some slight image adjustment work and I did this using layers within Capture One. If my images are all close in exposure I will often work on just one and then copy the layer to the rest of the images. You will have to make some small changes to the masks. In this case the edges of the mountains, vs the sky, but this process is very easy to do in Capture One.
In the first layer I have worked on the foreground, pushing up the shadows, and attempting to pull up a bit more of details by adding some structure.
In the 2nd layer I worked the Gradient Mask to pull down the sky and worked a bit on the white balance of just the sky. Capture One has a superior White Balance tool to Lightroom as you can still use an eye dropper to sample just the white balance in the areas under the mask.
Lastly I pulled down the areas of the brightest snow on the mountain as I knew as I worked up the panorama in Lightroom it would attempt to blow out the highlights, which is a huge issue with Lightroom panoramas that has existed from day one (remember Adobe has a “one and done” approach to everything).
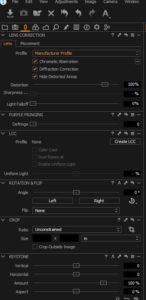
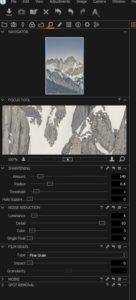
With the 5 images where I wanted them exposure and white balance wise, I then made universal changes to sharpening. Capture One now has a diffraction correction in it’s sharpening tool set and I always pick that. It’s under the Lens icon in the tools. You also need to go to the main sharpening tool (which looks like a magnifying glass) and change the default noise reduction. Move the Luminace and color noise all the way to the left and slide the details slider to the right to around 85 to 90 percent. This will make a huge difference on Fuji images. Note, if you are working in a ISO at 800 or higher, you will need to be less aggressive with this as Fuji gets pretty noisy past ISO 800 in most cases.
Examples of both of these:
- Diffraction settings
- Default sharpening settings
Now all you need to do is export the images. For this process you have two options.
- You can select to edit the images directly in Adobe CC Photoshop. With this method, C1 will export the image to CC and 16 bit tifs and each image will open independently in C1. You will need to save each image then use the Automate function to reopen the images into a panorama.
- You can export the images as 16 bit tifs and then import them to Lightroom. This what I do the most often. Lightroom has a good panorama merge tool that offers “boundary warp” which makes single row stitching very straight forward.
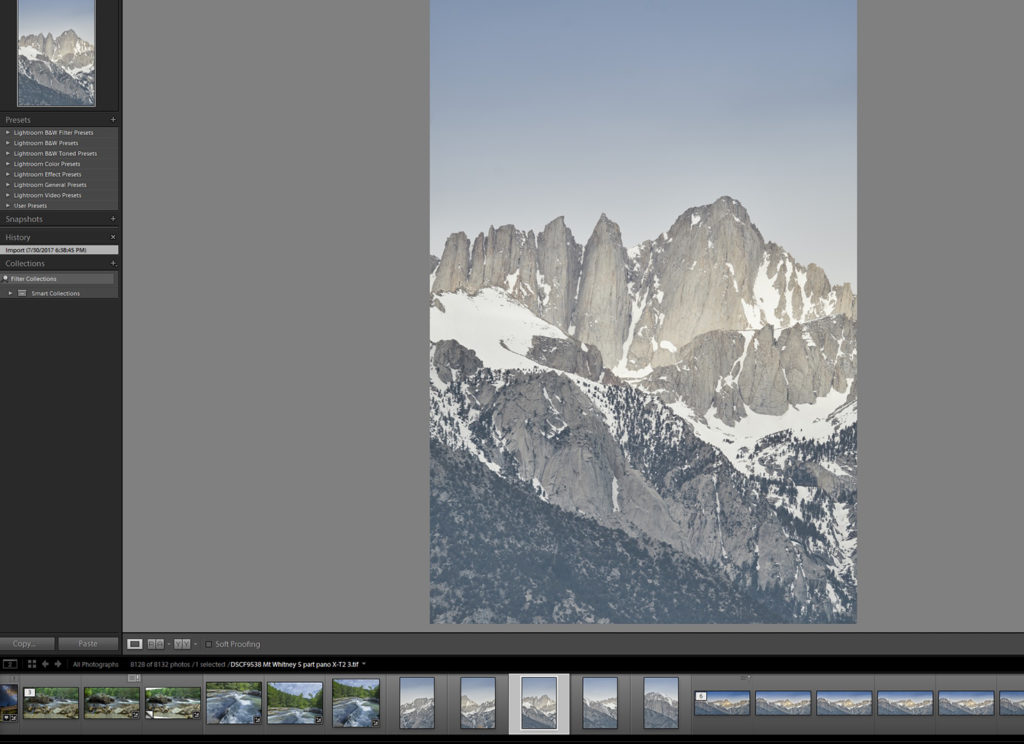
Once in Lightroom, the tiffs will be ready to made into a panorama using the Lightroom panorama merge tool.
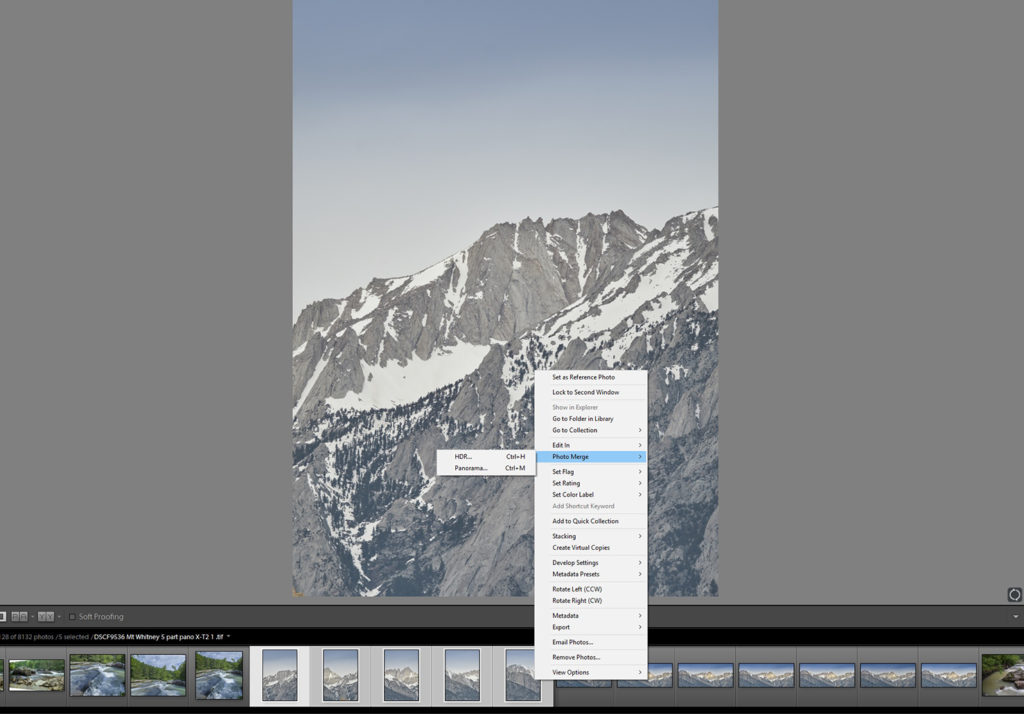
Now select the 5 images and then right click to get the menu drop down box and select photo merge, and in the sub drop down pick panorama.
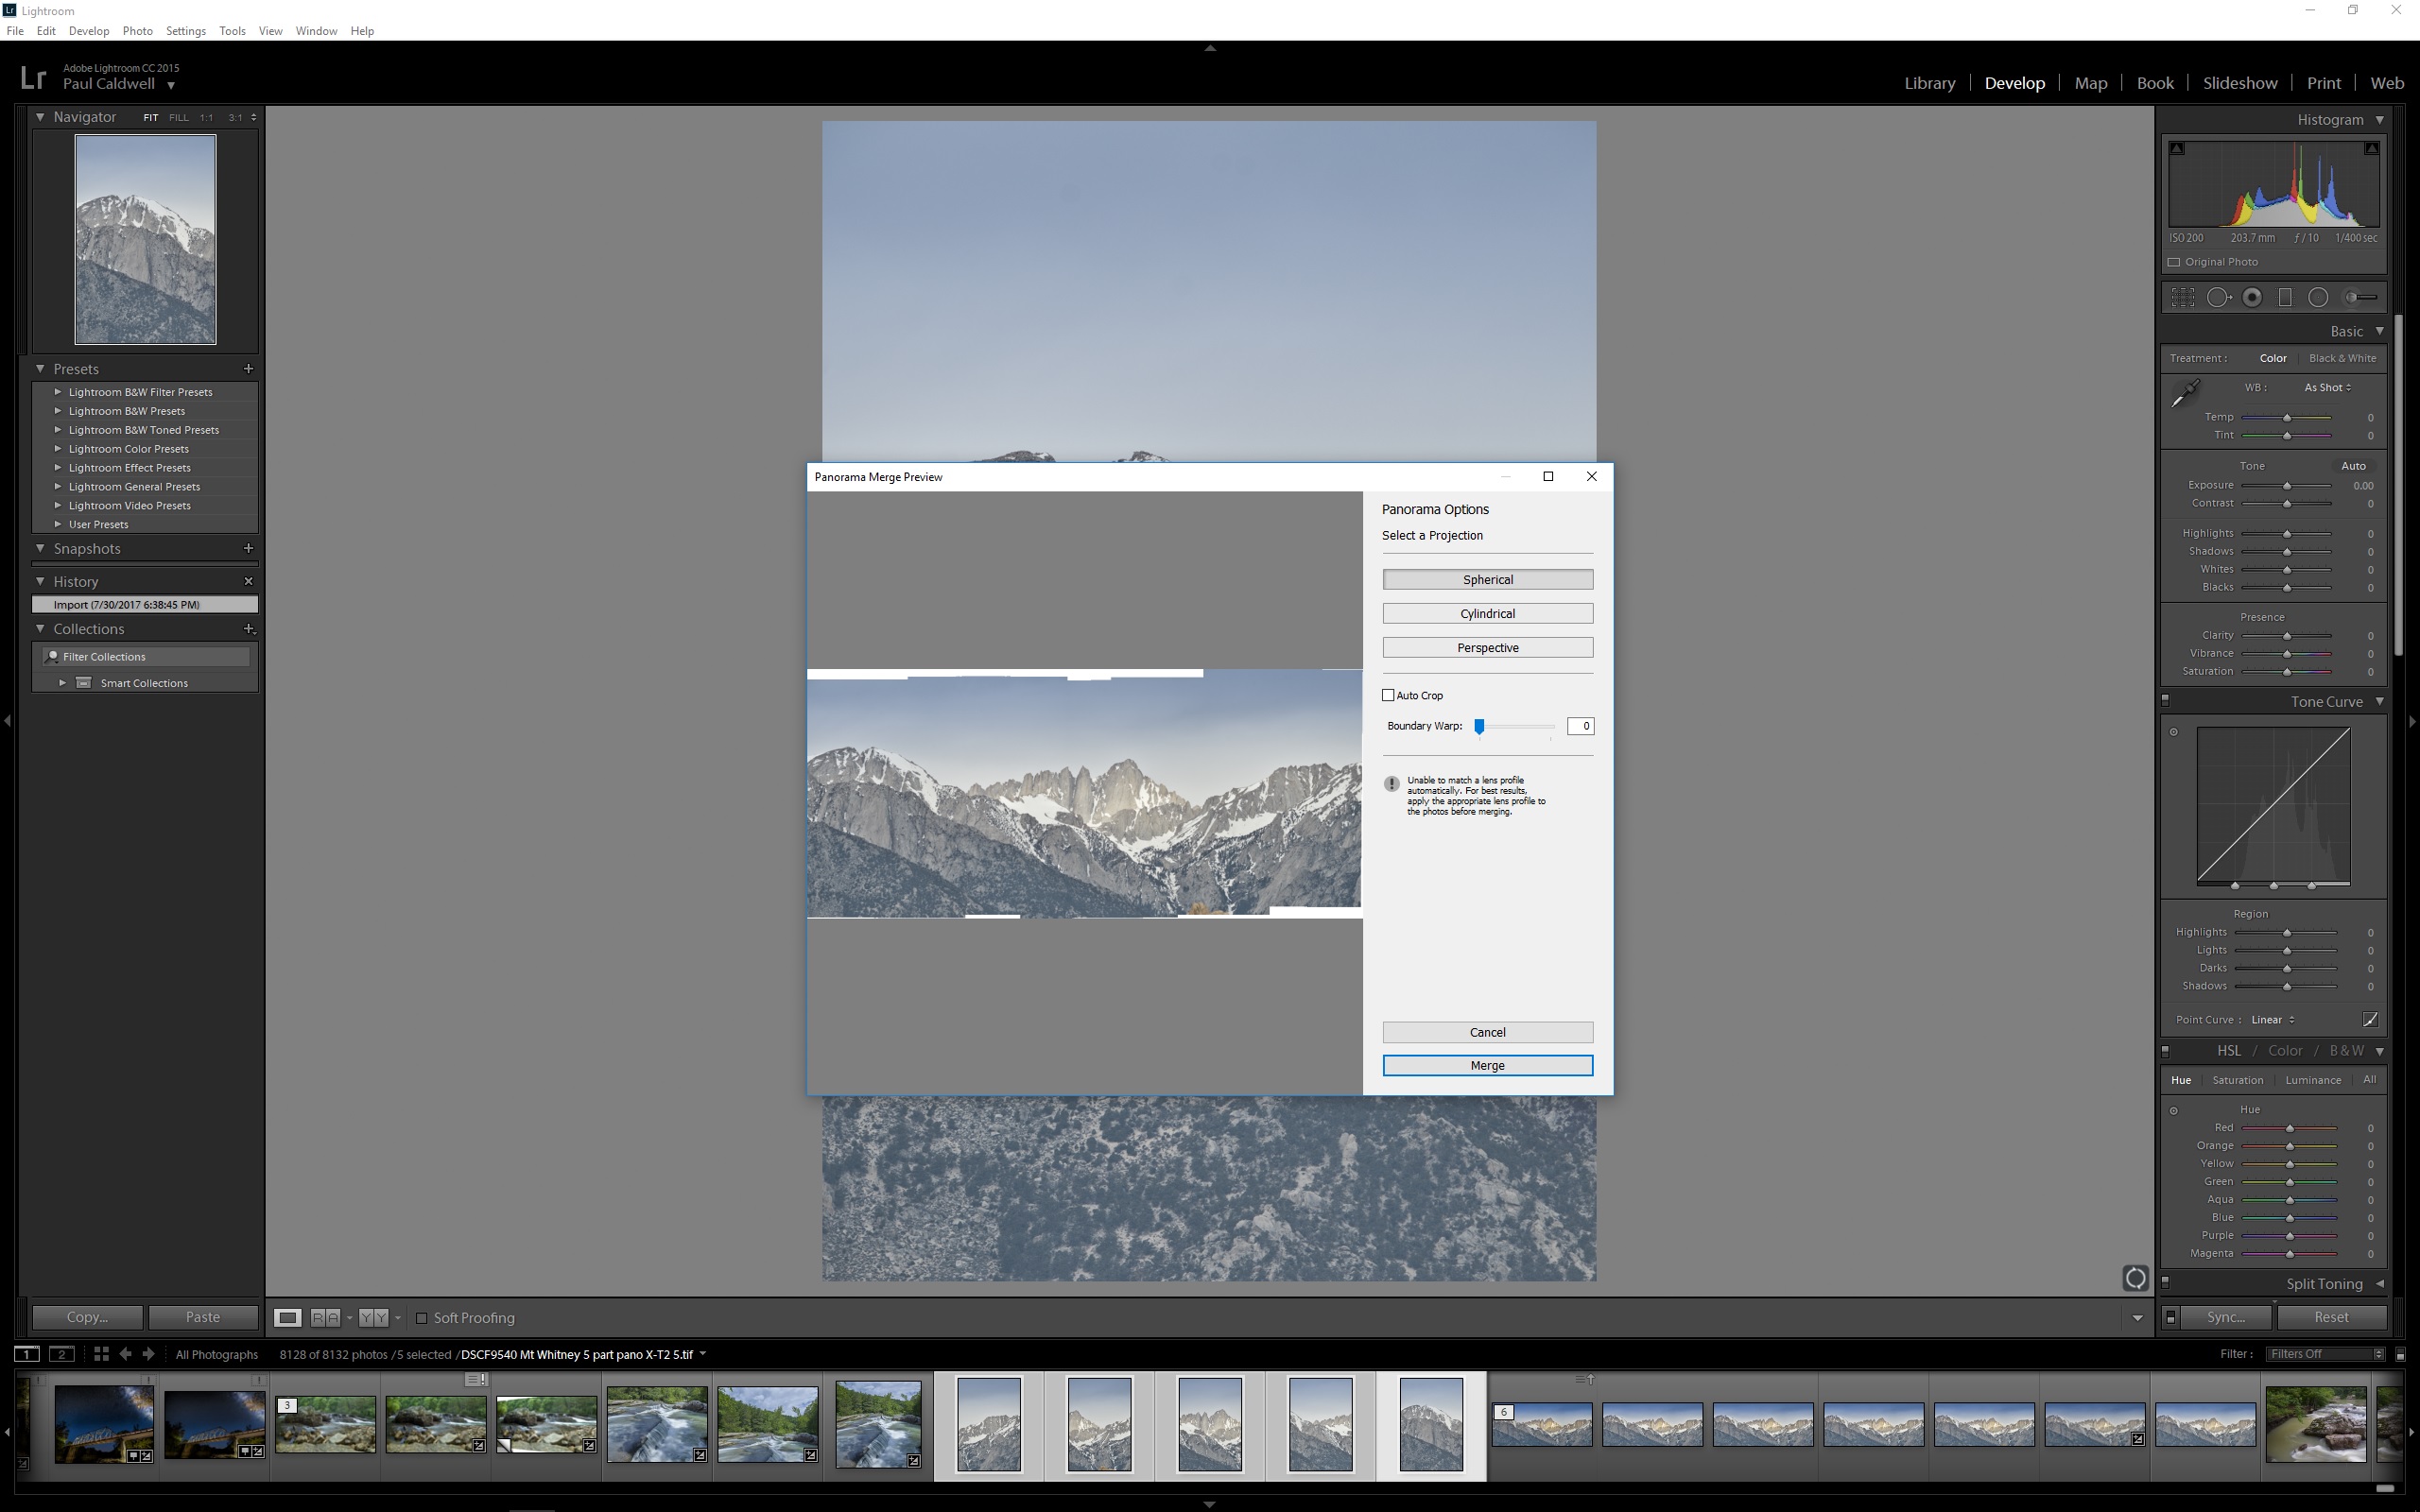
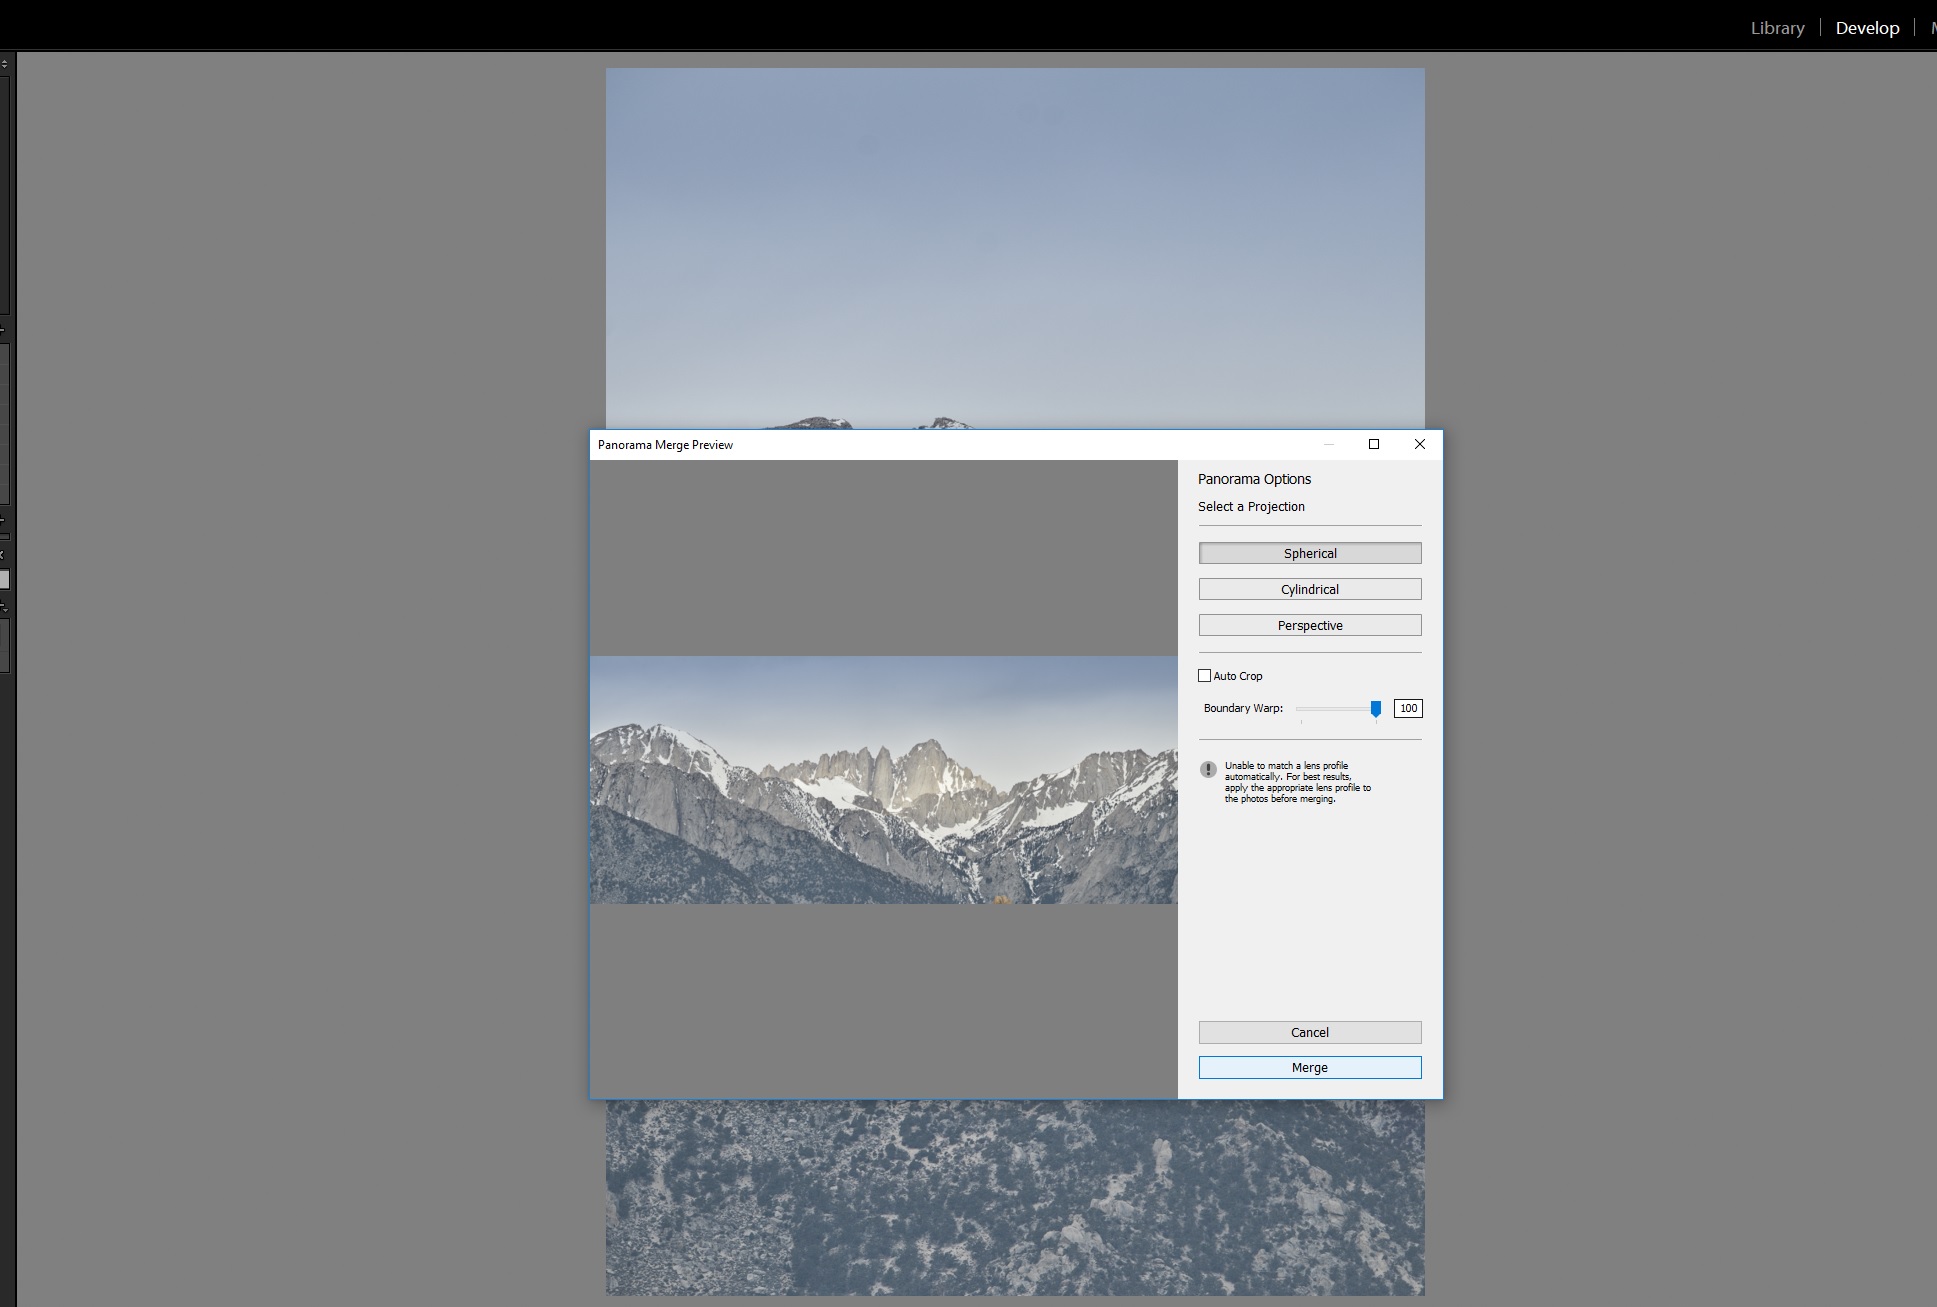
Once this is done Lightroom will bring up the panorama dialog box and I tend to just pick whatever Lightroom defaults to which for a hand held panorama most times will be spherical or cylindrical. Perspective will only work with the correct nodal point and the camera being level neither of which I was able to do in this case. Setting up a telephoto lens to it’s respective nodal point is not easy and being level meant using a tripod. As shown in the images below, Lightroom will pull the images together as best as it can. As long as the panorama is only a single row stitch, Lightroom will odds are do a good job, in fact I find it does a much better job at balancing out the exposures of the separate frames. Much better than the stand alone tools like Ptgui or Kolor Autopano. I only use this as a last resort if Lightroom or Adobe CC Photoshop cannot get a solution that works. Once you have the image put together by Lightroom, make sure to select boundary warp. This is the single great asset from Lightroom that really no other panorama stitching program offers (which has always surprised me).
- Lightroom stitching attempt before boudary warp
- Lightroom final stitching with boundary warp
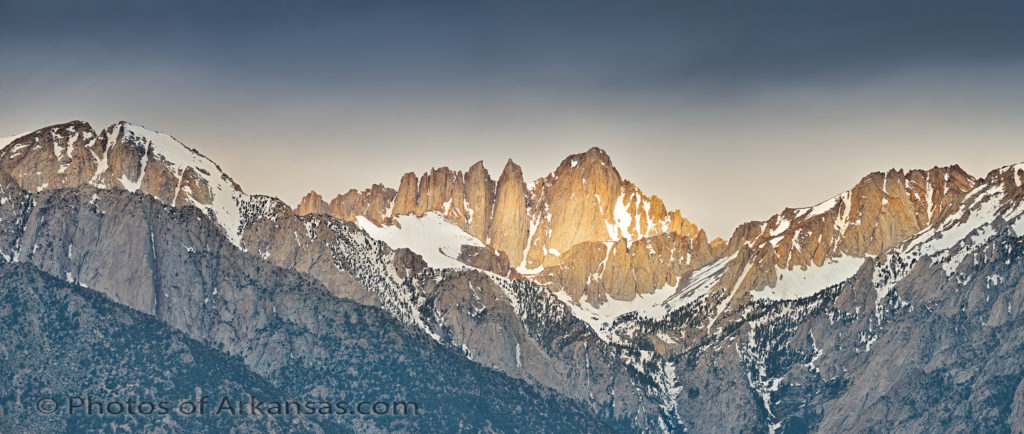
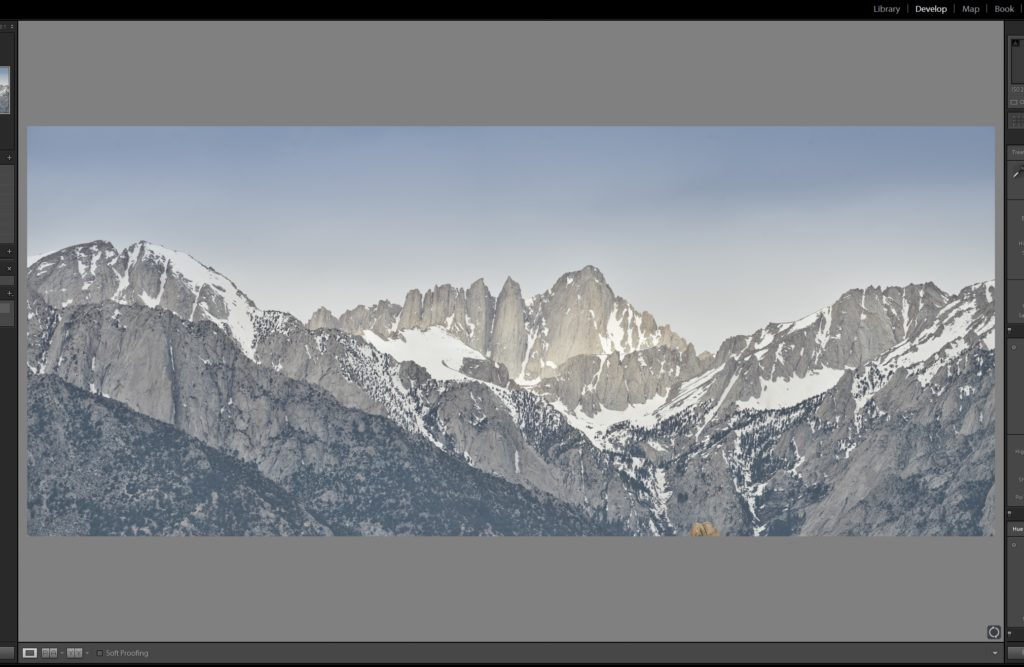
Once you “merge” you will end up with a very nice 5 part panorama. In this case I have gained a huge amount of resolution over just taking this scene with one 24 megapixel frame from the X-T2. Instead of 24 megapixels, my overall resolution is approaching 100 megapixels. This allows me to have quite a bit more leeway with the final image, both from a printing and cropping standpoint.
To get the final image, I did the following:
- I did a bit of image refinement with the image in Lightroom
- Then I selected the “edit in” option in Lightroom to take the image to Adobe Photoshop
- While Photoshop, I worked on the image with Topaz Clarity to help pull out the light on Mt. Whitney. my goal was to make the mountain stand out. I also did some curves corrections on the rock.
- Saving the image in Photoshop also places the image back in Lightroom where I then did a final White balance on the sky to get the color I wanted, less blue.
- My final step was to pull back the snow which had started to blow out and do the final sharpening on the image with Picurre Plus. Do this I had to go back to Photoshop.
This is great way to extend the resolution of any camera. There are times I can setup a large medium format camera and take the same image in one frame, but many times this not possible as I do not want to be carrying a huge Medium Format camera around all day. My age and older body just don’t allow for that anymore. Instead I often will prefer to take along my Fuji X-T2 with 5 lenses, 16mm 1.4, 23mm 1.4, 59mm 1.2, 10-24mm F4 and 100-400mm F4.5-5.6. All of these lenses render an excellent image with a lot of details. The 100-400 is especially sharp throughout the zoom range and is a joy to work with in the field.
Written for photosofarkansas, by Paul Caldwell 08/02/17.

08/02/17 Learning how to make a 5 part stitch panorama from a Fuji X-T2
[…] You can find the full article here: Creating a 5 part panorama with a Fuji X-T2 Camera. […]
Jesse Kershaw
Thanks for the tutorial on the panoramic with the XT2. I have one but so far and prob for a while Ill only have the kit lens only but it seems to be pretty good. Mountian pics like this are something I really appreciate and yeah just wanna send you a job well done. Cool to see the potential.