09/23/14 Using Stacking for better Night Photography results
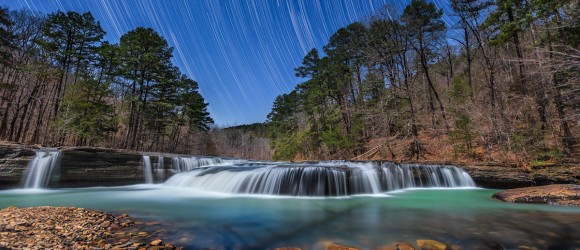
I have found that working at night in Arkansas can bring out some amazing photographic opportunities, like the photograph below.
Since early in 2008 I have been fascinated by one facet of night photography—the creation of star trail photographs. Capturing the motion of the earth over a period of time and blending the light of the distant stars into different lines of varying brightness is my mission. My first attempts consisted of just leaving the shutter open over a period of time and varying it from 30 minutes to 1 and half hours. My initial thoughts were that the best conditions for shooting the stars would be nights with little or no moonlight. The results in my location (Arkansas), were a bit disappointing since the ambient light from nearby towns and even a single home would give the sky a yellow/orange color. If I tried to change this yellow sky color in post processing it also influenced the color of the star trails making them red/yellow.
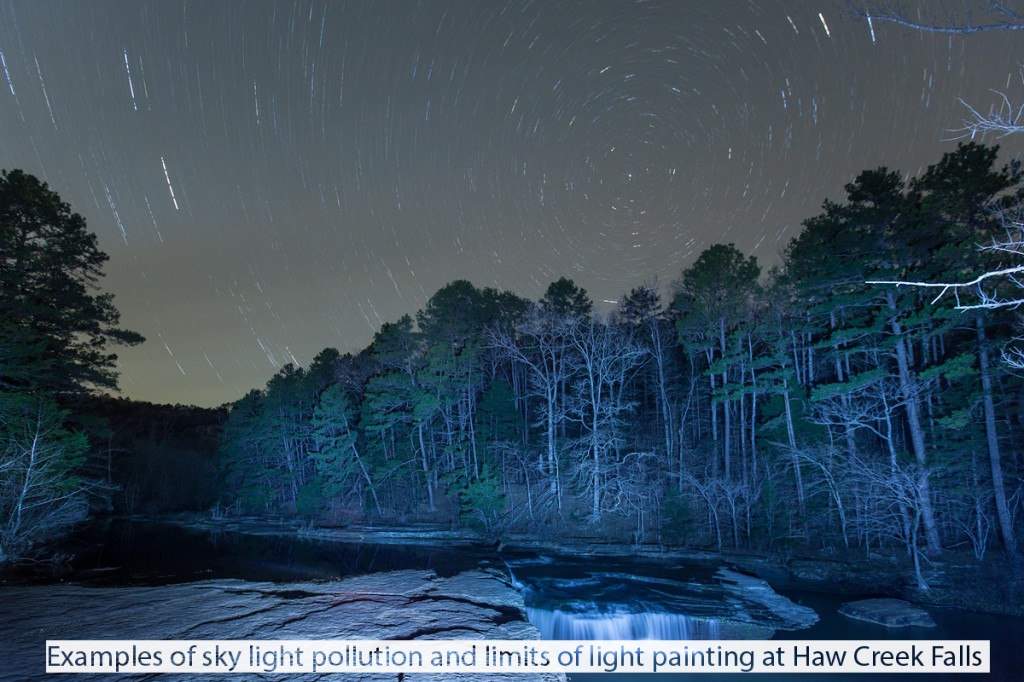
In this image, you can see an example of how light pollution can totally turn the night sky yellow/amber and the non-sky parts of the image have no details. Attempting to pull up the foreground produces a noisy and non-detailed image.
Things changed for me quite by accident as one night I was out when there was a half moon. The results from this short 20 minute exposure with moonlight moved things in a totally different direction for me. Instead of the yellow/orange sky, I now had a beautiful blue hue, with pure white star trails. Even more impressive was just how much the surrounding landscape had been illuminated. Now instead of a dark silhouette I could now see most of the details of the landscape. The colors all had a naturally strong saturated look and I was hooked. However after a few months of shooting in this mode, I noticed that as my single exposures approached 40 minutes the trails started to become faint to a point where only the strongest stars continued to show trails.
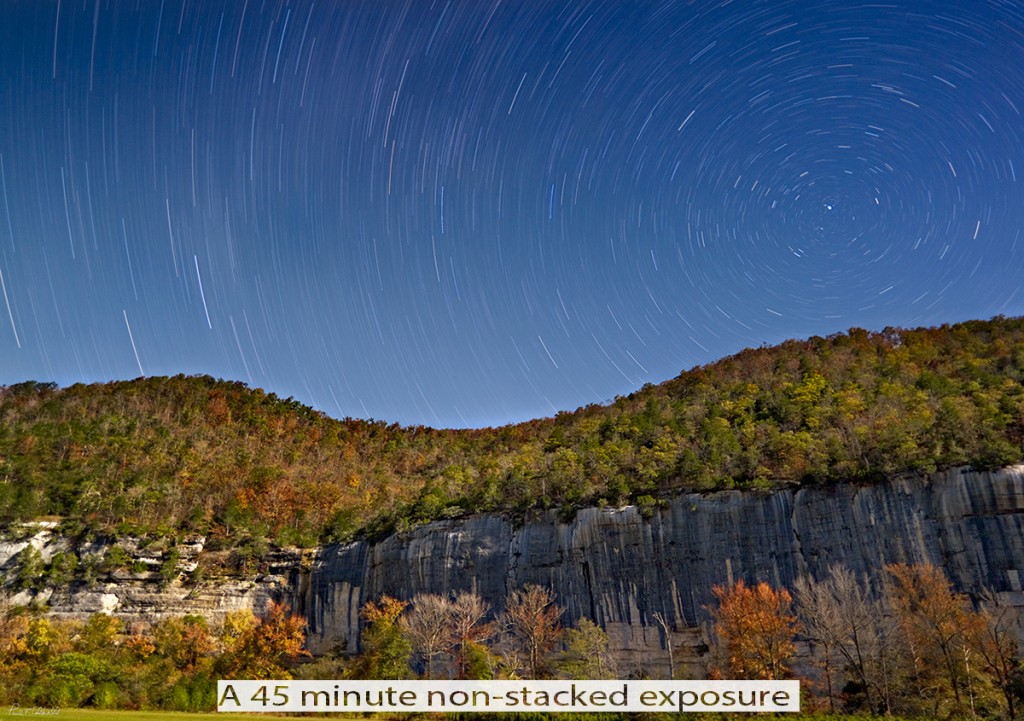
This is a 45 minute single exposure from a Phase One P45+. There is a good balance however only the strongest stars are showing through. There is considerable wind blur on the trees along the bluff.
If I tried to pull the exposure of the sky down, I lost many of the faint trails. I tried a few different solutions with filters, but nothing seemed to really give me the sky that I was looking for, one with a nice deep blue hue and filled with star trails. Then I read about some photographers that were stacking their exposures and I became very interested in what my results might be from night exposure stacking.
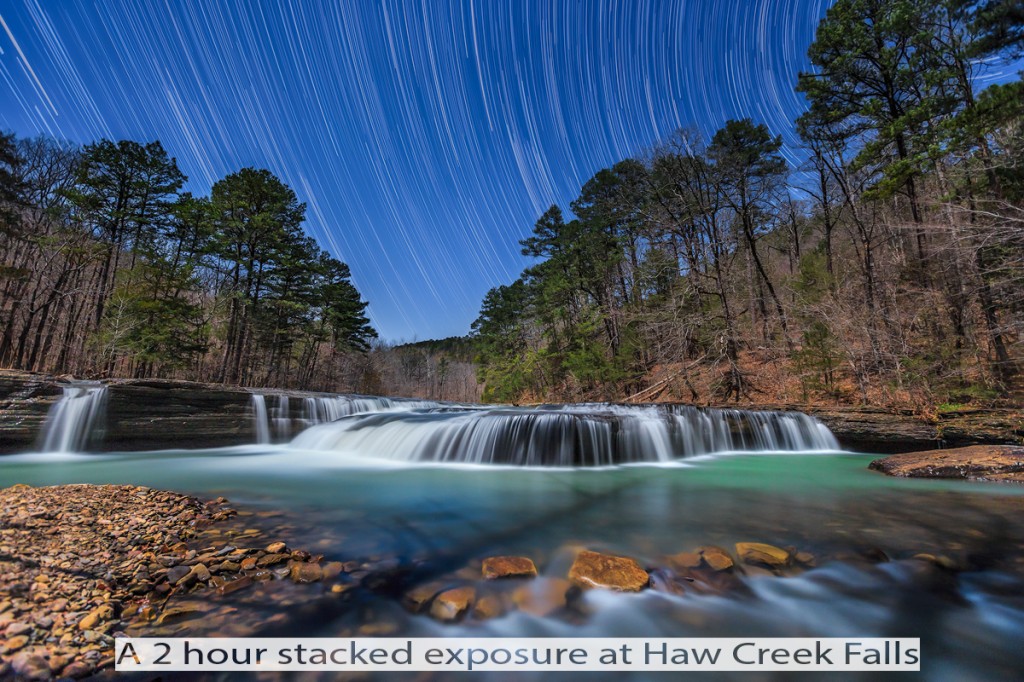
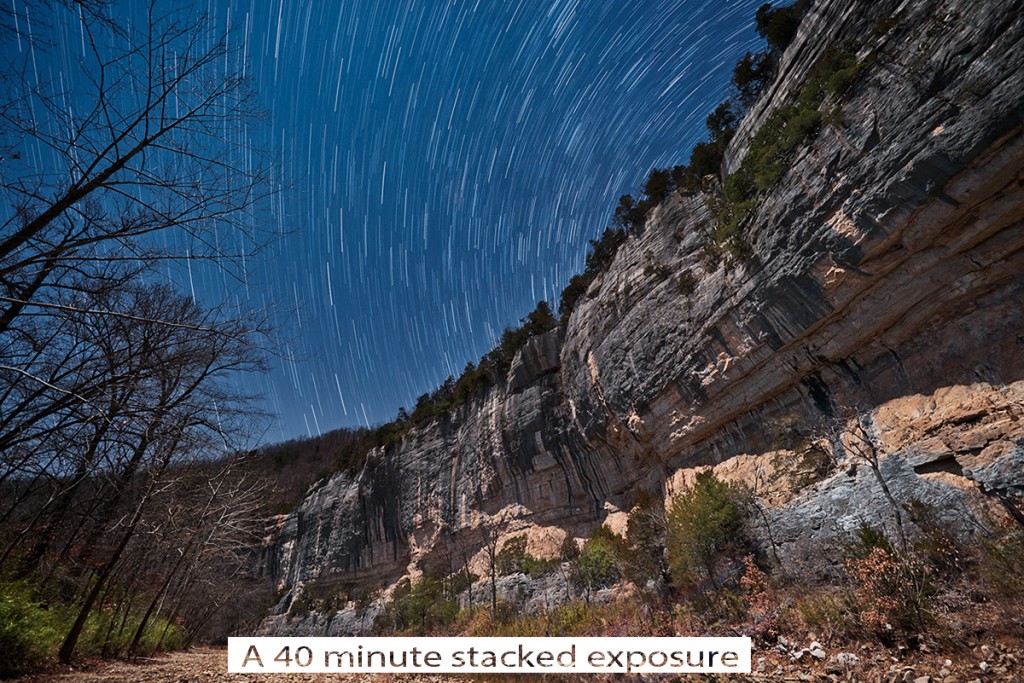
This is a 1 hour exposure taken in approximately 2 minutes stacked exposures. Notice the vastly greater number of star trails and the lack of motion blur.
The idea of stacking comes from photographers working with time lapse capture. The idea is simple enough, instead of one long single exposure, take a series of short exposures and then blend them together in Photoshop. By using Photoshop I found that you can create a smart object from all the stacked exposures and then run a series of blending modes on the smart object that capture only the movement of the stars in the night sky, creating the trails. Each night the period of time of each exposure will vary and it takes a few attempts to get just the right time for the best segment. Ideally I can find an exposure/aperture combination that shows bright stars but also allows for illumination of my landscape features. Since most exposures will be longer than 30 seconds, you need an intervalometer. With the intervalometer, set the interval to 1 and then set the total time of each single exposure. Then set the camera to continuous mode and for blub exposure. For example, if your exposure time for each segment is 2 minutes and 30 seconds, for a 2 hour exposure you will take 52 individual images to stack together later.
Stacking has several advantages over a single long exposure:
1. You have more interesting subject matter overall
- Since you now have the ability to see the landscape subjects that are illuminated by the moonlight, you have a much more interesting photograph. The illumination provided by the moon can be quite eerie at times and offers a unique look to the final photograph.
2. The ability to handle wind motion:
- During single long exposures, more than likely you will have some wind. The wind over a period of 2 hours can totally blur your trees to the point that it will actually ruin the photograph.
- Stacking allows you to find the best single exposure of the foreground and layer it back to the final image.
3. Hundreds of distant stars are brought into view:
- With night photography, you will get more distant stars the wider you can open the aperture so ideally you would try to work with aperture ranges of F2.0 to F4. Any wider and you will start to run into DOF issues with most lenses. Stacking allows you to work with these wider apertures. In contrast, working at F2.8 to F4 with a single long exposure of 1 hour most likely will cause the sky and stars to be overexposed.
4. Much more flexible workflow:
- Since you are stacking you will have many different images to work with in your landscape portion of the image. You may want to pick several and blend them together to take the best parts of each. You also may want to experiment with light painting on one segment. If it doesn’t work out, you don’t have to use that part of the stack, however if you light paint on a single long exposure and make a mistake, then you have ruined the entire sequence.
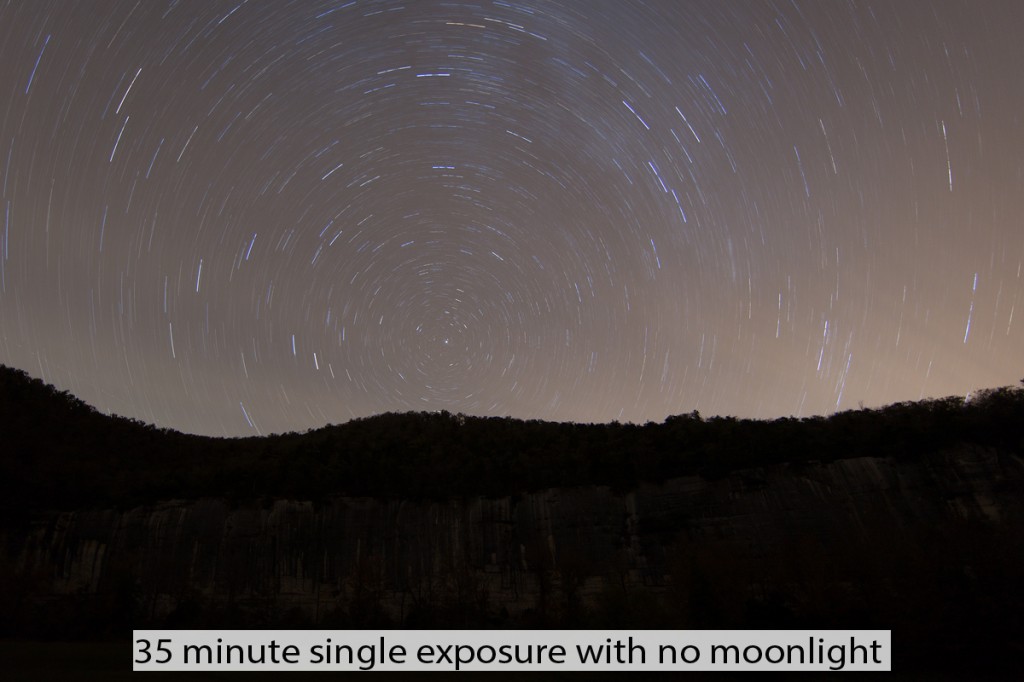
This is a 35 minute single exposure where no moonlight illumination was used. The combined light painting still really did not begin to pull out the details of the tress along the bank and the light painting only provides a 1 dimensional form of illumination.
5. Better control over plane trails:
- I have yet to work a night where planes did not fly over. If you are stacking, you can take out the plane trails before you run the blending modes to combine the images. Plane trails will always be some form of a straight line and will contrast sharply with the curved star trails in the night sky of your image.
6. Noise of a single long exposure vs stacking multiple exposures:
- Over the time of a single long exposure you can expect your camera to generate quite a bit of heat and thus get excessive noise and stuck pixels. If you stack, the shorter exposure times will contain less noise and fewer stuck pixels. This can make a big difference in the final image.
My current camera selections are the Nikon D800E with the 14-24 F2.8 lens and the Canon 6D with the 16-35 F2.8 lens. Both of these cameras allow you to turn off the long exposure noise reduction, which is critical. If you leave it on, then you will have a mandatory dark frame between each segment, which creates gapping. For both of these cameras, I use the accessory grips with extra batteries so I can get the longest operating times from each camera. I use a wired intervalometer with each camera to control the exposures. My goal for night photography is to maximize my sky view so I tend to work with focal length ranges of 14mm to 20mm. For the night exposures, I set the white balance to around 4330K.
For this night work, I like to shoot raw files as I feel you have more control over the file in post processing than with a jpg. I will then take 5 or 6 images from a series and work them up in both Lightroom and Capture 1 to see which software seems to handle the series better. On a 2 hour series, you will have to make some minor adjustments to the images to help balance out the sky illumination, since the motion of the moon will change the color of the night sky over time.
Once all the images are worked up, I will export them as 8 bit tiffs. I have found that the 8 bit quality is more than enough for the images I am creating. I will load the files into Photoshop layers from Photoshop Bridge, then select all the layers and create a smart object. This process may take a while with 52 tiffs especially with a series of 36MP images. Once the smart object is created, I recommend to save it, in a large document format with a .psb extension as odds are the file will be larger than 2GB in size. Then you can run the stack modes on the smart object.
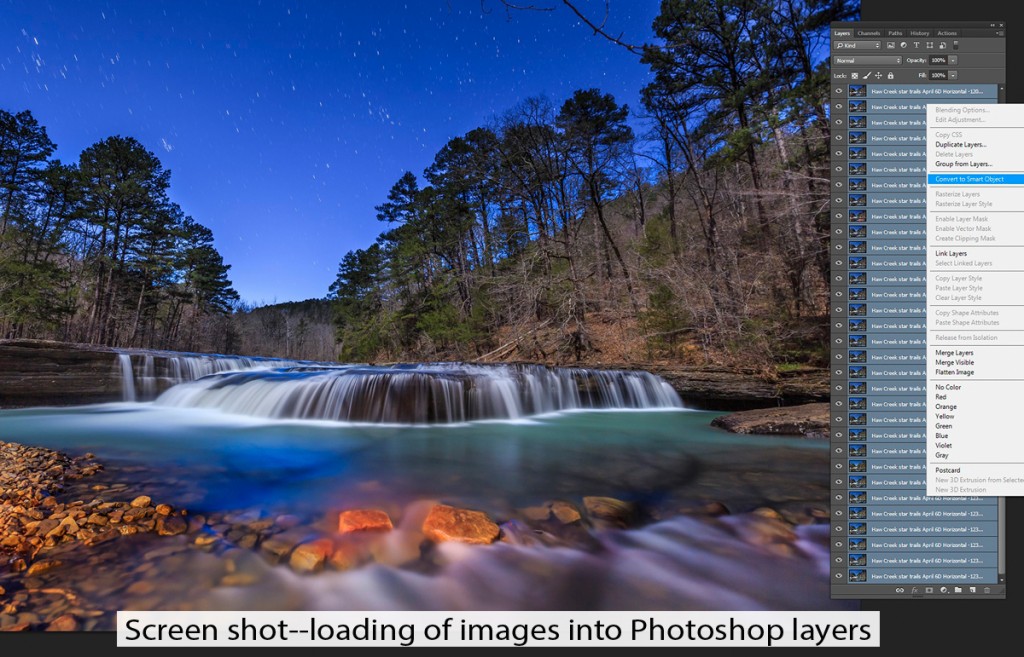
This is a screen shot from Photoshop. All the individual images have been loaded into Photoshop as layers and the stack is now ready to be turned into a smart object.
The stack blending modes are now part of Adobe CC and CS6. If you have an earlier version of Photoshop you will need to download them from the Dr. Brown website (www.Adobe.com). I like to run the Maximum and Mean modes and save the results. Maximum gives you the greatest amount of light to the stars but may be a bit too much, so by running the mean mode, you can layer the two and blend back to a good balance of the sky and stars. The mean stacking mode will also contain less noise.
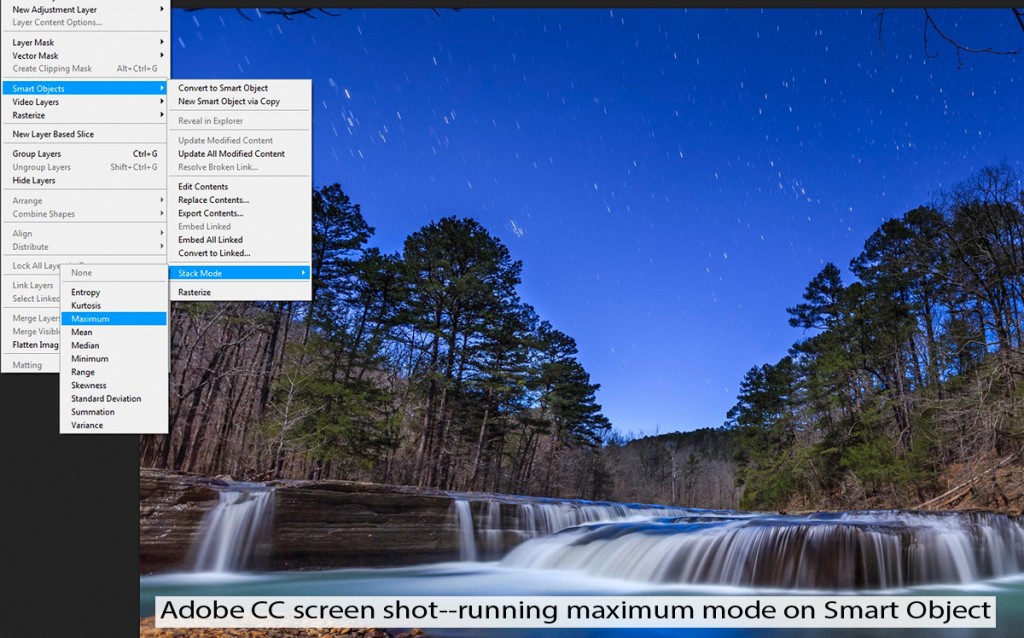
Once the smart object has been created, you are ready to run the various blending modes on it. In this screen shot, I am about to run the “Maximum” blending mode.
Once the stacking work is done you have finished the lion’s share of the process. All that is left to work on is the landscape (non-sky) portion of your photograph. During a 2 hour stacking set, the moon will move across your scene. Most often you will find that the moonlight movement has illuminated different portions of your shot. One technique I use is to take parts from several images to get the best overall result. An example of this, is when you start the moonlight will only be on the right side of your scene. Towards the end of the series, the moon will have moved higher in the sky and is casting light on the subject matter on the left of your scene which earlier was only in shadow. You will also want to hunt through the images to find the ones with the least amount of motion blur on trees or bushes.
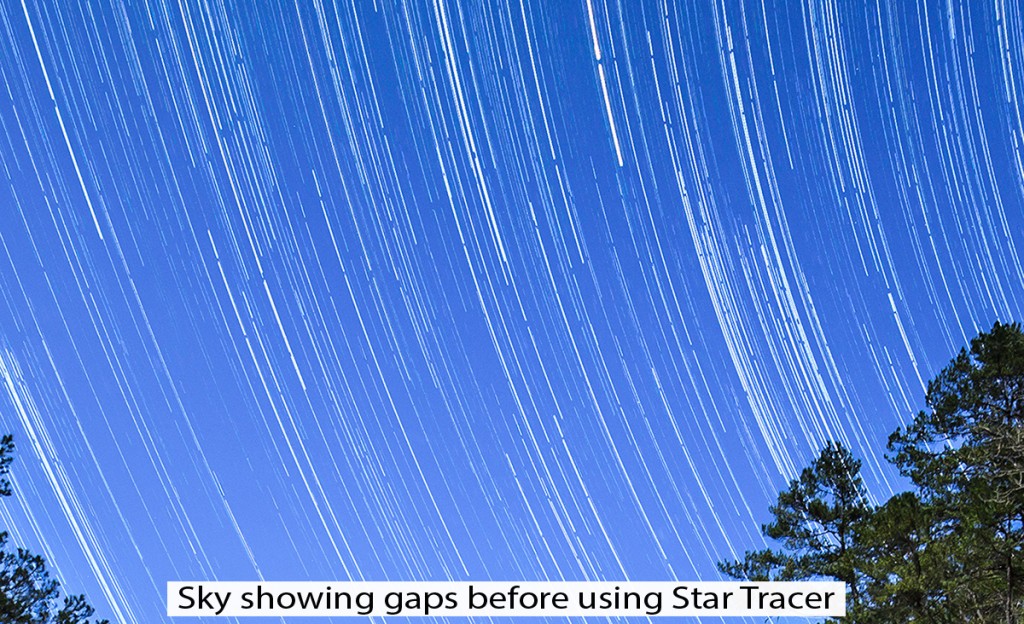
Stacking does introduce faint gaps between each exposure. After you have run the blending modes and combined the files, you can see the faint gaps created between the exposures. If you happened to stop the camera to check a file or move a flare buster to a new position, you will have an even longer gap. These gaps do detract from the star trails as they break up the continuous flow of light you are attempting to capture.
In this crop taken from the sky after the blending modes have been run, the small gaps between the segments can be seen along with larger gaps created by my stopping the process briefly to check the exposure balance.
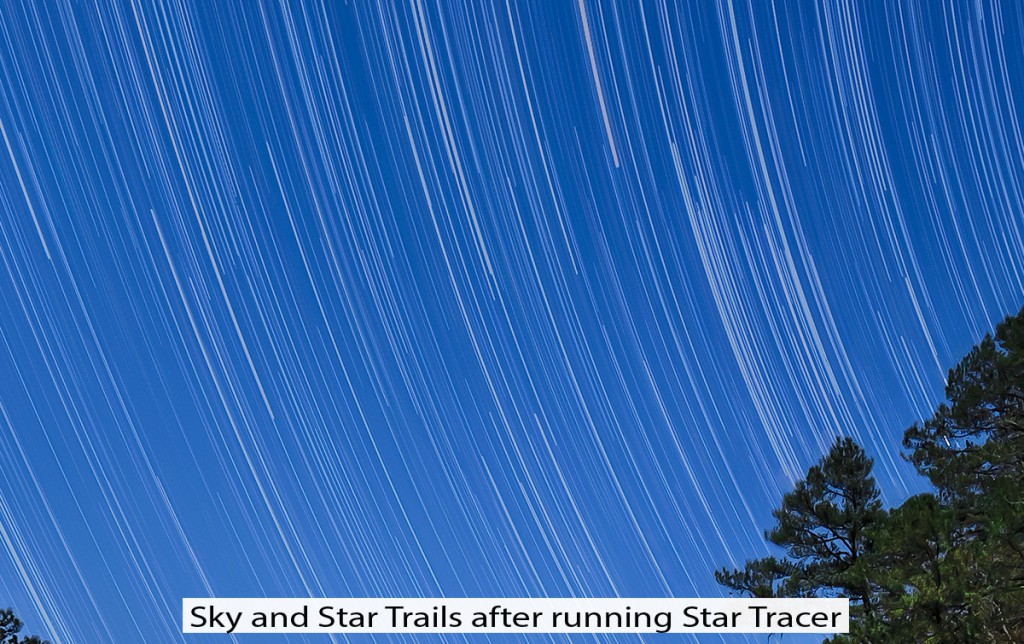
I have found that the easiest way to remove the gaps, is by using software called “Star Tracer”. Star Tracer is a stand-alone Windows based software. There currently is not a MAC version. Star Tracer uses some pretty advanced algorithms to move the image forwards and backwards to adjust the existing trails over the gaps, thus closing them. I feel that closing that gaps makes for a much more appealing final image. Star Tracer comes with a nice help section and is pretty straight forward to use. The most critical data is making sure the FOV (Field of View) of your lens has been inputted correctly into Star Tracer before you run it.
In this crop, of the same image after I have run Star Tracer you can clearly see how the various gaps have been closed, giving the final image a much more pleasing look.
The end result will have an amazing amount of detail for a photograph taken during the black of night and I feel much more pleasing to the eye. With stacking you can create images that will appear as if they were taken in daylight, in fact many people will try to tell you that the final images are combinations of daytime and nighttime exposures. Of course that is not true and all they have to do is go out and try it. One of most fascinating aspects of this process to me is just how light is available when the correct exposure/aperture sequence is determined. There is more work involved, but the final image that can be produced is more than worth the effort.






DOROTHY DORTIN
Found your work via The Arkansas Craft Gallery on Face Book. Stunning photos. Thank you for your love of beautiful Arkansas and sharing it thru your photos.
paul
Thank you for the kind words.
Paul