03/14/13 Review of the Breathing Color Stretch Relief Pliers
- At March 14, 2013
- By paul
- In Articles/Reviews, Printing & Framing
 0
0
04/24/13 I have added some new information to this article in regards to working with the stretch relief pliers and 2″ stretcher bars you can read more about it here:
When working with inkjet canvas, by far one of the most time consuming aspects of the workflow is the process of stretching the canvas. Inkjet canvas is a much more delicate product and requires careful stretching or issues like corner rubbing or tearing/straining of the weave will ruin a finished canvas print. Rework which involves staple removal can ultimately damage an inkjet canvas enough that it has to be reprinted.
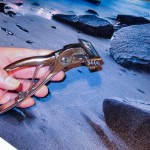
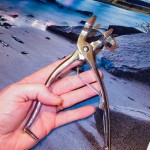
For stretching there are two basic methods that I am familiar with, hand stretching with a pair of canvas pliers (most often a pair of Fletcher style) or the use of a stretching machine. Machines take up a lot of space, are expensive and require a fairly large canvas volume to justify their cost. However they do a great job and once you have a workflow down can produce a very even and tight stretch. Pliers on the other hand are tedious and hard on the hands, as most require a constant pressure while stapling. They don’t have a large width so a lot of time is wasted in just working the canvas. Here is an example of such a pair of canvas pliers.
- View of Fletcher Pliers No 2
- View of Fletcher Pliers No 1
Canvas pliers like these don’t begin to share the expense of a stretching machine but only grab a small amount of canvas and are mostly designed to be used on the non-inkjet canvas. They also require a workflow where you are constantly working around the canvas in a circle in an attempt at keeping even tension while stretching. This style of plier is also really meant to be used with a wider stretcher bar. The 1 ½ inch style bars that are used for most inkjet canvas stretching will not allow this style of plier any purchase as they need to find a fulcrum point to gain leverage on the canvas. The only way in the past to gain this advantage on this type of stretcher bar was with the use of a stretching machine, however with the introduction of the Stretch Relief pliers by Breathing Color, the game has changed dramatically.
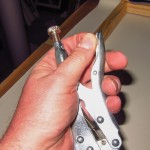
- Breathing Color Stretch Relief Pliers
- Stretch Relief Pliers in action
- Stretch Relief Plliers adjustable tension screw
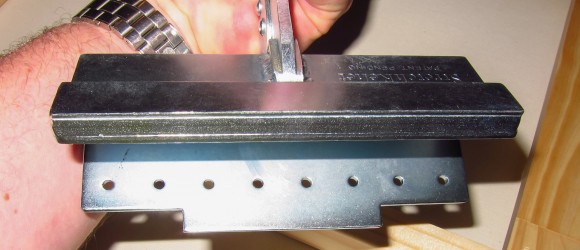
These pliers are a combination of a vise grip style of pliers which offers the ability to let the user lock the jaws of the pliers in place on the canvas, thus freeing up the need to constantly force the pliers closed. While making the stretch, the pliers offer adjustable tension with a screw at the back of the pliers. Stretch relief pliers jaws offer a 4.5 inch surface for the canvas. The flat part of the pliers have a set of teeth which will aid in holding the canvas during the stretch and not allow for any slack. The pliers have notches in the back to allow the user to work right over a center support bar and get in right to the edge of the corners. Now for the first time with a set of pliers you have the ability to get a grip right up to the corner with 100% control over the tension which aids tremendously in creating a good finished look to your canvas.
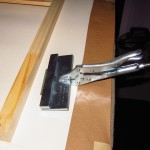
To me, the real key to the design is the notched back of the pliers which will grab at the back of a stretcher bar and create a perfect fulcrum point. The fulcrum allows you to draw back on the canvas with no need for any extra force but two fingers and hold that tension in place while you staple the canvas. You are applying tension to over 4.5 inches of canvas at one time which is over 2.5 times a normal set of pliers. I have found that the best set of stretcher bars for the stretch relief pliers are the 1 ½ inch style. Here is a picture of this style of stretcher bar with canvas wrapped over the bar with a pair of stretch relief pliers.
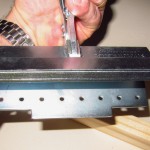
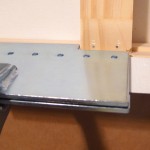
- Picture of Stretch Relief Pliers showing the back notches and holes for teeth
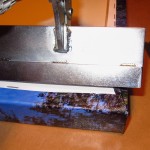
- Stretch Relief Pliers locked down on stretcher bar prepared for stapling
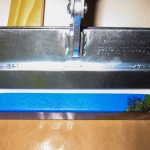
- Stretch relief pliers up against a center support showing how the notches work
- Stretch relief pliers engaged close to center bar showing 100% coverage
This style of bar is notched on the backside. The notches are meant for the placement of center and corner supports but the stretch relief pliers will utilize the notch and fit up against the back of the bar. In the middle picture shown above you can see the cut out notches on the back side of the pliers. The third picture shows the pliers up against a center support bar. The recommendation is to allow for 1 ¼ inch of free canvas but I have made great stretches with 1”. Much less than this and the teeth will not bite the canvas and this will allow for slippage.
I feel that the main strength of the stretch relief design is that they act similar to the way a stretching machine works. This is because they allow you to finish one side completely then flip the canvas over and finish the opposite side. Usually I will start with the long side first. The older style pliers are designed to work from the center of the canvas out, and you rotate the canvas each time after you staple. For example starting in the middle on the long side, flip to the opposite side staple there and then do the short side. Repeating the process till you have neared the corners.
I prefer to start my stretch on one long side with 4 temporary staples. I then move to the opposite side, and use the stretch relief pliers to gain purchase and tension. It’s important to standardize on one style of bar and allow a standard amount of extra canvas on all your prints. For example I use a Larson 6011 bar, 1 ½ inch, and on all my prints I add 2 inches of extra printed material. Thus I have the 1 ½ inch width of the stretcher bar covered and have ½ inch printed material to wrap around the back. This allows me to line up the print on the stretcher bar as I know that when I am centered on the bar, I will have ½ inch of white canvas and ½ of printed material.
Once I am lined up, I will lay in the first series of staples. I then move to the opposite side and pull my temp staples and again use the stretch relief pliers to pull the canvas tight and finish that set. Now you have approximately 4.5 inches of canvas down on each long side in the center. I quickly move to the short sides and apply one staple to the top of each corner. I feel this helps keep the canvas from getting waves in it during the stretch. Once this is done I complete one long side, then the other long side. This whole process takes about 2/3 less time as trying to do this with a normal set of pliers. You will tend to forget and run out of staples because you are moving along so fast. Remember on the long sides not to staple all the way to the edge as you still have to form a corner. Once the long side as done, simple flip, pick a short side and finish one then the other. I will then quickly examine the face of the canvas to make sure I don’t have any waves. At this point you are basically done with the stretching. The only process left is the cornering/finishing.
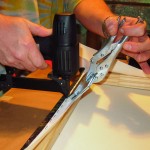
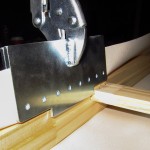
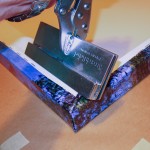
On a corner the notched edges of the Stretch Relief pliers allow you to get right up to the edge of the stretcher bar. Being able to get close like this with the added advantage of the fulcrum allows you to get an even and very tight tension on this key part of the canvas. How one finishes off the corners is up the individual, I prefer to cut out some of the extra material and then tuck the corner over. The Stretch relief pliers will still make a strong enough grip to include this extra material and still provide a tight stretch. This is so important since usually the cornering requires some doubling of the thickness of the canvas. When finished the stretch relief pliers will create an excellent stretch and create a drum tight product.
- 2nd View of Stretch Relief pliers showing how assist in creating an excellent corner
- View of Stretch Relief pliers engaged in finishing a Gallery Wrap Corner
In summary, the stretch relief solution give the user a similar type of control afforded by a stretching machine. This is possible due to the several design features:
- The greater surface of the pliers
- Teeth which bite and hold the canvas
- Piers which allow the user to free up the hand and don’t need as much constant tension
- The cut out notches on the back edges which allow the ability to get close to opposing edges
- The notch in the center of the back which creates a fulcrum and provides excellent tension
- A screw on the back of the pliers that allows the user to adjust the totally amount of tension
With these pliers you have an equaled amount of control and tension during the stretching process. You are able to do this with just the control of two fingers due to the fulcrum created by the pliers. The time savings and actual relief to your hands from not having to grip and hold the pliers/canvas in place will justify the extra cost of the stretch relief pliers. My only reservation is that the pliers only come with a 6 month warranty. Construction and welds all seems to be very well done and hopefully his warranty period can be extended to 1 year. I feel that by using these pliers you will get a much more professional product which is evenly stretched and better looking than a stretch from conventional 2” pliers. Over the years I tended to lead with paper/matted/framed prints on anything larger than 20” x 30”, but with the advent of the stretch relief pliers I am now much more at ease with larger canvas projects. I will get more work done, which is right the first time and needs no re-tensioning later on or rework.
You can learn more about the stretch relief pliers here: www.breathingcolor.com

