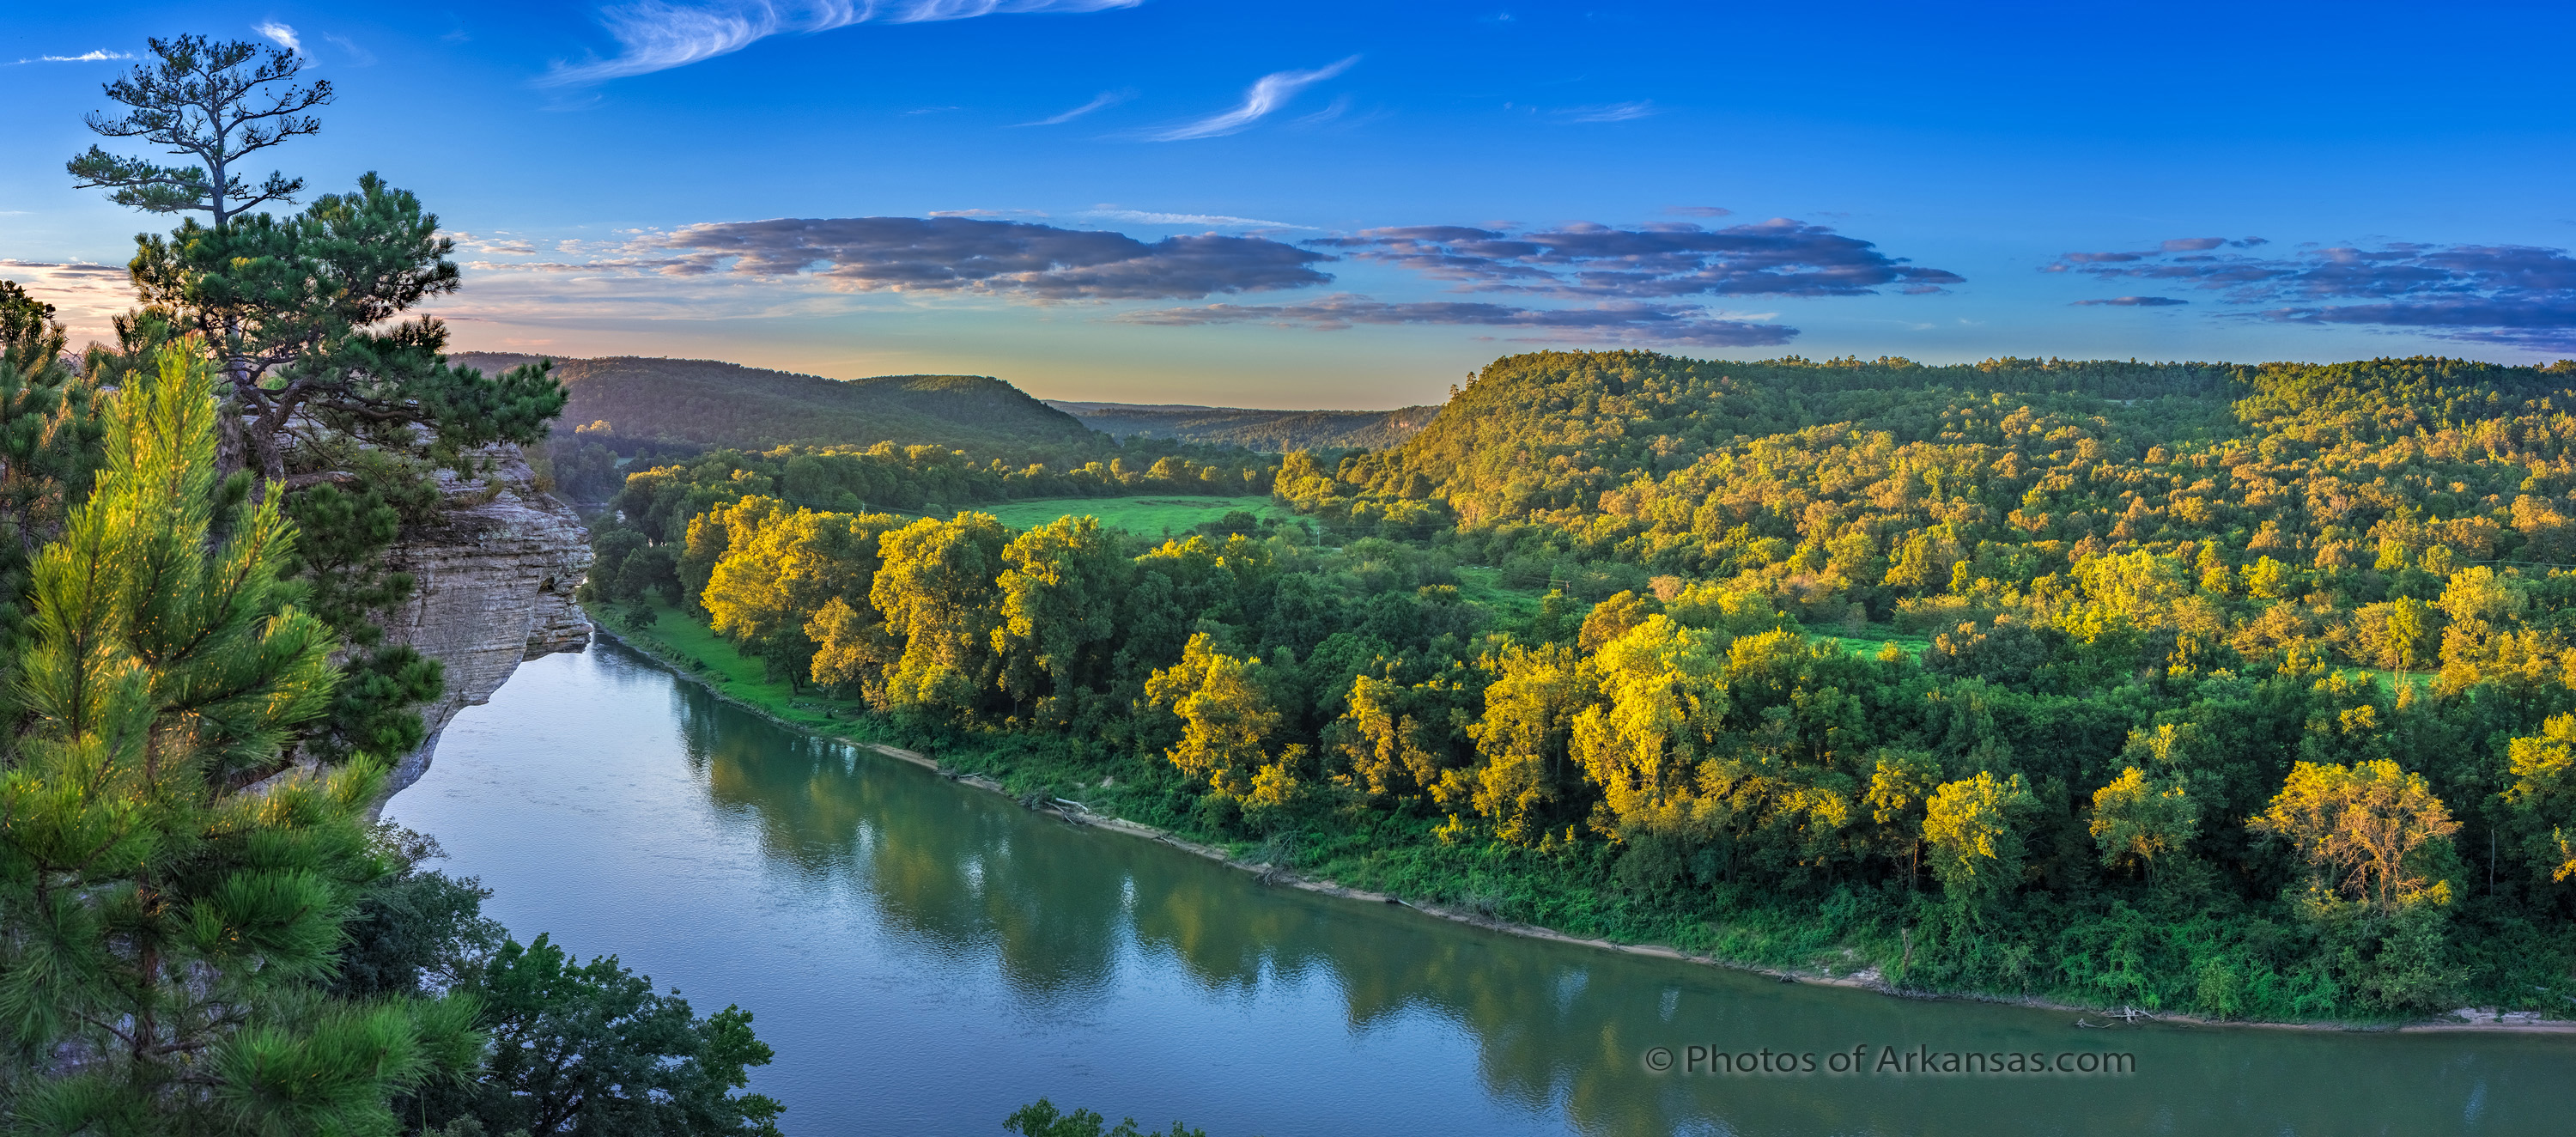
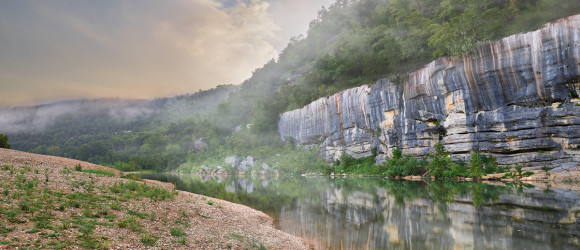
01/04/17 Featured Arkansas Photography–Sunset from Calico Rock on the White River
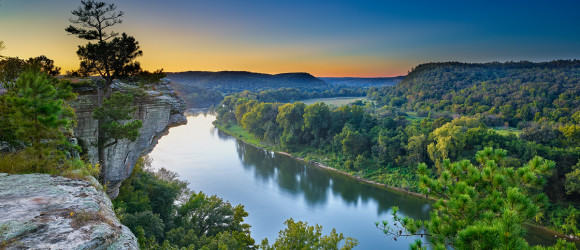
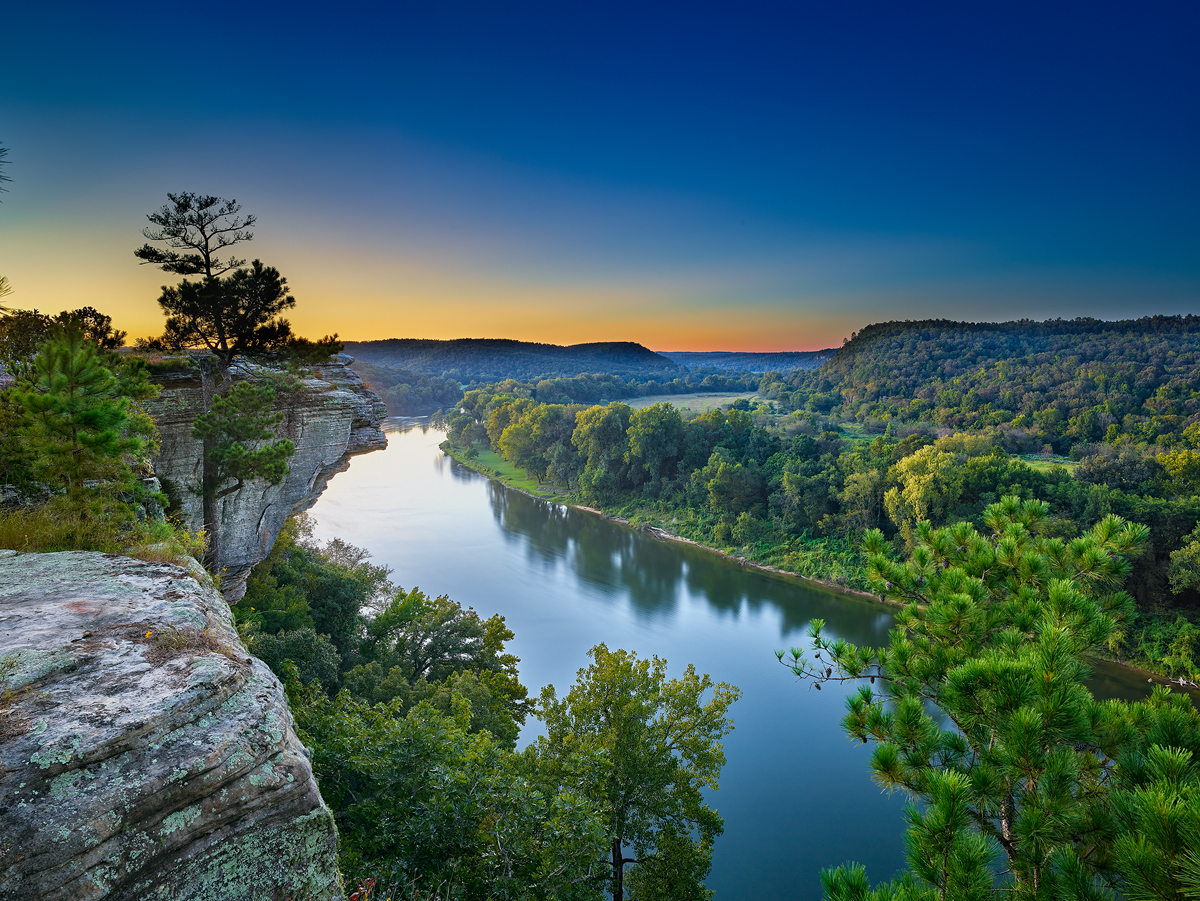
Afterglow from near Calico Rock on the White River in Arkansas.
Taken with a Phase One IQ100 back and Phase One XF camera @ 35mm LS lens, @ ISO 100 Single frame with a lot of push in the shadows.
The view of the White River from Calico Rock is one of the best in the state. Here you have a huge sweeping bend in the river and a beautiful valley that is full of deciduous trees that can produce a wonderful fall color display (however this did not happen in 2016). This spot on the river is just above the town of Calico Rock and you can easily see the town from this spot. I prefer to work this spot in the early morning or late evening. In the late summer to early fall the sun will set just off to the left of the frame and allows for a wonderful afterglow. In the winter and later fall the sun will be too far to the left to be really much of a part of the shot.
If you come to this spot in late May to the end of June the sun will set right over the lone pine tree and will give you a lot more illumination on the river and trees below the bluff. Calico Rock is also a great spot for night photography as there is not very much local light pollution that will effect your shot. However be warned that during most nights, the river fog will quickly rise over the top of the bluff and start to block out your view of the sky. It’s a great thing to watch as the fog starts to build up upstream and then starts to roll down the valley, eventually filling everything up. You will have to continuously watch the front of your lens as it’s very easy for the outer element to fog up.
Just another great spot to spend an afternoon in Arkansas.
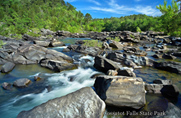
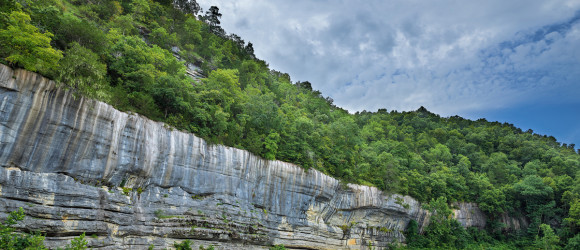
09/27/16 Featured Arkansas Landscape Photography–Late afternoon at Roark Bluff Buffalo River

Late afternoon light creeping along Roark Bluff on the Buffalo National River
Taken with an Phase One IQ100 @ 35mm LS lens, ISO 50 and circular polarizer for both sky and cutting glare on leaves.
This is the time I like to start working the Buffalo River, as fall is just around the corner, and as can be seen in this shot, is actually started on the Buffalo.
The Buffalo River at Roark Bluff is one of my favorite spots to photograph and I work it as often as I can, but the drive up and back has started to slow me down. I was hoping for a few clouds to help break up the sky and there were there, but only towards the far side. The sun was playing hide and seek most of the afternoon, and when the sun finally came out the wind started to blow ruining the reflection. There are a lot of spots on the Buffalo to catch a reflection but this is my favorite.
This was taken in one exposure, something I never could have done before with a Phase One CCD back, the 100MP CMOS chip does have some excellent range. This type of shot is one of the most difficult as you are working directly at the brightest part of the subject. This means that anything not illuminated by the sun (in this case the left side of the river) will be in deep shade. You want enough exposure to be able to pull this area up some and not leave it black, but you also have to be very care not to blow out the sky, especially the left side. The use of a polarizer was needed more for the glare on the leaves to the right. Without it the colors would not have been as nice and clean, you have to be careful when working such a scene to see that you keep the polarized effect as even as possible on your sky, so you may need to try a few exposures.
After waiting for almost an hour, the sun popped back from behind the clouds and the wind died down long enough for this shot.
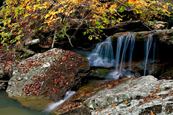
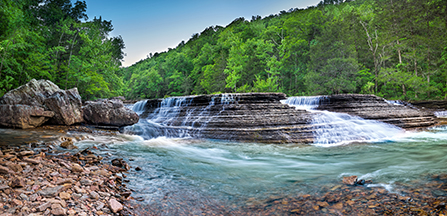
09/21/16 Featured Arkansas landscape photography–6 finger falls on Falling Water Creek
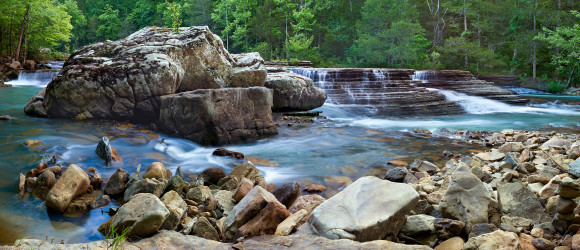

Late May on 6 finger falls in Newton County
Taken with a Phase One IQ100 and 35mm LS lens, 2 part horizontal pano. Taken in 4 shots to merge later for foreground and background in Helicon Focus
Arkansas has many great streams to hike but one of the best is Falling Water Creek, which is well named as it has a large number of waterfalls it’s entire length before emptying into Richland Creek. Falling water creek has an upper and lower half, and some of the best spots to photograph are on the lower half. There you will find creek wide ledges like 6 finger falls. 6 finger falls, named for the cut outs the creek has made in the ledge, is quite a wonder. It offers great photographic opportunities year round but is best in the fall and spring. You will be lucky to find any water in the creek in the fall and if you do consider yourself lucky. The banks are lined with deciduous trees that offer a great display of fall color.
You will also like the fact that for most of it’s length, falling water creek has a forest service road that parallels it’s length and so offers quick access. This of course means in Arkansas you can expect to find all types of folks here on a good weekend, so plan your trip during the week if at all possible. The forest road is number 1205. Heading due north on the road, falling water creek will be on your right for the upper half, and then after you cross it on the left. For a portion of it’s length, the Ozark Highland trail is just above the road on the right, below the bridge. This is great day hike also.
Make sure to include a trip to the mouth of falling water creek at Richland Creek campground. Richland is the crown jewel of creeks in Arkansas and is also protected as a Wilderness Area, so you can enjoy a day without hearing a 4 wheeler.
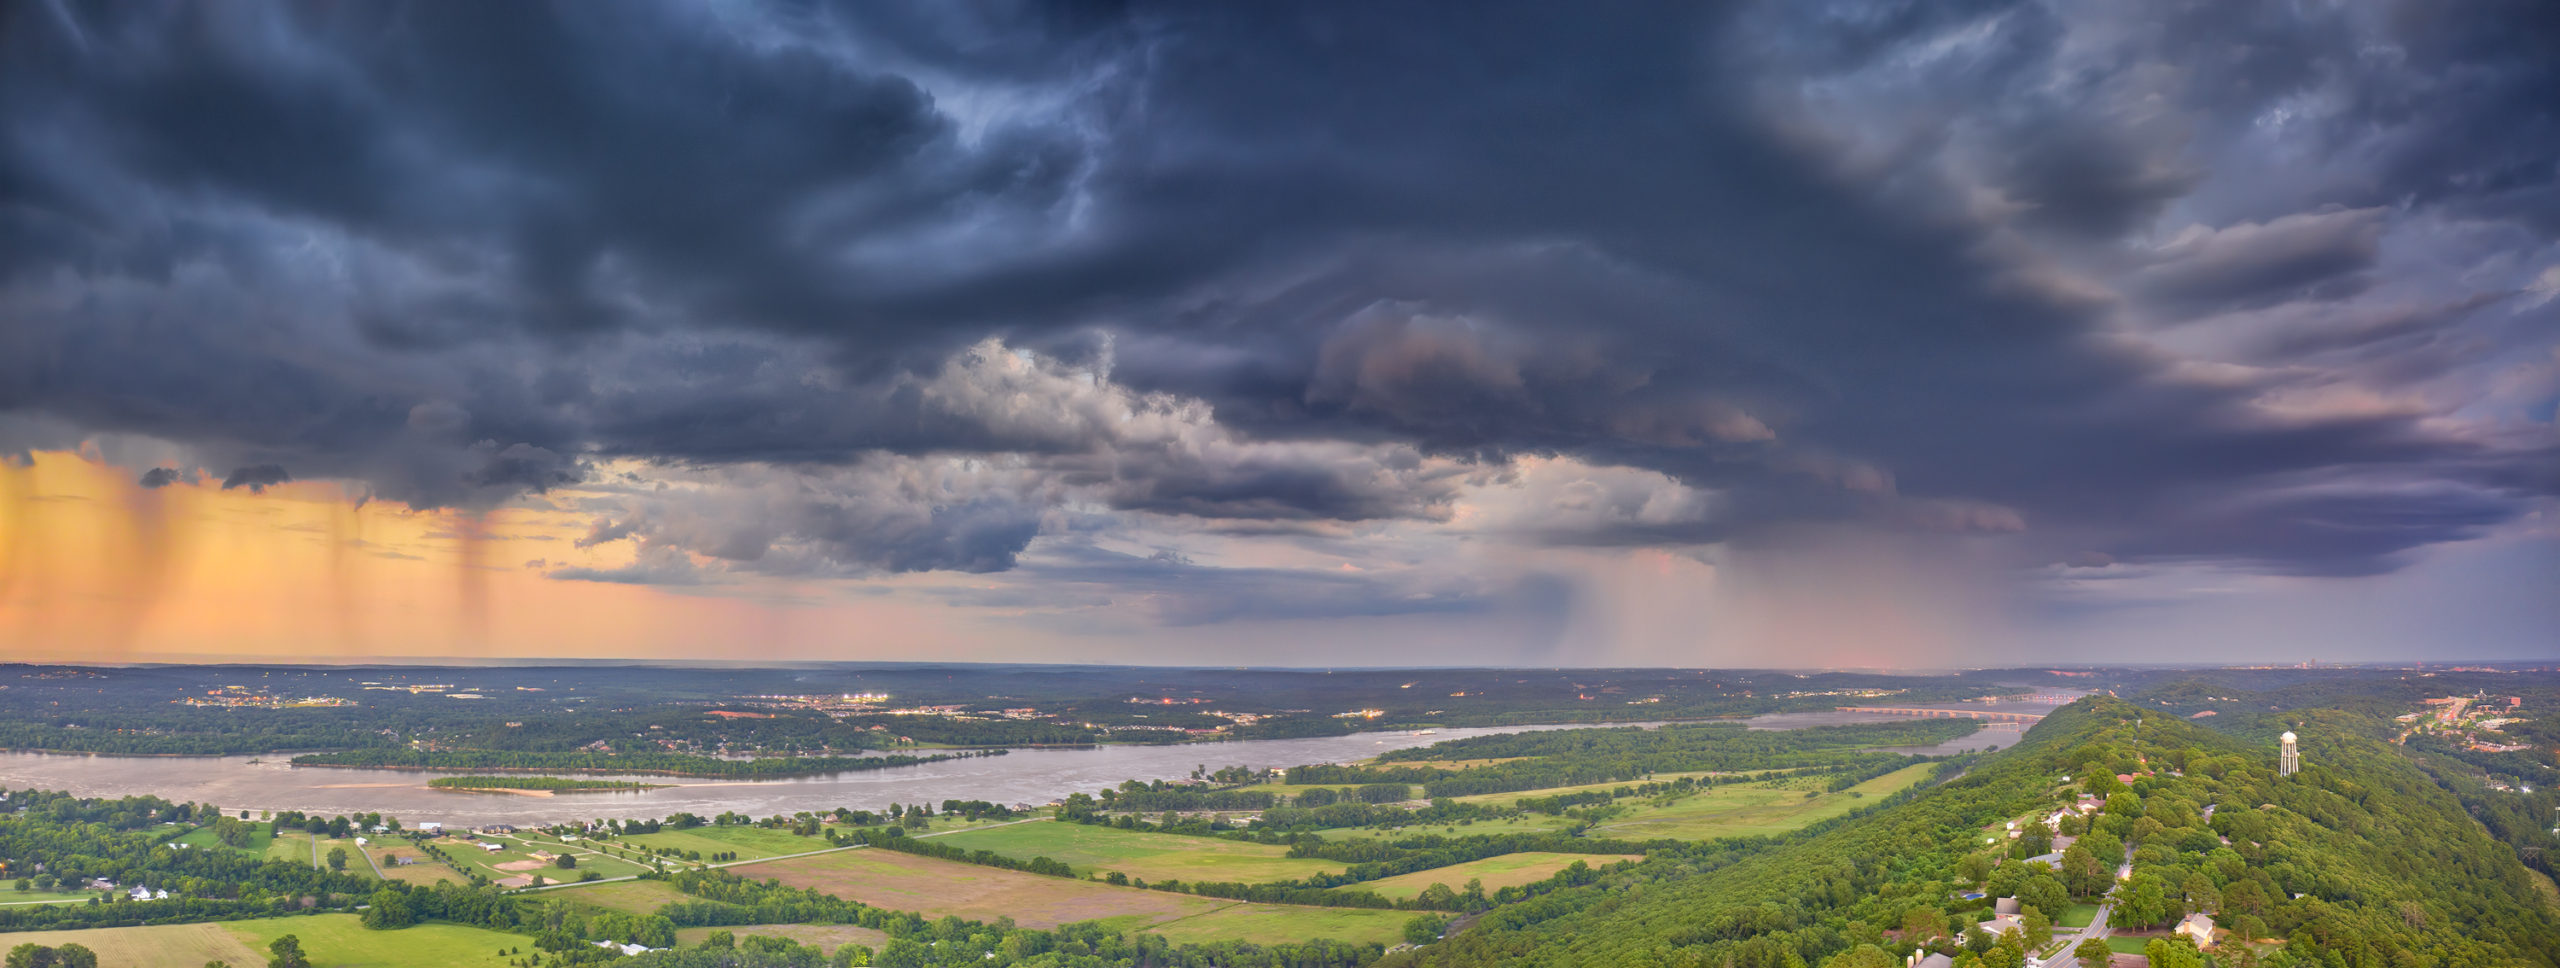
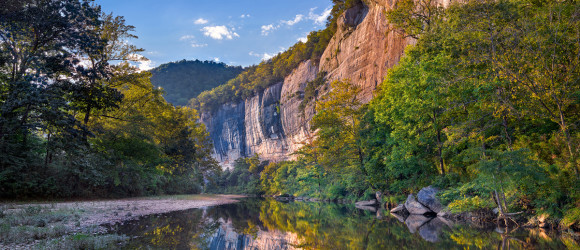
08/20/16 Featured Arkansas Photography–Early morning at Buffalo Point, Buffalo National River

Early mornings are some of the best times to photograph the Buffalo River. This is from Buffalo Point.
Taken with a Phase One IQ100 and 35LS lens, no filters @ ISO 100 for 1/40th of a second F12 and Phase One XF.
While on a trip to the lower Buffalo River, I was able to spend the night at Buffalo Point Campground. This is the first campground that was built on the Buffalo, and dates back to the WPA and CCC days of the late 1930’s in Arkansas. Here you are pretty low down on the river as there is only about 20 or so miles left before the river runs into the White River. Buffalo Point is a very popular spot on the river as it has an excellent campground, and there is a great swimming hole below the large bluff on the far side of the river. From here you can take a quick float down to Rush which is about 8 miles or do down river. It’s a great float to take in the fall to enjoy the fall colors as most often there will be enough water for floating year round.
I was hoping to catch the early morning light burning off the fog but there was only a small amount of fog. However there was a large cloud bank moving in from the west and sun managed to pop the lower clouds along with the fog rising up towards the top of the bluff. I had the place to myself, which on this river is a rare event so I was able to have almost 45 minutes before the first floaters started to come down from Hwy 14 and break up the great reflection on the river.
The Phase One XF and IQ100 worked together very well on this occasion. I was using a tripod due to the slower exposure times and the fact that the 35LS lens is so heavy. The camera controls on the back of the IQ100 LCD made working with this scene very easy. I ended up shooting several manual brackets but due to the impressive dynamic range of the IQ100 sensor, I was able to create this image from one exposure. The 35LS lens performed quite well, giving me excellent details throughout the image.
08/15/16 A close look at the Dynamic Range of the Phase One IQ100
I have been using the IQ100 now for several months, and have noticed that there are some interesting facets to the dynamic range of this digital back. Lets take a more detailed look at this particular image taken on the Buffalo River, in Arkansas
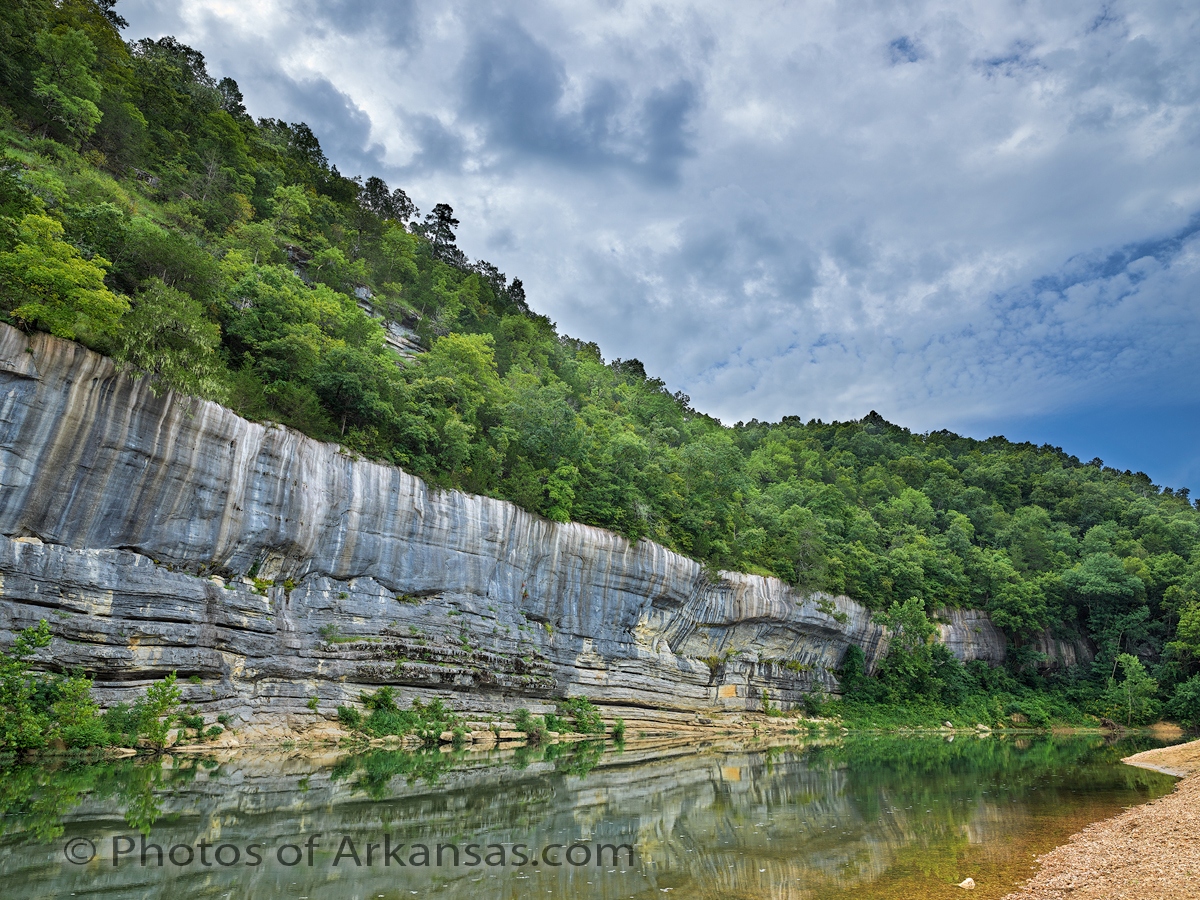
The Buffalo River at Buffalo Point in early August with a morning storm rolling in.
The IQ100 is of course the first 100MP digital camera ever marketed, was introduced in January of 2016 by Phase One, and so far has had a very good reception. I was very interested in the previous IQ250, 50MP digital back, however it has a 1:3 crop factor, which for my work, (example this image) would have been too much to sacrifice. I use wide angle lenses in most of work unless I am stitching and the 30 percent loss in focal view was too much for me. But I easily saw with the IQ250 the massive advantages that CMOS had over the traditional CCD Phase One backs. This showed up for me in two main areas, noise and dynamic range. These both have many definitions but for me it’s simple:
Noise, how much noise will I see in areas of shadow, at base ISO and at higher ISO. If I push an image, how much detail is lost to noise in the shadows. With a CCD back, there was never too much room here even at base ISO of 50
Dynamic Range, with one single exposure, what can I capture? If I adjust for highlights, will my shadows be filled with too much noise or vise versa. Also how well does my color saturation hold up at higher ISO ranges. With CCD digital backs, the color saturation fell off very quickly once past the base ISO. You might be able to get one more stop before the saturation was lost.
Moving to the IQ100 from the IQ260 I was hoping to see similar if not greater dynamic range at base ISO to the Nikon D810. I still regard the Nikon D810 as the flagship for dynamic range at base ISO of 64. With the Nikon D810 it’s easy to push a single exposure as much as 2.5 stops and still have wonderful details in the areas of shadow. Phase One (P1) rates the IQ100 at a base ISO of 50 so I was hoping to be able to get at least 2 stops of details when shooting at ISO 50. So on my first couple of outings with the IQ100, I mainly used ISO50 and planned to push the shots when necessary. I quickly found out that this the chip in the IQ100 (made by Sony) behaves differently that the 36MP chip in the D810 (also by Sony).
In working at base ISO 50, it became apparent to me that a shadow push of even 1 stop may be enough to cause you to lose details in the shadows, and also a huge amount of color saturation. This was a surprise to me as I had expected to get even better push than what I was seeing with the D810. However it was also soon apparent that the IQ100 has quite a bit of leeway with highlights, much more so than any of the CCD backs I have used from Phase One in the past. You can easily let your highlights go past 1 to 1.5 stops and still regain the finer whites. If you combine the “highlights” slider in Capture One, along the exposure slider, there is a lot of recovery. Looking at the example below: Click on the image to view it larger
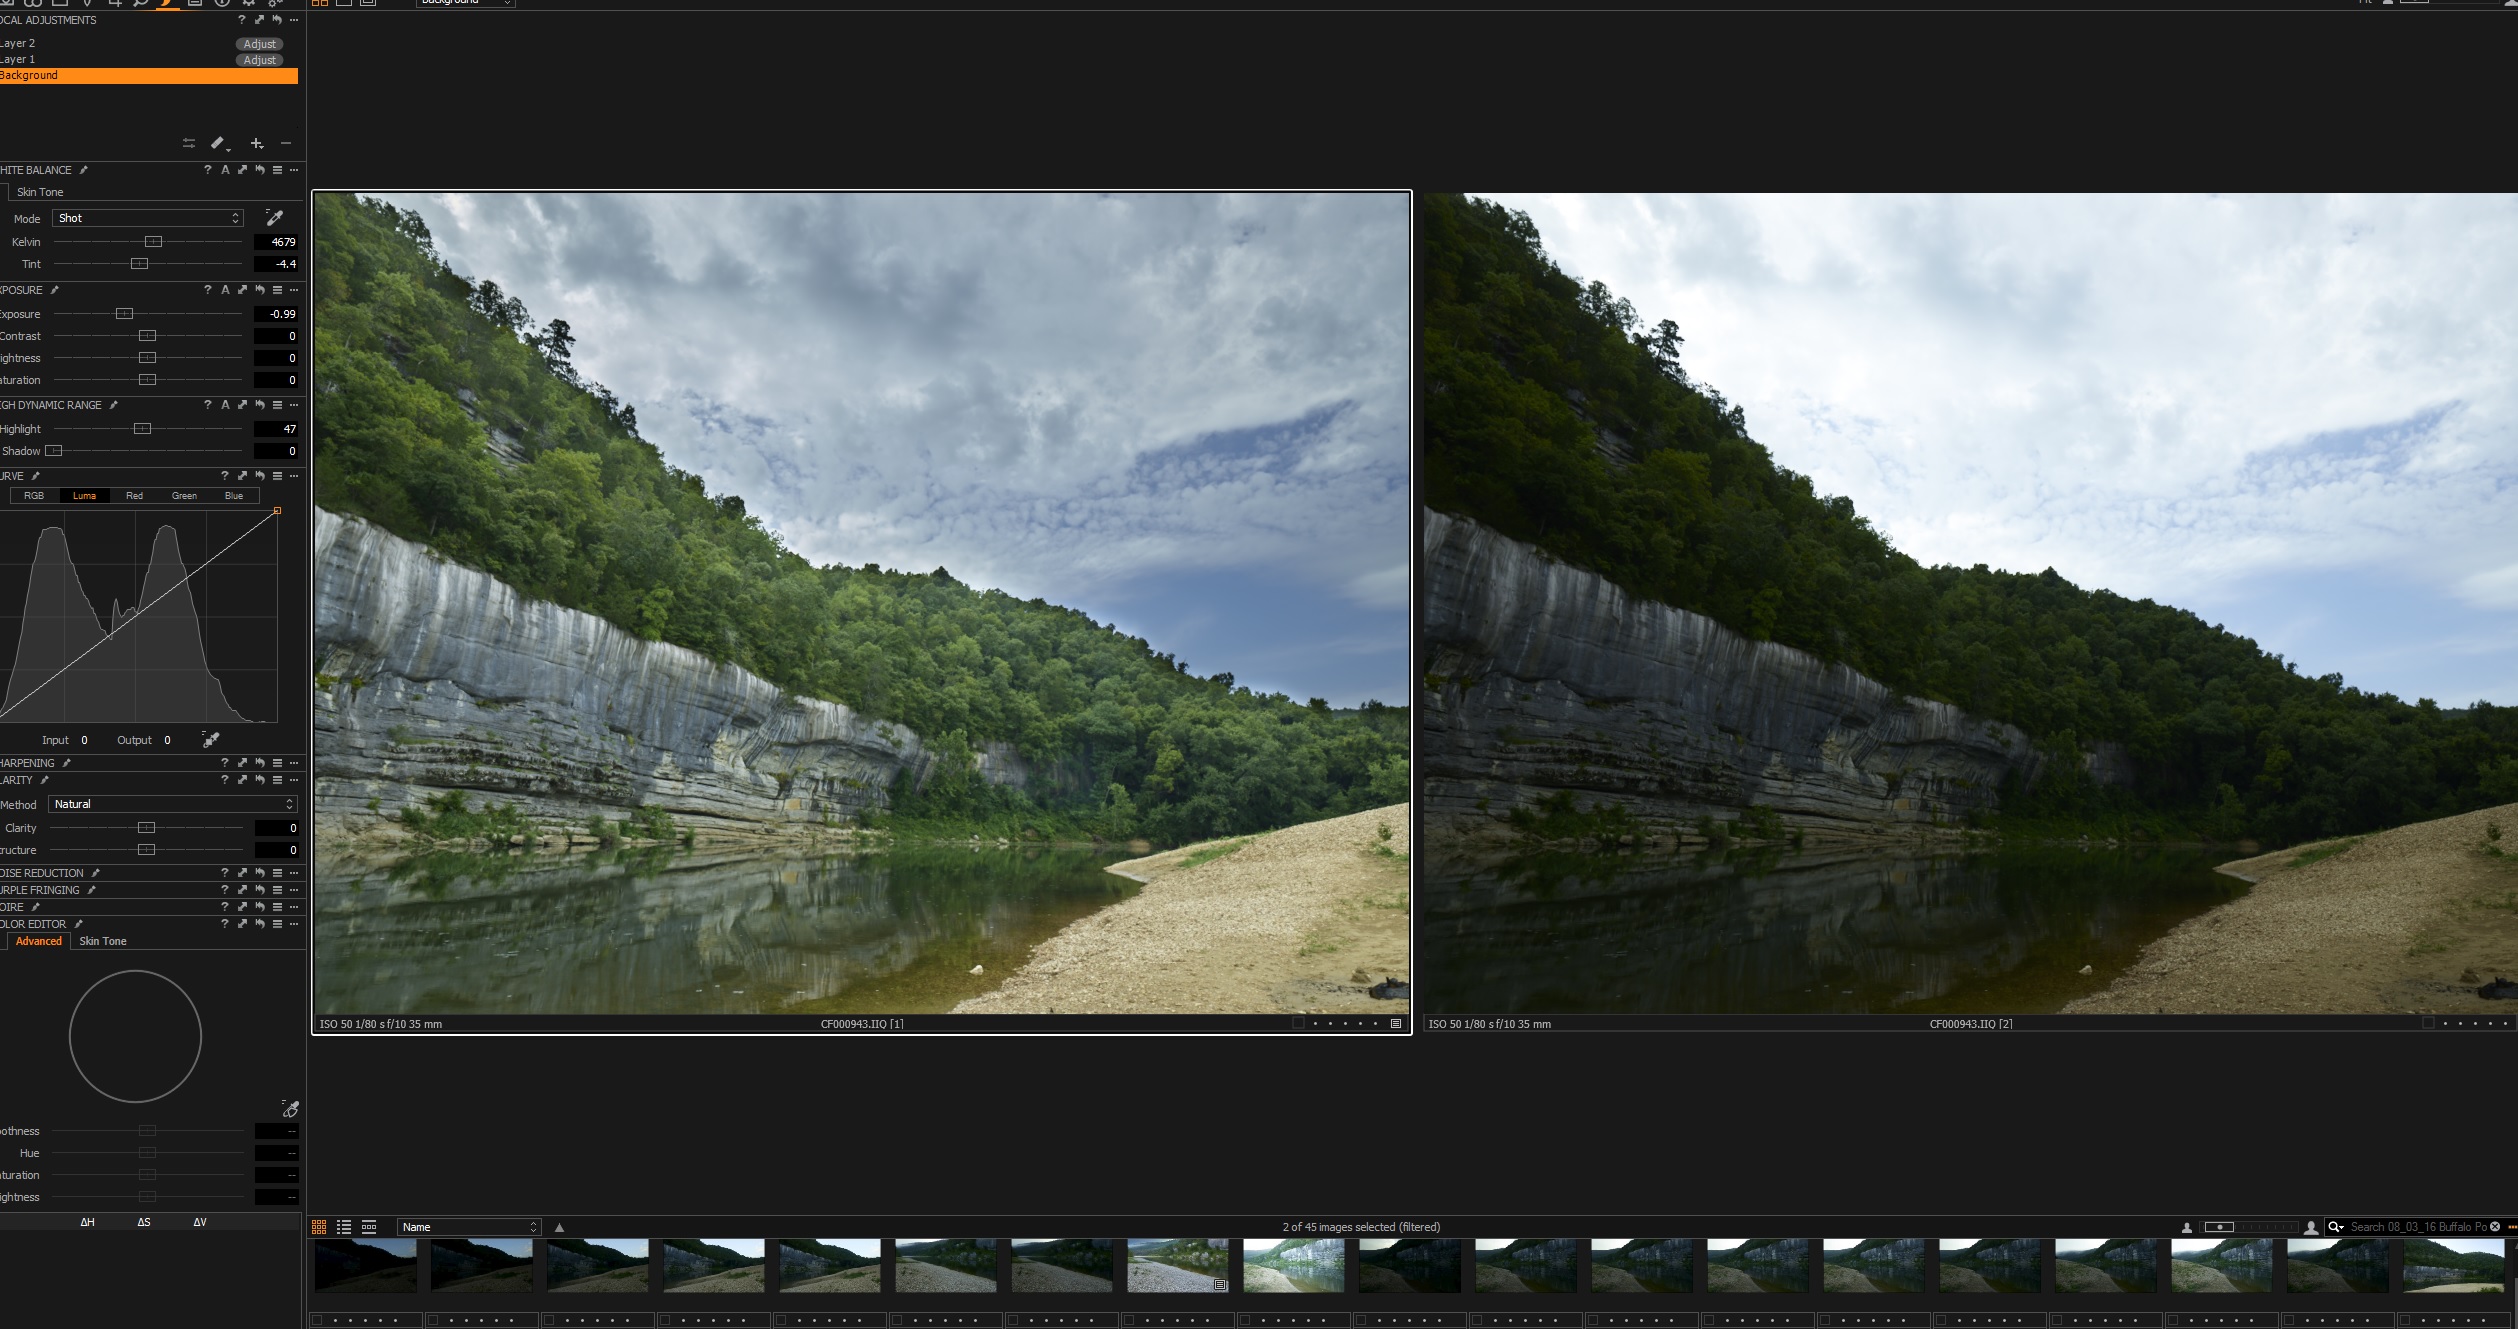
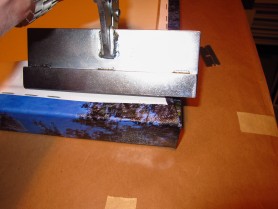
Screen shots of IQ100 image side by side
The image on the right side is the base image before any adjustments, the image on the left side, I just pulled the overall exposure down from center to -99 (almost 1 stop) and then adjusted the highlights to 47 from the far left. This pulled back all of the sky and actually provided some very nice cloud features. I then just added a local adjustment layer to the lower portion of the file, (non sky) and pulled up the overall exposure then added one more adjustment layer to tweak a few dark areas. Overall the end result to me is very nice and again is testimony to just how much range is in a single exposure from this chip. The take away is for sure feel free to let your highlights go a bit so that you can pull in a bit more shadow details.
Here another example.
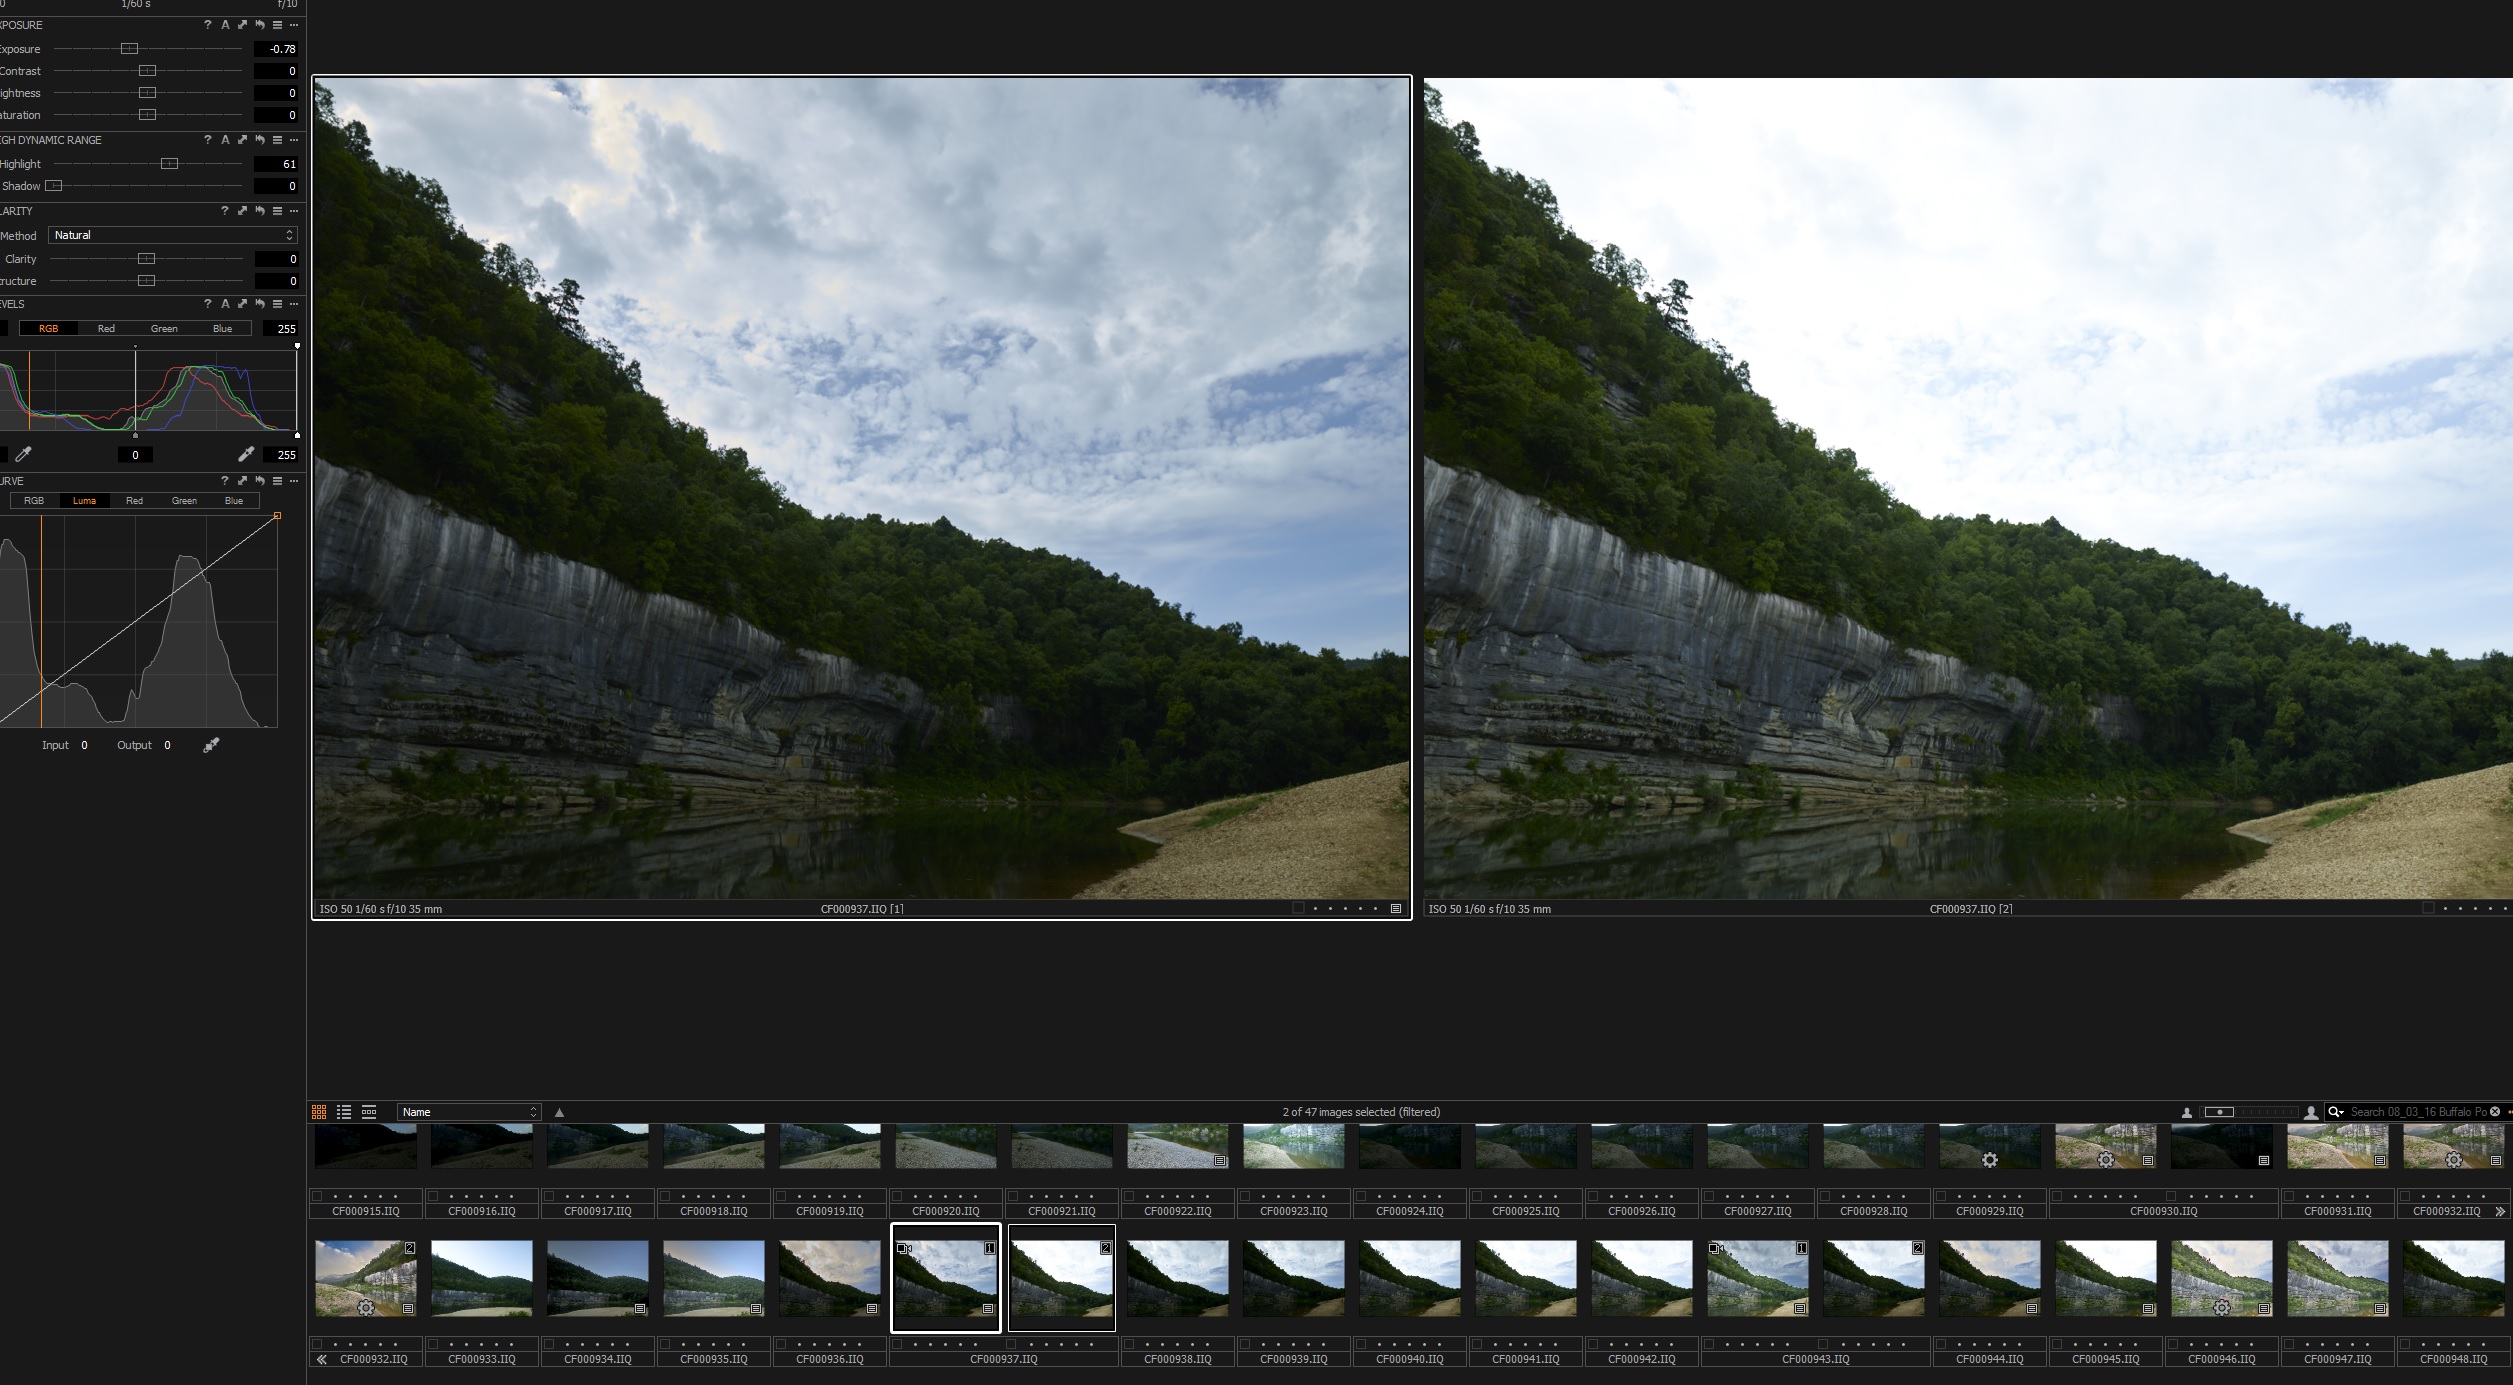
2nd Example of highlight range IQ100
Here the original raw file is on the left side. Initial thoughts are that the sky is pretty blown, but with just a bit of highlight adjustment and overall exposure work, you can pull back the sky to a very manageable level. The bluff and trees will easily recover to most of their full detail with a bit of shadow recovery and local adjustment layer to work only on that part of the image.
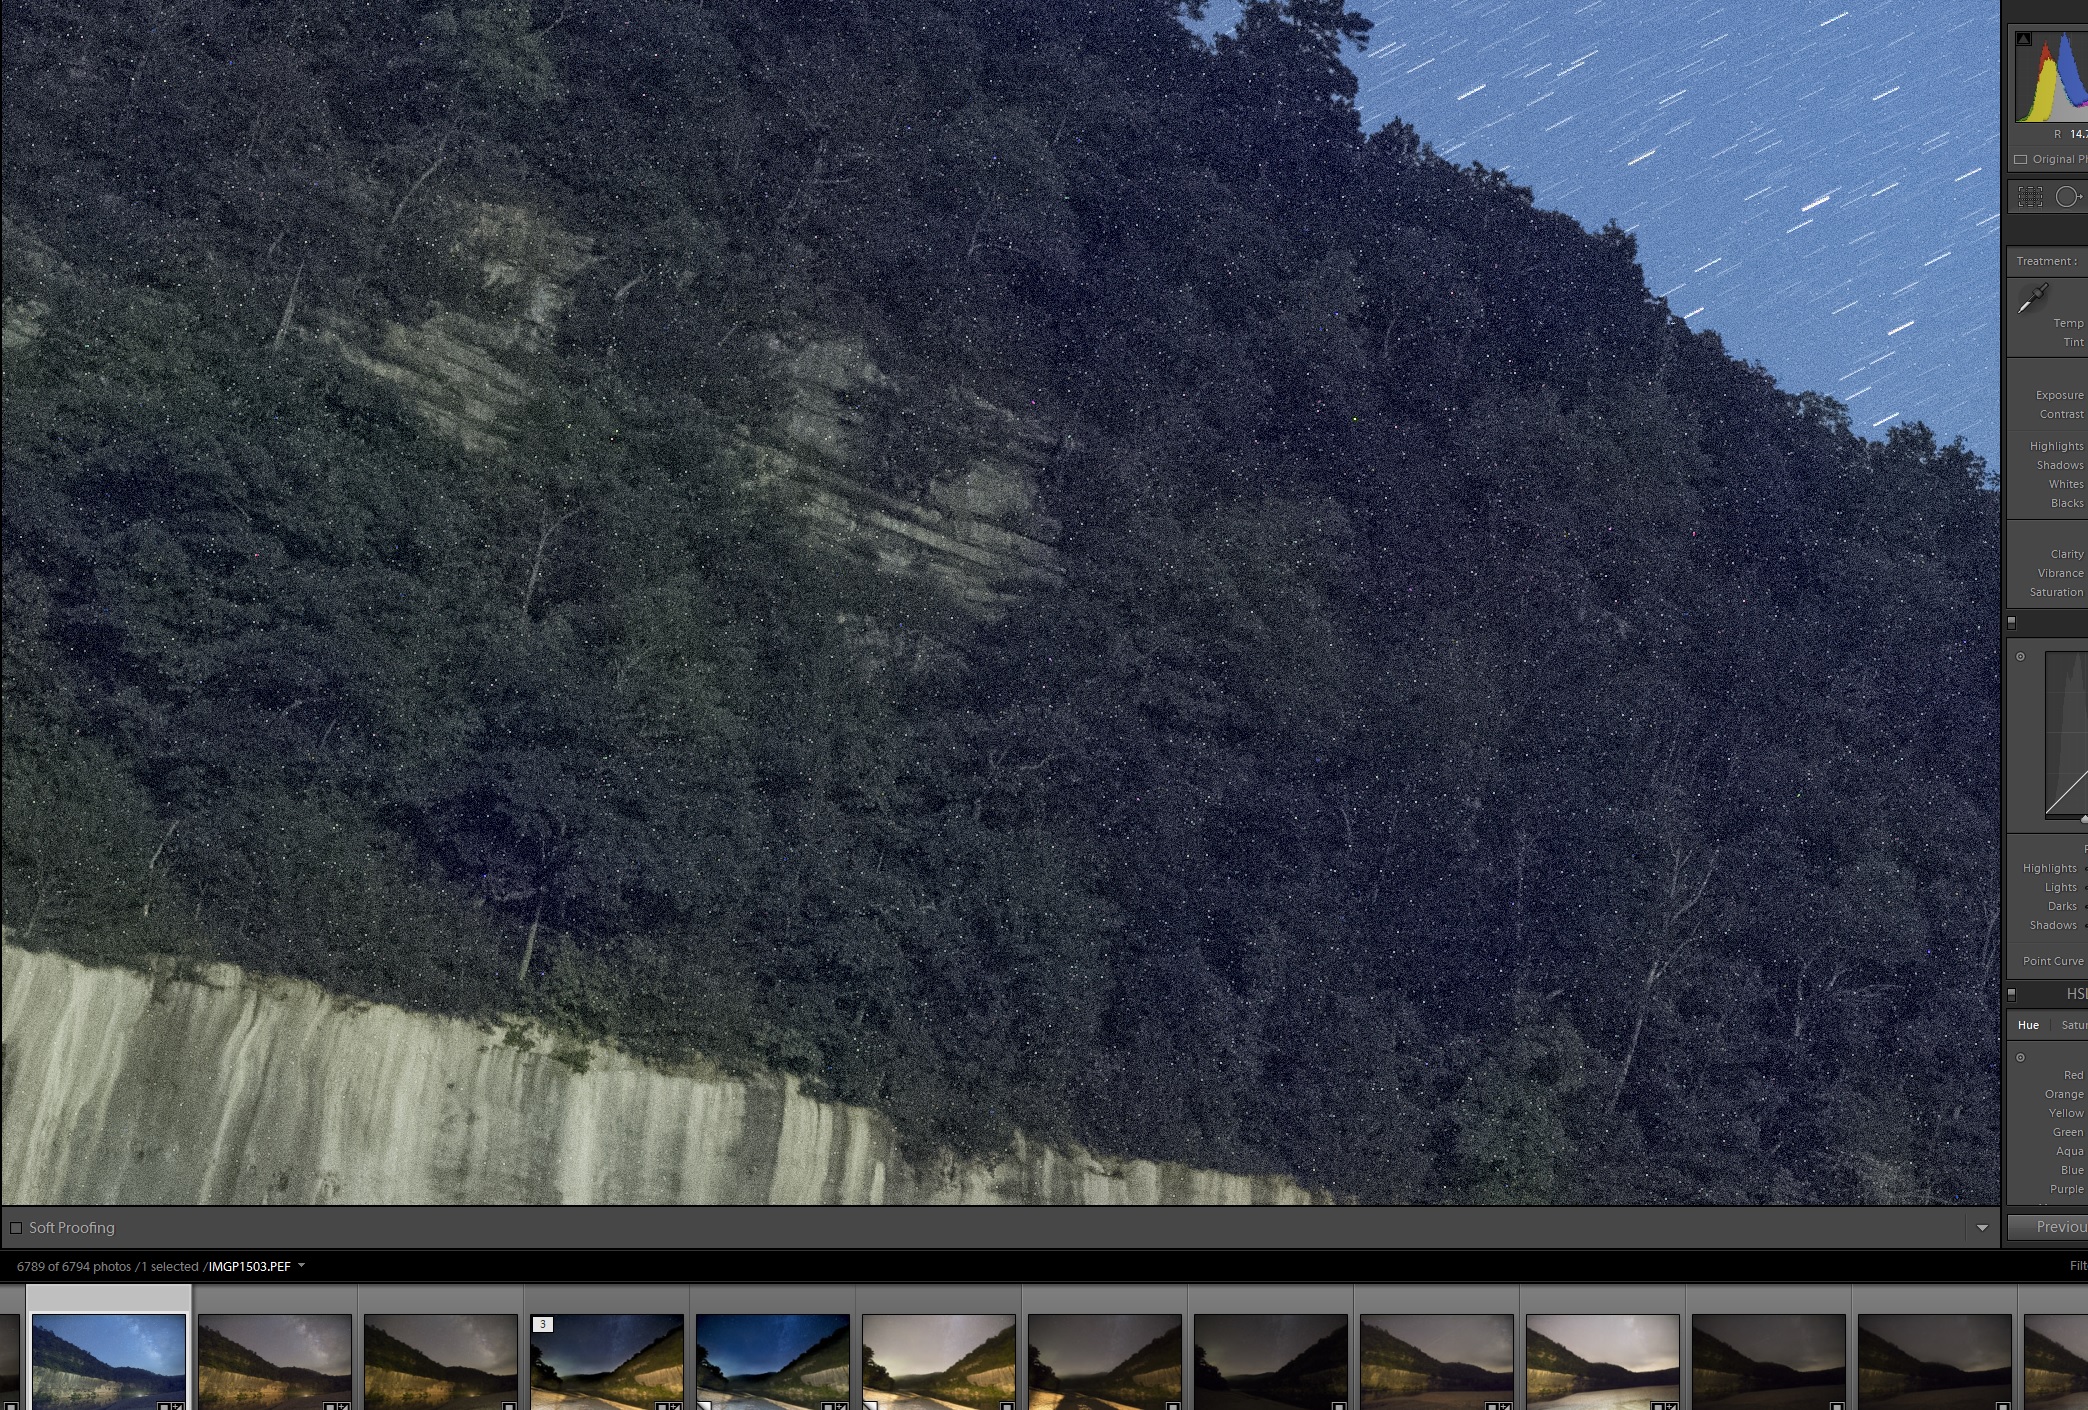
From my photography I feel if there is a downside to the IQ100 dynamic range, it would be in the shadow recovery. Here you have to be very careful as just one stop or two can make a huge difference between good details and color in the shadows. Lets go back to an example from the same set of images. If you look at the image at the top of this article, you can see that towards the far right on the bluff there is a dark area. I shot this scene in several brackets at both ISO 50 and 100 as I was unsure as to just how the clouds would capture. As it turned out, the clouds/sky were not the problem, but the dark shadows were. Look at this comparison: make sure to click on the image to view it full screen.
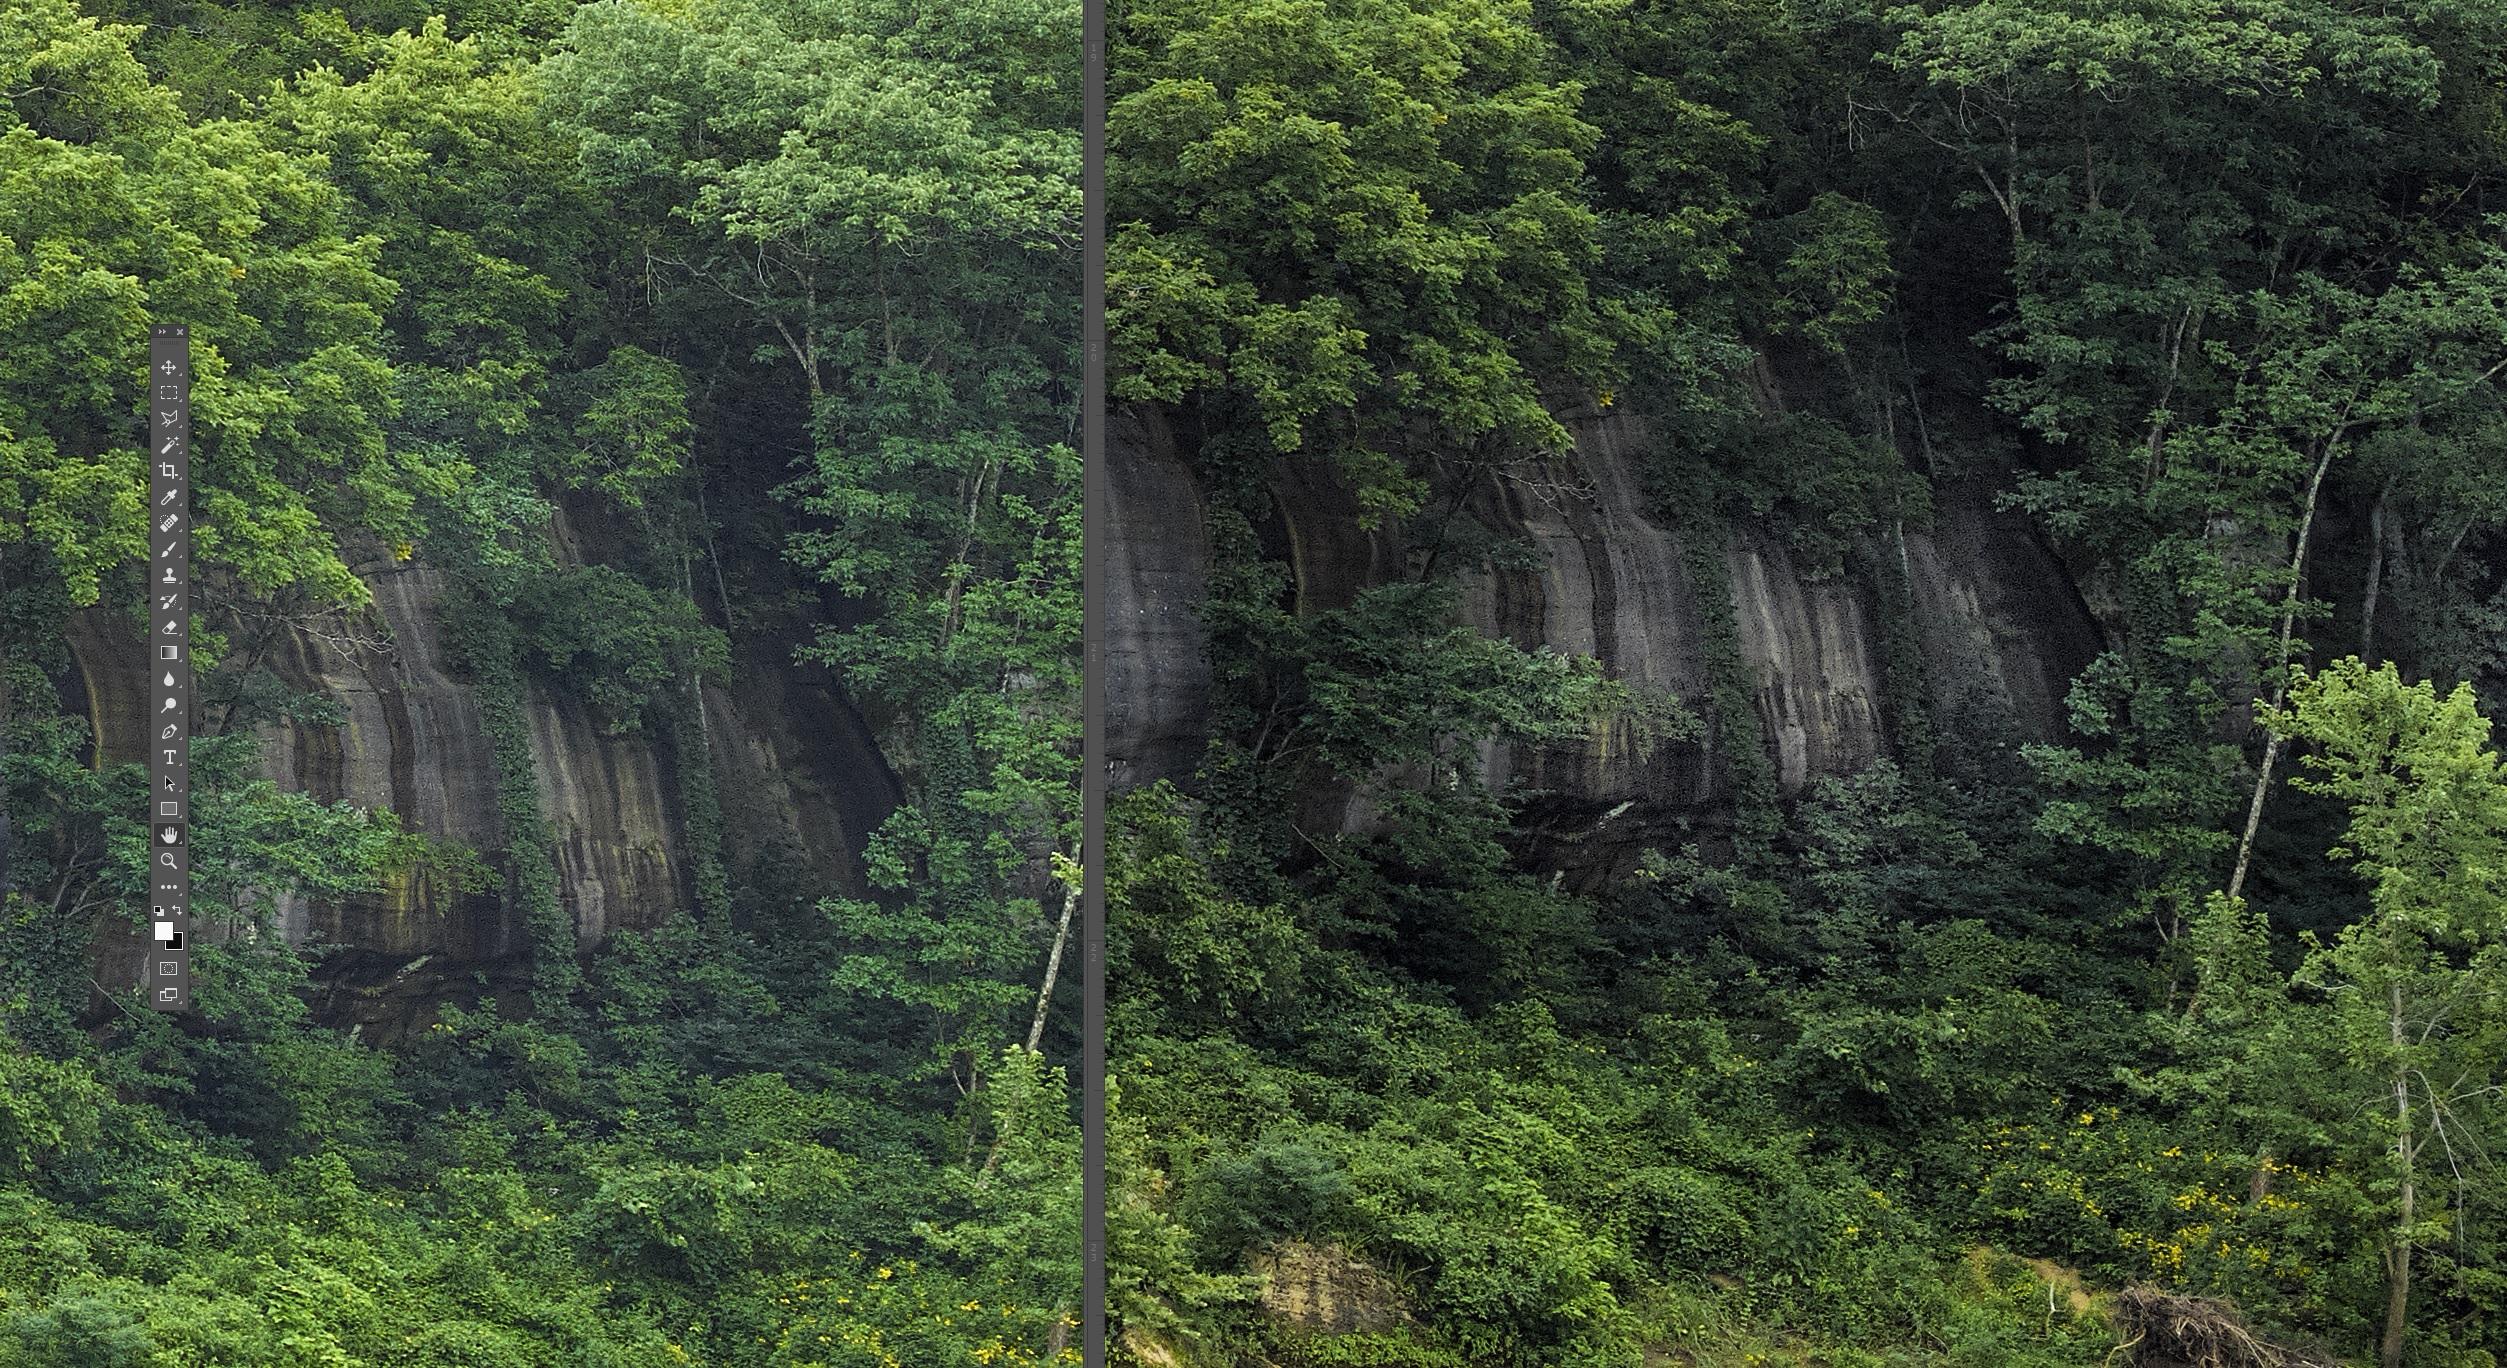
IQ100 side by side for shadow details
The image on the left was shot at ISO 50 at 1/25th of a second, F12, and the image on the left was taken immediately next at ISO50 and 1/60th of a second F12. If you click on the image, you can see that the bluff and trees along the bluff are almost devoid of color and there is considerably more noise. Both of these screen crops are from sharpened final images. The image on the left holds the green down into the shadows where as the same part of the image on the right is starting to lose the color fidelity. The color you may be able to pull back with some work in Photoshop, but the noise and loss of overall details you will never get back. So the point, is that you really need to watch your exposure and if you are unsure, bracket the frames. Just a difference in 1/25th and 1/60th can make a big improvement in the overall quality of the final image.
Photographer’s Notes:
I feel that there is considerably more dynamic range in the IQ100 CMOS back, over similar CCD backs like the IQ260 and IQ380 (60 and 80MP respectively)
The IQ100 has a tendency to push to a green overall tint and it seems that the greens can easily be come over saturated.
When working in mixed outdoor lighting, I would recommend exposing to the right, and pushing the highlights, as from my shooting experience you can easily recover 1 stop and possibly 1.5 stops in the highlights.
The shadows will quickly loss details and color if underexposed, even at base ISO of 50 or one push to ISO100. Once these details are lost you will not be able to get them back easily.
Considering that the 100MP back will start to suffer softness from diffraction at apertures past F11, you need to balance your shooting between both shutter speeds (subject allowing) and ISO.
When working on a single file, don’t be fooled into thinking that you have lost your highlights as you will be surprised to see just how much dynamic range and malleability is available in these fantastic files.
05/25/16 Six Finger Falls on Falling Water Creek–Featured Arkansas Landscape Photography
- At May 26, 2016
- By paul
- In Featured Arkansas Photography
 0
0

A late springtime view of six finger falls on falling water creek.
Taken in two frames with a Phase One IQ100 and Phase One 35mm LS lens, raw files developed in Capture One, panorama stitching in Lightroom.
We had driven up to 6 finger falls to attempt a night shoot, which did not work out due to the clouds that rolled in, however during the sunset, the light did allow for a wonderful series of photographs. I love to get down low on the creek, below the falls and attempt to grab some short pans, as the normal medium format of 4:3 does not allow for very much to work with. I am not a big fan of cropping out the center of a shot to get to a pano, as you loose so much image in the process.
Normally, I would have used my rail to get a nodal solution, but I had forgotten it. Using the Arca D4 geared head, it was easy enough to get level for each shot, then go back to Lightroom to let it work it’s magic on the panorama. Lightroom with the new panorama feature does a great job on single row stitching and now they have added a feature called boundary warp, which really does a great job. In the past, I had always used software like Ptgui or Kolor’s panorama software, to get a cylindrical solution, as I am panning with a wide lens, (the 35mm in medium format is equivalent to about 22mm with a 35mm camera), still not that wide. The 35mm LS has a pretty good hyper focal range by F11 and I took this at F14. Due to the subject range and distance, I was not worried about losing details to diffraction.
For these shots, I used both a circular polarizer and a Neutral Density filter. The polarizer was from B+W and the ND filter from HiTech, (their new Firecrest line). This allowed exposure times of around 1 sec, at an ISO of 50. There was little to no wind blowing so I was able to get away with just two exposures.
The addition of the boundary warp in Lightroom has really made this type of photography more fun and much quicker to get to a solution.
 From the Blog
- 01/24/24 Sunset over Walton Heights and Pinnacle Valley January 24, 2024
- 01/22/24 Looking through the Keyhole on Roark Bluff–Autumn January 23, 2024
- 01/14/24 Sunset from Pinnacle Mountain Little Rock, AR January 12, 2024
- 01/14/24 Winter View of Pinnacle Valley January 12, 2024
- 01/12/24 Fall Scene, Pinnacle Mountain January 11, 2024
- 01/11/24 Hasselblad XCD Camera lenses, all out of stock? January 11, 2024