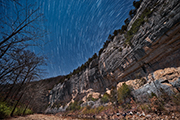
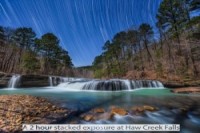
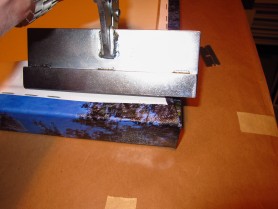
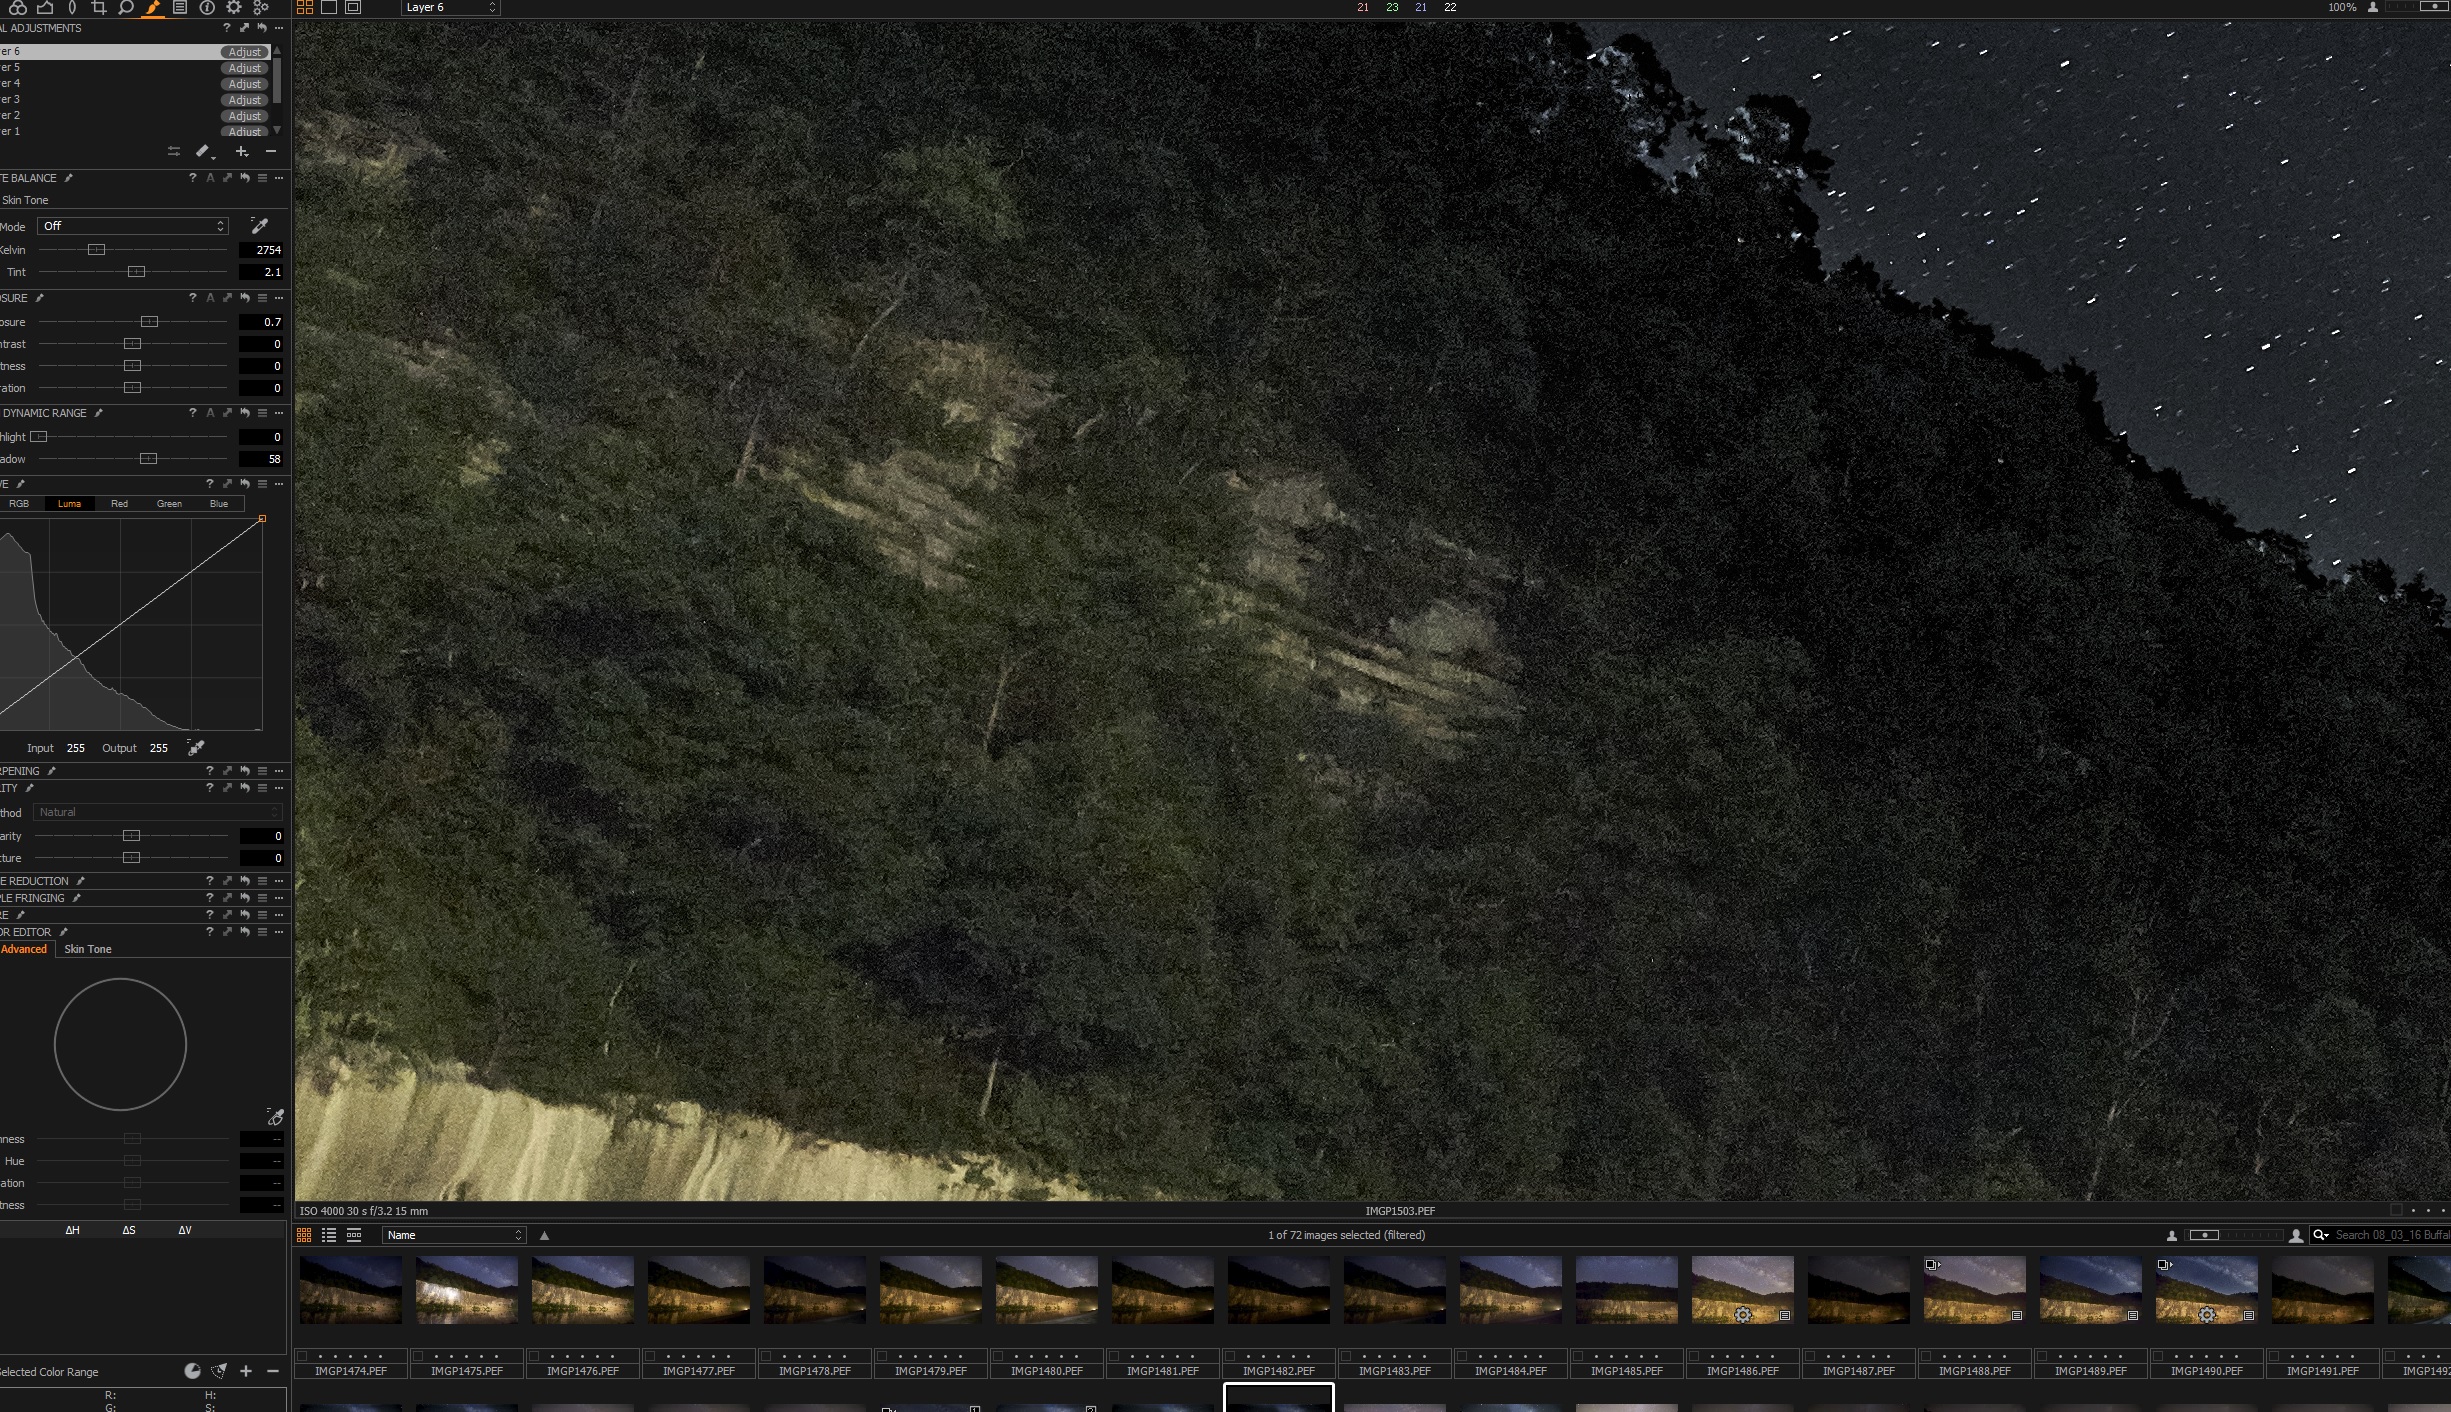
Pentax K1 White Dot Issue on Longer Exposures–Same as the other cameras using the Sony 36MP chip
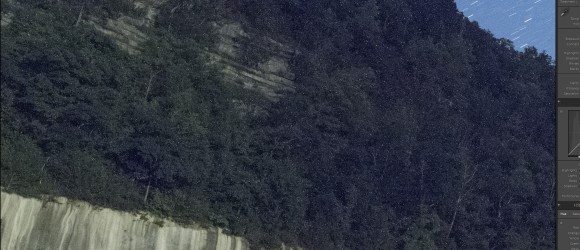
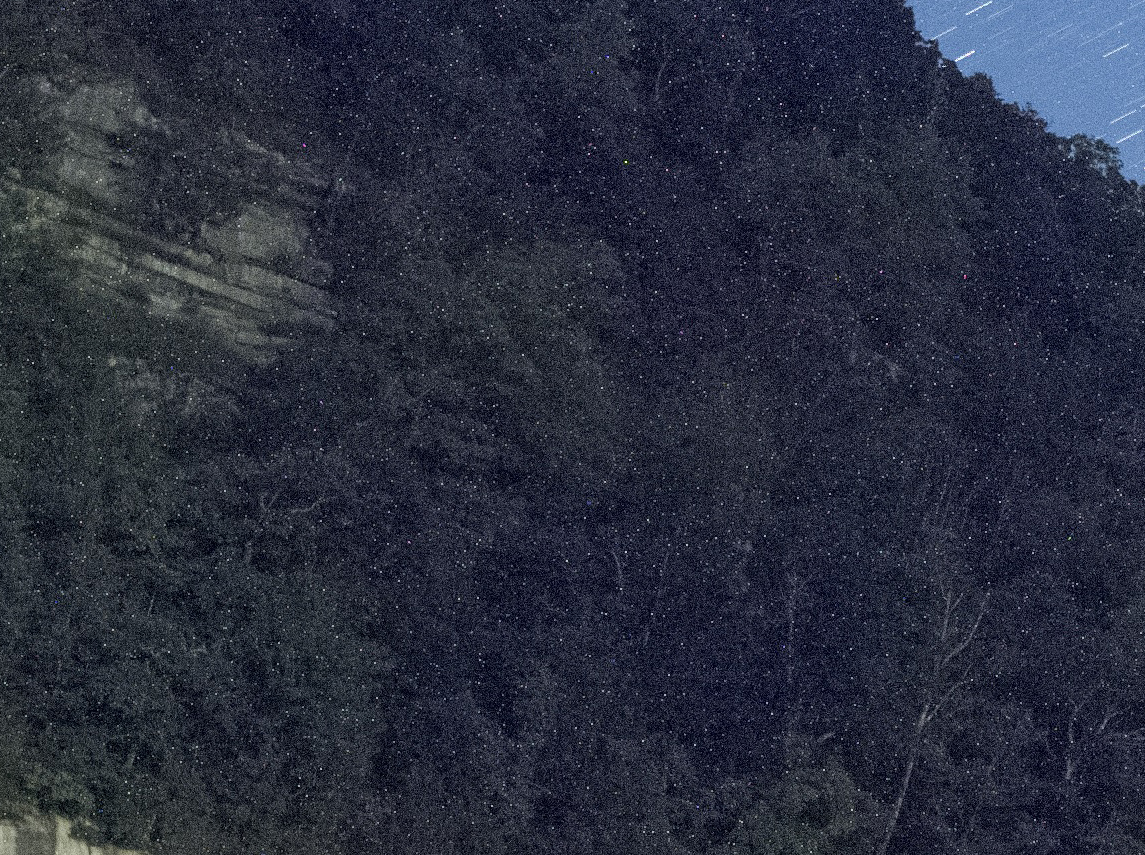
Example of Pentax k1 White Dot issue–Click on image to view in better detail
With the introduction of the full frame Pentax K1, Ricoh Imaging appears to have made a giant stride forwards with technology, however it appears that they overlooked one critical issue with the 36MP Sony sensor–White Dots with longer exposures.
I have worked with the K1 now for several months and have found it to be an excellent platform for most photography, however one of my main reasons for the investment in the K1 was astro-photography. Night sky work, not telescope work. Photography of both the MilkyWay and star trails. Both of these forms of photography require long exposures and in most cases multiple stacked exposures for the best results. What you quickly find, that when used in this fashion, the K1 creates thousands to millions of fine white dots, as shown in the photo above. These are not traditional noise, as we know it, as that tends show up as stuck pixel (red, green and blue) or extra grain in the shot. This exact same problem was visible in early shots taken with the Nikon D810, and Nikon quickly recalled all the early shipping D810’s and made some type of a firmware and hardware fix. It was not a standard firmware fix, as the camera had to be sent to a Nikon service center for the fix. But it worked!!. The D800e also had the same problem, but Nikon did not fix these with a recall, they just fixed the problem on later shipping cameras. I know this because I owned 2 D800e’s and the first camera had the issue terribly and the 2nd camera was clean. My D810 also showed the problem immediately but was much better after the Nikon fix.
Read more about the Nikon recall here–Nikon Recall for White Dots.
Read more about the Nikon D800e Problem here–Nikon D800e White Dots.
I have noticed this issue in all my long exposures with the K1, from 30 seconds to 2.5 minutes, at ISO ranges from 320 to 5000. The issue becomes worse over time so it’s fair to state that it’s a temperature related issue from the sensor, just like Nikon noted. How does this issue effect your photography? Read more below.
Photographer’s Notes:
- The main concern here is that the millions of white dots are not easily removed in post. Currently Adobe Lightroom does nothing to remove them and Phase One’s Capture One with the single pixel noise reduction slider will take most of them out, albeit at a possible loss of details.
- Where will you see this issue? With any long exposure of 30 seconds or more and if the outdoor temperature is above 85 degrees F, expect the problem to be very severe.
- Will you see this issue with Astrotracer photography? Yes, with the Astrotracer feature of the camera enabled, you will see the white dots unless you turn on the “Long exposure noise reduction” feature in the camera
- OK, if I can remove them with the “Long Exposure Noise Reduction” what is the big deal” Good question and I will answer this in more details later on, but the main reason is that LENR (long exposure noise reduction) requires the camera to take another exposure the same length as the previous exposure so you are wasting battery life, shooting time, and heating the sensor up.
- Why do the White dots bother Stacking work? The white dots remain fixed throughout the exposures, however over time expect to gain a few thousands more. If you are stacking and want to remove gaps created by stacking, the white dots become very problematic.
Read more about why stacking for star trails is important here: Stacking for better night photography.
Why the White Dots are a concern for Night Photography:
There are many reason, but for sure 2 come to mind immediately.
If you stack for star trails. This allows you to use partial moonlight to illuminate the foreground of your subject which gives you a much more natural look to your image. Stacking requires a intervalometer to be used as you need to have a timer and control over the interval, which in this case is 1. The fact that the intervalometer will close the shutter between each stack, means you will have a slight gap in your star trails. This is easily fixed with the use of software that will slightly rotate your final image to cover up the gaps. Examples of this type of software are “Star Tracer” If you rotate the images with the white dots, they become dotted lines though out the entire file and contrast sharply with you star trails, in effect ruining the image. There is no easy way to remove all the millions of dotted lines either.
So this says you have to work up the images in a raw converter that will removed the dots to a good degree and so far the only software I have found that will do this is Capture One, by Phase One. You are eliminated from any Adobe product like ACR or Lightroom as both just seem to magnify the dots. Also any image work, where you might add clarity to help brighten the stars will also brighten the white dots.
If you use the Pentax LENR (long exposure noise reduction) most of the white dots are taken out, but this brings up some more issues.
The LENR takes an exposure that is just as long as the original, so if you just complete a 2 minute exposure, the camera will lock up while it takes a 2nd matching dark frame. You cannot make any other adjustments to the camera or view anything during this time frame. The resulting dark frame create a much larger gap in your star trails photography, and Star Tracer can remove them, but at a huge price since your image will heavily blurred by the rotation to fix this large a gap. Sure you cut back on the time from 2 minutes to 30 seconds, but then you more than likely will have to increase your ISO to a point that the increase in will degrade your details in the foreground portion of your image. But that still may be something I try with the K1 and Star Tracer to see if I can get an acceptable solution.
LENR is also very wasteful. Thing about it, you are just using up both battery life and possibly heating up your sensor due to extra processing going on. The use of LENR, also precludes using a intervalometer as it will throw off your sequence. If you are set to shoot at an interval of 1 for 2 minutes etc. then when the dark frame kicks in it will start to run into your actual next exposure time, and shorten it. This also adds up over time and creates unbalanced exposures.
If you are using Pentax Astrotracer for night shots of the Milky Way, odds are you should go ahead and enable LENR, as the max time you are going to kept out of the camera is 5 minutes and the difference in the images is most impressive. This also precludes you using Pixel shift for night work something I was curious about since pixel shift seems to give better results at higher ISOs with the K1. But if you are working traditional star trails, then LENR is not a great idea and thus you have to consider using Capture One for your raw. Make another note, do not capture as jpg as even Capture One won’t remove the white dots from jpgs, they are fixed forever in the image.
Here is an example from the same crop shown at the top of this article that was worked in Capture One. Click on the file to view at 100% and you can see that Phase One has done a very good job here on the raw conversion for the K1, as most the white dots are removed.
Example of the Capture One and white dot removal
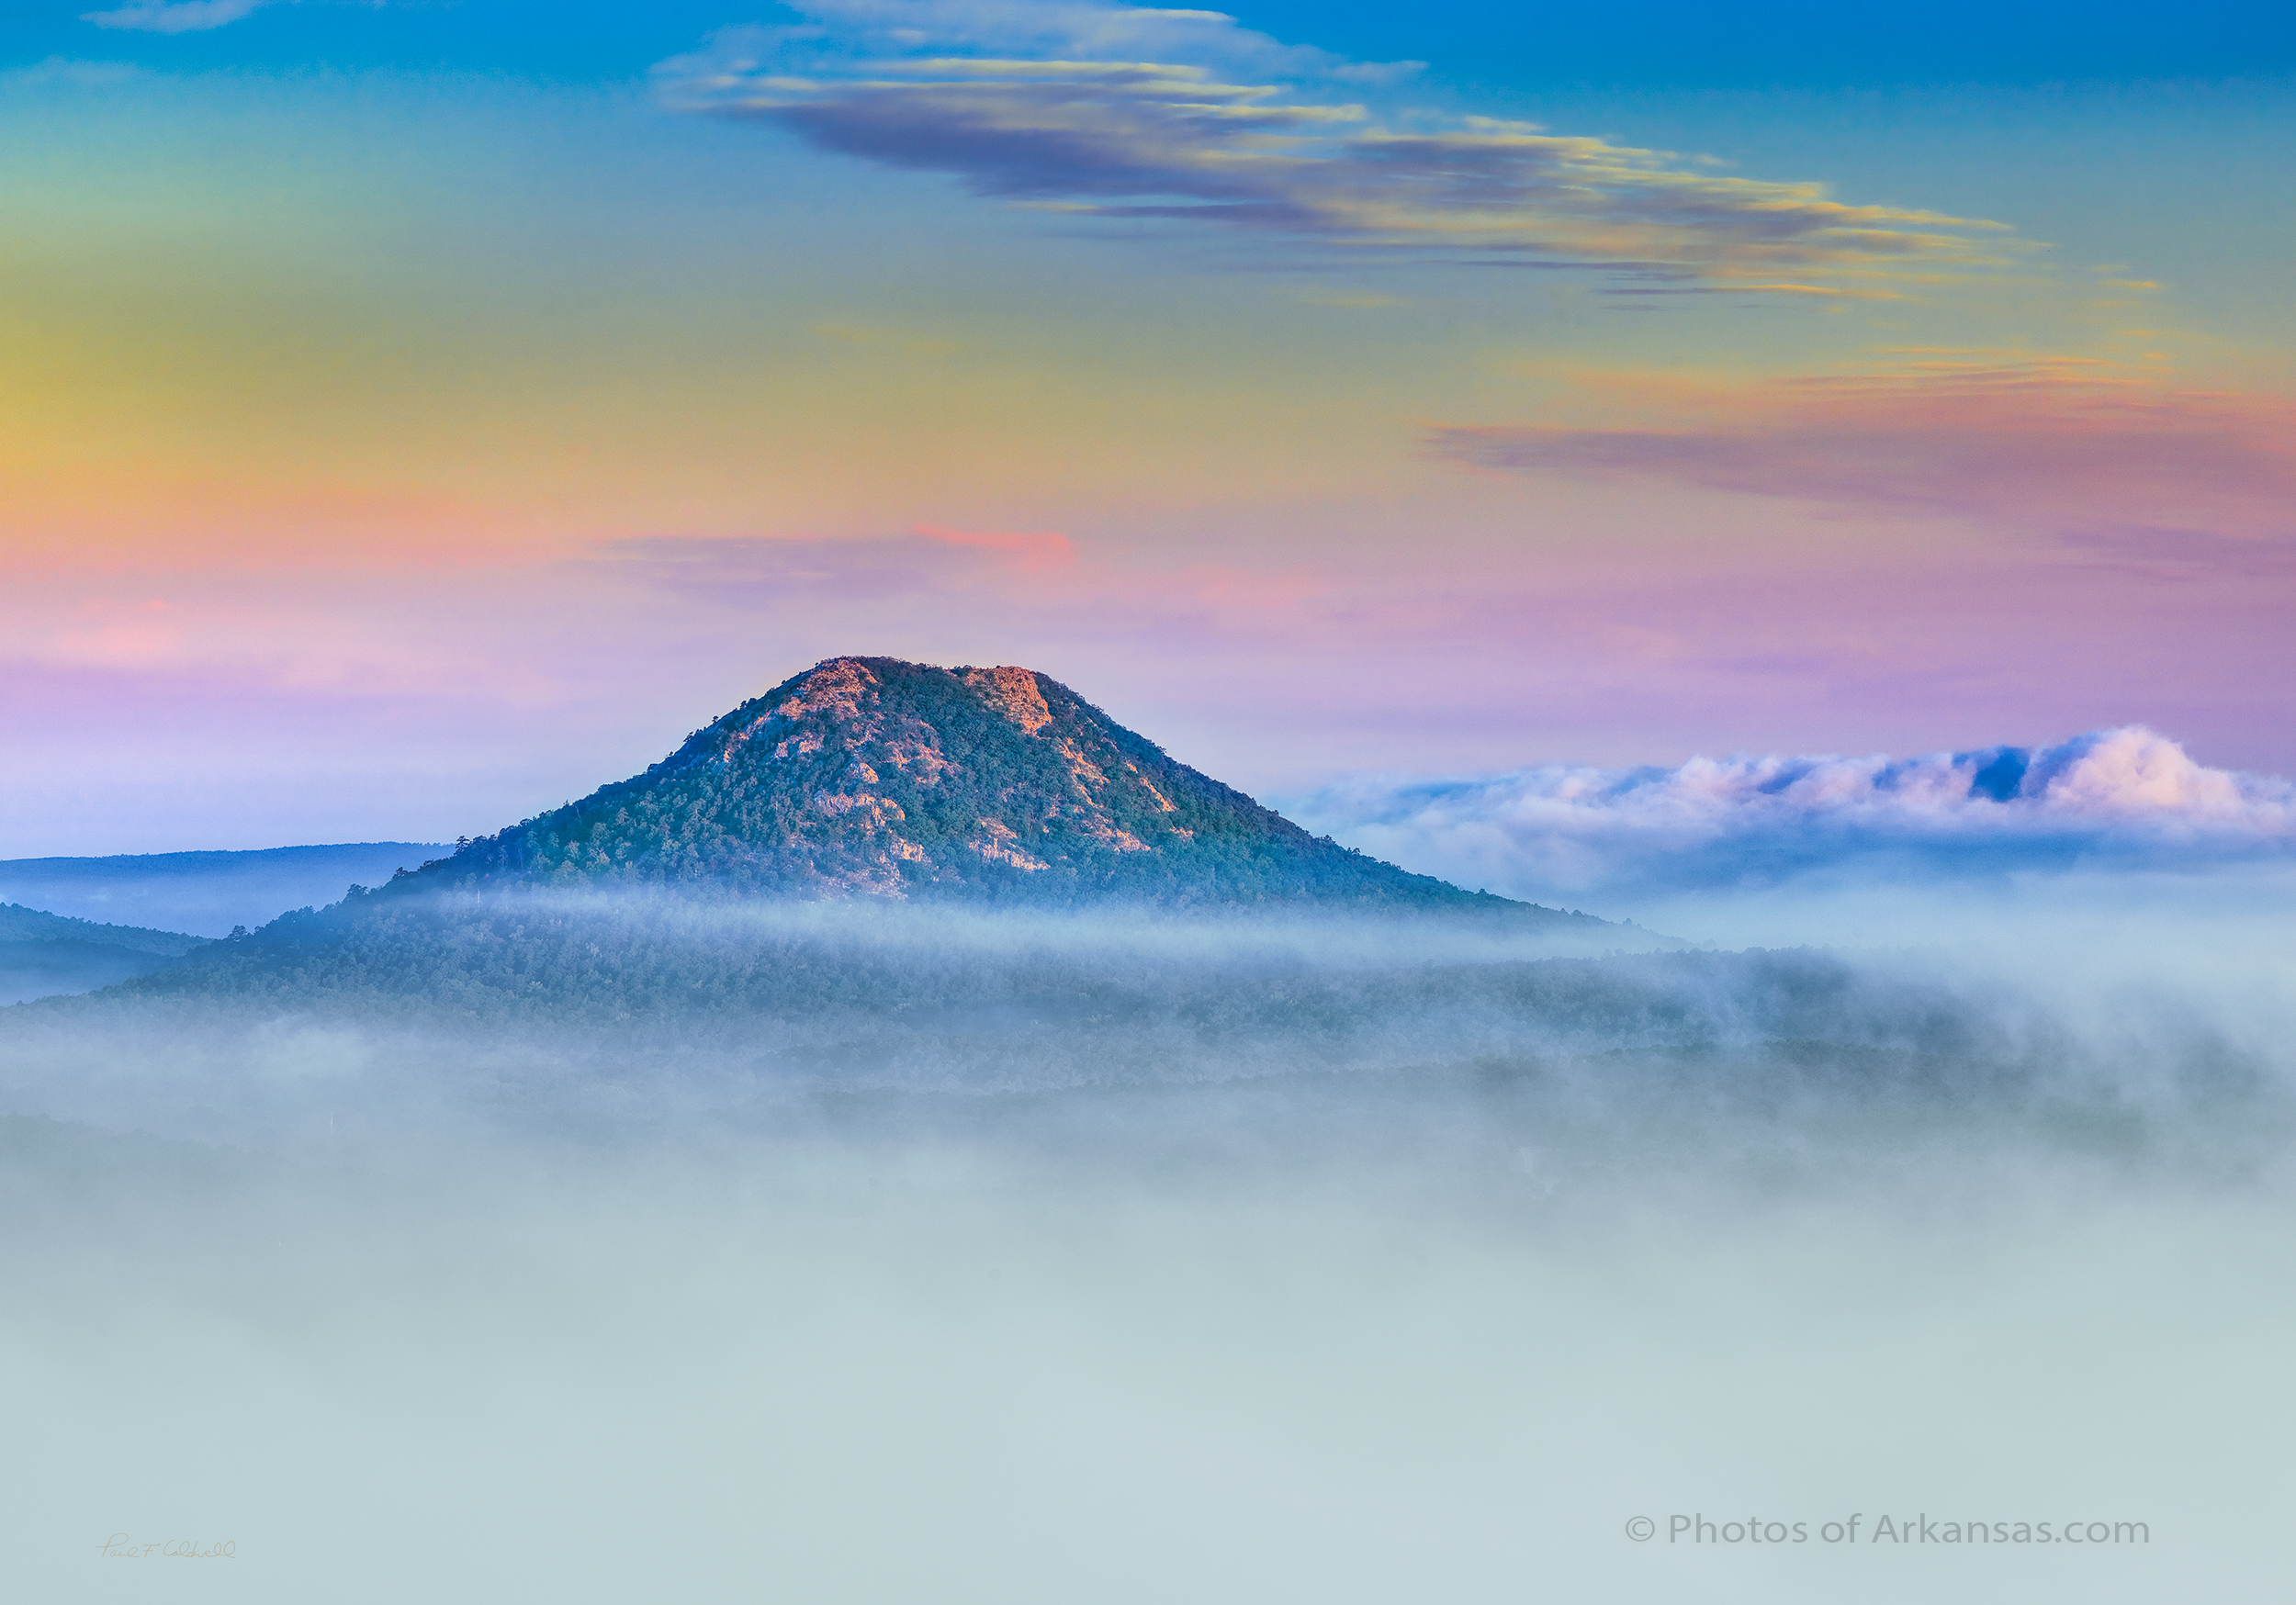
08/08/16 Featured Arkansas Landscape Photography–Milky Way over Buffalo Point, Buffalo National River
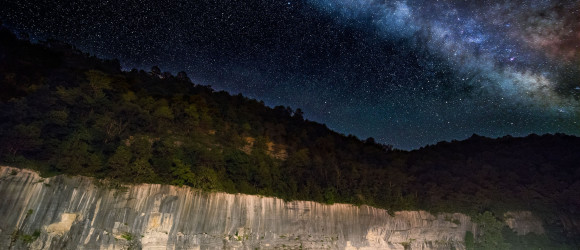

The Milky Way over the Buffalo River at Buffalo Point, Buffalo National River.
Taken with a Pentax K1 and 15-30mm lens @ 15mm and F 3.2 ISO 3200 for 2 minutes using the Pentax Astrotracer function in camera.
This was my first test for night photography with the Pentax K1, and overall I was pleased with the results from the Astrotracer feature in camera. This photograph is a combo from a 2 minute Astrotracer shot for the MilkyWay, and several different shots for the foreground at various times. I used a small lantern down by the bluff to add some local illumination.
Chris Kennedy and I worked for about 2 hours, starting with a very clear night sky and temperatures around 89 degrees with 100% humidity. 2 hours later the temperature was about the same, so I was sweating just standing around waiting on the camera. But there was little to no wind so I was able to pull a nice reflection of the bluff on the river and if there had been a bit more water or a better angle by me, I might have gotten a Milky Way reflection.
Buffalo Point is one of the more popular spots on the Buffalo River, and the only campground with full electric hookups, so it will always be crowded in the summer months. You can either reserve a campground in the lower camping loops or you can try to get a spot in loop A, where it is always first come first serve, and loop A is the original WPA worked sites. I hope to get back to work this place in fall, both for the Milky Way and later on for Star trails. Star Trails will be a bit more difficult due to the location of the moon and due north.
Paul Caldwell
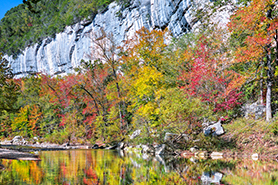
06/18/16 Featured Arkansas Landscape Photography–Nighttime skies over Falling Water Creek
- At June 18, 2016
- By paul
- In Featured Arkansas Photography
 0
0
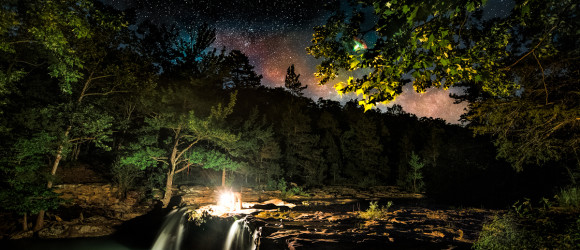

Nighttime skies over Falling Water Creek
Taken with a Nikon D750, ISO 3200, 15 seconds with a Nikon 14-24 lens at 14mm F 2.8 for main night sky and a series of shorter exposures to blend in the lantern and water.
Working with the night sky can be easy and hard and on this night it was a combination of both extremes. I was working with Chris Kennedy at Falling Water Falls in the Arkansas Ozarks. Falling Water Falls is one of the more known spots and very often has a lot of folks either swimming or just hanging around. But at midnight, I have yet to run into anyone (at least human). I have thought about this spot many times for either star trail work or the Milky way and have successfully taken many star trail shots here, but have never worked the Milky Way. The conditions for the best Milky Way shooting are a moonless night or as close to it as you can get. On this night Chris and I were working with a very small amount of moon less than 16% and we both hoped that this amount of light would not effect the Milky Way’s luminace, but we were wrong. As soon as the last of the sunlight was gone, we could quickly see that there was quite a bit of light being provided by the 16% moon, which was setting directly behind us. On this night, June 8th, the Milky Way was due south and very faint at first. This was as strange night as there was too much moonlight to really see the Milky Way but the stars were amazingly bright. Also this small amount of moonlight did not provide very much light to the falls and surrounding area, so we quickly fired up a lantern.
The night was very muggy and dead calm. Normally I want dead calm, but as soon as I fired up the lantern every bug in the area made a bee line for the light and for the rest of the night we were covered in bugs. There were also a lot of lightening bugs and they added a strange effect to a lot of the star stacks. We kept looking for the Milky Way to the southwest as both of our star tracer apps were pointing us that direction but we could not see it. After working for about 1 hour I happened up to the top of the falls and for the first time could really see that the Milky Way was off to the southwest and very low on the horizon. Strange!, but still possible to shoot.
We quickly left out spot on the far side of the falls. We had set up here as it was the only only place to really get a clear view of the sky below the falls. Once on top on the large ledge that creates Falling Water Falls, we could clearly see the Milky Way just over the tree line. The moon was so low in the sky now that it was not providing any illumination at all, so Chris walked out on the ledge and held the lantern. It really made the shot in that the lantern provided just enough light to the immediate parts of the trees and gave a very nice fade out. The trick was holding the lantern totally steady for the 17 seconds required to shoot the sky. We actually both tried this for each others shots and it came out very nicely. I have left one piece of lens flare in this shot as it’s not really hurting the shot. The 14-24 will flare always, when given any chance. This will be an easy one to take out later.
I used the Nikon D750 for this shot and I was very impressed! The ambient temperature was around 70 degrees F and the relative humidity had to be 100%. I shot the entire sequence at ISO 3200 with the 14-24 wide open at F2.8. The longest exposure I used was 20 seconds and there was just a bit of trailing on the far sides which I did take out with a custom brush in Photoshop. At 20 seconds I was just able to get enough of the unique color of the Milky Way, however the rest of the frame was totally blown out due to the lantern. So I then shot a series of short frames the shortest exposure @ 6 seconds and then combined various elements from 3 different shots to get the final work. There was no wind blowing or very little most times so the leaves are not blurred and can add a nice effect. The lantern added a very warm tone to the trees and water so I also tweaked that back to a more neutral tone.
Overall I am pretty happy with this attempt. If there had been much more water coming over the falls, then all the trees below the falls and on the side would have been moving due to the force of the water. The lantern captured the nice green color of the water which is common to all Arkansas streams this time of year. For the Milky Way, I spent the most amount of time as it was just barely showing so I used several different adjustment brushes in Lightroom to help bring out the colors and different tones common with the nightsky. The stars were very bright this night and they add a very nice contrast to the night sky above the Milky way.
 From the Blog
- 01/24/24 Sunset over Walton Heights and Pinnacle Valley January 24, 2024
- 01/22/24 Looking through the Keyhole on Roark Bluff–Autumn January 23, 2024
- 01/14/24 Sunset from Pinnacle Mountain Little Rock, AR January 12, 2024
- 01/14/24 Winter View of Pinnacle Valley January 12, 2024
- 01/12/24 Fall Scene, Pinnacle Mountain January 11, 2024
- 01/11/24 Hasselblad XCD Camera lenses, all out of stock? January 11, 2024