02/14/16 Featured Arkansas Landscape Photography–Sunset from the summit of Flatside Pinnacle


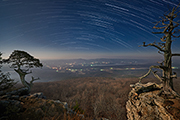
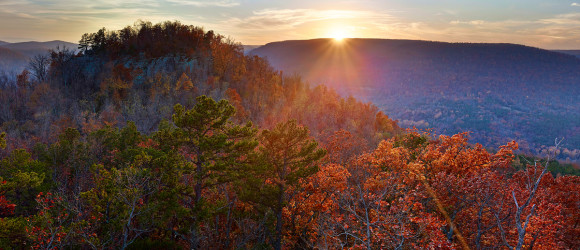
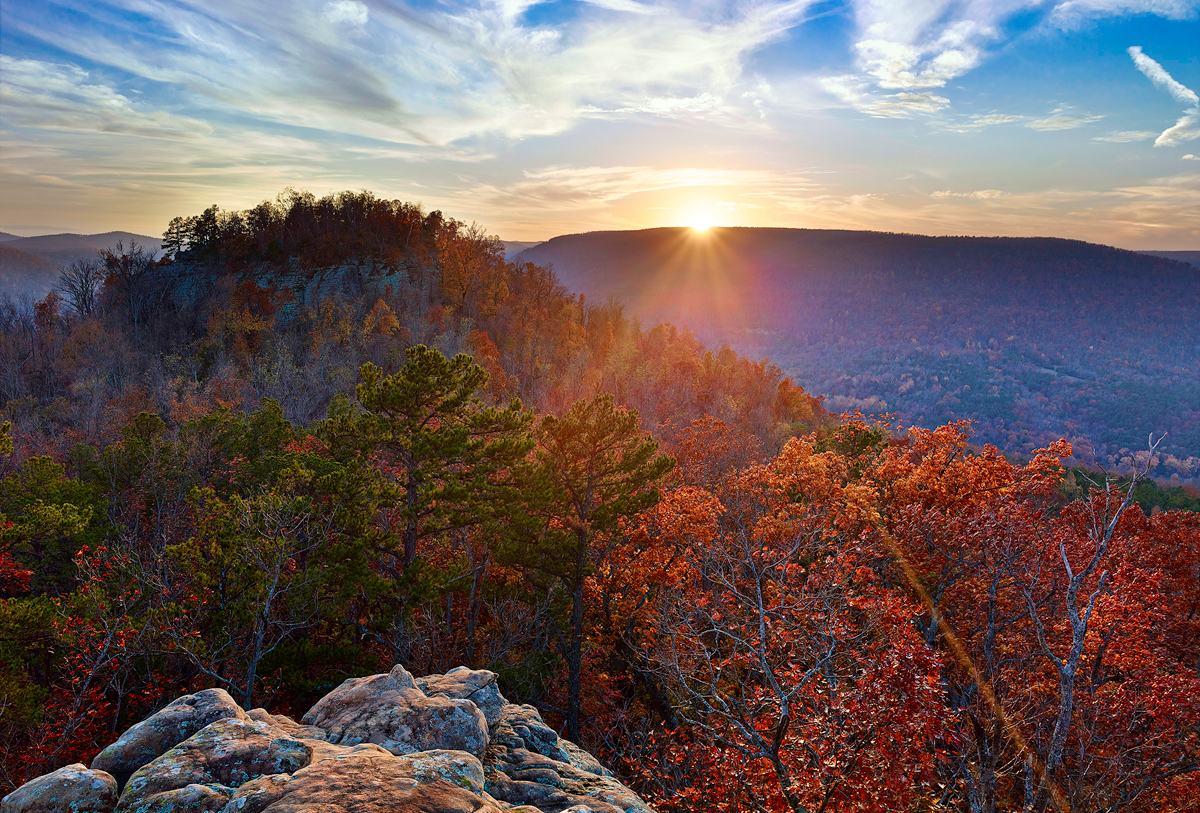
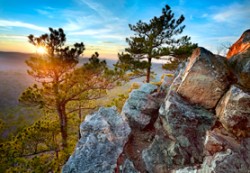
Sunset from the summit of Flatside Pinnacle
PLEASE NOTE: All of the photography of this website is the property of www.photosofarkansas.com and is copy right protected. Do not copy any of the images on this site to paste on Facebook, Pintrest, or any other website without the permission of Paul Caldwell. Years of time have gone into capturing these photographs, please respect that. I do not take copy right infringement lightly. If you have a need to display any of my work on your site ASK me before you Copy & Paste.
Taken with a Phase One IQ160 Medium Format Back and Arca rm3di/28mm Rodenstock Lens, image was captured in a bracketed series of exposures.
I have featured this image many times, but it’s still one of my favorites. I took this shot in January 2011 with a “tech” camera an Arca rm3di, with a Rodenstock 28mm lens. This view has since been ruined by graffiti, which was painted all over the rocks. I have slowly tried to removed it over the past 2 years, and have made some progress, however to the assholes that did it, **uk you.
Flatside Pinnacle is the key point in the Flatside Wilderness, and is right in the middle of the Quachita mountains. Looking in the shot between the two pine trees you can see Forked Mountain off in the western distance. Towards the middle of summer, you can catch the sun setting over the top of Forked Mountain. Flatside itself is around 1,500 feet tall, which make it taller than both Mt. Nebo, (near Russellville) and Petit Jean Mountain. The good news is that you don’t have hike very far to get to the summit as a road takes you almost all the way to summit. The Ouachita trail comes very close to Flatside also. The view from the summit has to be one of the best in Arkansas. Here looking to the west you can see Forked Mountain, and off to the right, Mt. Nebo, Spring Mountain, and the grandest of all Mt. Magazine, which is over 2,700 feet tall.
Flatside is great spot to catch a sunset, however if you want to get the best light try to get there before 11:00 am as after that you will be shooting into the sun. If there are some clouds, you may still get away with a great shot. Take a lunch and sit out on the rocks and enjoy the day.
11/10/15 Featured Arkansas Landscape Photography–Springtime View of Haw Creek Falls
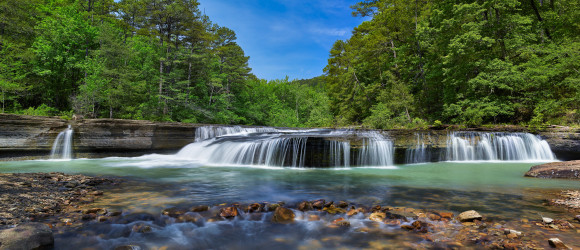
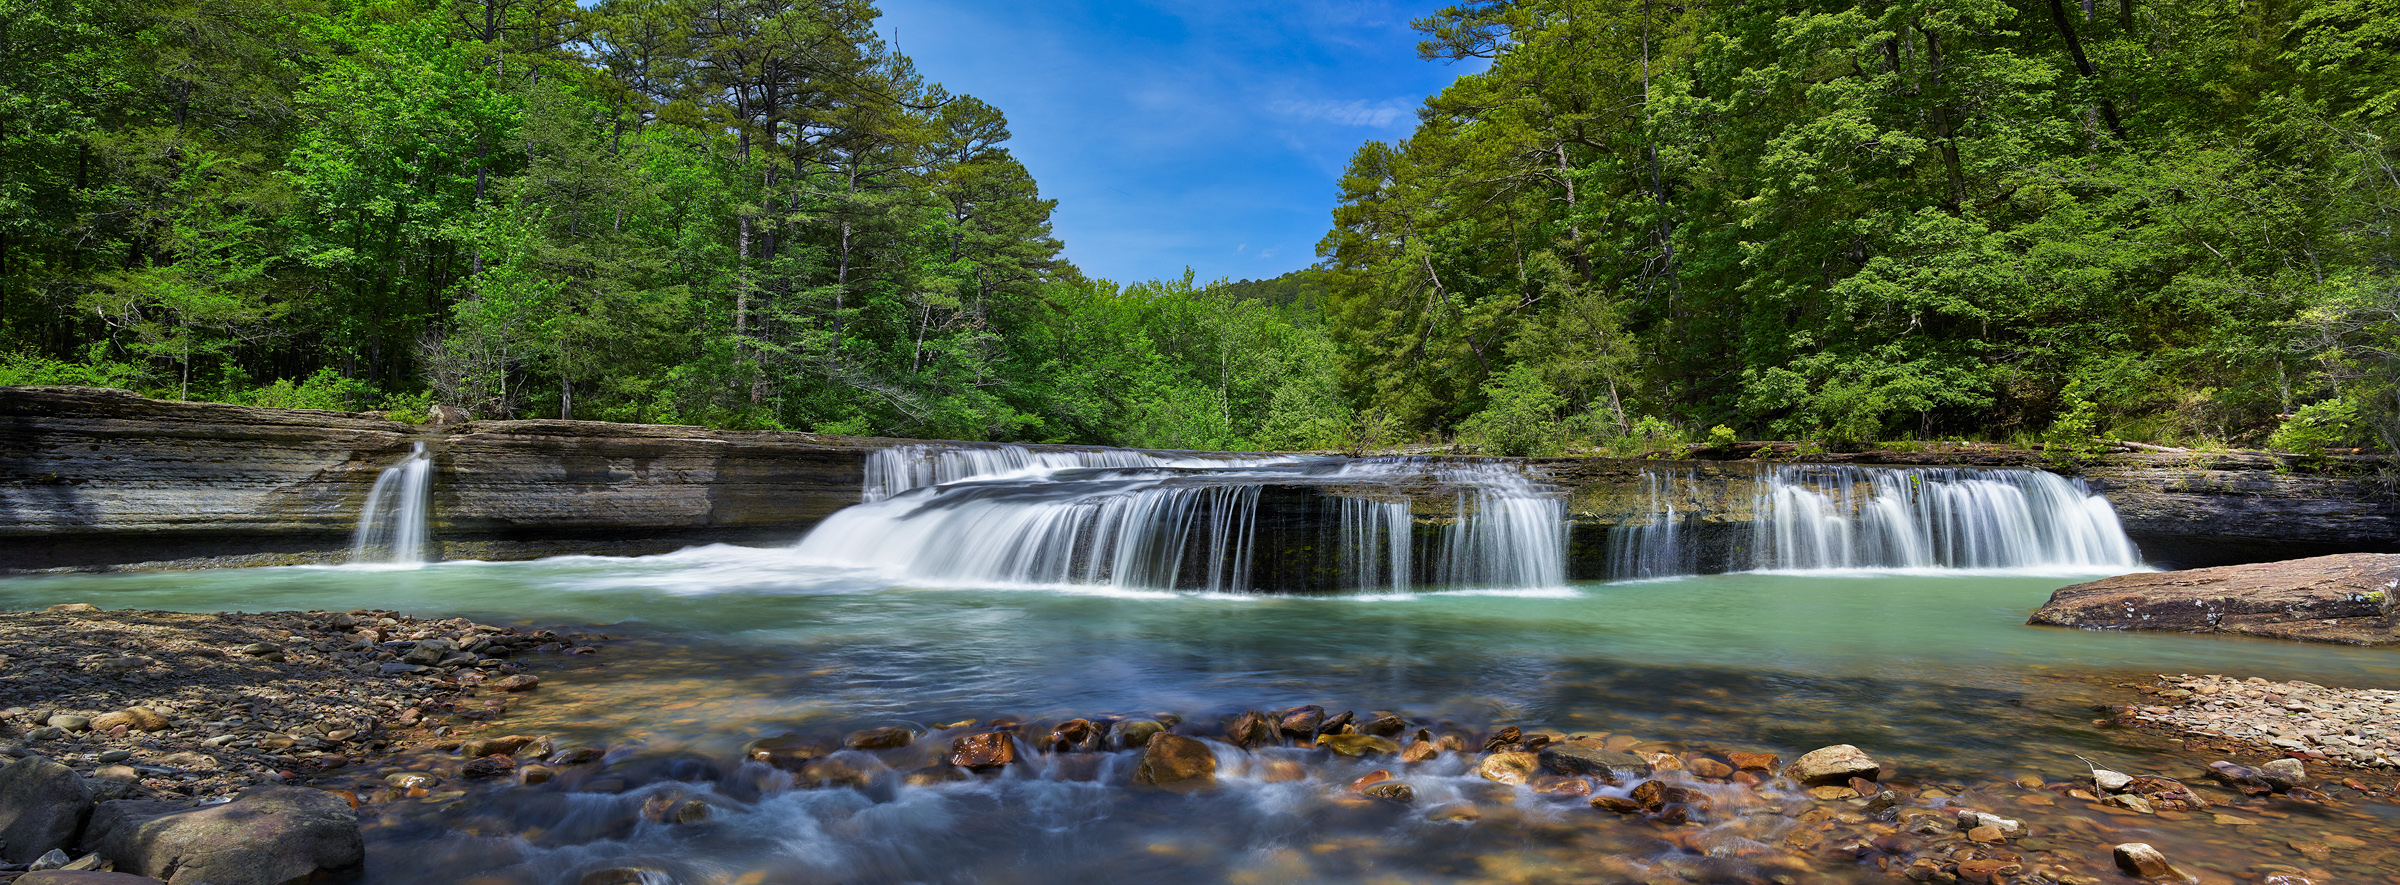
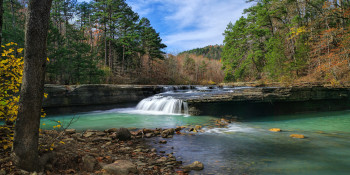
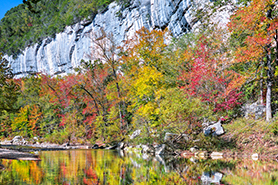
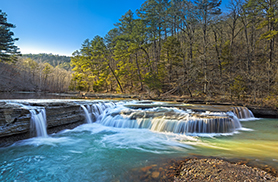
Springtime View of Haw Creek Falls in the Arkansas Ozarks
Taken with a Phase One IQ260 and Arca rm3di tech camera/40mm Rodenstock lens
This is a typical day at Haw Creek falls, and I was again lucky to be there without anyone else to stand around and get in the way during the shoot. Haw Creek is a lovely smallish creek that runs in the Big Piney Creek, not far from these falls. The falls are impressive since there is a large ledge that runs all the way across the creek and in higher water conditions the water will start to consume the entire ledge. I like to catch water about like this, just enough to keep most of the ledge in play but not too much to flood out the rocks below the falls. To get this shot, I used my Arca rm3di camera which allows movements like a large format camera with my digital camera back. The shot is actually a composite of 3 images, Left, Center and Right. The Left and Right segments represent 16mm of shift in those respective directions. This allows you to create a very high resolution panorama without any of the issues like parallax. The lens I used was as 40mm Rodenstock HR-W which allows for an excellent field of view when shifted.
You have to be careful when working Haw Creek as there tends to be a lot of wind blowing down the creek. In most cases, I prefer to take a 1 to 4 second exposure of the water which in most cases will have a lot of wind blur in the trees. So you have make sure to cover the tree movement with a second series of exposures around 1/125 to 1/250 to stop the wind movement. It’s a simple process to combine the files later since I am using a tech camera and the movements are very precise. To allow the longer exposures I used both a Circular Polarizer and a Neutral Density filter. The polarizer will help with glare on the water and rocks and adds about 1.5 stops of exposure to the shot. As this was a bright day, I had to use a 1.2x ND filter. When I was taking the faster exposures for the trees, I left the polarizer on, but took the ND filter off as I no longer needed the extra exposure compensation.
As I already mentioned, Haw Creek Falls, tends to be overrun with people during the peak times of the year. The best day to go is a Monday as there will not be as many people at the campground and thus less traffic around the falls. There are some great swimming spots above the falls in the large pool that is created by the ledge. It’s a great place to head to when you know you have some water running in the creek.
Early fall morning along Richland Creek–05/29/15 Featured Arkansas Landscape Photography
- At May 29, 2015
- By paul
- In Featured Arkansas Photography
 0
0

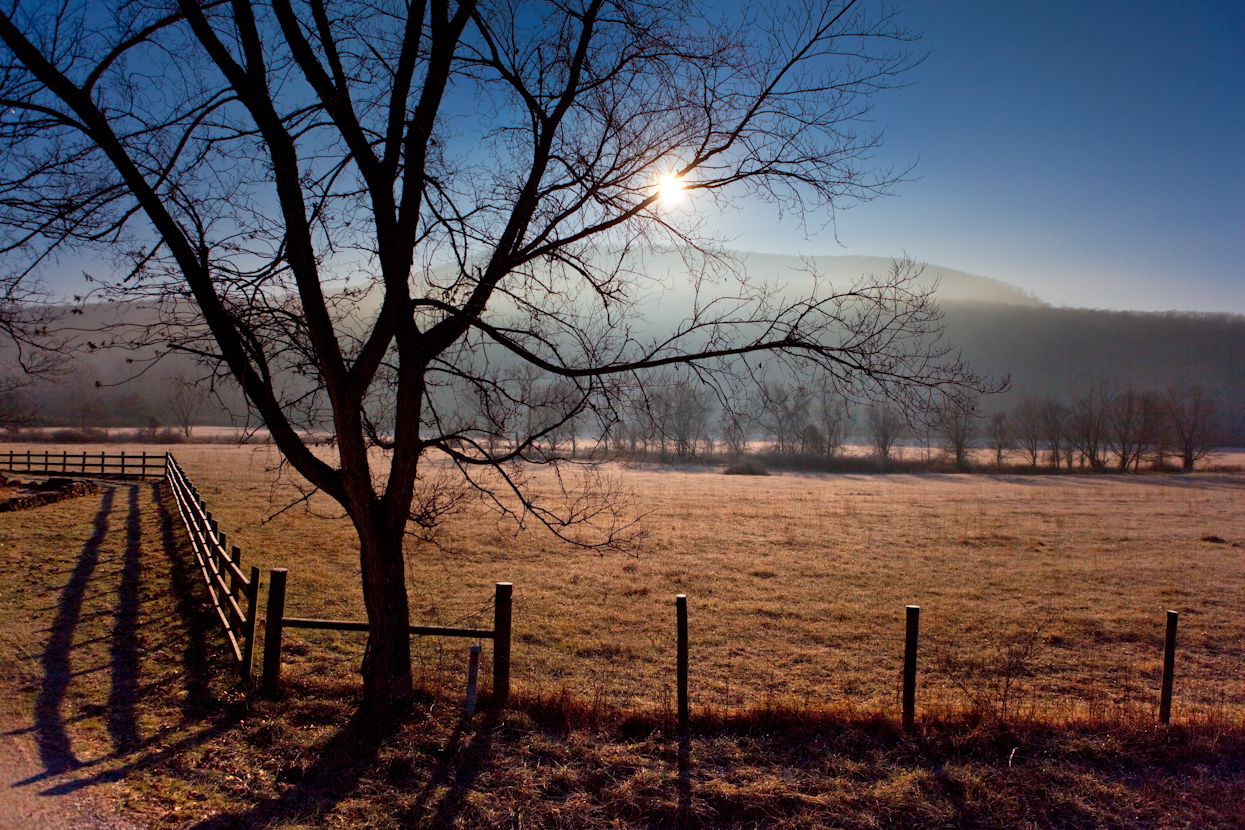
Taken with a Phase One IQ160 and Arca rm3di camera and Rodenstock 28mm lens @ iso 50 for 1/2 second exposure.
I am a huge fan of Richland Creek, having spent at least the last 20 years or so exploring it’s vast reaches. I was lucky enough to Kayak this creek for over 10 years as that one of the best ways to get to know a creek. Richland (the name comes from the fact that the mouth of Richland near Woolum Ford on the Buffalo was excellent farming land) has some beautiful features throughout it’s length as it moves towards the Buffalo, but by far the best scenery is found in the 5 miles of the creek above Richland campground. This shot was taken on a fall morning and the sun was popping back and forth between the clouds. I was setup and waited on the best light for at least 20 minutes and only got about 2 minutes before the next bank of clouds rolled in. The level of water in the creek on this day was low but in many respects this is an excellent level for photography as you can safely stand in the middle of the creek for the best vantage points. One aspect of creek photography, if you don’t plan on getting wet, don’t bother.
This spot is directly below one of the larger rapids on Richland called, Shaw’s Folly. In this shot, look for the large rock on the upper right which is about the size of a small house. This marks the end of the rapid and all of the creek in the picture is just the run out. But in this shot you can see why I love Richland as it’s just full of huge rocks and each one has it’s own unique shape and color. The water was gin clear this day so I was able to feature some of the bottom of the creek by using a polarizer to cut the glare.
Late October Sunset at Sam’s Throne–03/31/15 Featured Arkansas Photography
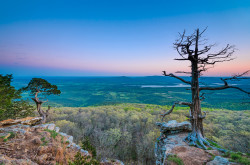
Sunset from Sam’s Throne in the Arkansas Ozark mountains
Taken with a Phase One IQ180 and Arca rm3di with Schneider 43mmSK lens, iso 100 @ 1/125th and F11. This was a interesting evening as there was a wedding going on at the same time. I was pretty amazed to see anyone trying to get married in a wind that was blowing as much as 30 mph at times. I kept trying to move to stay out of their way, however they wanted the bride and groom to stand where they could be in the sunset. Oh well, I am sure they don’t remember me with good feelings. Something to remember if want to have a wedding in a public spot. This shot for me was a winner and I was impressed with the Phase One IQ180 which I was blessed to use on this day. The conditions were less than perfect as I was shooting into direct sunlight and the wind was blowing close to 30 mph at times and really never stopped, which can be a common occurance at Sam’s anytime of the year.
To make matters worse, I was using a CCD Phase One IQ180 and knew that I was going to be limited in the shutter speeds I could use. I also knew that I more than likely would get some massive flare since I was shooting directly into the sun. I have seen that the Schneider’s don’t create as much of a damaging flare as the Rodenstock lenses do. At the time of this shot, I was using a Rodenstock 28mm and the Schneider 43mm. I knew I wanted the wide range of the 28mm, but I also knew that I would pay for the use of the Rodenstock with massive damaging flare. So I used the Schneider and was very happy with the result.
I did not use a CL-PL as I was concerned that I limit the amount of available light and thus create too much noise. Instead I took a series of bracketing exposures. I took this shot in a vertical series, but the Schneider is not noted for a great amount of hyperfocal range ever with tilt, so I figured I would not use the lower parts. After looking at the shot, I liked the center segment the best and just went with it. It’s going to be hard to see in this shot, but I was able to stop most of the motion at 1/125 of second shutter speed. The Schneider created a wonderful solar flare, which reached all the way through the shot. Many times such flares are faked later on Photoshop, but this one came from the aperture setting of F11. There were some contrails to contend with, but overall the colors I was able to pull from this shot still make me pretty happy.
Richland Creek in Autumn–12/18/14 Featured Arkansas Landscape Photography
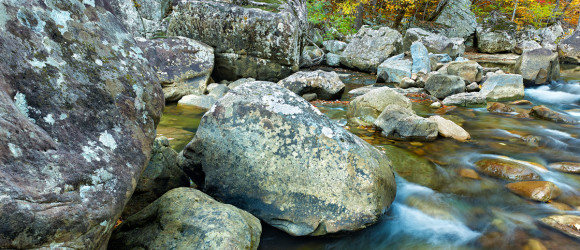

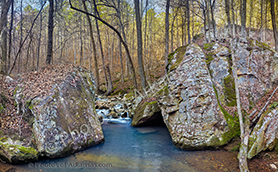
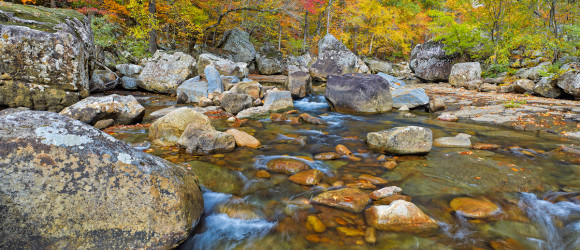
Richland Creek in Autumn below Shaw’s Folly Rapid
Taken with a Phase One IQ160, Rodenstock 28mm HR lens, F11 for approximately 1 second, iso 50. Richland Creek, which runs from Newton County to the Buffalo River near Woolum Ford, has some of the most beautiful photographic subject matter in Arkansas, if you love creeks. Here you can find huge rocks that have ended up in the creek that had to have originated up much higher on the bluffs. Some of these rocks are the size of a small house and most are the size of a car. Richland creek has several sections that run over flat bedrock and this spot is one of them. This spot is about 100 yards long and starts out directly below Shaw’s Folly Rapid. The foliage on the left back, which is featured in this shot, is full of oaks, maples and hickory trees which on this day were all in full color. There was just enough water in the creek to allow for a movement shot. Normally, I like to have bright sunny days to work Richland, but on this day which was overcast I was able to get one of my best shots of the creek. Using tilt, I have gained quite a bit in overall depth of field so I was able to keep the details of the large rock on the left foreground in focus along with the trees in the background. This was a magic day for sure.
Arca FP (Focal Plane Shutter) Facts and costs overall a bit disappointing

Yesterday, I was very excited by Arca’s announcement of the new FP (Focal Plane Shutter). I knew that this device was in the works well over 10 months but had been asked to keep all mention of it off the web. Arca is a small company based in France, with basically no website, so getting information about current and future products can be very difficult. The FP was the one single item that Arca was working on that really had my excitement and interest. The main reason being:
- It was going to “fit” into the current r cameras rm3di or rm3dl in a modular fashion
- All existing lenses with R mounts would work
- Price point was going to be around $1,800.00 for the shutter and all electronics needed to run it.
- Focal plane shutter would allow shutter settings of 1/3, 1/2 and 1/10 of a stop.
With the actual announcement, unfortunately, a few of these previous statements did not come true.
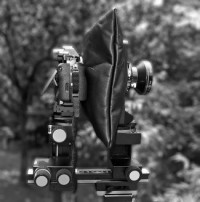
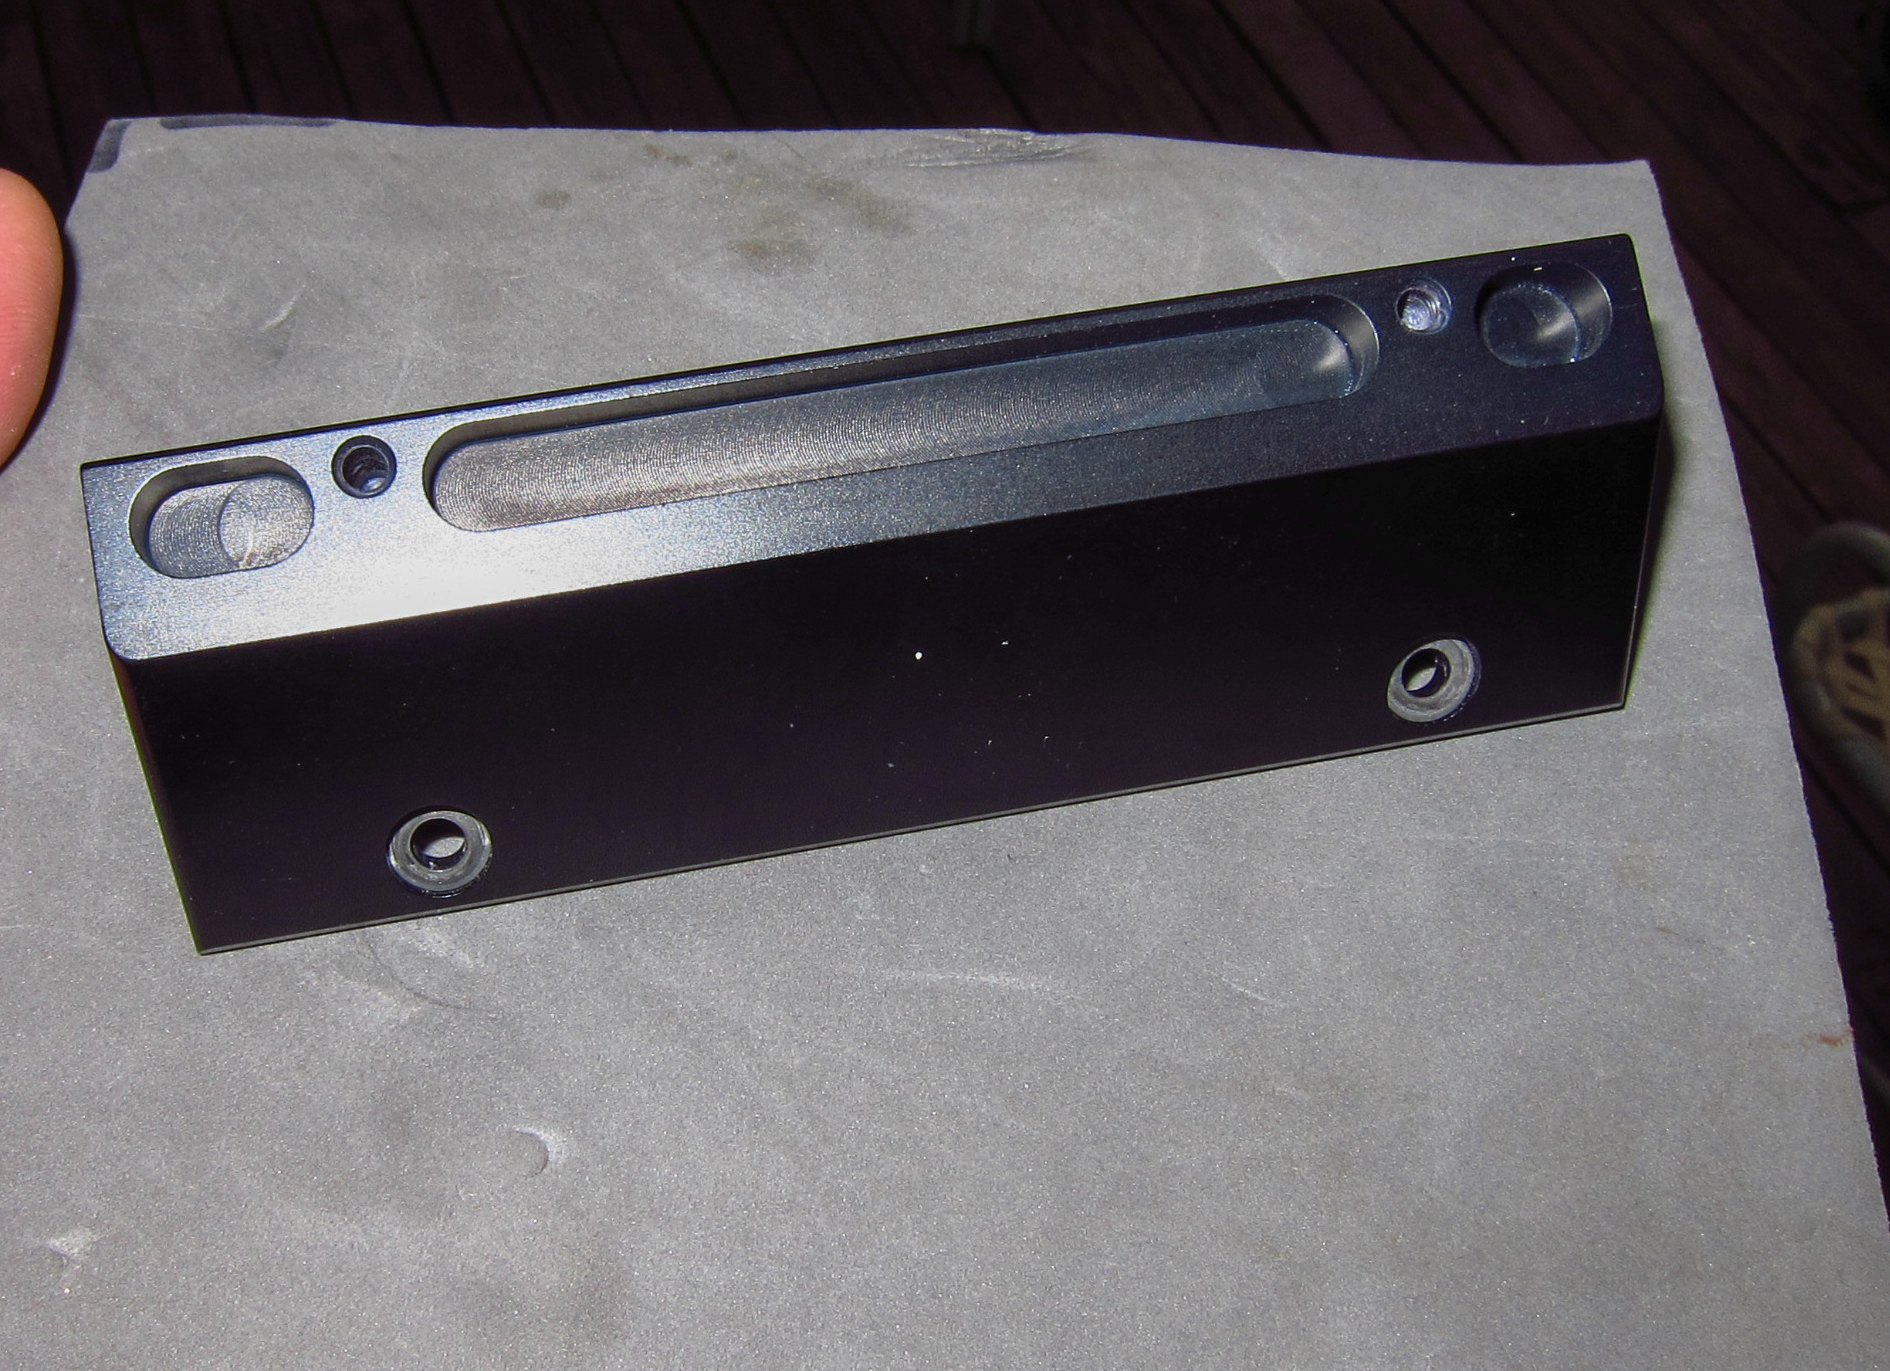
The FP is a real item, and it will be a modular attachment to the current R series cameras, see my previous post for more information. Here is a picture of the FP
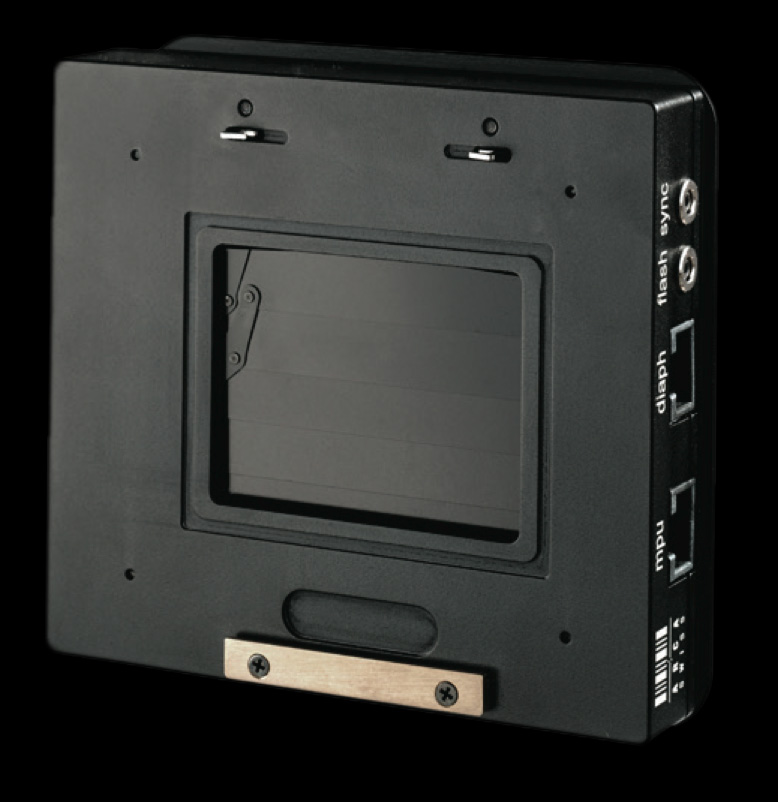
- New Arca Swiss Focal Plane Shutter for R series Cameras

Knowing the Arca does excellent design and that they make very good products in regards to quality, I have no doubt that this FPS will work as designed. However it also seems that there will a limit as to how wide a lens can be used with it. There are some pretty important issues to consider.
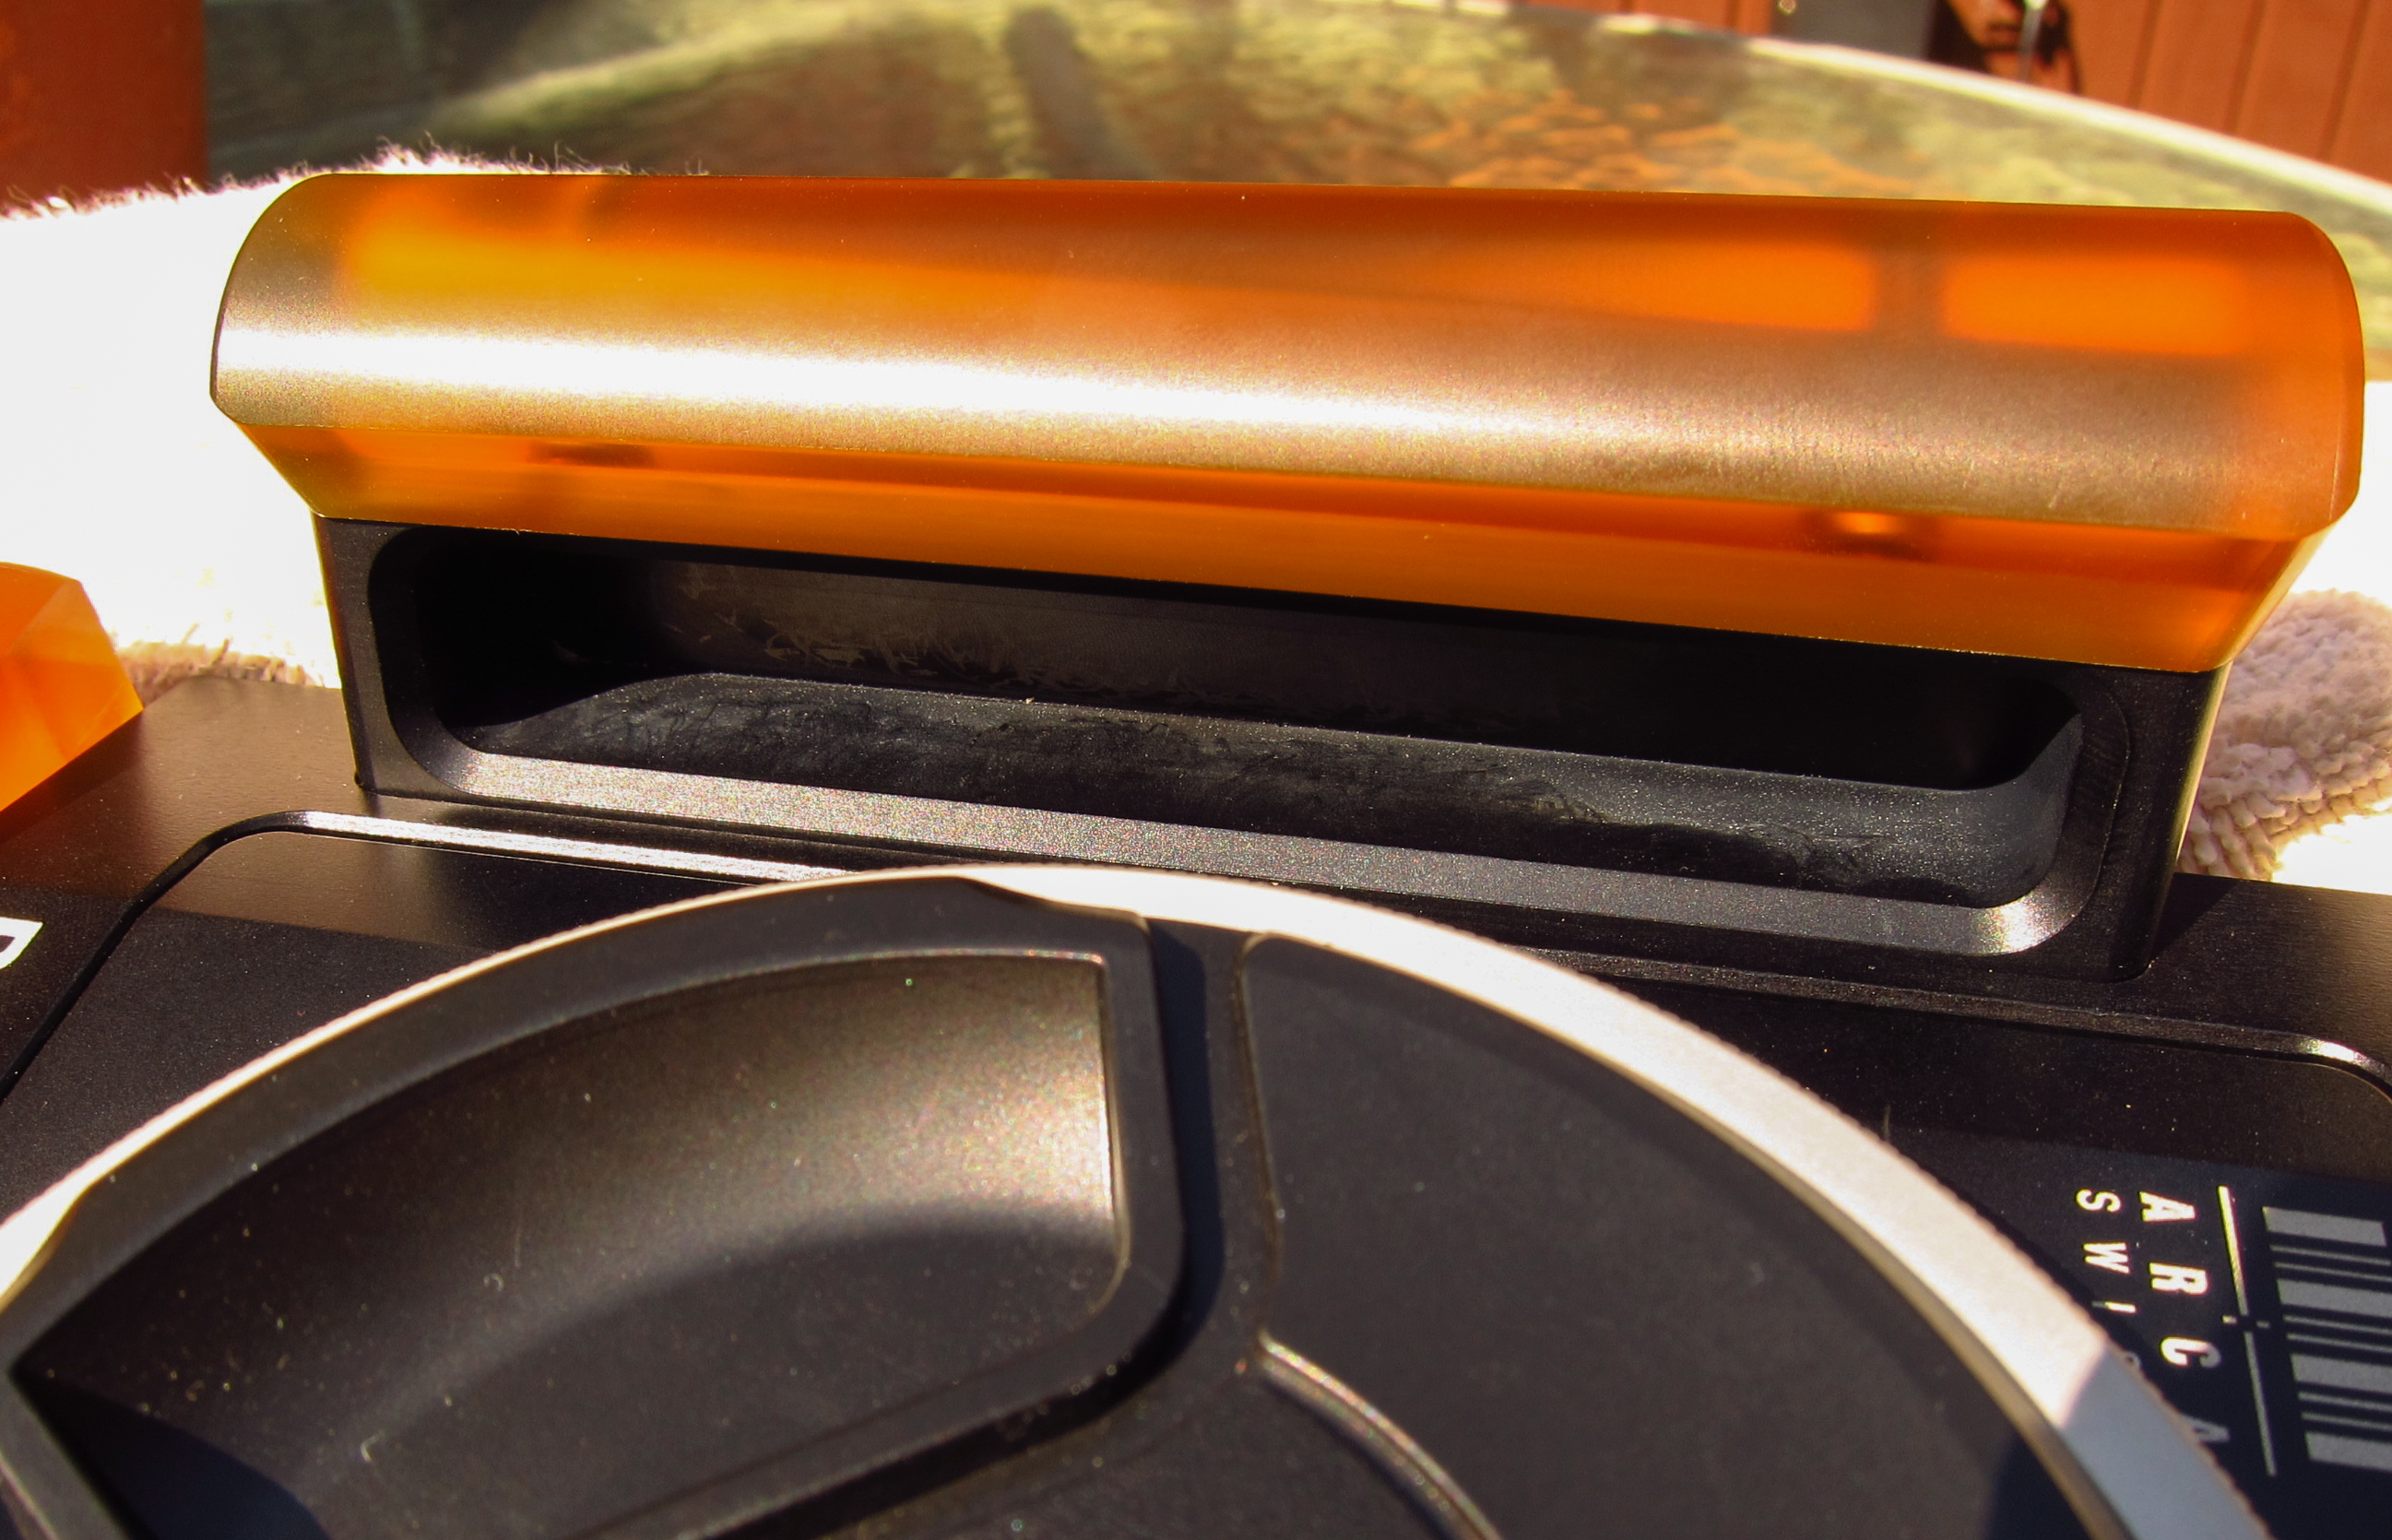
I. The lenses that can be used will need a new modified lens tube installed. The lens tube is the first ring of the R mount, and you can clearly see it in this photo.
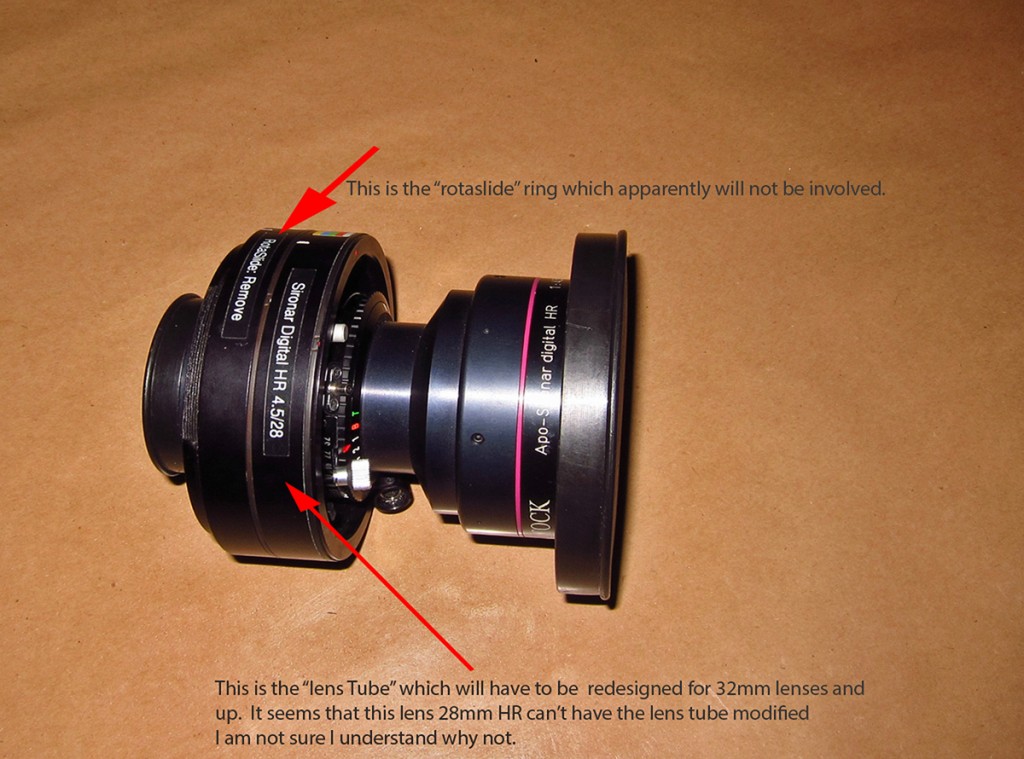
- Rodenstock 28mm HR in Arca R mount
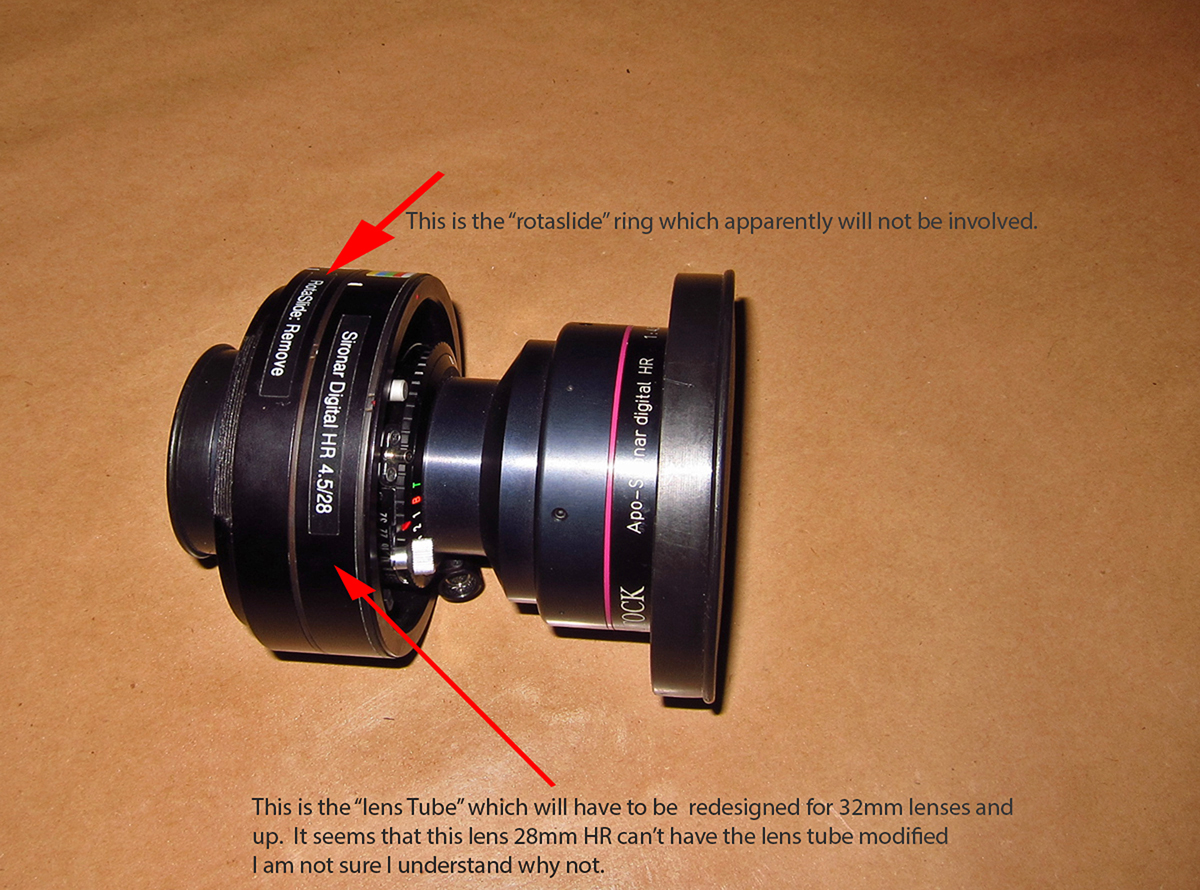
The first ring, closest to the lens, with the name Sironar Digital HR on it, is the lens tube that will have to be modified. Modified is not a good word as basically you will replace it with a new one. The lens will have to be measured, the measurements sent to Arca, and they will make a new ring. I guess in the future with Arca, if you were to purchase a new lens, they might ship both rings. OK, now lets add up the cost. The rings are $495.00 each. So if you are going to work with say 5 lenses, you will need to spend an additional $2,500.00 just to be able to use the new shutter. I find this the most unappealing part of the deal, as Arca should consider giving a credit for the current ring, however I guess it makes sense to keep the old ring, to revert back to if the FP has a failure. Plus you need to either drive your lens to an Arca representative or ship them and to ship and insure 10K of glass, I figure that will add about $250.00 to the cost.
II. The shutter is going to be controlled via a wifi attached controller.
The dEx controller. I have to assume that this is not “part” of the shutter so it’s safe to say add another $1,200.00 to the total cost. Plus it’s wifi controlled. This is a new technology to implement, so I hope it’s well thought out. If the wifi connection fails or disconnects in the field, it appears you will not be able to fire the shutter. This means you would have to removed the shutter from the R camera and the new modified lens tube, then reinstall the original lens tube.
Looks like the cost of the FP will also be a bit more than I had anticipated. Here is an estimated breakout of the cost for using the shutter with 5 lenses. This is based on pricing that was released late on the 18th of September 2014. Pricing is much higher than I expected. This easily approaches the cost of the Alpa FPS. So competitive advantage based on pricing appears to have possibly gone out the window. I was also hoping that the lens tube replacement would stay at $350.00, not $490.00. More information needs to be out on that soon.
- Cost of Shutter…………………………………………………………$2,940.00
- Cost of 5 lens tubes………………………………………………$2,500.00
- Cost of mpu for shutter……………………………………….$1,400.00
- Cost of wireless controller for shutter………….$1,200.00
- Total cost for FP shutter……………………………………..$8,040.00
One other thought, as it appears that the dEx controller will be making a wifi connection, but to what? I can’t see the controller depending on a digital back’s wifi (mainly because right now so few of them have it). So what is the wifi all about. Do you wifi to the controller with say a iPhone, to make the settings i.e. change shutter speed (that would be about all you could change on a shutter)? If so, again, I have to wonder about that, as it makes you very dependent on the battery life of your phone and the battery life of the dEx. To me it would be so much more efficient to have a hard connection to a device that can set the shutter. It would become serendipitous to carry both lens tubes on any trip so if the shutter fails or can’t make a connection, you could re-install the old lens tube, pull out the shutter and shoot with the copol shutter already in the lens. This would of course only apply to lenses that already had the copol shutter installed. I wonder if Arca will still sell new lenses with copols.
Even with the extra costs, I believe overall this is a good investment long term for a R camera user, and once a Phase One back comes out with Live View that is full frame and works with movements with minimal crosstalk effects (which create color saturation loss on shifts), the photographer in the field will have quite a system.
06/18/14 Featured Arkansas Photography–Early springtime sunset at Haw Creek Falls
- At June 18, 2014
- By paul
- In Featured Arkansas Photography
- 0

I was able to catch the setting sun at just the right angle
Taken in 3 parts with a Phase One IQ260 and Rodenstock 40mm lens, Arca rm3di camera with a CL-PL filter. This image will be featured in my up coming show at Cantrell Gallery. I am featuring locations in Arkansas that I am always drawn back to. Haw Creek Falls, is not the tallest waterfall in Arkansas or the most dramatic, however it’s a beauty. Haw Creek runs over a huge ledge that runs back about 100 yards and has created in effect a natural dam. There is pool behind the falls that is a great swimming hole in the summer months. The way the trees lean down to the water just makes for a great photograph. Working a sunset at Haw Creek can be very problematic, most times there will be someone standing on the ledge and you have to time out your shots. Also in the later months of summer the sun will be going down directly over the center of the valley which makes for a much more difficult shot. In this case, mid April, the sun is still over to the far left and on this evening as it set it cast an amazing line of light down the valley of Haw Creek. This effect only lasted about 10 minutes, just enough for me to figure out where to stand to get the best vantage point. On this day, the entire main ledge had water coming over the top which always makes for a great shot. I took this photograph as a series of stitches using an Arca technical camera, the rm3di. As the light was already at a low angle, I did not need a neutral density filter, just a polarizer to help cut the glare off the water. I was blessed this evening as there was almost no wind blowing which made for a very detailed shot.
03/30/13 Adding a Grip Extension to a Arca Swiss Rm3di–Getting a better handle on things
- At March 31, 2013
- By paul
- In Phase One & Arca Camera
- 0
-
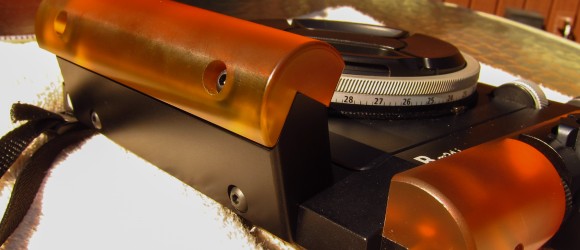
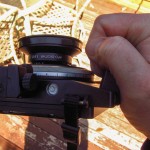
- Stock Arca Swiss Grip
-
- Attempting to grip a Arca Swiss rm3di camera
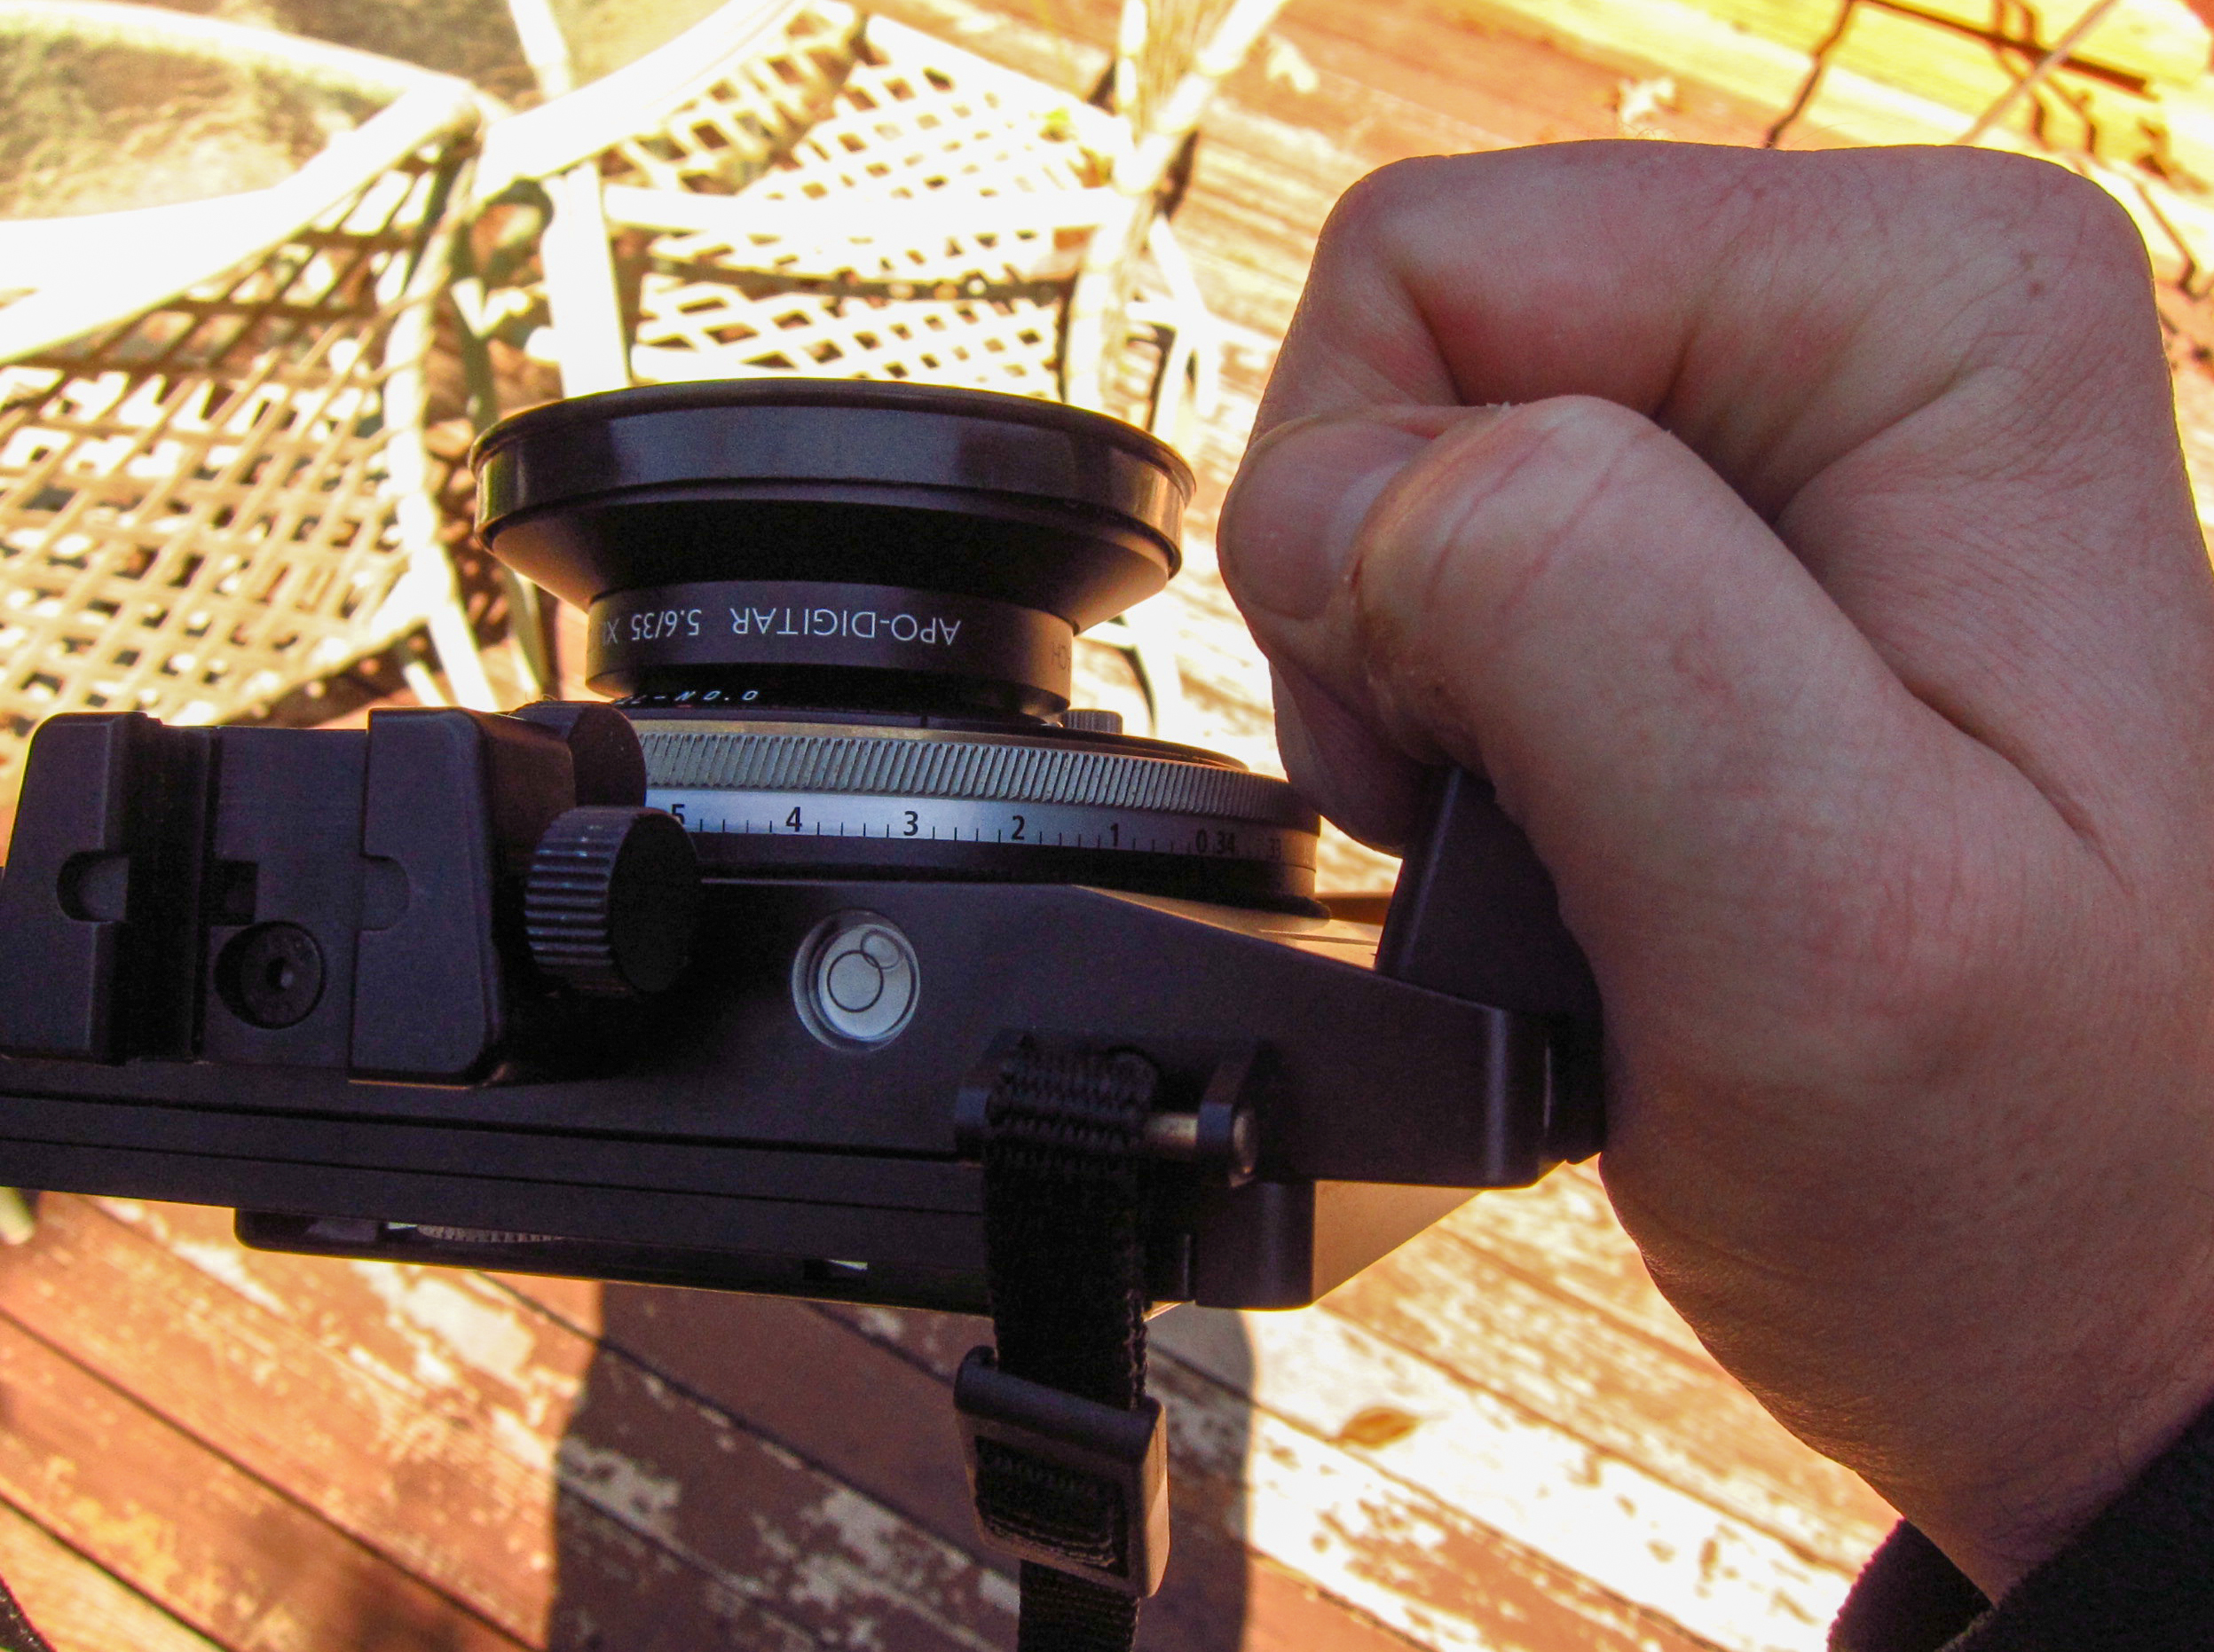
One of the more unique aspects of the Arca rm3di camera are the orange/yellow horizontal and vertical grips. These grips are made from a smooth plastic material that seems very durable. However the grip for the vertical extension has one rather minor issue, clearance for fingers around the grip. Arca does not allow for any extra height and the stock grip fits flush to the camera body. Also Arca does not allow for a left side grip. This to me is a huge oversight in the design since you can only grip the camera/lens and digital back on the right side. If you are right handed, you have to dedicate your control hand to move the camera around, similar to how a DSLR works. In my workflow, I would like to be able to hold the Arca with my left hand, which would allow me to make easier adjustments, like for tilt, shift, aperture, shutter speed and focus.
The larger issue however is that you don’t have a solid and secure grip when using the stock vertical grip. I have a large hand, but even with a smaller had, there is not enough height to get any purchase on the grip. When you consider the fact that you are holding a camera, lens and a digital back with a value of over 30K, you want to be sure when you grasp the vertical handle that you have a solid purchase. Since the handles designed by Arca don’t have finger indentations, you are looking for the ability to wrap your fingers around the handle and dig into something solid. After I worked with my rm3di for a few months, I realized I needed something more, and I reached out to Rod Klukas, the U.S Arca Rep. Rod informed me that Arca made a “grip extention” and I ordered one immediately.
-
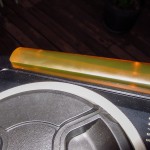
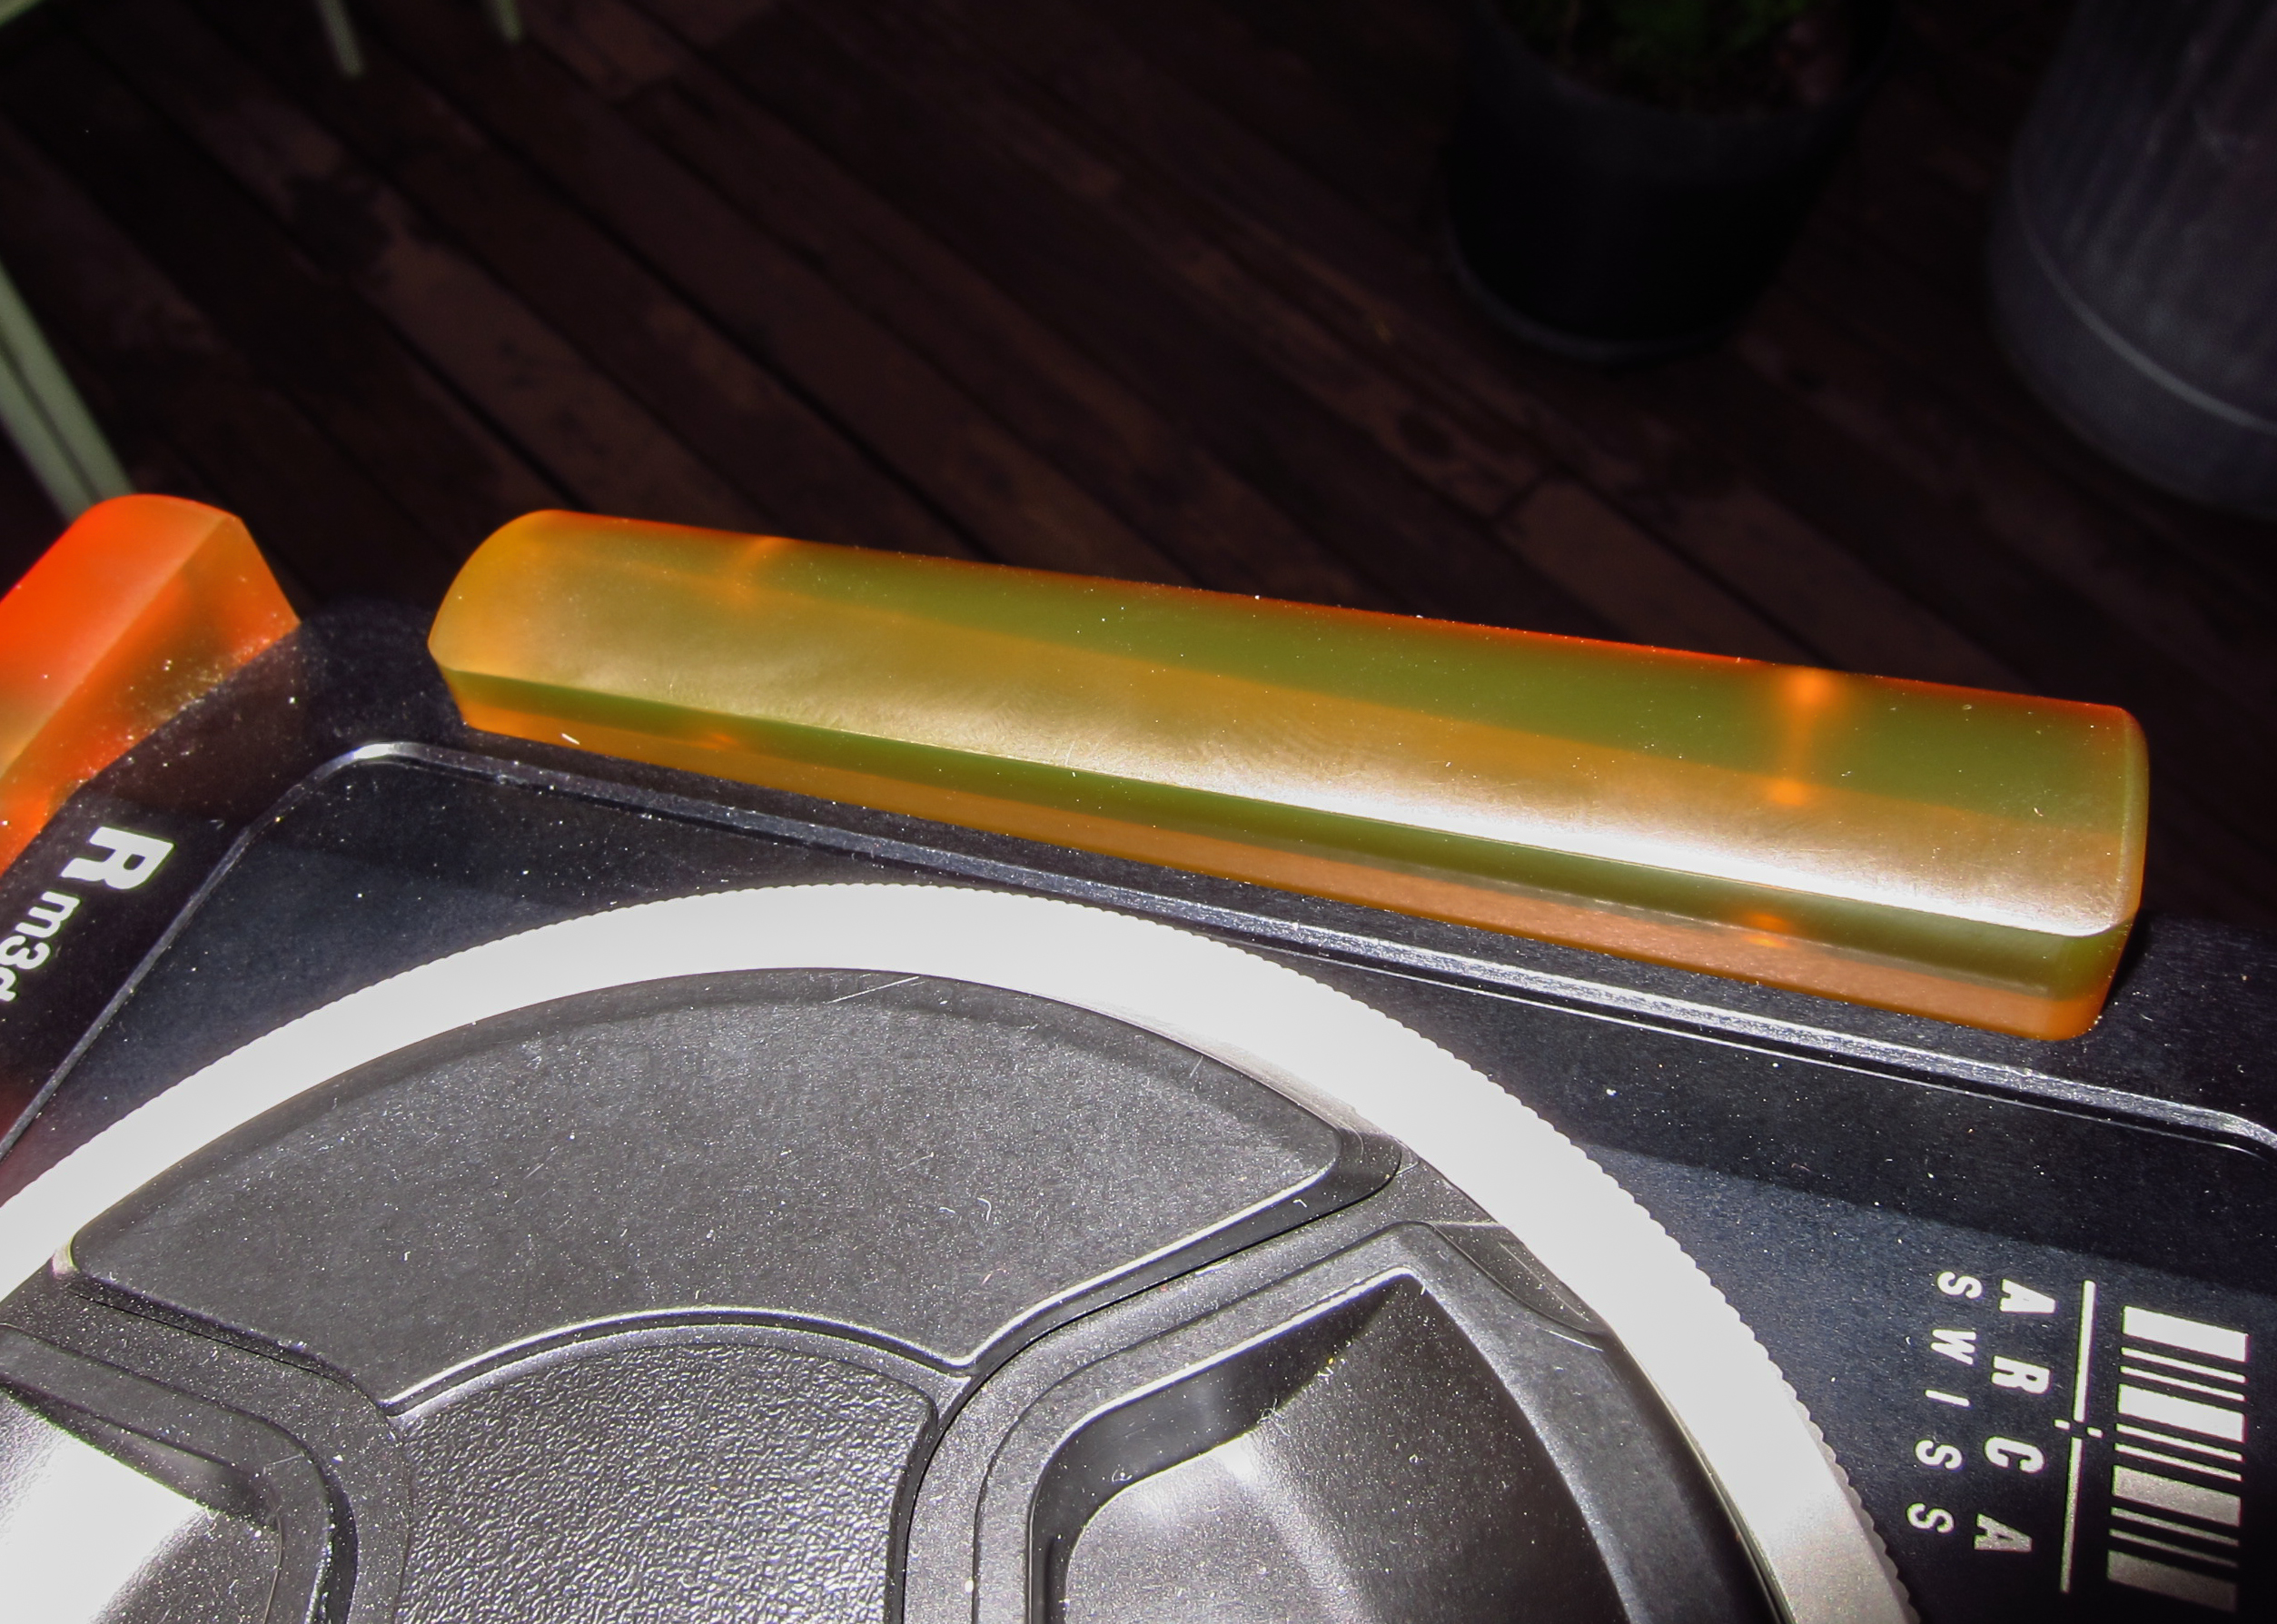
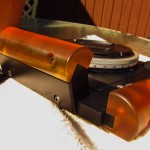
- Close up of grip extension for Arca rm3di
-
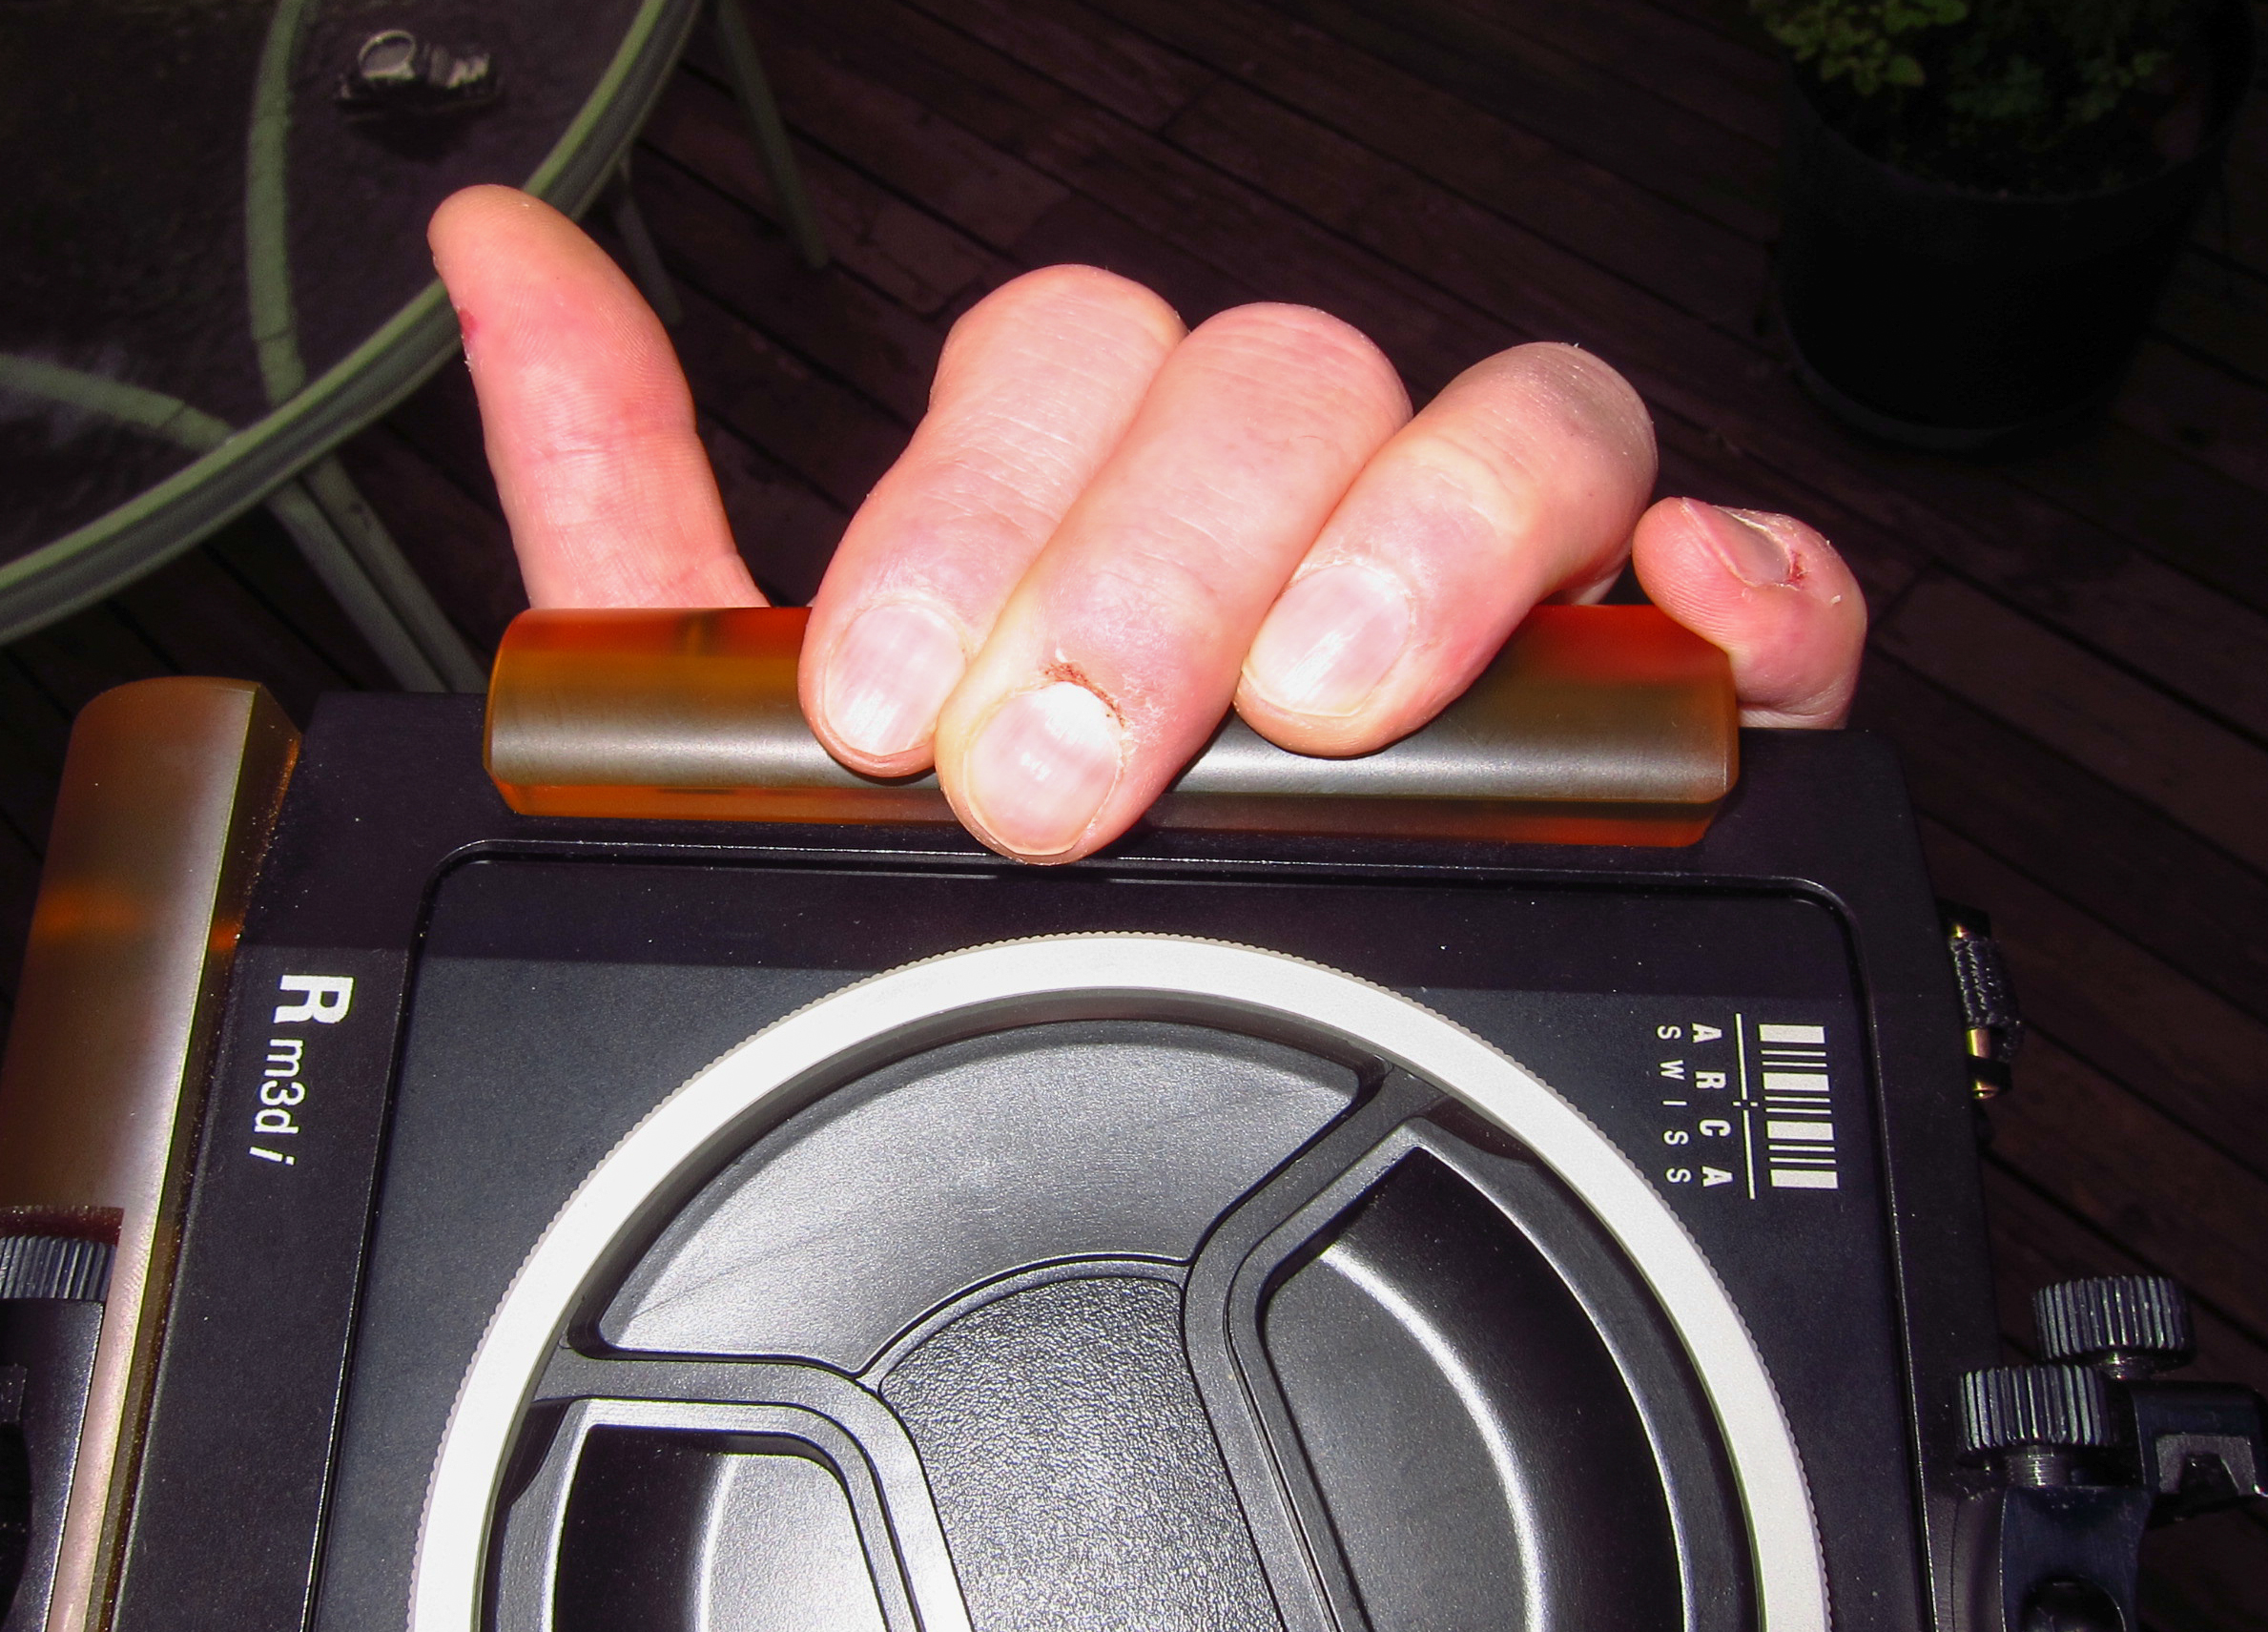
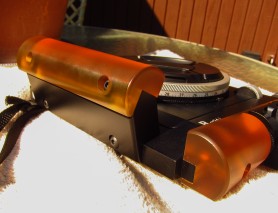
- Arca rm3di grip extension mounted to camera
The Arca rm3di grip extension made from one piece of material. It is concave on the inside which will allow the user to get a very secure grip on the handle. To install it one simply unscrews the current handle and places the grip extension in the same place. The holes line up perfectly and you use the new screws that are included with the grip extension. Then it’s simple process to screw back on the stock Arca grip. Arca has designed a very secure solution here. The grip is angled outward and presses right up against the back of the camera. The fact that it’s angled outwards gets the grip away from the mounted lens and thus your fingers will not be hitting the lens or shutter.
-
- View looking directly down on the Arca rm3di showing how secure the grip is
-
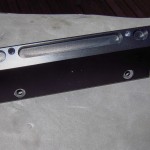
- Arca rm3di with grip installed showing outward angle

-
- Arca rm3di with grip extension mounted view from back of camera
Once it’s mounted, make sure to place the included allen wrench somewhere secure. I just keep mine with the camera body in the case I use. I have had my grip installed now for over a year and I have never had anything come lose. When I installed it I put just a bit of blue thread locker on my threads. The grip extension gives me total confidence when I pick up the rm3di with a Phase One digital back installed. I have carried this camera/digital back combination over pretty rough terrain and in streams with no concerns at all. My only issue is that Arca just don’t include the grip extension with the base price of the camera. The additional cost of the grip extension is approximately $385.00 and you may have to wait a while to get one. I ordered mine from Rod Klukas directly.
Here is a link to Rod’s website: www.Rodklukas.com
10/06/12 Featured Arkansas Photography–Wintertime sunset at Flatside Pinnacle

Sunset over Flatside Pinnacle in the Eastern Ouachita Mountains
Taken in January 2012, Camera Digital-Phase One IQ160 mounted to Arca rm3di, Lens-Rodenstock 28mm HR, 2 exposures to create a exposure bracket. The wintertime in Arkansas can be very photogenic. I was out on Flatside in early January 2012 working with a new Rodenstock 28mm HR lens with a Arca Swiss rm3di. I wanted to test the lens in various combinations of focus and tilt. For this shot I was able to get a hyperfocal of about 24 inches to infinity. I used approximately 1/2 of a degree of downward tilt on the Arca rm3di. The corresponding depth of field was amazing. For this shot I took off my polarizer as it just did seem to make much difference. The Phase One IQ160 performed very well here. In the past when working with my older Phase One P45+, I found shots like this one impossible since the P45+ was impossible to work with bright highlights. For example on this shot I would have needed to take a shot for just the sun and these several more exposure brackets to try and pull in the shadows in the foreground. The Phase One IQ160 did this shot in 2 exposures. I still couldn’t get it all in one, but I found the Dynamic Range of the Phase One IQ160 a vast improvement over my P45+.
 From the Blog
- 01/24/24 Sunset over Walton Heights and Pinnacle Valley January 24, 2024
- 01/22/24 Looking through the Keyhole on Roark Bluff–Autumn January 23, 2024
- 01/14/24 Sunset from Pinnacle Mountain Little Rock, AR January 12, 2024
- 01/14/24 Winter View of Pinnacle Valley January 12, 2024
- 01/12/24 Fall Scene, Pinnacle Mountain January 11, 2024
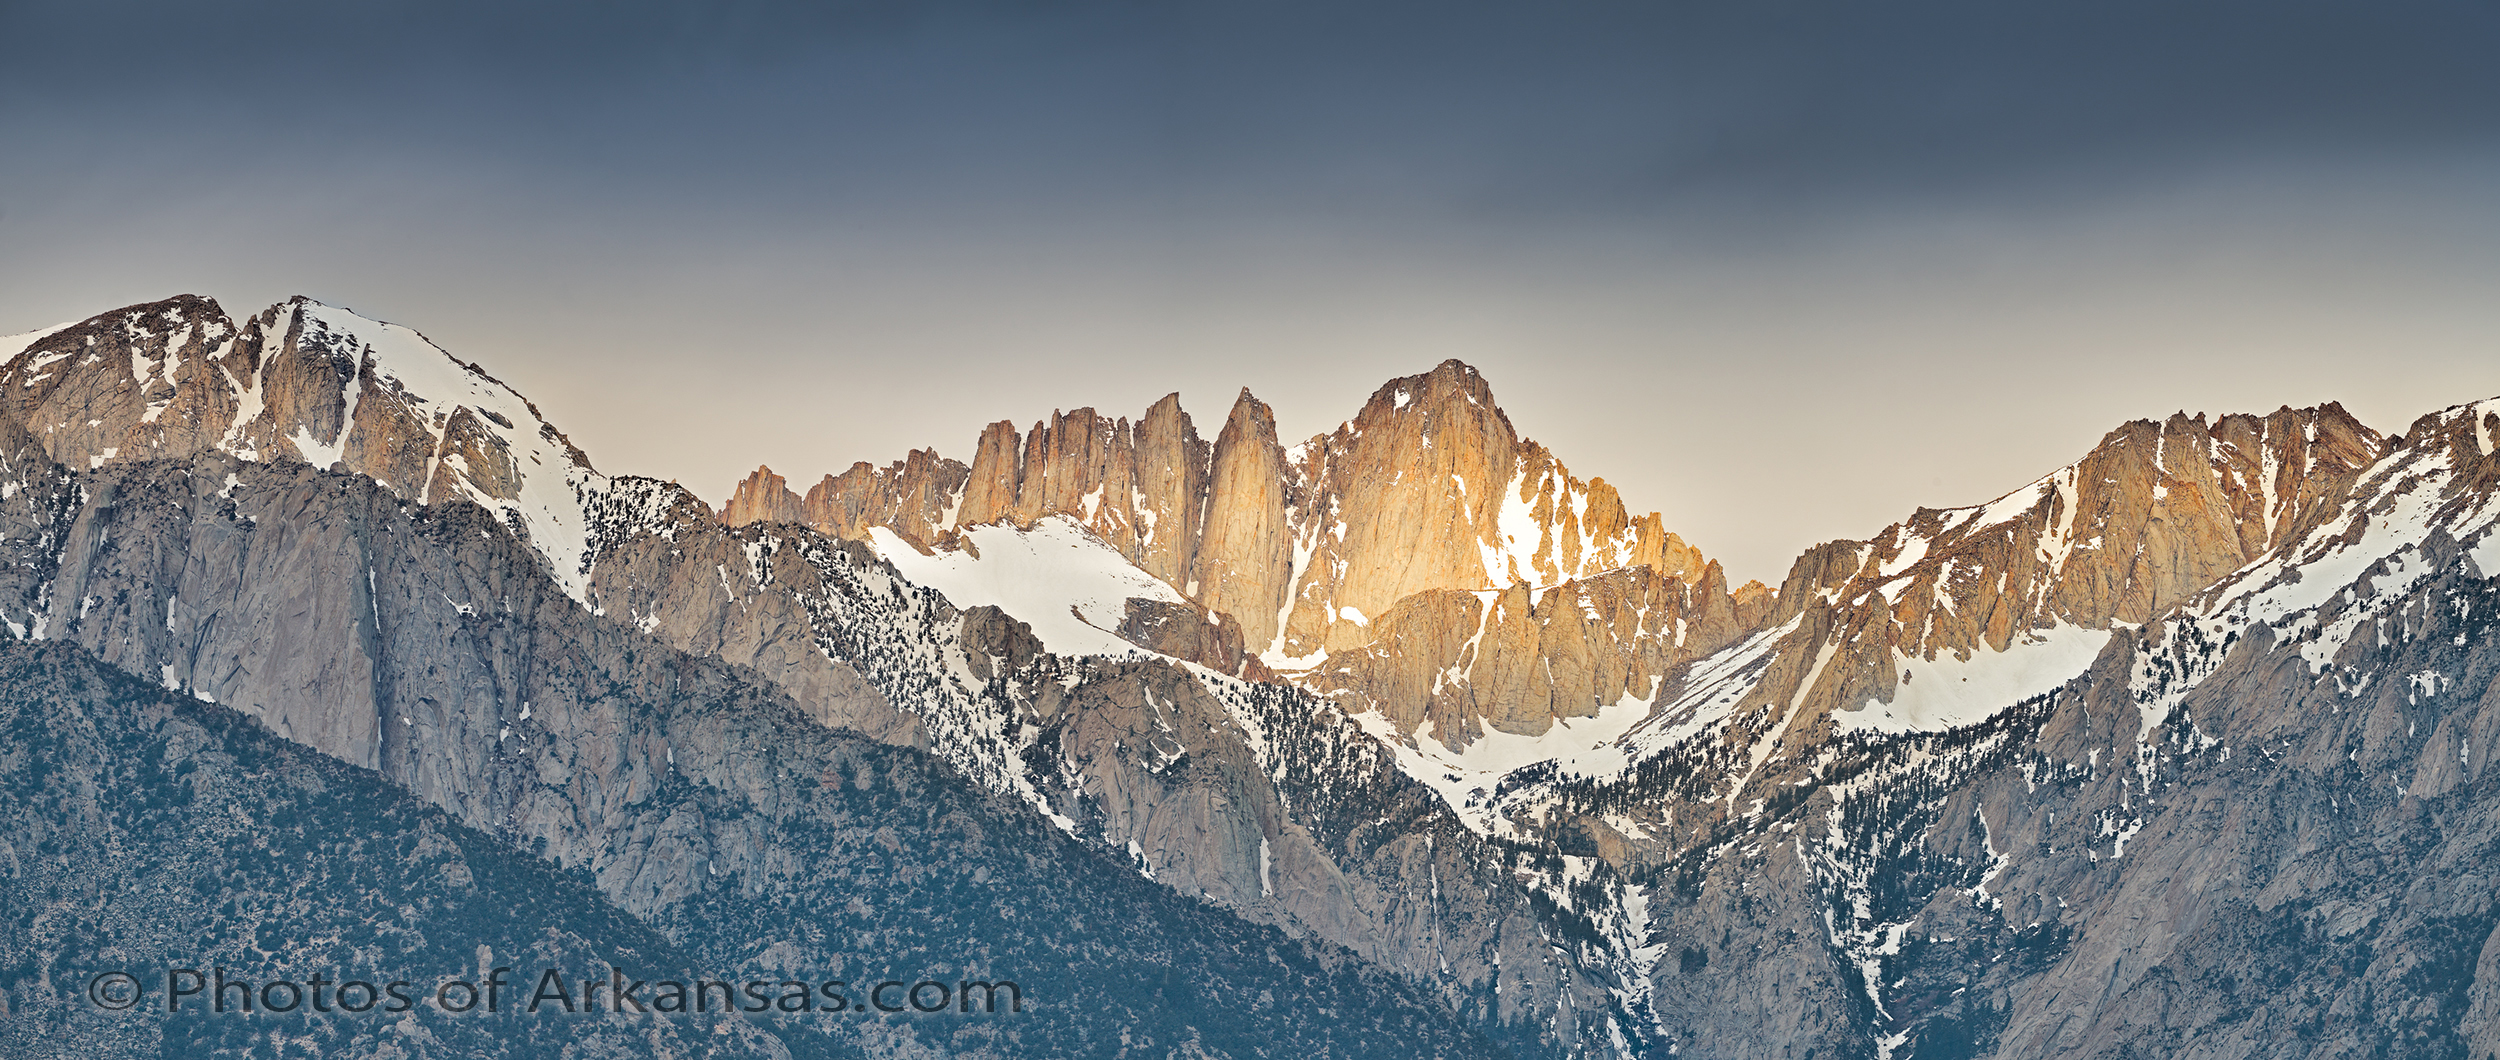
- 01/11/24 Hasselblad XCD Camera lenses, all out of stock? January 11, 2024