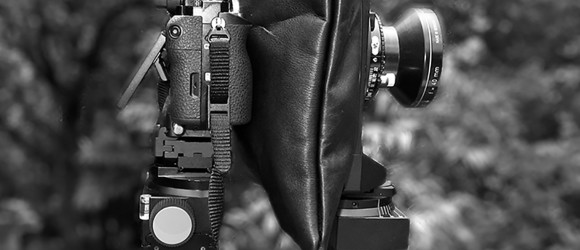
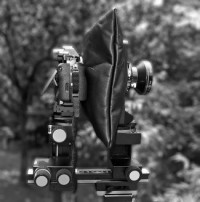
The Arca Swiss DSLR-2–A perfect companion to the Sony A7r (Part 1-camera review)
Authors note: Since this review was written, Arca has started to ship the new Universalis. This is a smaller and more compact version of the DSLR2, which will have some new features and functions, however the basic operations of the Universalis will mirror the DSLR2.
For the landscape photographer, one camera in the mirror-less category stands out by far more than the rest, the Sony A7r. This camera, with its 36MP sensor and excellent dynamic range offers a huge range of photographic options. However there is one area where the Sony A7r is weak, the range of lenses in the FE (full frame mount) that Sony offers for it. In fact it seems that most photographers using the A7r, bypass the Sony lenses and work with non-Sony lenses and adapters. With this in mind, I recently was able to use the A7r with a modern in-line view camera, the Arca M2 configured to work with DSLR’s. In this configuration is is called the Arca DSLR2. With this setup, the photographer is given a new level of photographic capability with the use of Rodenstock and Schneider Digital lenses and any other lens with a manual aperture ring that will accept the Arca R mount.
With the Arca DSLR2/Sony A7r combination the photographer has a huge advantage as they now can take advantage of traditional view camera movements. Why would this be something a landscape photographer would be interested in? Since the Sony lenses available for the A7r (4 at this writing) is very limited. Secondly, no Sony lenses have ever been produced in a Tilt Shift design, like the Canon TS-E or Nikon PC-E lenses. With the DSLR2 you now have the ability to use Rodenstock/Schneider lenses, which are the pinnacle of lens design, both wide angle and telephoto. On top of this with the DSLR2, you have the ability to add movements to any lens. This will allow you so much more control over the depth of field of the subject. With this combination you now have the ability to use one of the most powerful 35mm digital sensors so far developed, the Sony 36MP CMOS, with the best optics currently available. In the past, these lenses were only an option with higher medium format digital cameras, or film/view camera combinations.
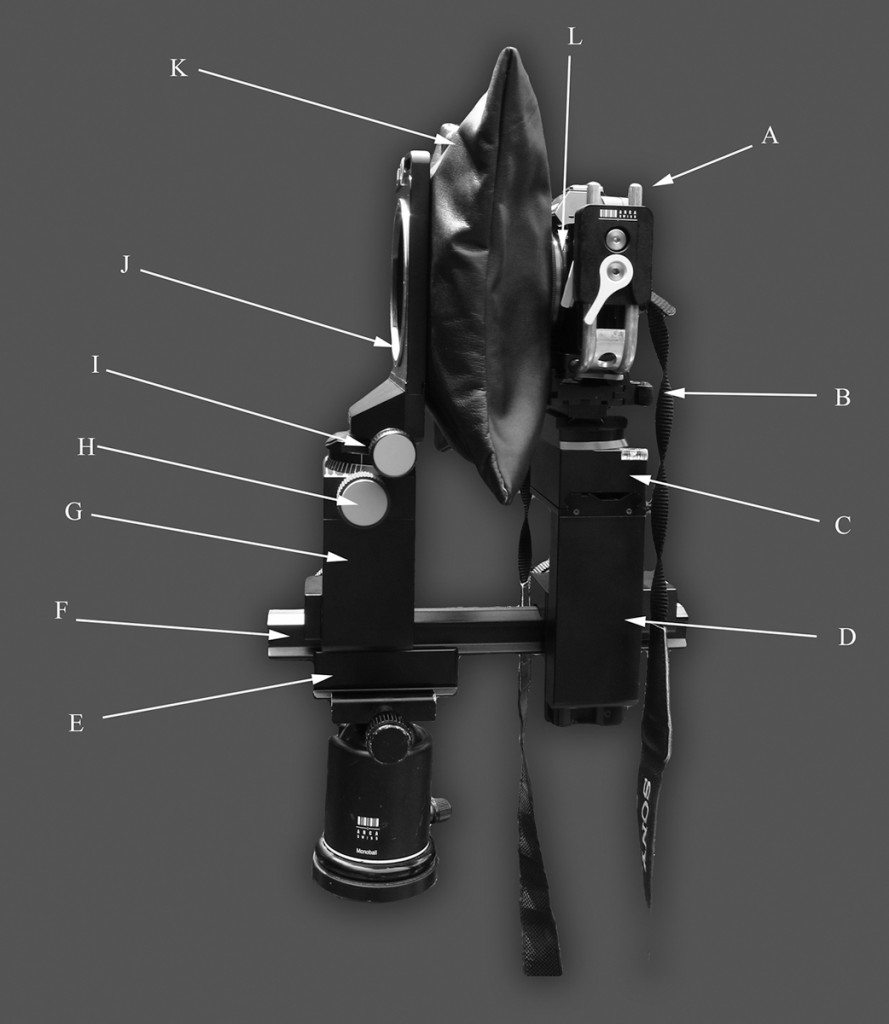
Major Components of the Arca Swiss DSLR-2
A. Acra L Bracket with Sony A7r G. Front Standard with Swing and Tilt Control
B. Arca Lever operated Quick Release H. Swing Control Knob
C. Shift Control I. Tilt Control Knob
D. Rear Standard with Focus Control and Lock J. Arca R Bayonet Mount
E. Arca Connecting Bracket K. Leather Bellows
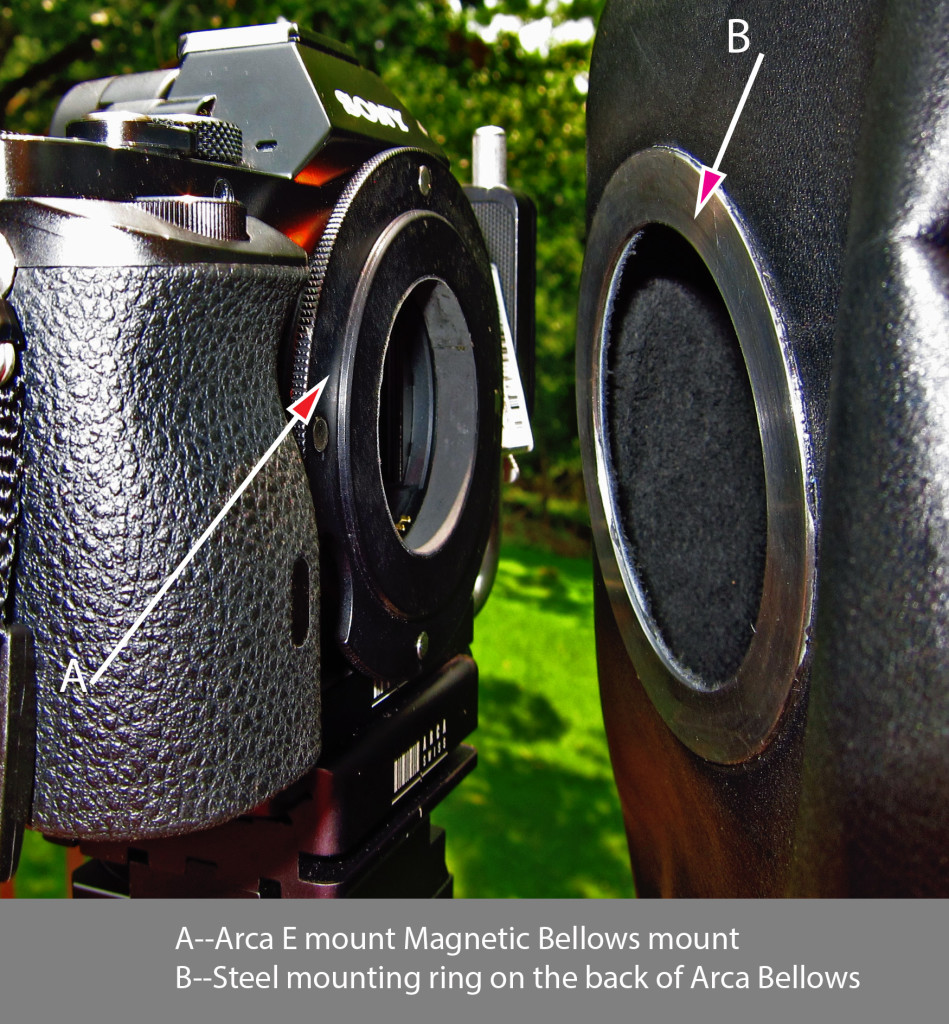
F. Arca Main Rail L. Arca Magnetic Bellows mount to Sony E mount
The Arca M2 has been around for many years, but in the past most of the use of this excellent platform has been with film and medium format digital backs. Now with some slight improvements, the photographer can use all of the advantages of an in-line camera on the A7r:
- Tilt
- Shift
- Swing
- Rise/Fall
- Precise focus control
In addition, these important movements can be used with various digital lenses:
- Rodenstock: 32mm HR-W, 40mm HR-W, 70mm HR, 90mm HR 105mm HR
- Schneider: 35mm SK, 43mm SK, 47mm, 60mm SK, 120mm
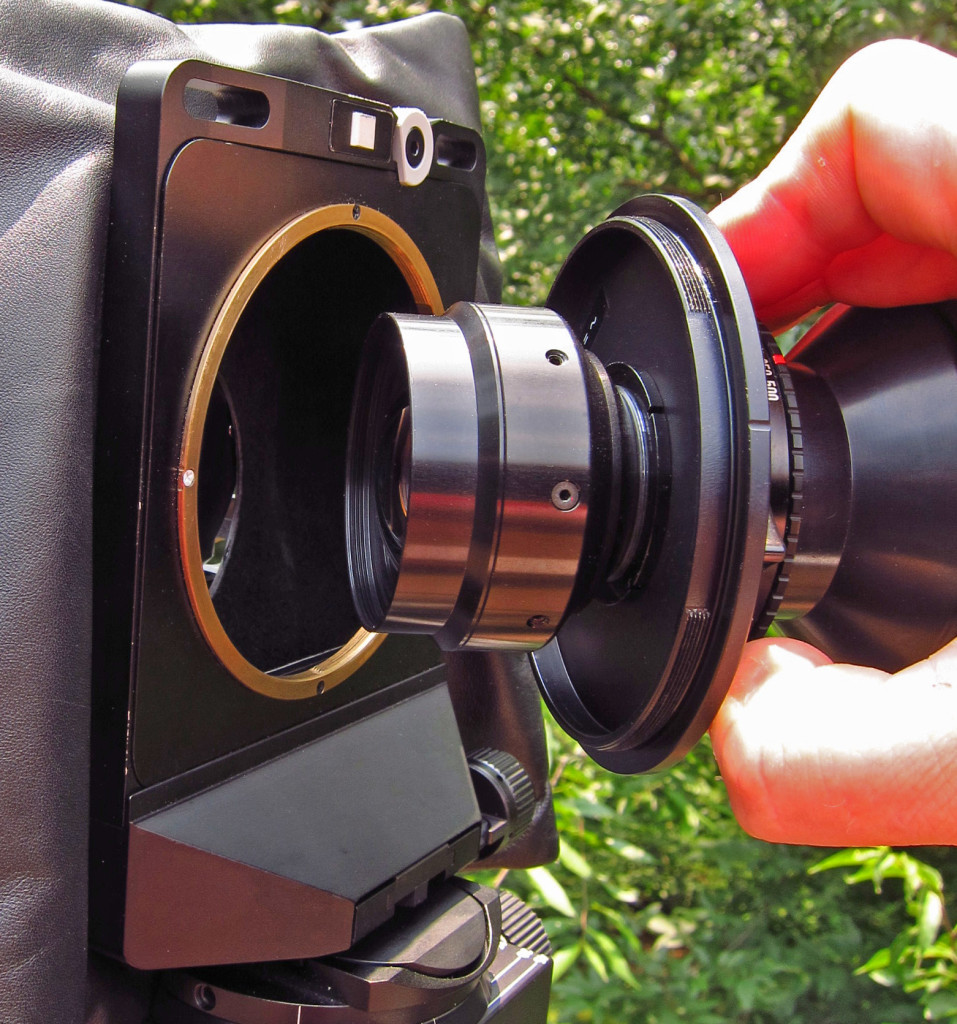
This is all done with the implementation of the Arca R mount for the various lenses, and a special bellows for the A7r that uses a magnetic attachment for the bellows to the e-mount of the A7r.
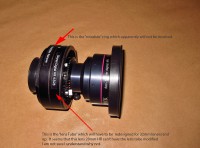
(In this photo, you can see the brass mounting ring where the R mount receptor is, attached to the front of the bellows. The large circular threaded mounted (black) that is on the Rodenstock lens clearly shows how the threads on the R mount. Notice in this picture, a white dot on the brass ring and a slight indentation on the lens mount, these are to assist in lining up the lens when mounting.)
First let’s take a look at the Arca DSLR2 and the various components.
The Arca DSLR2 consists of the following basic parts:
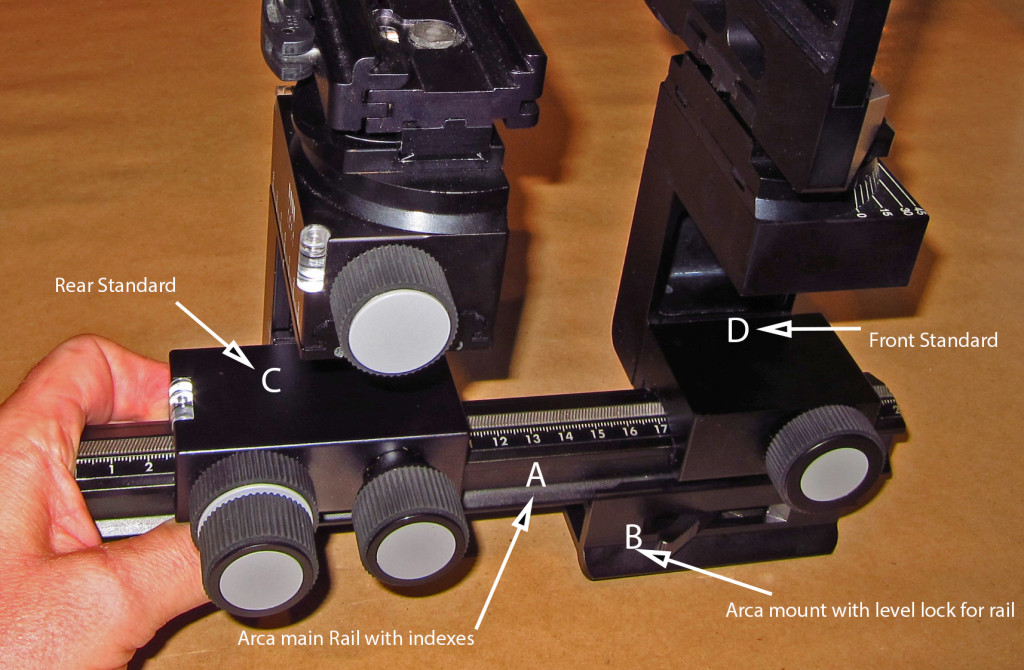
- Bottom rail and Arca lever locked attachment, with traditional Arca foot
- Front standard with swing and tilt control
- Rear standard with rise/fall and shift control and focus control–both gross and fine
- Bellows with magnetic mount
- Arca e-mount magnetic bellows attachment
- L-bracket for A7r
- R mount bayonet attachment for lens
Bottom rail and Arca mount:
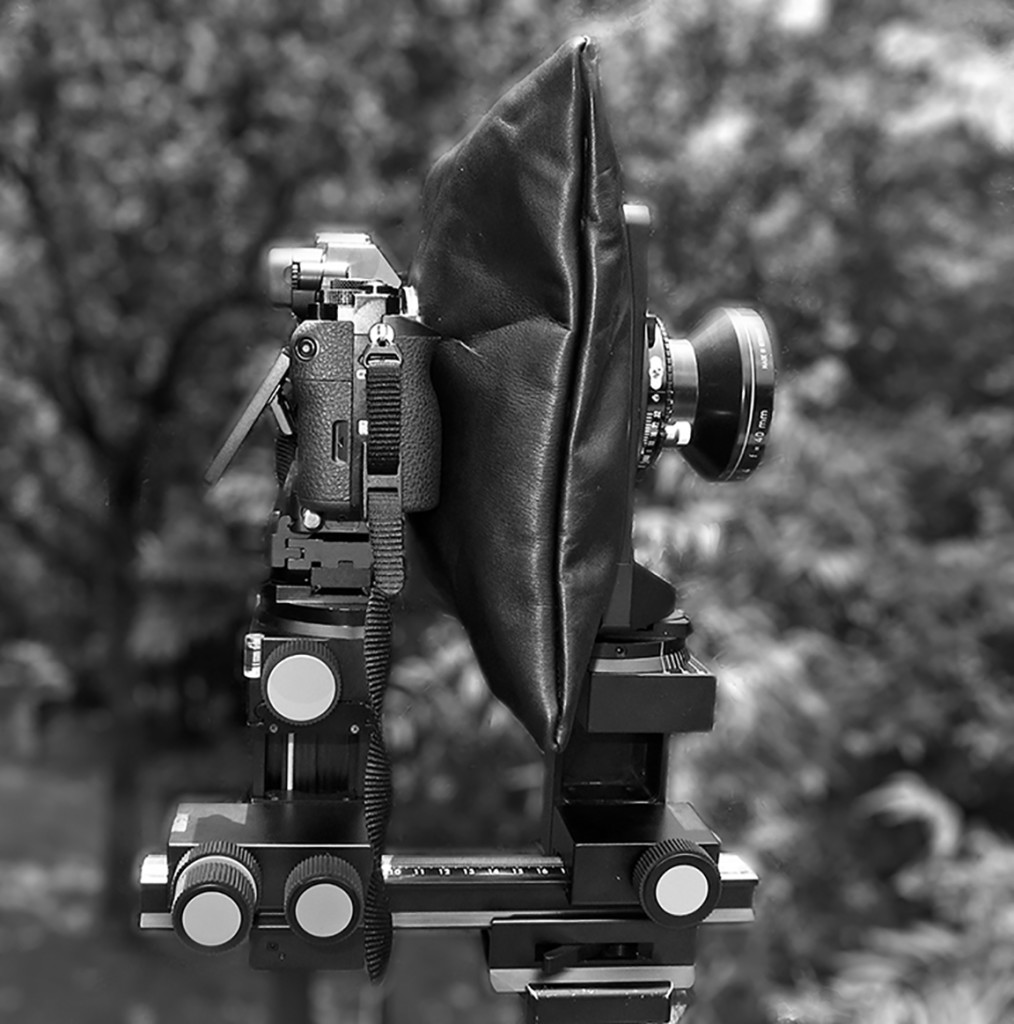
This portion of the DSLR2 is what everything else will be attached to. The rail is geared and allows movement of the front and rear standard forwards or backwards to obtain precise focus. You can also add a 2nd rail which will double the length which is good for macro or table top photography. There is a bracket on the bottom of the rail that is placed in any tripod with an Arca compatible head. In this photograph at the beginning of this review, you can see the top of an Arca B1 tripod head and how the entire DSLR2 is placed into the tripod. The Arca attachment bracket is lever operated to allow for quick removal from the rail when necessary.
Front Standard with swing and tilt control:
The front standard holds the R lens mount, the front part of the bellows and has the tilt and swing controls. The lens will mount with a simple twist into the R mount and then is locked into place.
[new_royalslider id=”2″]
(To view the images in full screen, hit the double arrows towards the upper right corner)
You can see on the right side of the front standard, two adjustment knobs, the top knob is for tilt the bottom knob is for swing. A lens can be tilted as much as 25 degrees, up or down and the tilt amount is shown in a clear white numeral scale. The amount of tilt is very precise as the tilt is geared. The swing can be as much as 45 degrees to right or left and is also controlled by a geared process that allows for very small adjustments. Here is a close of the front standard showing the tilt and swing controls.
[new_royalslider id=”3″]
(To view the images in full screen, hit the double arrows towards the upper right corner)
Rear standard with rise/fall and shift control and focus-both gross and fine:
This part of the Arca DSLR2 is where a lot of control occurs, at least with my style of photography. The rear standard has a push pressure attachment spot where you will insert the L-bracket with the A7r mounted. Once the camera is centered (more on this in a bit) you now have control over focus, tilt and rise and fall. The focus control is in two knobs, a gross movement and fine movement. You focus the camera simply by using the Live View screen and then moving the camera forwards/backwards until the subject comes into sharp focus. With the Sony A7r this is very easy since the camera has both an excellent LCD and EVF both with focus peaking. I was able to obtain sharp focus with each lens I used.
[new_royalslider id=”4″]
(To view the images in full screen, hit the double arrows towards the upper right corner)
From the rear you can shift the camera body as much as 30mm right or left. I found that with the A7r and the Arca DSLR2, that I was able to obtain useful images with as much as 18mm of left and right shift. You can also combine that with rise and fall and create a huge 9 part image that would be well over 150mp in overall size. The maximum rise and fall will be limited by how much of the rise is needed to center the camera, this then becomes your new starting zero. Since the Arca DSLR2 was designed around full size 35mm DSLR bodes, when you use the Sony A7r, you need to adjust the height upwards to account for the much smaller size of the Sony A7r. One facet of this design is that Arca may want to create a more specialized mount for the A7r which will allow you to start at zero on the rise fall scale. However due to the large amount of rise and fall that is available, over 40mm total there is plenty left to shoot with.
Bellows with Magnetic mount
Arca provides a black leather bellows to cover the space between the Sony e-mount lens opening and the rear element of the lens in use. This bellows is permanently attached to the rear of the R-mount on the front and has a round magnetic attachment which fits very snugly to the e–mount bellows ring. The bellows has enough give to allow a huge amount of forward/rearward focus movement and front swing and tilt. I had no light leaks with the bellows when attached with the magnetic mount. The magnetic mount allows for a very quick snap on an off of the bellows when either changing the lens or moving the camera from a horizontal to vertical position.
Arca e-mount magnetic bellows attachment
[new_royalslider id=”5″]
(To view the images in full screen, hit the double arrows towards the upper right corner)
Simply stated, this is an e-mount ring. It quickly fits into the lens mount of the A7r and the front side is smooth and allows for the attachment of the rear of the bellows. The ring is anodized in a matte black color to keep reflections to zero and is very effective.
L-bracket for A7r
With the Arca DSLR2 configuration, Arca includes one of the adjustable L brackets to mount to the A7r. This bracket is very sturdy, light weight and allows for a very easy adjustment of the A7r during the centering process. It also allows for a very quick 90 degree rotation of the A7r from horizontal to the vertical orientation. In the field, I found it best to just leave the L bracket attached to the A7r. The L bracket attaches to the A7r via the tripod attachment threads in the base of the A7r camera body.
R mount bayonet attachment for lens
The standard for all Arca lenses is the R mount. This is circular mount that is threaded on both sides, mount and lens mount. The threading is very similar to how a deep sea diving helmet is threaded, so only a very short twist and the lens is securely mounted. The mount is brass and should last forever. The teeth are very closely spaced so you need to be sure not to cross thread the lens when mounting. With the Arca DSLR2, the photographer can mount pretty much any lens that will accept the R mount plate, which should include any of the Rodenstock/Schneider lenses available, not just the more recent digital lenses from these companies. Note, that the Rodenstock 23mm and 28mm will fit, but you will not be able to obtain infinity focus as the rear element can not be moved close enough to the Sony sensor. Each of these lenses will have a Copol 0 or 1 shutter so you need to remember to set the lever on the shutter to open the lens wide open as you will be using the shutter of the A7r. However the aperture will still be set on the Copol 0 or 1 shutter.
The widest lens I was able to use on the Arca DSLR2 was the Schneider 35XL. I have been told by Arca that the Rodenstock 32 HR-W will also work, but I did not have one of these lenses to test with. On the longer side, really any telephoto lens should work with no problems, you will just have to make the necessary extensions on the rail of the front standard.
Setup of the DSLR2 with the A7r
Once you have assembled the Arca DSLR2 it can be carried in one piece. It’s a bit bulky but I found it fit in about the same amount of space as my Arca rm3di. The DSLR2 is about 4.5lbs with the A7r mounted and I was surprised that it weighed about the same as my Arca rm3di with a digital back and lens mounted. I carried the DSLR2 without a lens mounted in the field since it’s such a simple operation to mount the lens in the bayonet when you reach your shooting location. So from my pack, I had the front and read standards mounted and the front lens mount/with bellows.
Setup is very straight forward. Simply mount the rail to your tripod head with the foot. Remember the foot is released via a lever so you can slide it to the optimum location before you mount it to the tripod head. Your tripod head needs an Arca style mount, which is very common in the industry.
Once the DSLR2 is secure in your tripod head, mount your lens. Be careful with this step so you don’t cross thread the R mount. Once this is done, all this is left is to center the rear lens element on your A7r sensor.
This process takes a bit time as each lens used will be a bit different. The goal is to line up your camera sensor with the rear element of the lens in use so that the rear element is centered on the sensor as best as possible. This is done all by visual sighting with the rear cover of the bellows pulled back over the rear element of the lens. Take your time here since if you are off left/right or up/down then you image will not be on the center of the sensor to start so if you apply movements they will be off also. Once you feel you have the rear element lined up, take the bellows back over the rear element and attach it to the Arca magnetic e-mount ring, and you are ready to shoot.
Impressions from shooting with the Arca DSLR2 and Sony A7r
This is very impressive setup. I use an Arca rm3di camera with a Phase One IQ digital back in a lot of landscape photography. I moved quickly from a 645 style DSLR camera body to the rm3di, mainly because of the overall lack of optical quality in the wide angle medium format lenses currently available. The rm3di is only an enabler, but it gives me the ability use much better wide angle and normal lenses on my Phase One digital back. I prefer to use movements in most of my photographs to enable a greater DOF and I tend to use wide angle lenses in my photography. By allowing for tilt and shift, I can gain a greater focus perspective on my subject and create panorama style photographs with great precision. However there are many limitations to this setup.
With the A7r, and the DSLR2, I was able to use a “real” live view screen with focus peaking. With the addition of the ability to zoom into 100% to check focus, there was never any doubt that my subject was in perfect focus. The fact that I was no longer limited to the base ISO of my camera (as is the case with a CCD based MF back) and instead roam from ISO 100 to 1600 with impunity was a huge benefit to me. I could set an aperture on my lens then with live view on the A7r, focus on my subject and thus eliminate any issues of focus shift. I no longer needed a scale and distance meter to gauge my focus, I could see it as I was now using a camera with excellent live view.
The camera controls of the A7r, were simple for me, I shot in manual mode and set the camera to accept non-Sony lenses. THIS IS A MUST OR THE CAMERA WILL NOT FIRE. I quickly tried all the various lenses I have and was impressed with the results from all of them. Since these lenses are coming in closer to the sensor, I would recommend still shooting an LCC frame especially if you do any movements. I used Phase One’s Capture One Pro Vr 7 for all the conversions and had no trouble with any of them.
I quickly realized that this solution was a perfect one for my style of photography and found I developed a working rhythm, where I shot everything I needed in the horizontal plane first, then rotated to vertical and shot those series. Once you get used to the process, the setup time is much less then bringing an Arca Rm3di/Digital back into operation. You can carry the entire Arca DSLR2 assembled in your pack if you wish, but I chose to remove the lens and bellows just for precaution. I did leave the A7r mounted to the DSLR2 the whole time, and used the body cap to protect the sensor when the bellows was not mounted to the A7r.
I have long known just how good the A7r sensor is and the amount of dynamic range it’s capable of, but I never considered that I could be using the same lenses I use on my digital back with an A7r. The cost of entry to this system is much less than a Medium format digital solution. The costs would be:
Sony A7r $2,300.00
Arca DSLR2 $4,300.00
VS
Phase One IQ260 $39,999.00
Arca Rm3di $ 5,870.00
You still have to pick up a lens or two, but you have so many options here it’s hard to list them all. It’s very easy to place an R mount on any of these lenses, by simply unscrewing the rear element. Most of the lenses will come with a Copol Shutter 0 installed already. The cost of the Arca R mount is around 500.00 per lens and each lens would need such a mount. NOTE, any Arca lens already in the R mount works perfectly. If the lens is configured for the rm3di, all that has to be done, is remove the R mount from the various Arca lens tubes which are used for the rm3di. There is no issue with offsets or other critical adjustments as your focus is determined by the simple process of moving the camera body forwards or backwards. The lens stays in one location.
After I used the DSLR2, I quickly realized that if this solution had been available when I bought into medium format digital, I would have gone the other way, and purchased the Sony A7r and a DSLR2. For someone just starting out with large format photography, and wanting to learn about movements and how they affect photography, the Arca DSLR2/A7r solution is an excellent place to start.
Lenses I used and feedback on each:
My main goal with each lens was to see just how far I could shift each before color cast became too harsh. I was not as interested in rise and fall for this testing.
- Schneider 35XL apo-digitar with center filter. On center, the 35XL worked very well, but when I attempted to shift, I saw considerable color shifting by 8mm of shift. If I took the lens to 10/12mm of shift, the amount of color saturation loss was too much to recover with a standard LCC in Capture one.
- Rodenstock 40mm HR-W. This lens allows for excellent movements. I found I could get to 16mm of horizontal shift with minimal loss of color and saturation loss. The shots were easily cleaned up in Capture One with the LCC. The 40mm will actually get to around 18mm of shift but on such extreme shifting, many times I felt that the color loss was pretty extreme especially with a blue sky.
- Schneider 60mm XL apo-digitar with center filter. This lens was by far the best all-around performer. Shifts of 15mm were easily obtained and even 20-22mm was useable. The Schneider 60mm was a perfect companion to the A7r.
- Rodenstock 90mm HR sironar-digital. The 90mm Rodenstock gave me the best range in movements, up to 25mm of shift. There was very little color cast even with 25mm shifts. The ability to use Live View to focus made the 90mm a pleasure to use. Even though the 90mm HR give the best range in movements, the focal length is a bit too long for most of my work.
Pros:
- Low cost of entry
- Excellent solution that allows upgrading to Medium format at a later date
- Allows the use of the best optics available to photography to date, Schneider/Rodenstock digital lenses
- Sony A7r has excellent dynamic range and ease of use features
- Very stable shooting platform with moderate size and bulk
- Can be easily carried in the field
- Allows for a vast array of movements which improve the overall photographic solution
Cons:
- Need for understanding of a rail focus system
- Very manual shooting style no Auto Focus
- Setup is very critical in that you need to be centered on the sensor
- Sensor is exposed to the elements a lot more than normal use, it’s going to get dirty
- LCC frame is recommend especially for shots with movements
- There is a bit of a learning curve for someone coming from a non-technical camera environment.
Overall I would highly recommend this solution to any landscape photographer interested in the best optical performance for their work.


